For 1990-2009 cars only
Tools Required
| • | EN 46342 Driver Handle |
| • | EN 46347 Crankshaft Front Oil Seal Driver |
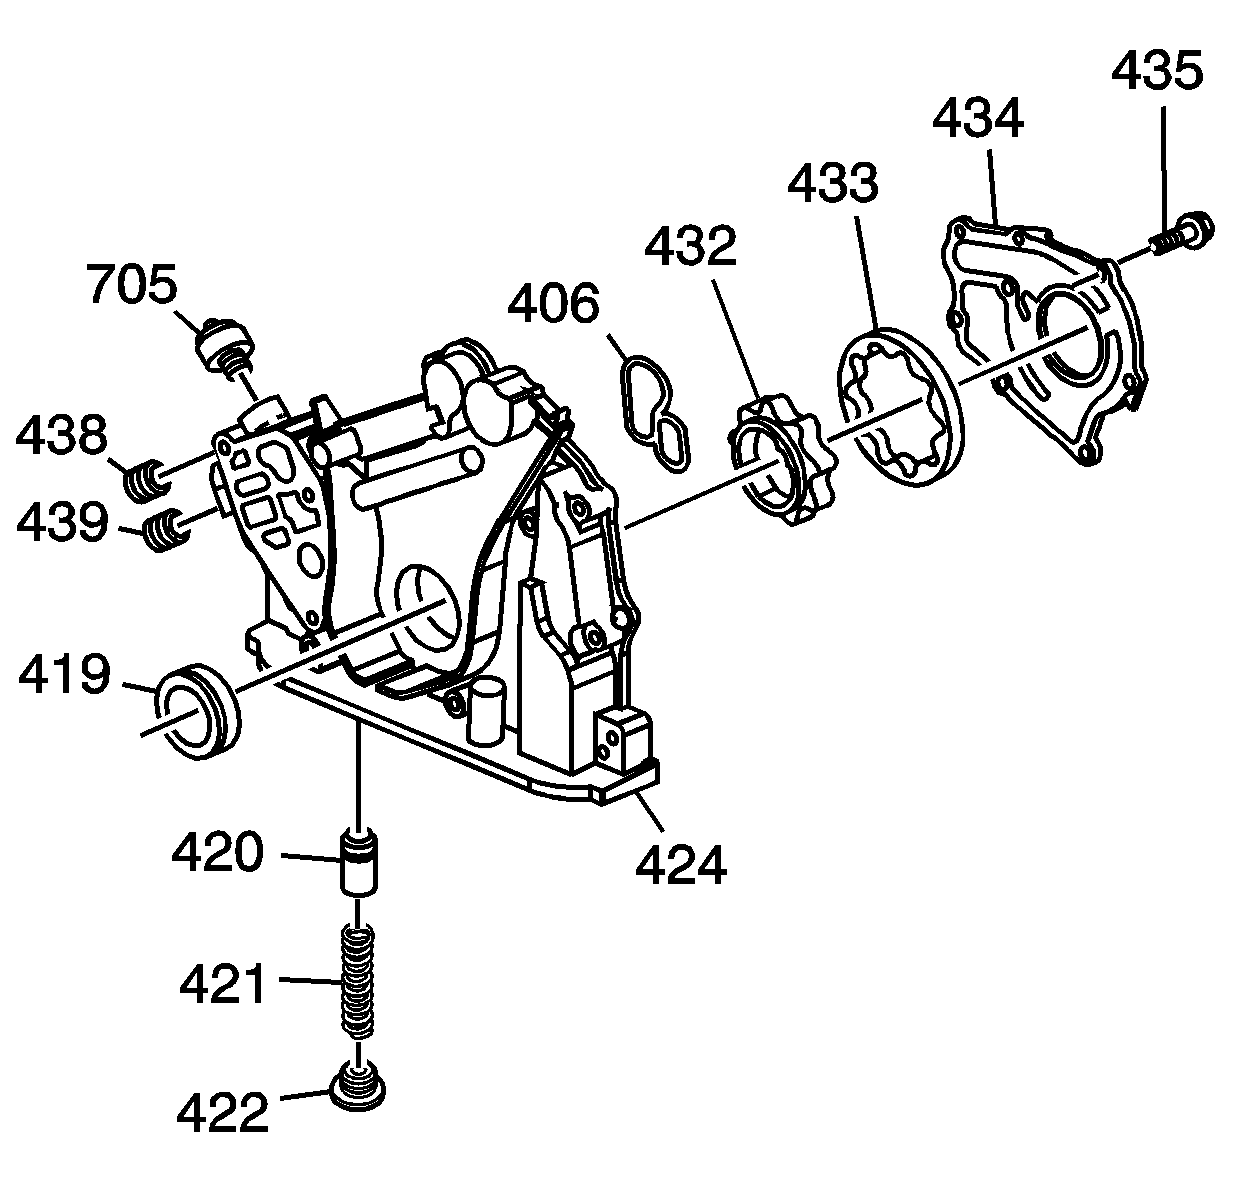
- Lubricate the rotors (432, 433) and valve (420) with clean engine oil.
- Install the rotors (432, 433) to original direction.
- Install the cover (434).
- Apply threadlock GM P/N 12346240 (Canadian P/N 10953493), or equivalent, to the threads of the bolts (435).
- Install the bolts (435).
- Apply sealant GM P/N 12346240 (Canadian P/N 10953493) to the threads of the bolt (422).
- Install the valve (420), spring (421) and bolt (422). The valve must slide freely in the housing bore.
- Apply sealant GM P/N 12346240 (Canadian P/N 10953493), or equivalent, to the threads of the switch (705).
- Install the switch (705).
- Apply sealant GM P/N 12346240 (Canadian P/N 10953493) to the threads of the plugs (438, 439).
- Install the plugs (438, 439).
- Tighten plug (438) to 44 N·m (32.5 lb ft).
- Tighten plug (439) to 34.3 N·m (25.3 lb ft).
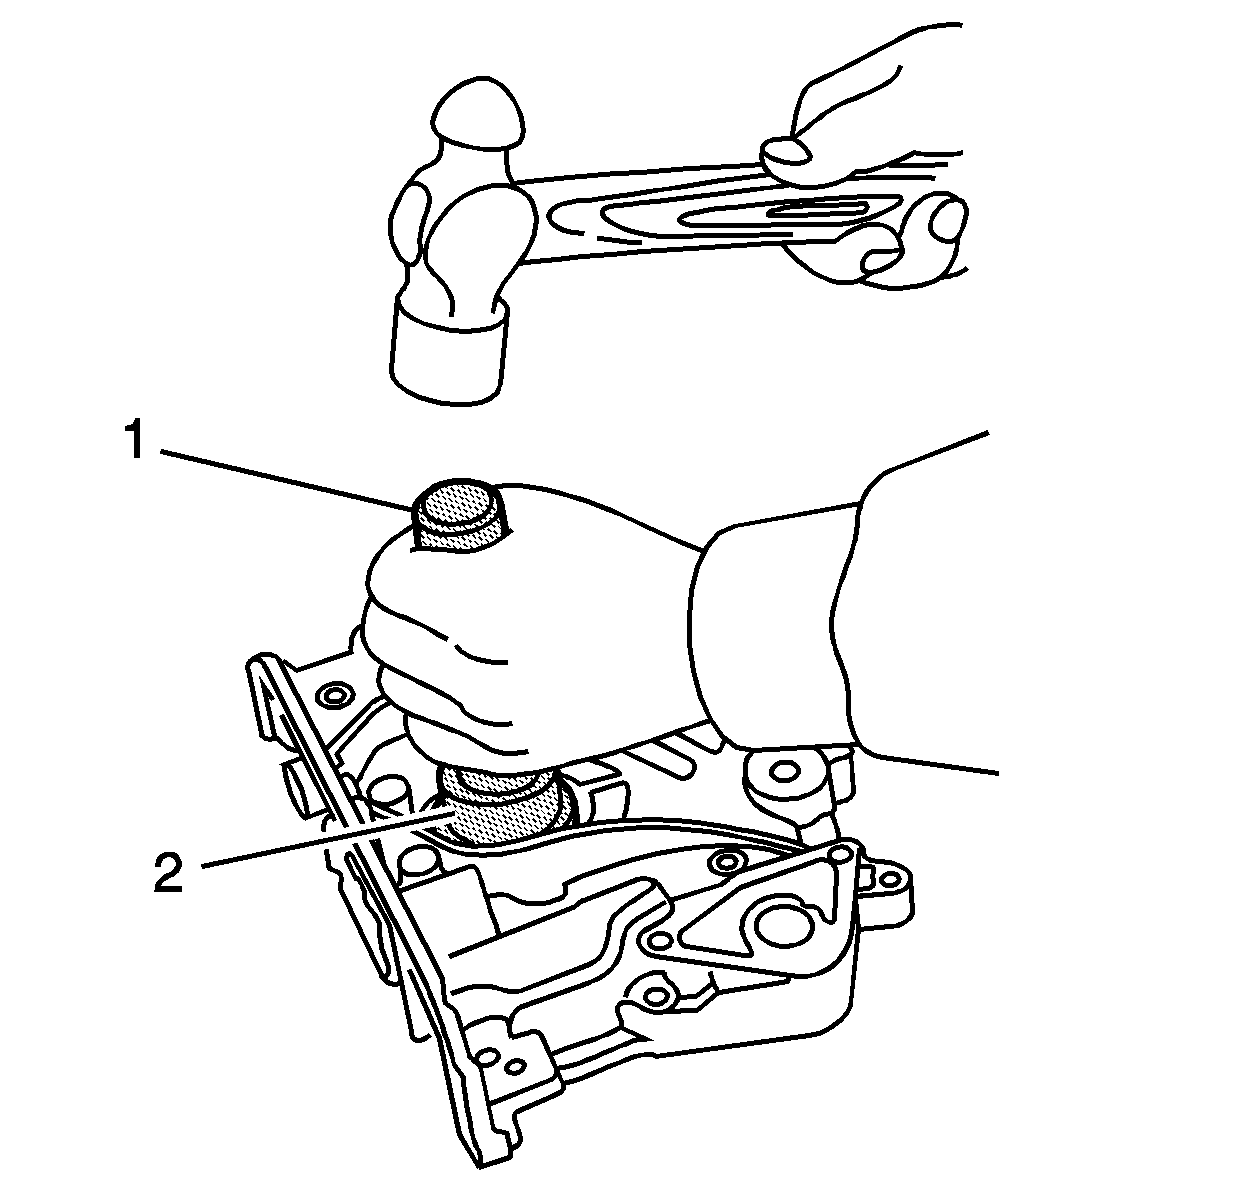
- Use the EN 46347 (2) and the EN 46342 (1) in order to install the oil seal. Gently tap and install the NEW oil seal until the tool bottoms on the oil pump housing.
Notice: Refer to Fastener Notice in the Preface section.
Tighten
Tighten the bolts to 6 N·m (53 lb in).
Tighten
Tighten the bolt to 39 N·m (28 lb ft).
Tighten
Tighten the switch to 18 N·m (13 lb ft).
Tighten