Starter Replacement 2.2L (L61)
Removal Procedure
- Turn the ignition OFF.
- Disconnect the negative battery cable. Refer to Battery Negative Cable Disconnection and Connection .
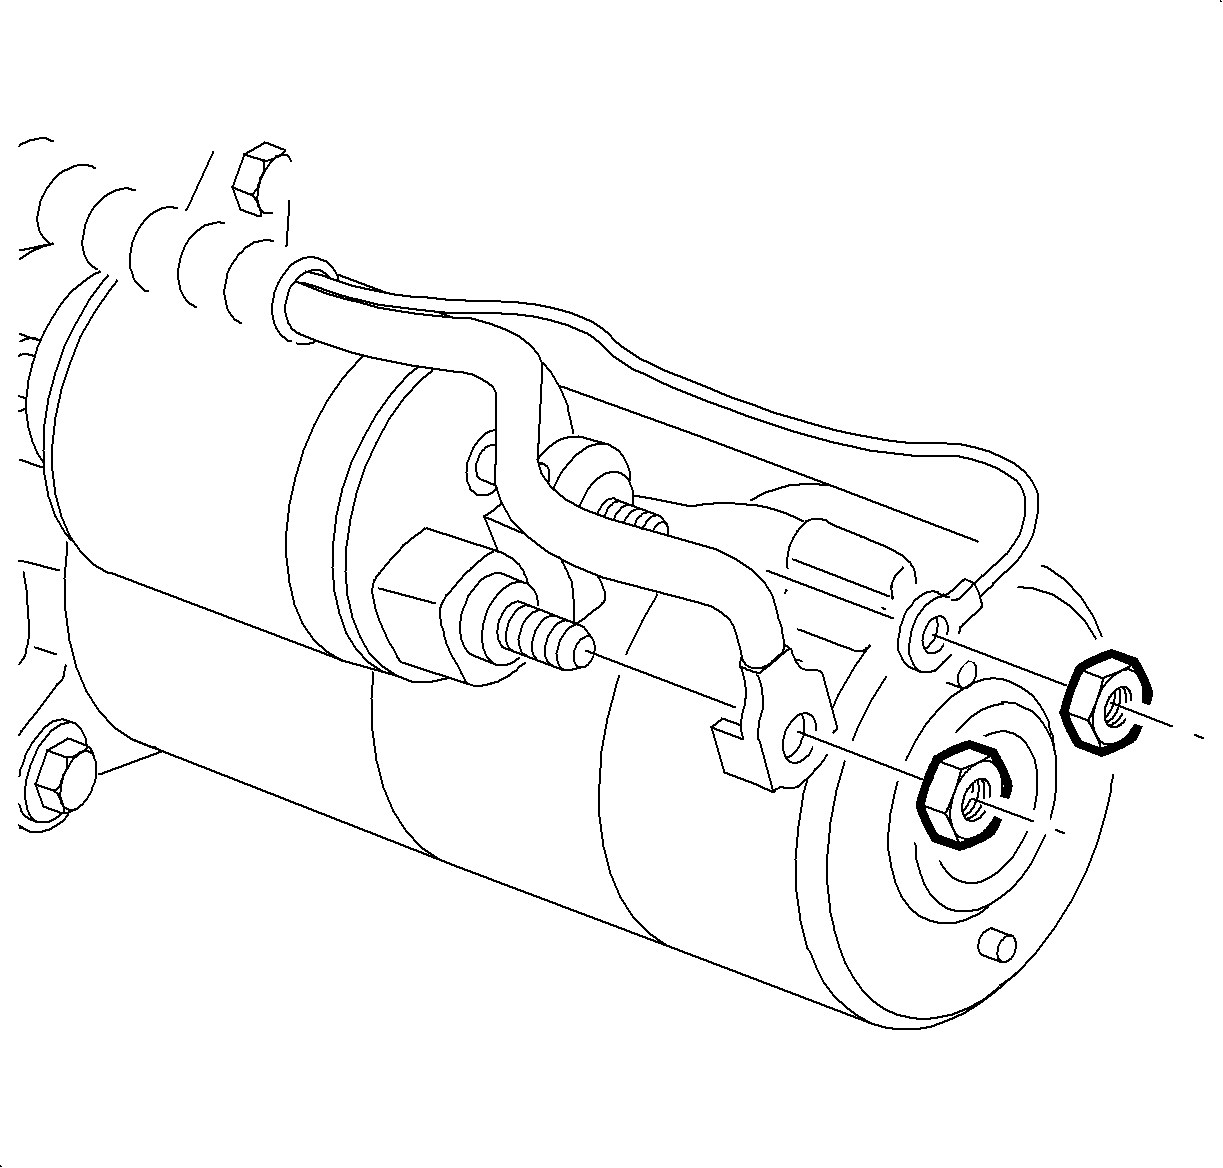
- Remove the B+ battery cable nut at starter.
- Remove the S-terminal nut.
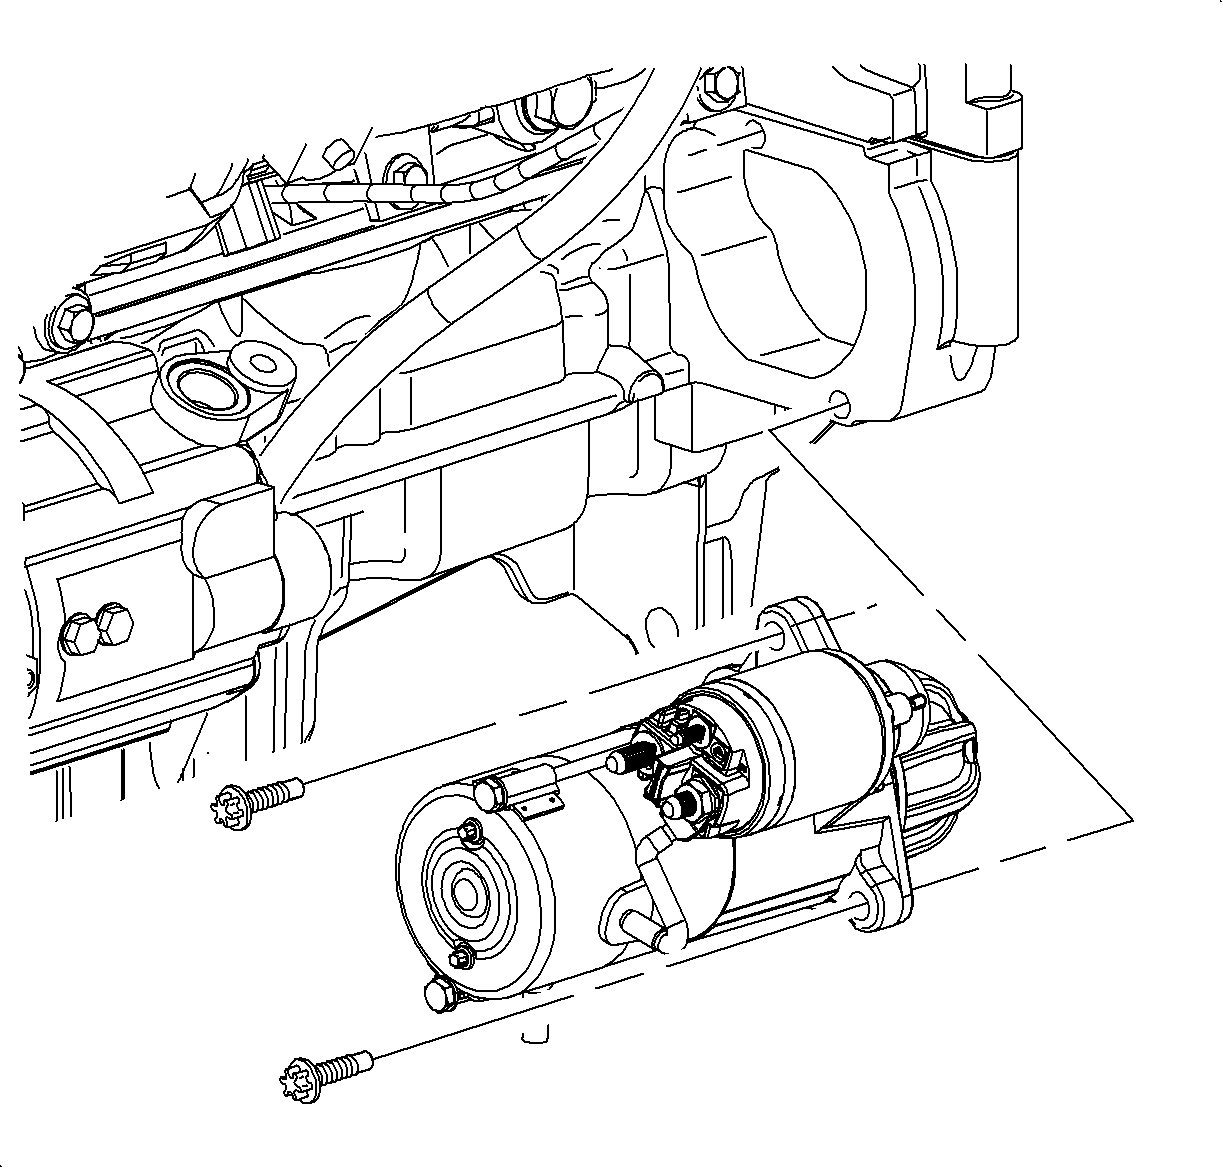
- Remove the lower starter assembly to engine block bolt.
- Remove the upper starter assembly to engine block bolt.
- Move the starter right, clearing the engine block, then left and out of the engine block (flywheel housing).
Important: Record all pre-set radio stations.
Installation Procedure
- Guide the starter into the engine block (flywheel housing).
- Install the starter mounting bolts.
- Install the B+ cable and nut.
- Install the S-terminal wire and nut.
- Connect the negative battery cable to the battery. Refer to Battery Negative Cable Disconnection and Connection .
- Reprogram the radio stations.
Notice: Refer to Fastener Notice in the Preface section.
Tighten
Tighten the starter-to-engine bolts to 40 N·m (30 lb ft).
Tighten
Tighten the B+ cable-to-starter nut to 10 N·m (89 lb in).
Tighten
Tighten the S-terminal nut to 5 N·m (4 lb ft).
Tighten
Tighten the battery terminal bolts to 17 N·m (13 lb ft).
Starter Replacement 3.5L (L66)
Removal Procedure
- Turn the ignition OFF.
- Disconnect the negative battery cable. Refer to Battery Negative Cable Disconnection and Connection .
- Remove the B+ battery cable nut at starter.
- Remove the S-terminal connector.
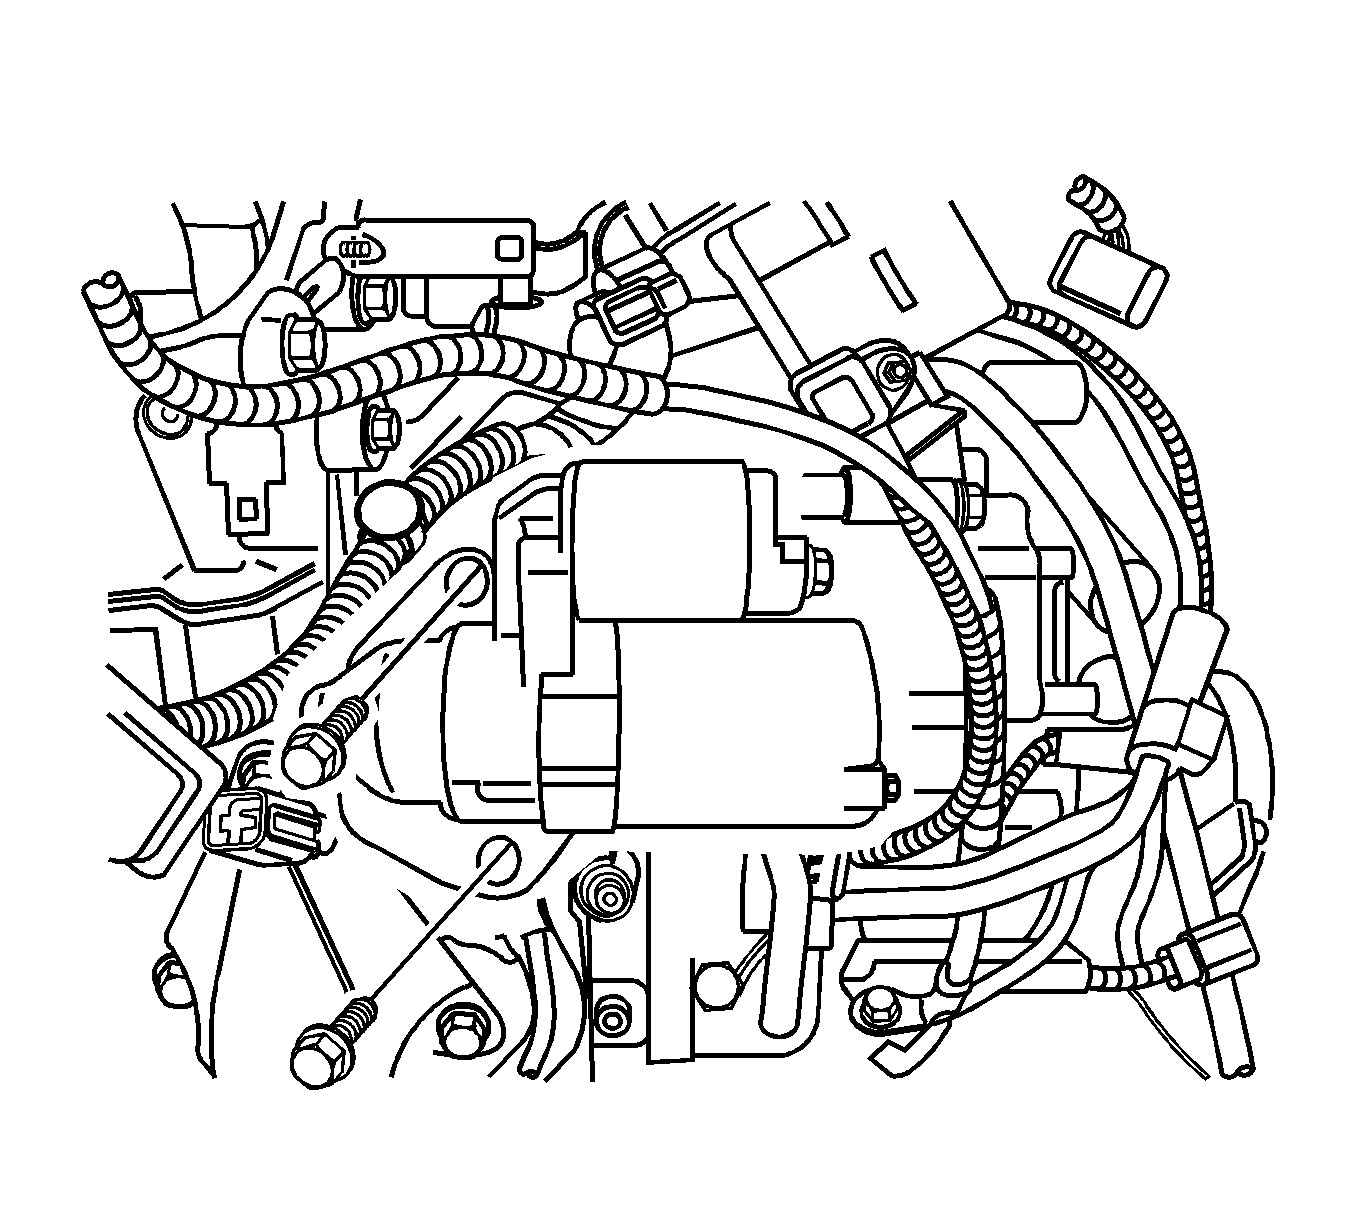
- Remove the lower starter assembly to transmission bolt and oxygen sensor connector bracket.
- Remove the upper starter assembly to transmission bolt.
- Remove the starter.
Important: Record all pre-set radio stations.
Installation Procedure
- Install the starter to the transmission.
- Install the starter mounting bolts.
- Install the B+ cable and nut.
- Install the S-terminal wire .
- Connect the negative battery cable to the battery. Refer to Battery Negative Cable Disconnection and Connection .
- Reprogram the radio stations.

Notice: Refer to Fastener Notice in the Preface section.
Tighten
Tighten the starter-to-transmission bolts to 44 N·m (33 lb ft).
Tighten
Tighten the B+ cable-to-starter nut to 10 N·m (89 lb in).
Tighten
Tighten the battery terminal bolt to 17 N·m (13 lb ft).
Starter Replacement 2.4L (LAT)
Removal Procedure
- Raise and support the vehicle. Refer to Lifting and Jacking the Vehicle .
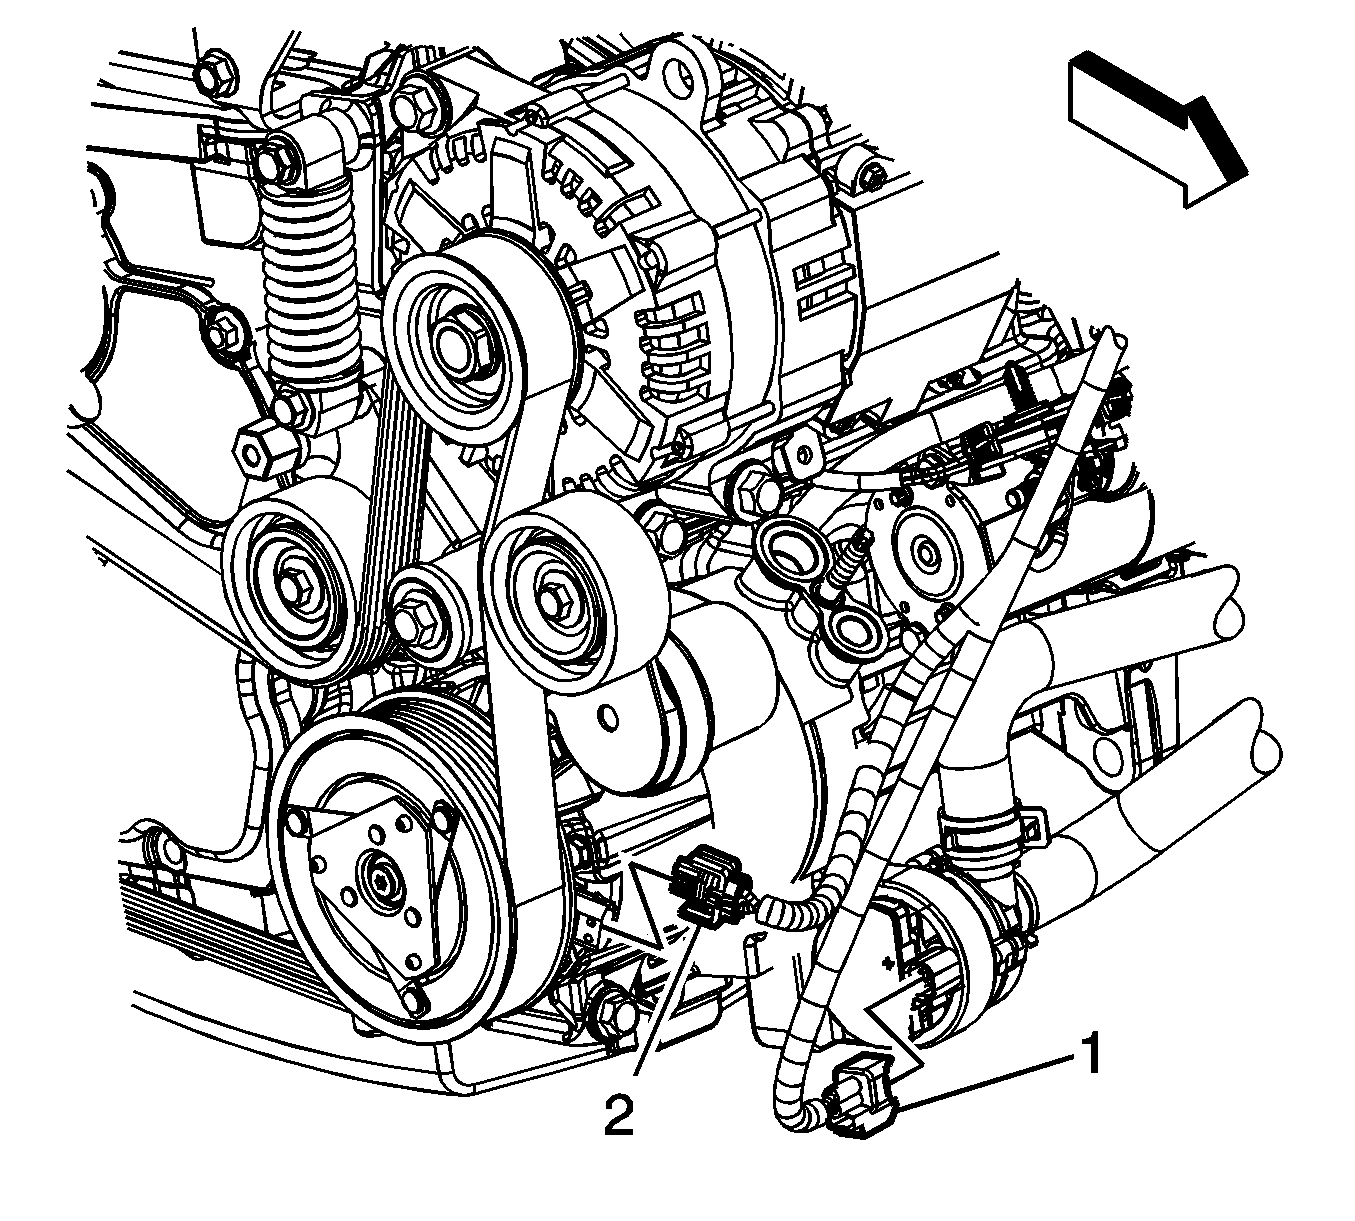
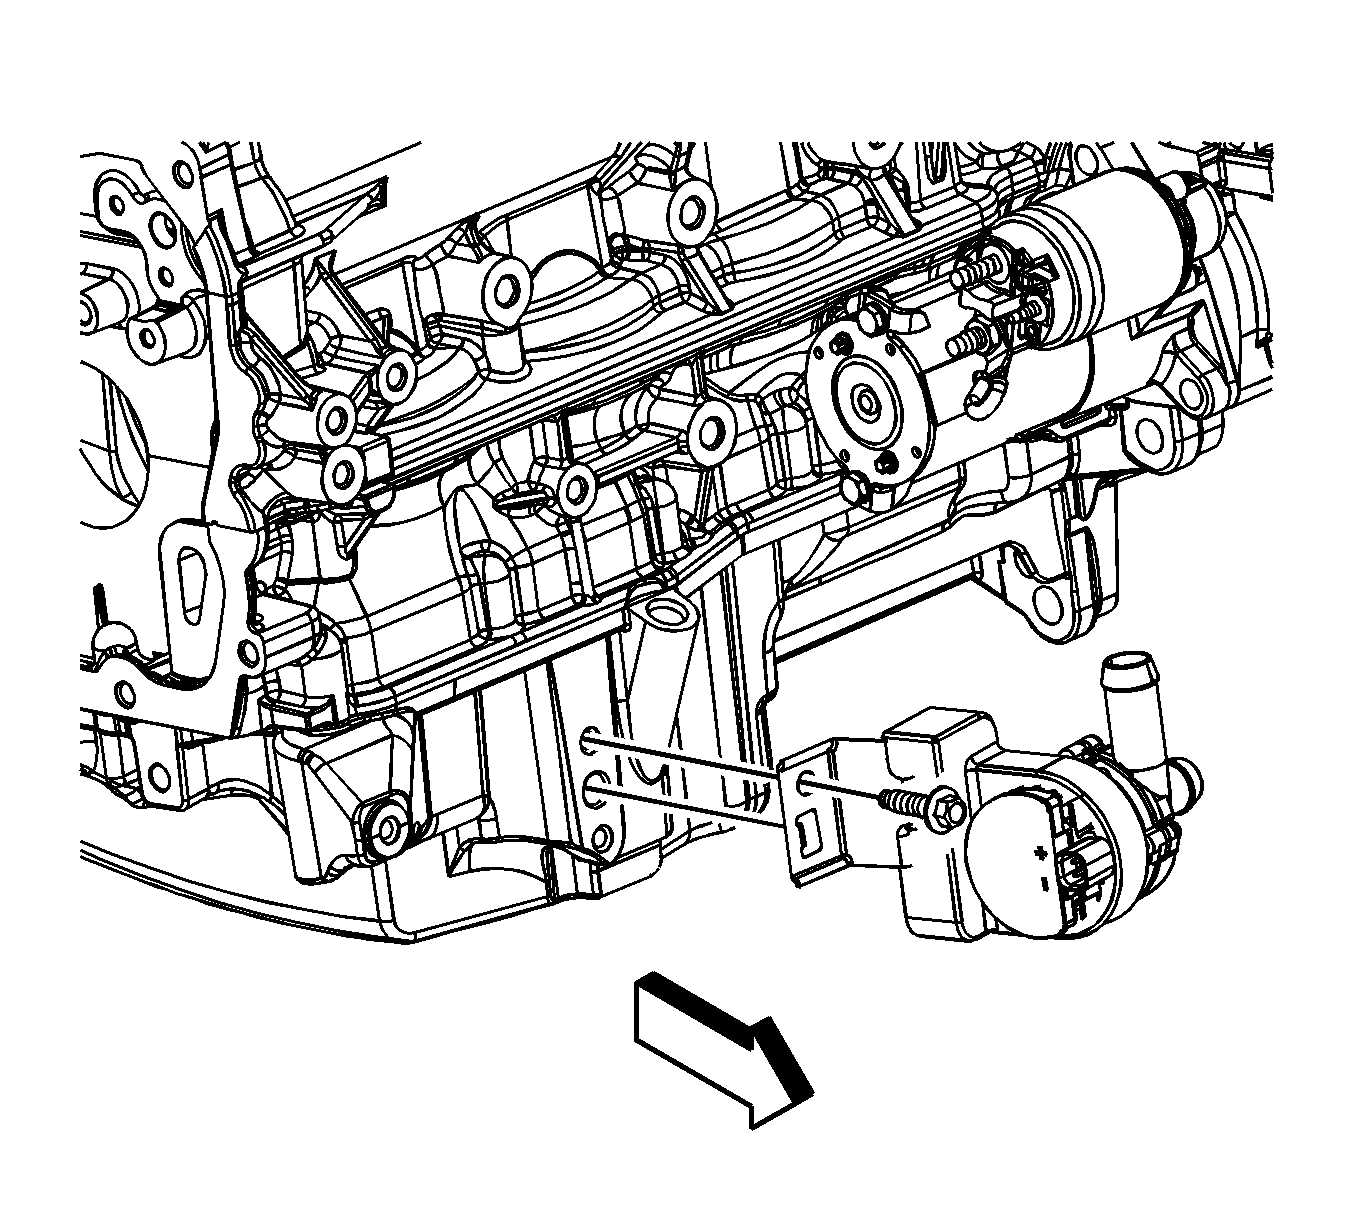
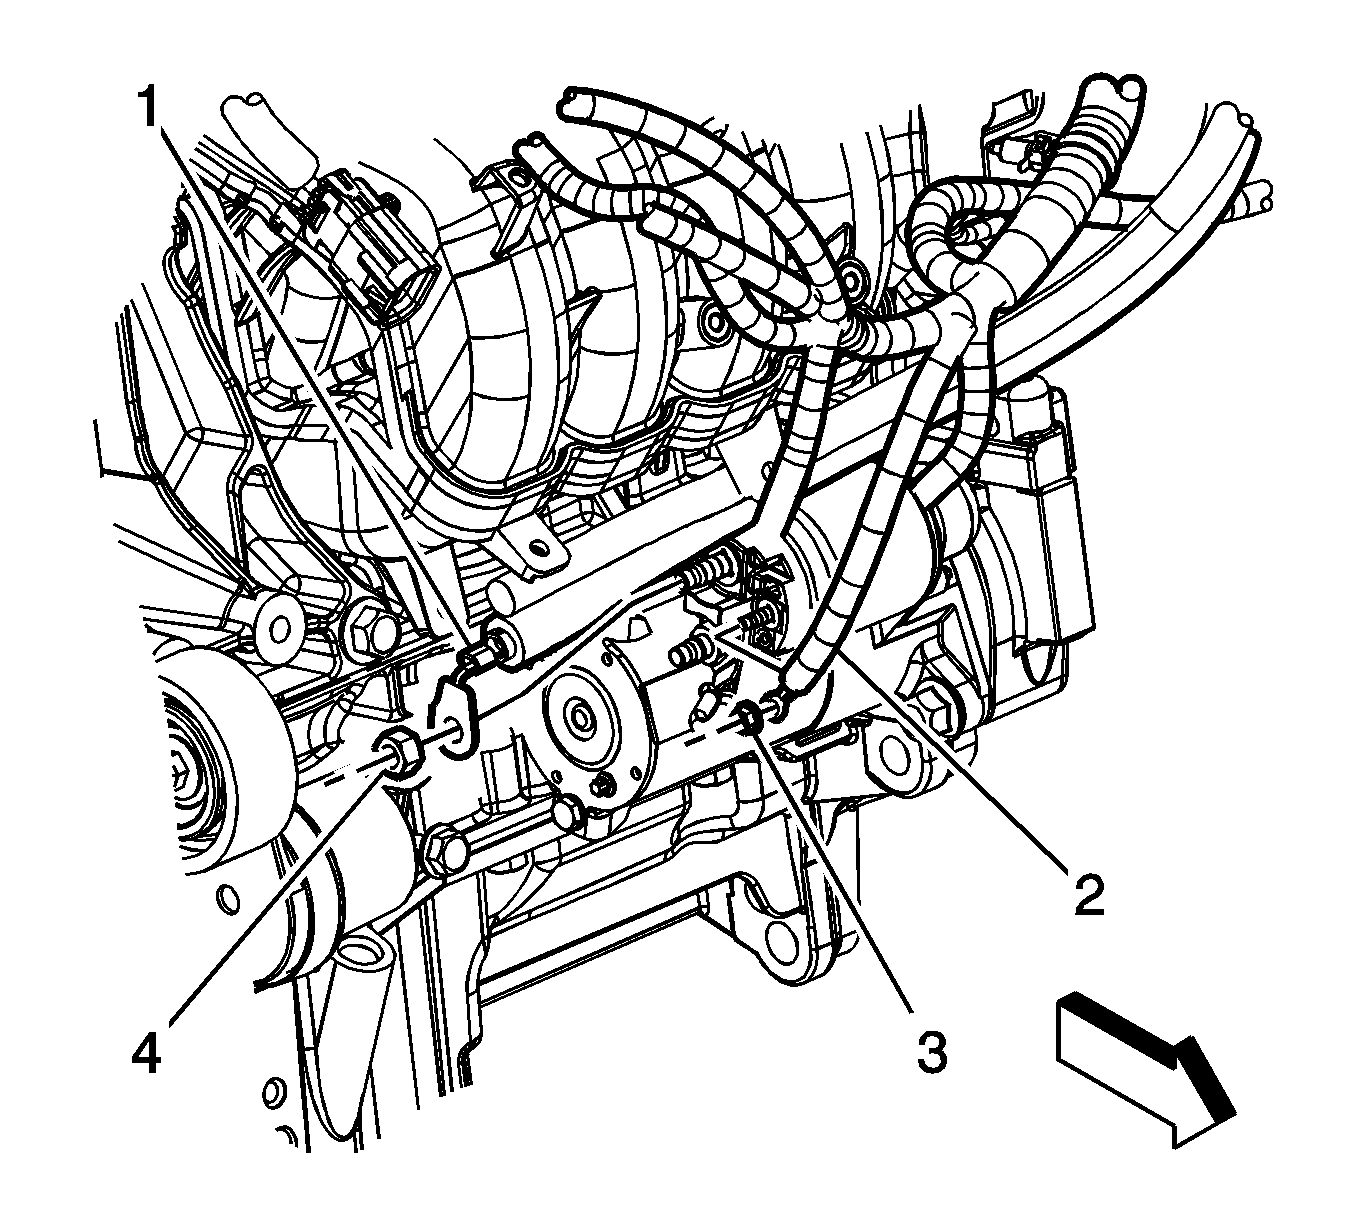
- Disconnect the engine wiring harness electrical connector (1) from the generator control module coolant pump.
- Remove the generator control module coolant pump bolt.
- Remove the generator control module coolant pump from the oil pan.
- Reposition and secure the generator control module coolant pump out of the way.
- Remove the engine wiring harness lead (2) from the starter motor.
- Remove the engine wiring harness to starter motor S terminal nut (3).
- Remove the positive battery cable to starter motor nut (4).
- Remove the positive battery cable lead (1) from the starter motor.
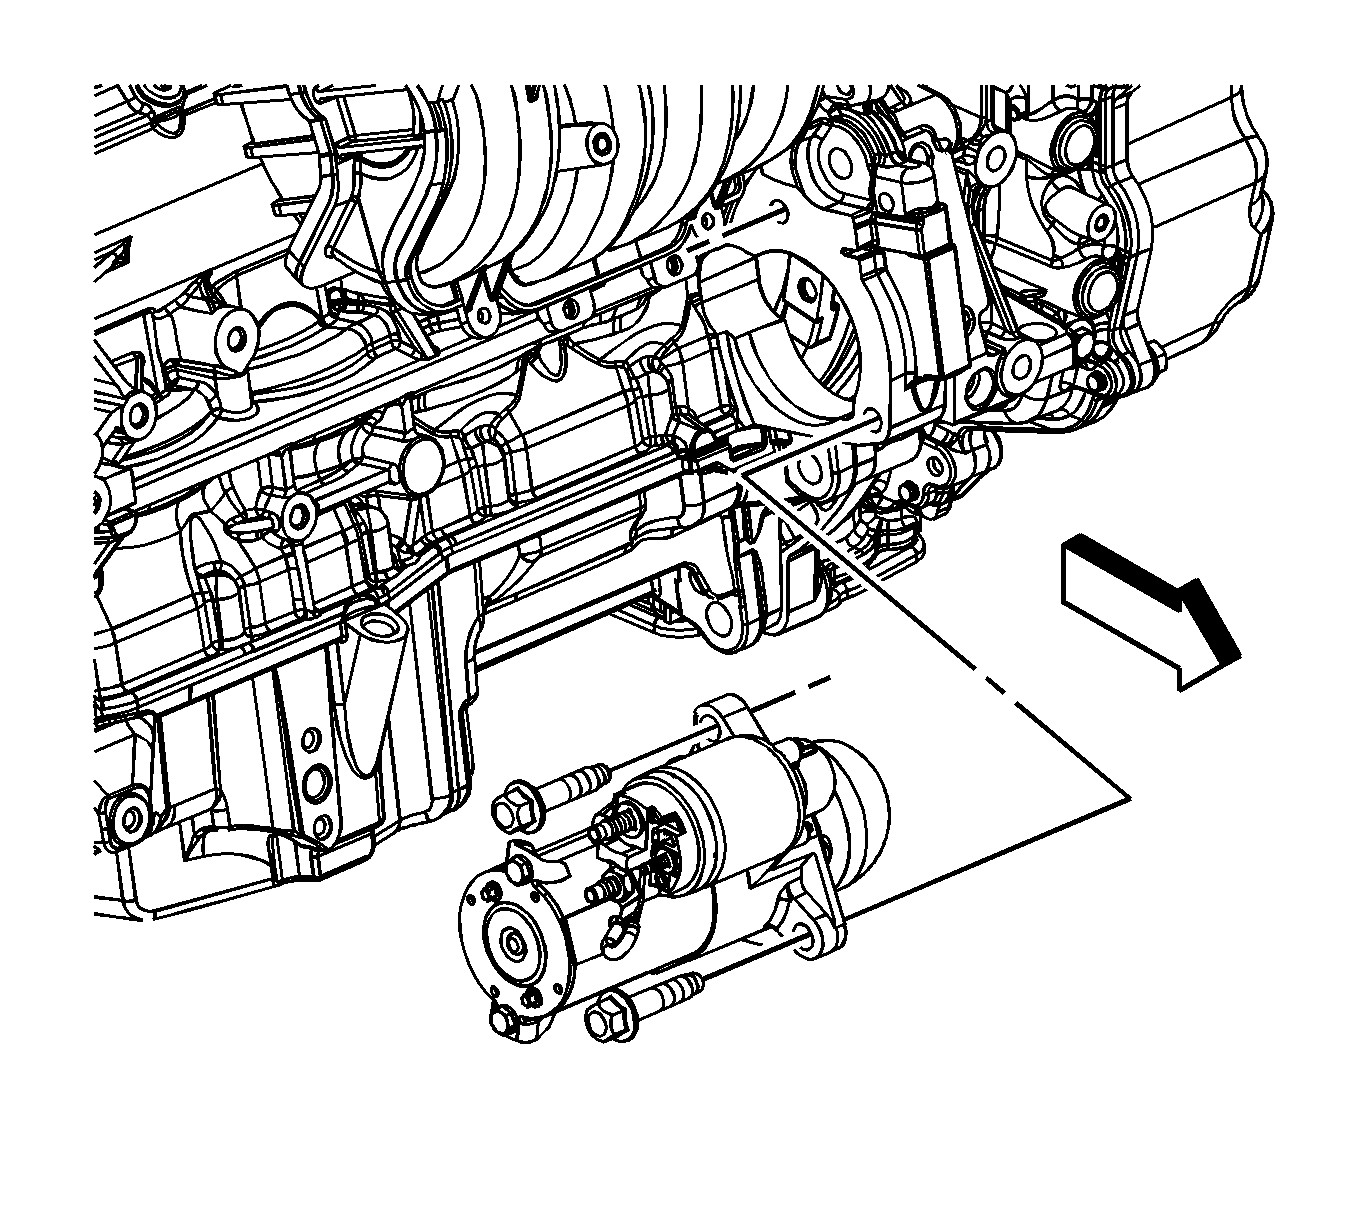
- Remove the starter motor bolts and starter.
Installation Procedure
- Install the starter motor and bolts.
- Install the engine wiring harness lead (2) to the starter motor.
- Install the engine wiring harness to starter motor S terminal nut (3).
- Install the positive battery cable lead (1) to the starter motor.
- Install the positive battery cable to starter motor nut (4).
- Unsecure and position the generator control module coolant pump.
- Install the generator control module coolant pump to the oil pan. Ensure that the anti-rotation tab is inserted into the hole in the oil pan.
- Install the generator control module coolant pump bolt.
- Connect the engine wiring harness electrical connector (1) to the generator control module coolant pump.
- Lower the vehicle.
Notice: Refer to Fastener Notice in the Preface section.

Tighten
Tighten the bolts to 53 N·m (39 lb ft).

Tighten
Tighten the nut to 5 N·m (4 lb in).
Tighten
Tighten the nut to 22 N·m (16 lb ft).

Tighten
Tighten the bolt to 22 N·m (16 lb ft).

