For 1990-2009 cars only
Removal Procedure
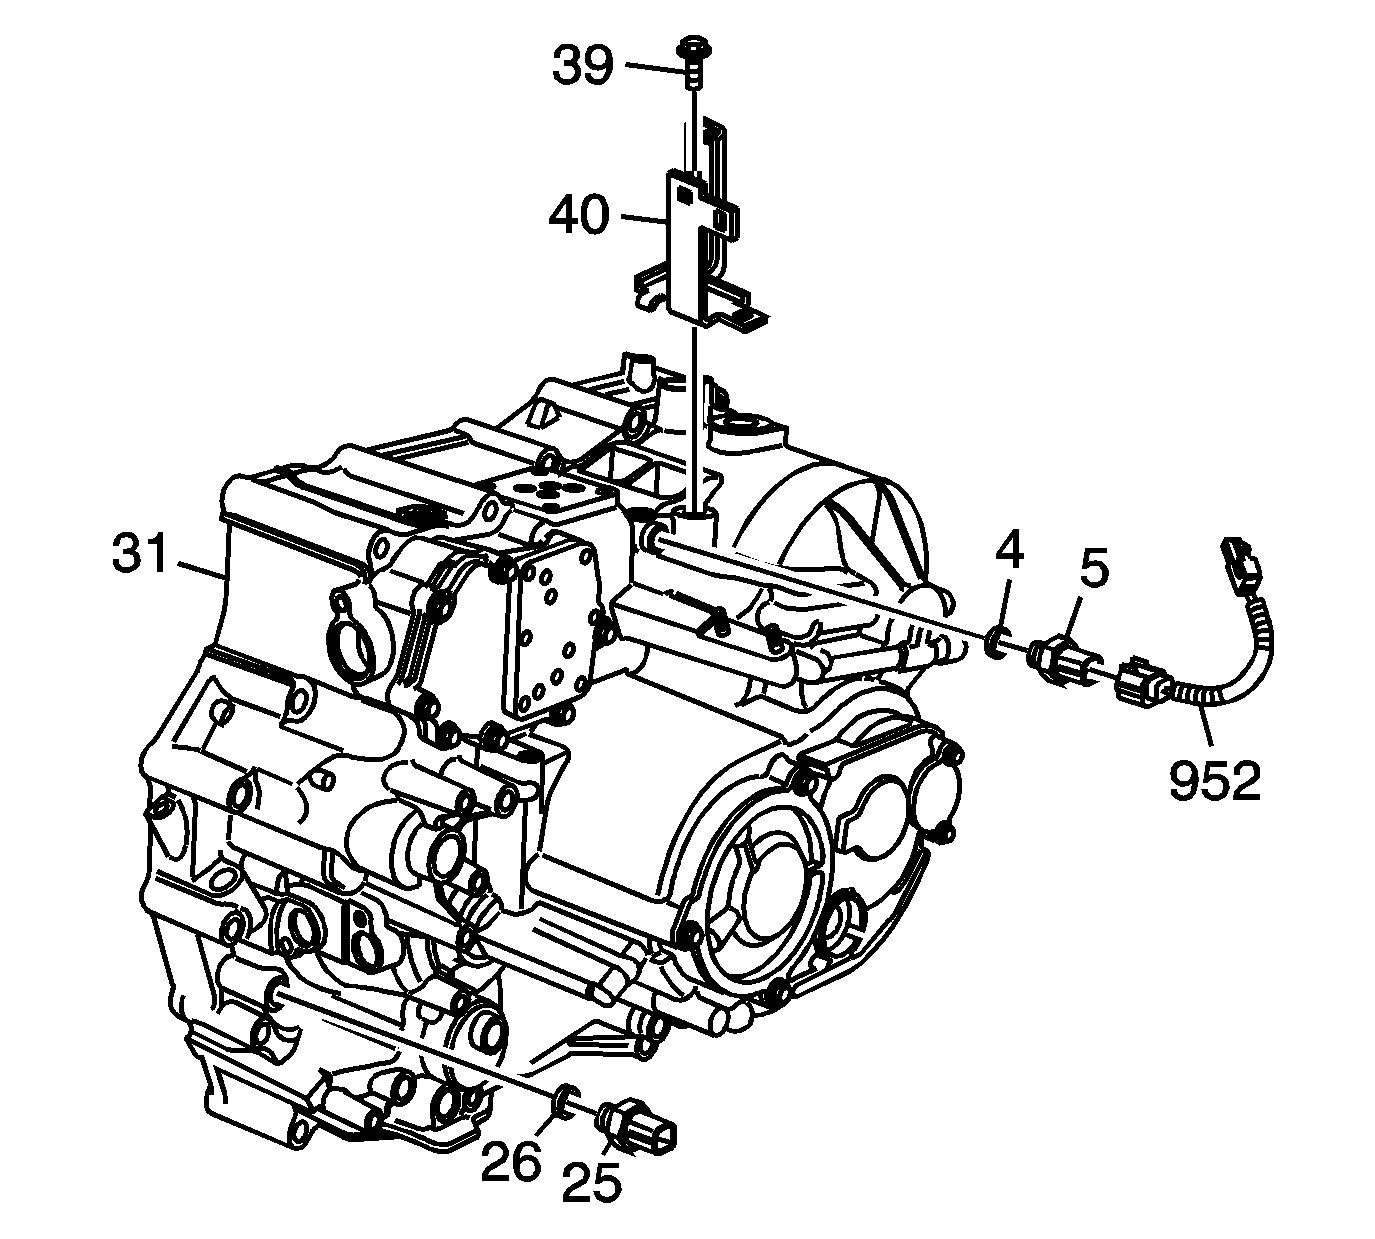
- Remove the engine wiring harness bracket (40) and engine wiring harness bolt (39).
- Remove the 4th clutch pressure switch harness (952) from the 4th clutch pressure switch.
- Remove the 4th clutch pressure switch (5) and the 4th clutch pressure switch seal (4) from the top of the transmission case (31).
- Remove the 3rd clutch pressure switch (25) and the 3rd clutch pressure switch seal (26) from the side of the transmission case (31).
- Inspect the fluid pressure switches for damage. Replace the switches if faulty.

Installation Procedure
- Install the 3rd clutch pressure switch (25) with a new 3rd clutch pressure switch seal (26) into the transmission case (31).
- Install the 4th clutch pressure switch (5) with a new 4th clutch pressure switch seal (4) into the transmission case (31).
- Install the 4th clutch pressure switch harness (952) on the 4th clutch pressure switch.
- Install the engine wire harness bracket (40) and engine wiring harness bolt (39).
Notice: Refer to Fastener Notice in the Preface section.

Tighten
Tighten the pressure switches to 20 N·m (14 lb ft)
Tighten
Tighten the pressure switches to 20 N·m (14 lb ft)
Tighten
Tighten the engine wiring harness bolt to 12 N·m (106 lb in).
