For 1990-2009 cars only
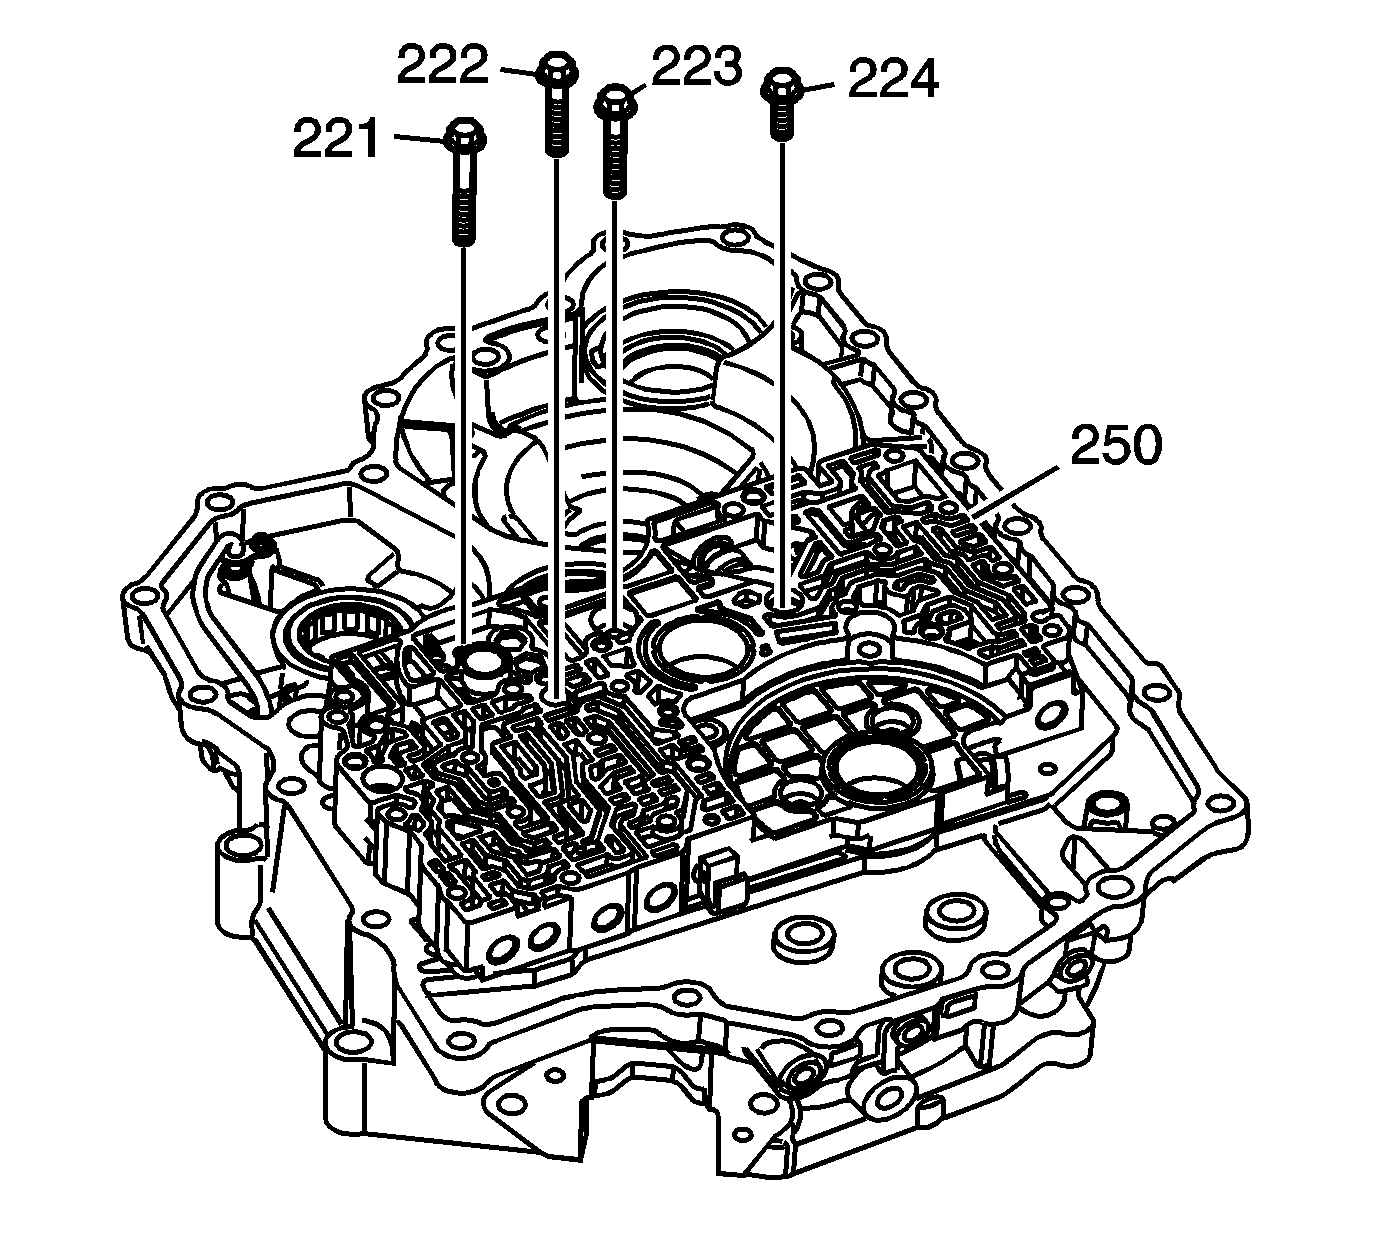
- Remove the 10 control valve body bolts.
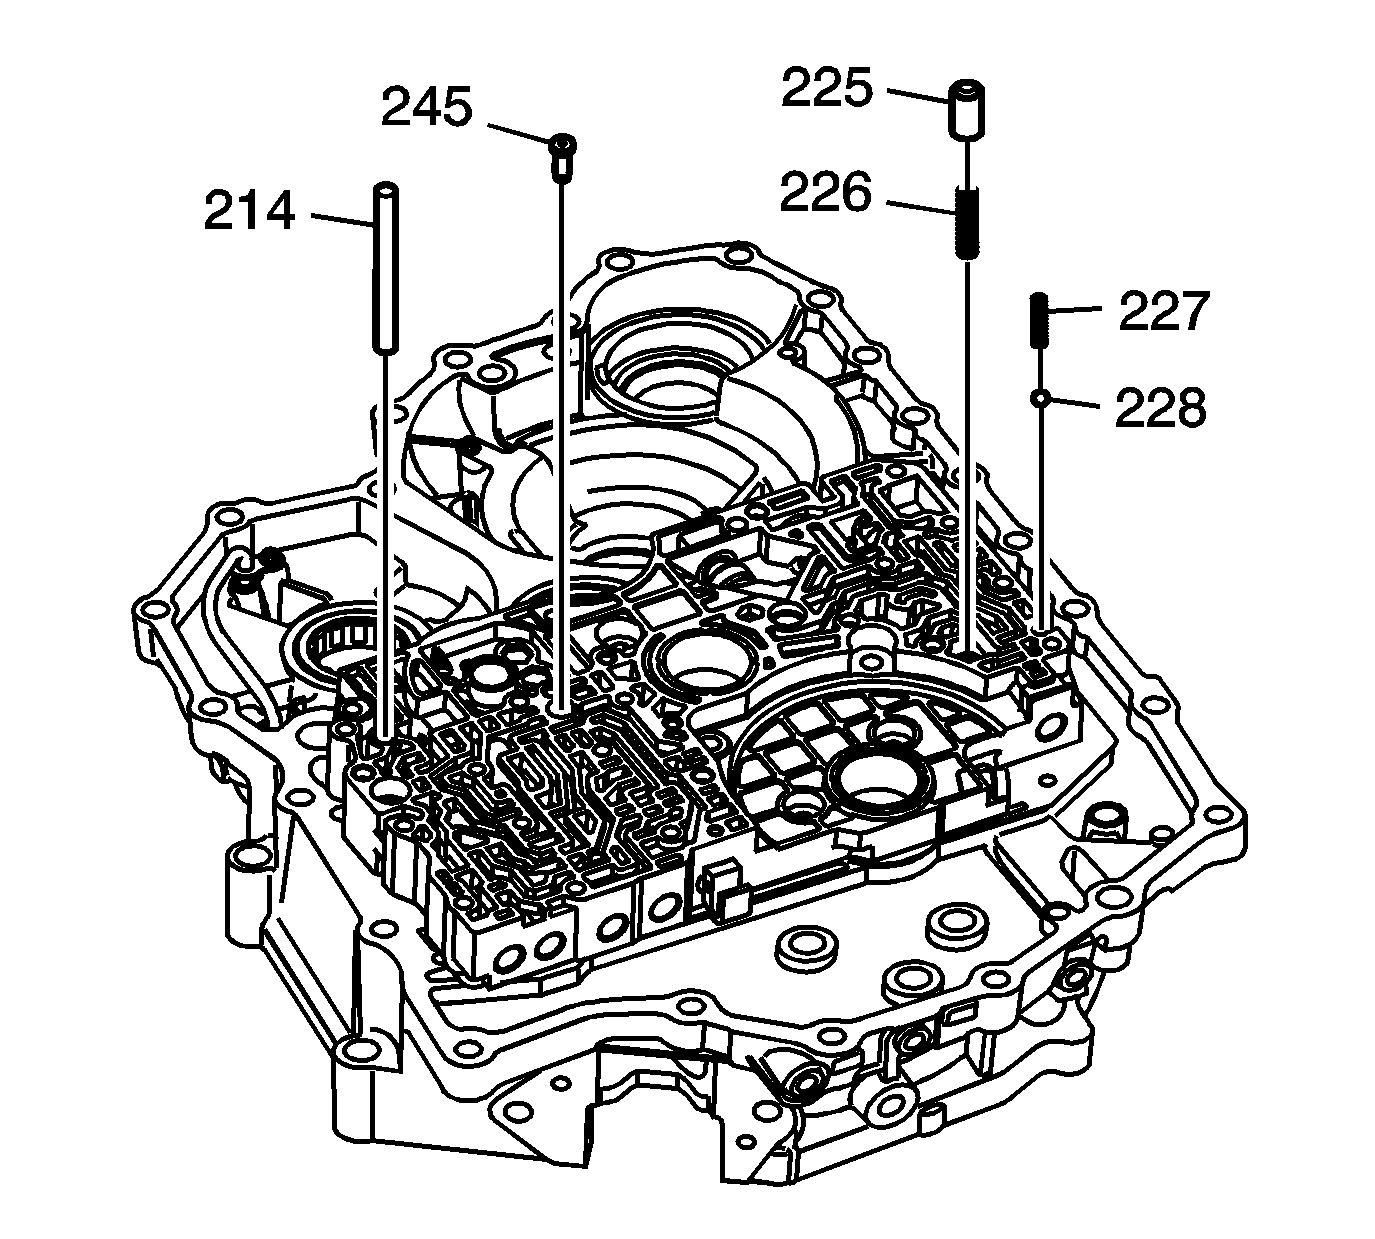
- Remove the torque converter check valve (225).
- Remove the torque converter check valve spring (226).
- Remove the oil cooler check ball return spring (227).
- Remove the oil cooler check ball (228)
- Remove the 4th clutch apply fluid pipe (214).
- Remove the lubrication control valve (245)
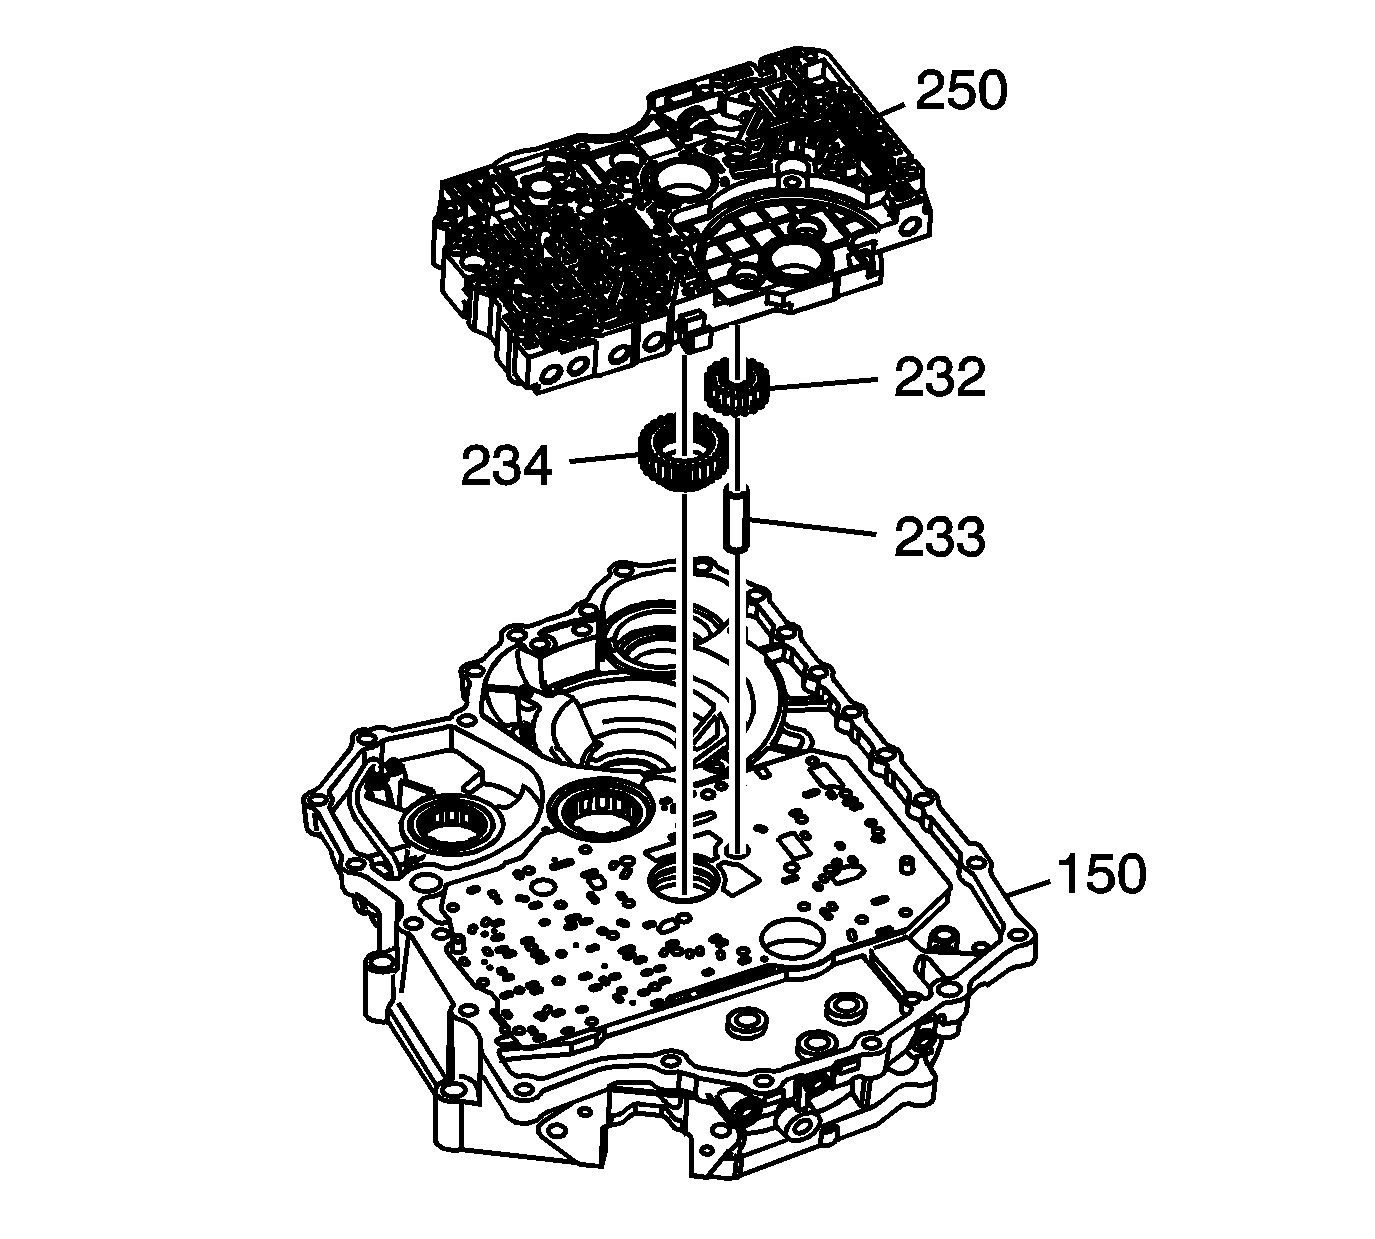
- Lifting straight up, remove the control valve body assembly (250) from the torque converter housing assembly (150).
- Remove the fluid pump driven gear pin (233).
- Remove the fluid pump driven gear (232).
- Remove the fluid pump drive gear (234).
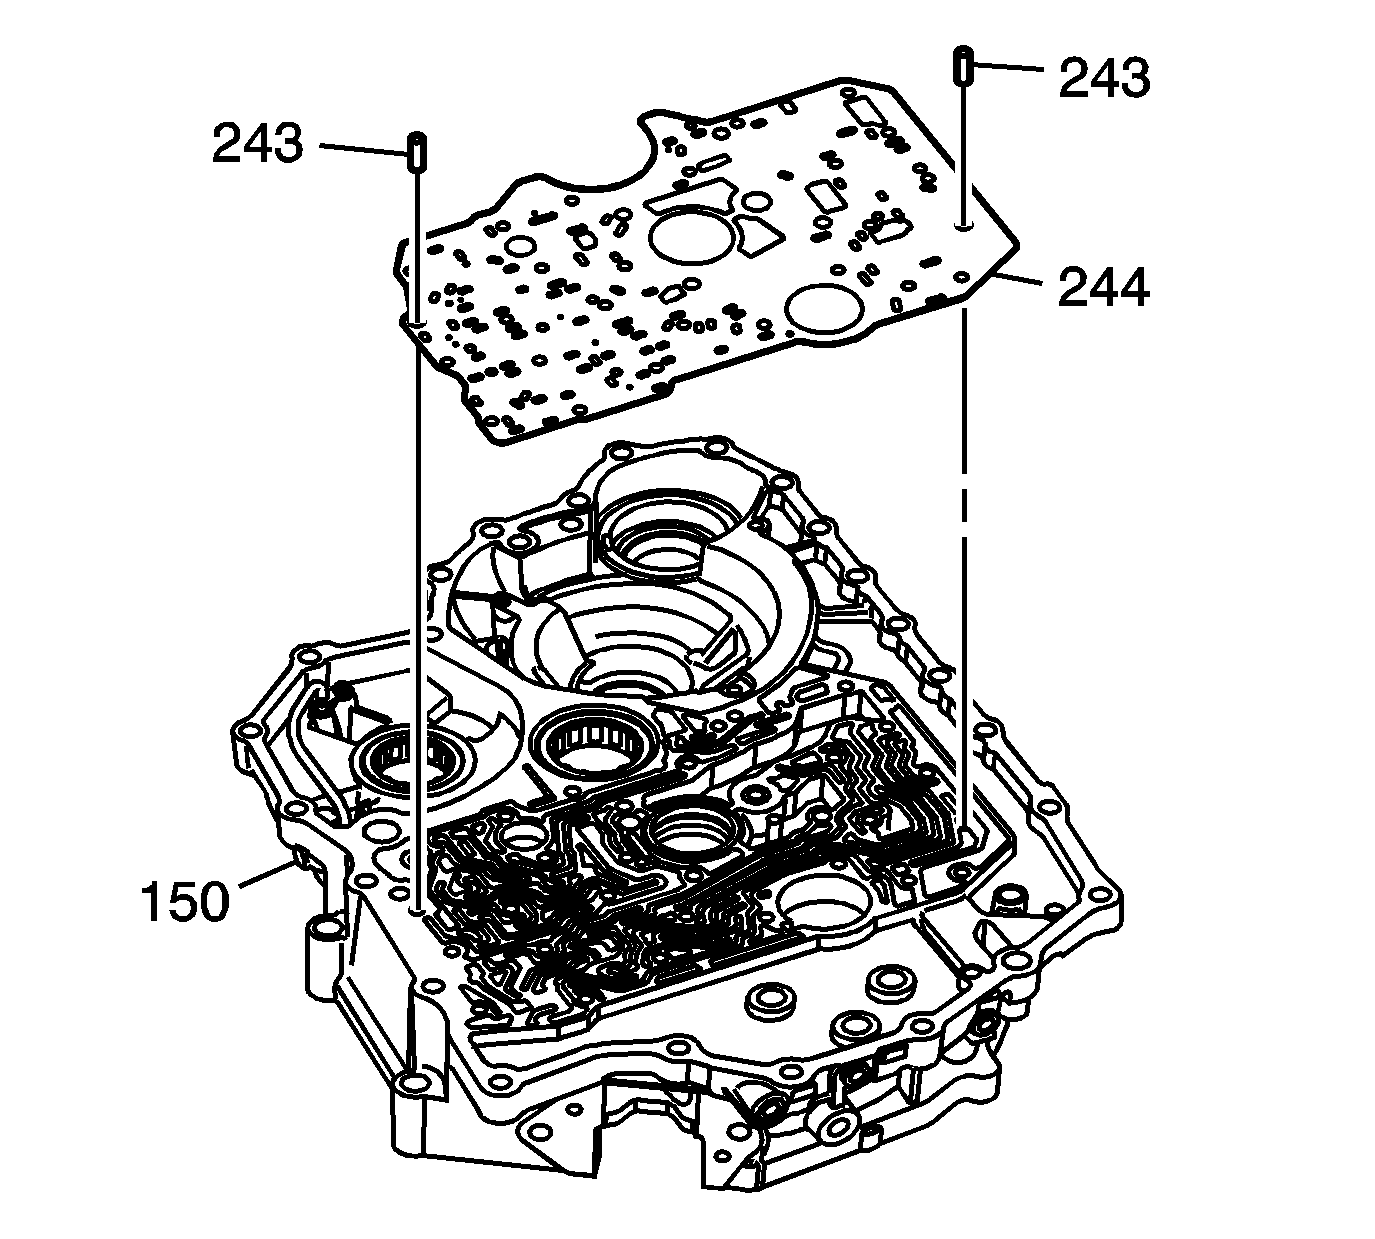
- Remove the 2 control valve body spacer plate locating pins (243).
- Remove the control valve body spacer plate (244).

Important: Do not misplace the following components
when removing the control valve body assembly (250):
• Oil cooler check ball (228) • Oil cooler return spring (227) • Torque converter check valve (225) • Torque converter check valve return spring (226) • Lubrication control valve (245)
| • | 2 control valve body bolts (221) |
| • | 2 control valve body bolts (222) |
| • | 3 control valve body bolts (223) |
| • | 3 control valve body bolts (224) |


