Tools Required
| • | J 26941
Bushing and
Bearing Remover |
| • |
J 29369-2
Bushing
and Bearing Remover - 2-3 in |
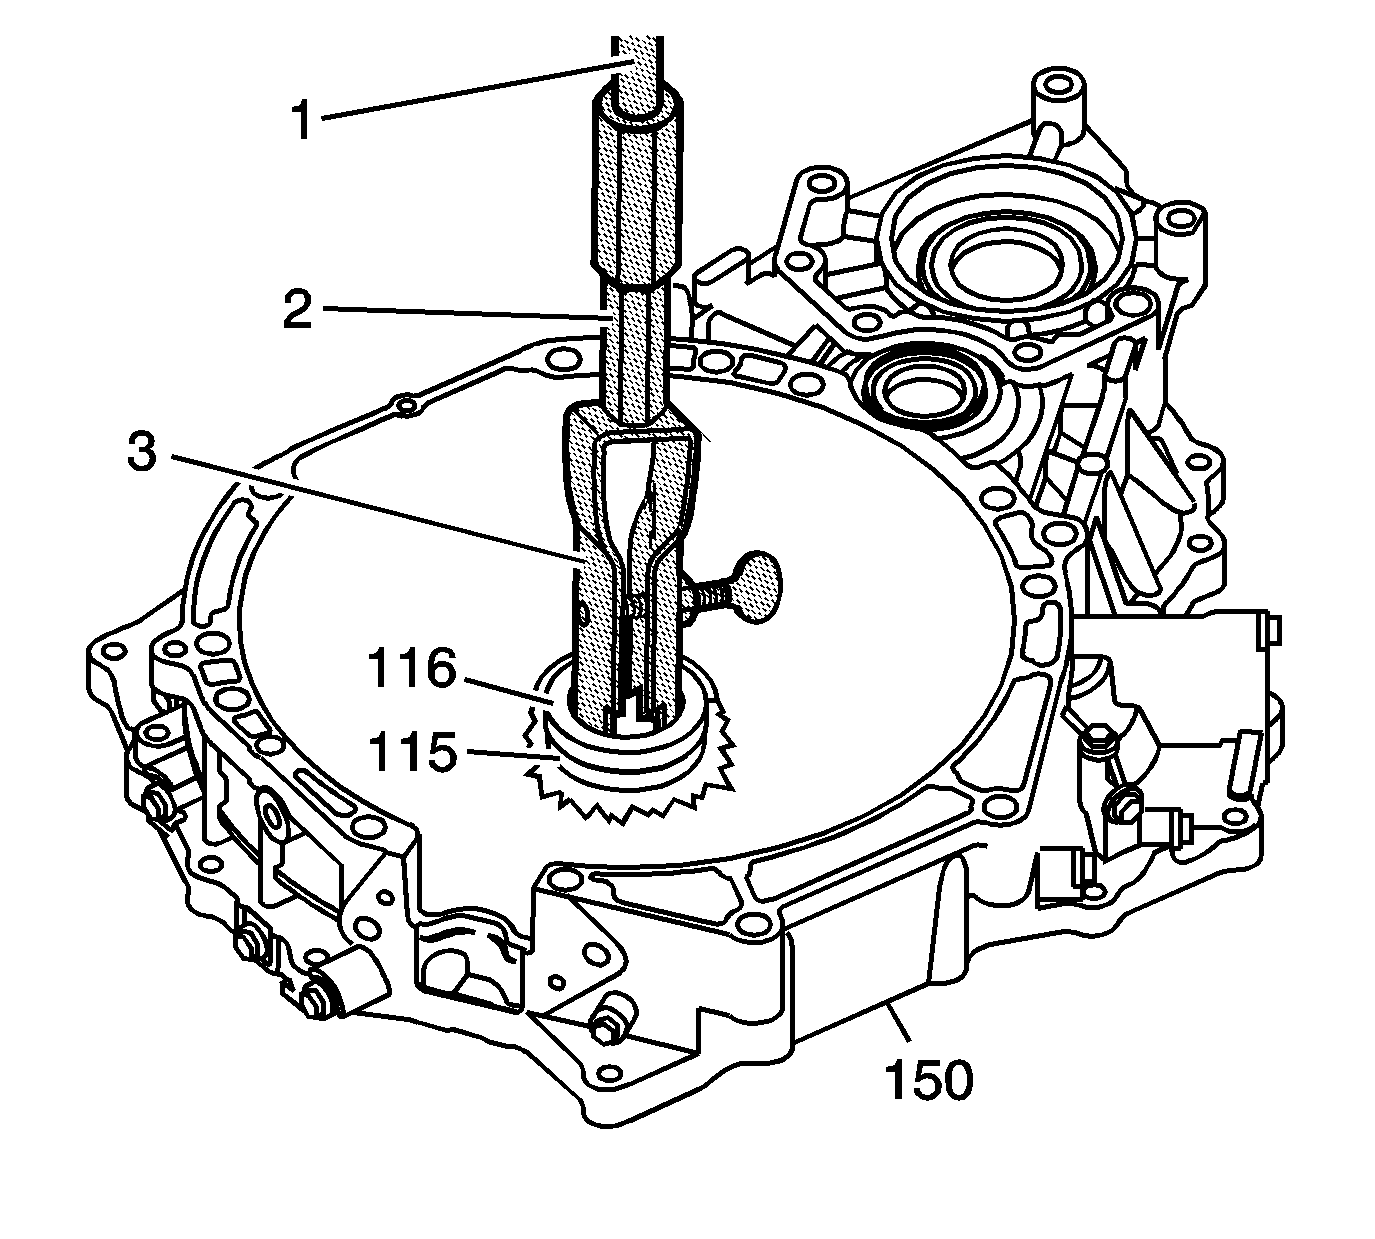
- Using the
J 26941
(3),
SA9133T
(1) and
SA9133T-1
(2), remove the torque converter
seal (116) from the torque converter housing (150).
Important: Ensure the jaws of the
J 26941
do not catch on the other side of the bearing
bore.
- Using the
J 26941
(3),
SA9133T
(1) and
SA9133T-1
(2), remove the torque
converter bearing (115) from the torque converter housing (150).
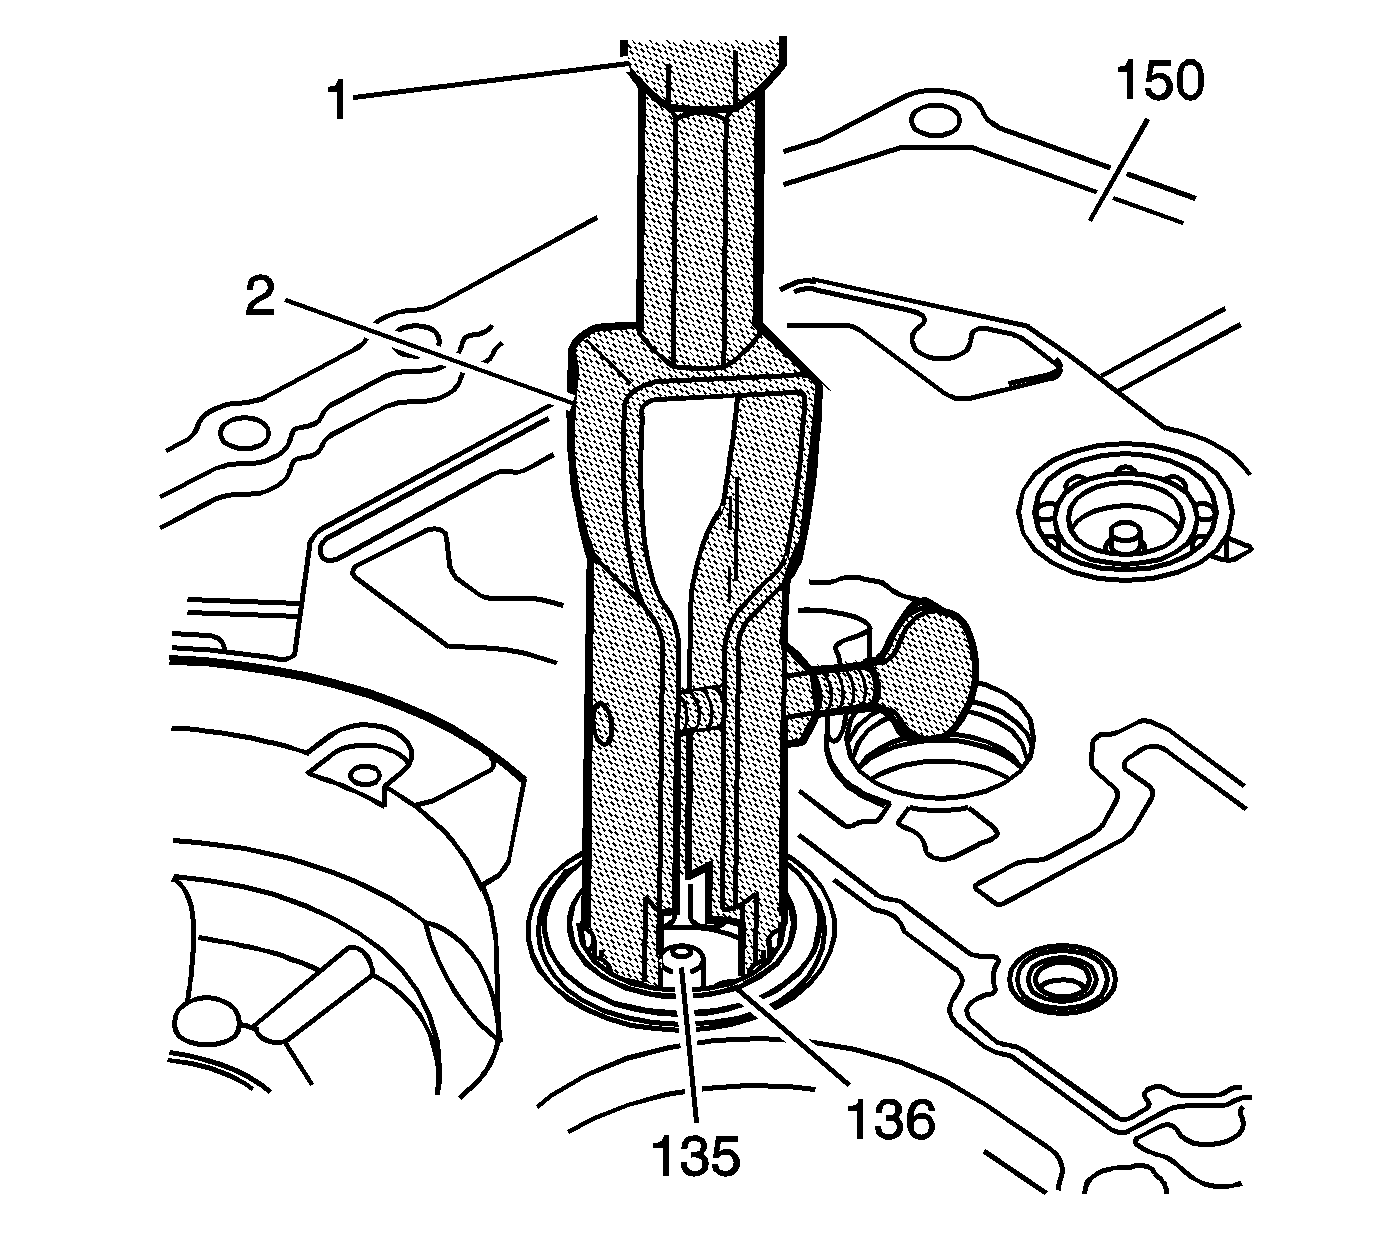
- Inspect the output shaft front bearing (136)
for wear or damage. Do not reuse the bearing after the bearing is removed. Replace
the bearing if necessary.
- Using the
J 26941
(2),
SA9133T
(1) and
SA9133T-1
, remove the output shaft
front bearing (136) from the torque converter housing (150).
- By hand, remove the output shaft lube feed plate (135) from the
torque converter housing (150).
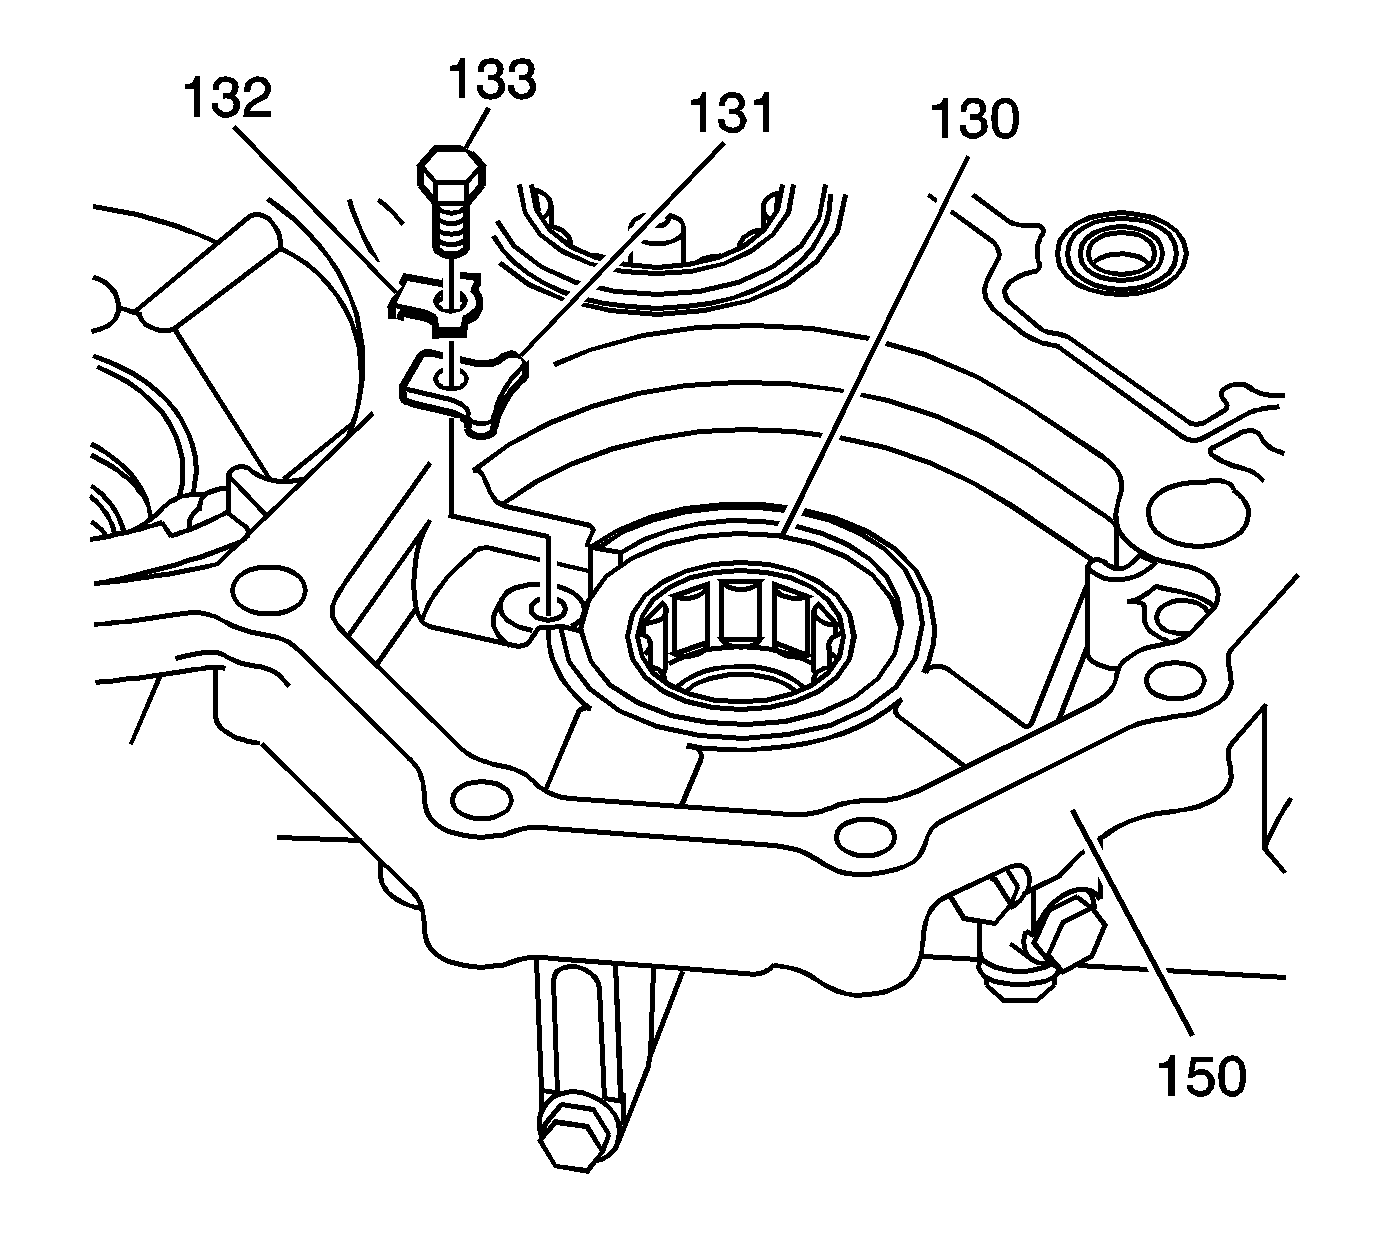
- Remove the 1st/2nd clutch shaft intermediate
bearing retainer bolt (133) from the torque converter housing (150).
- Remove the intermediate bearing retainer (132) and the front bearing
retainer washer (131).
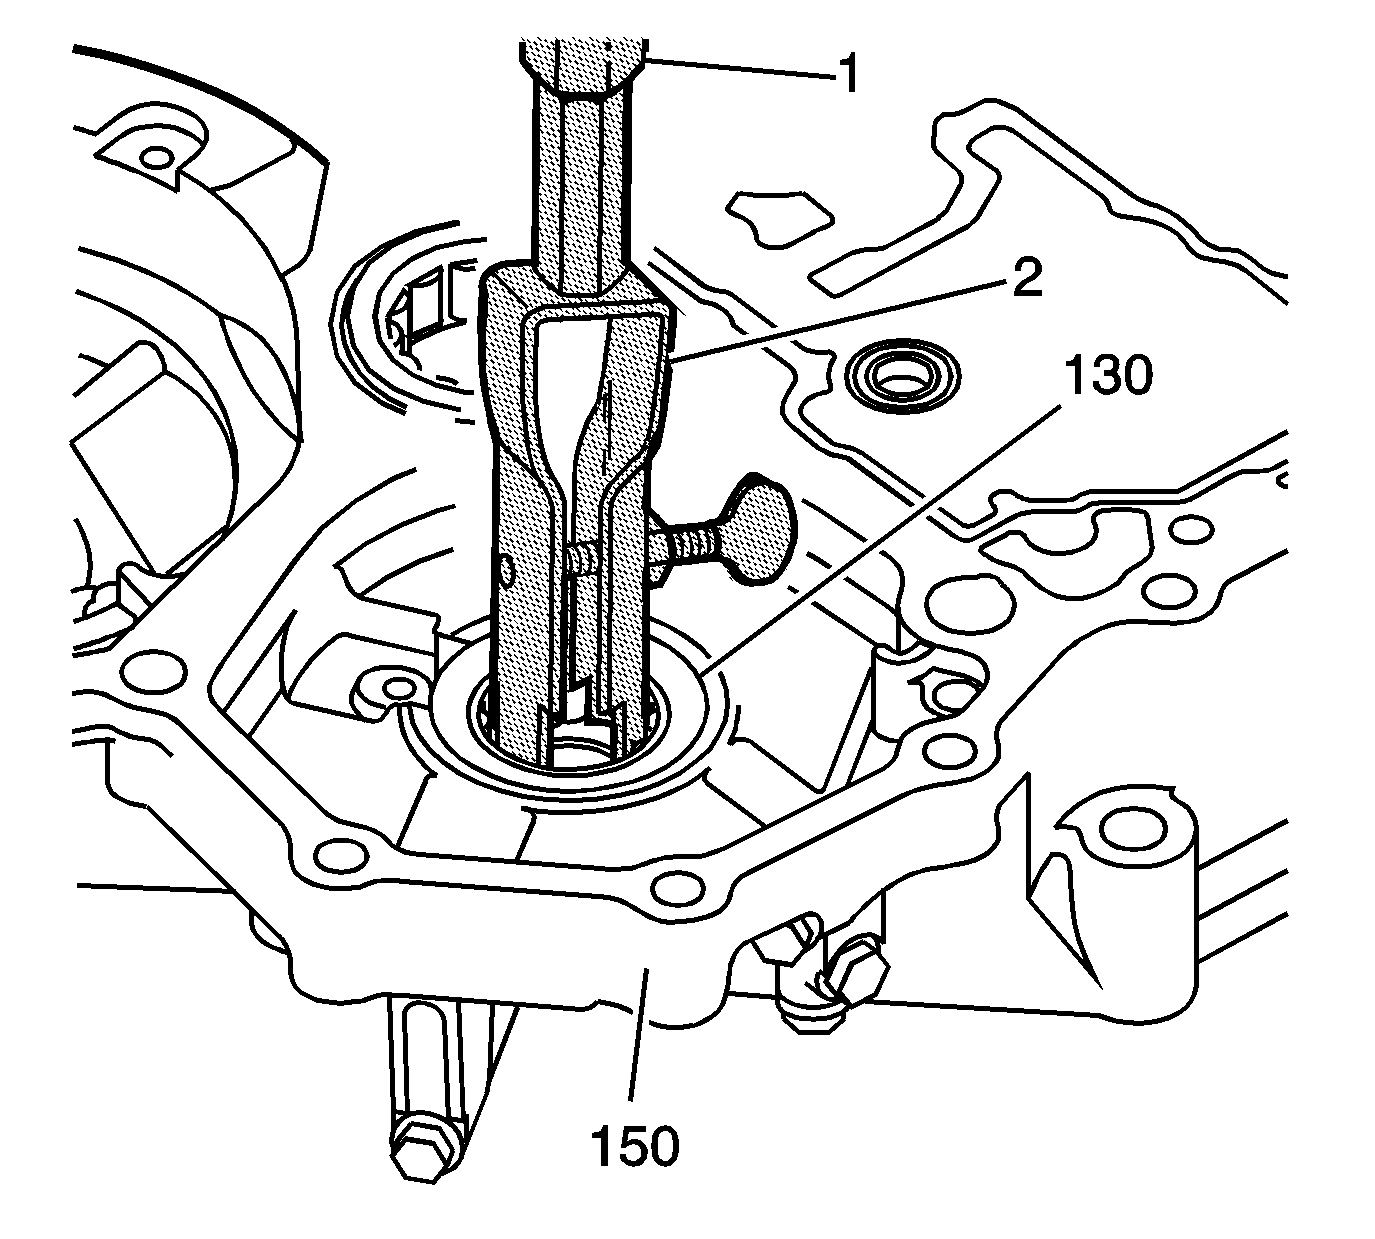
- Using the
J 29369-2
(2),
SA9133T
and
SA9133T-1
(1),
remove the 1st/2nd clutch shaft intermediate bearing (130) from the torque
converter housing (150).
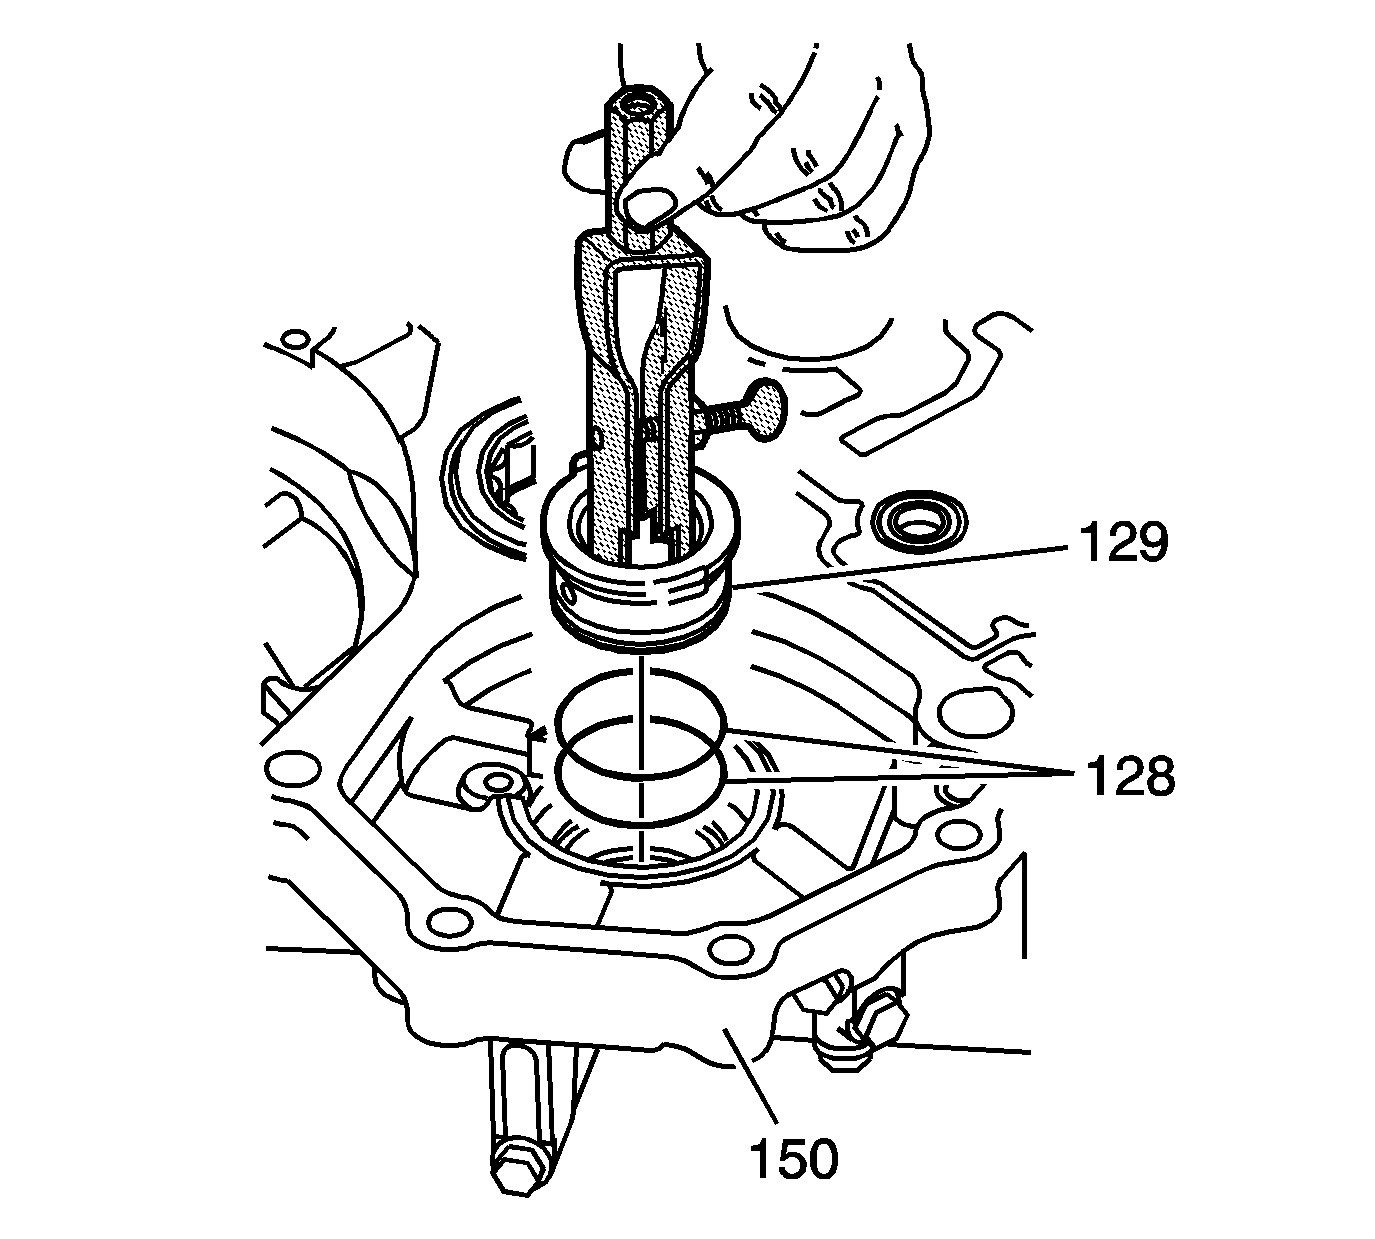
- Using the
J 29369-1
by hand, remove the 1st/2nd clutch shaft lube feed collar (129)
from the torque converter housing (150).
- Remove the 1st/2nd clutch shaft lube feed collar seals (128).
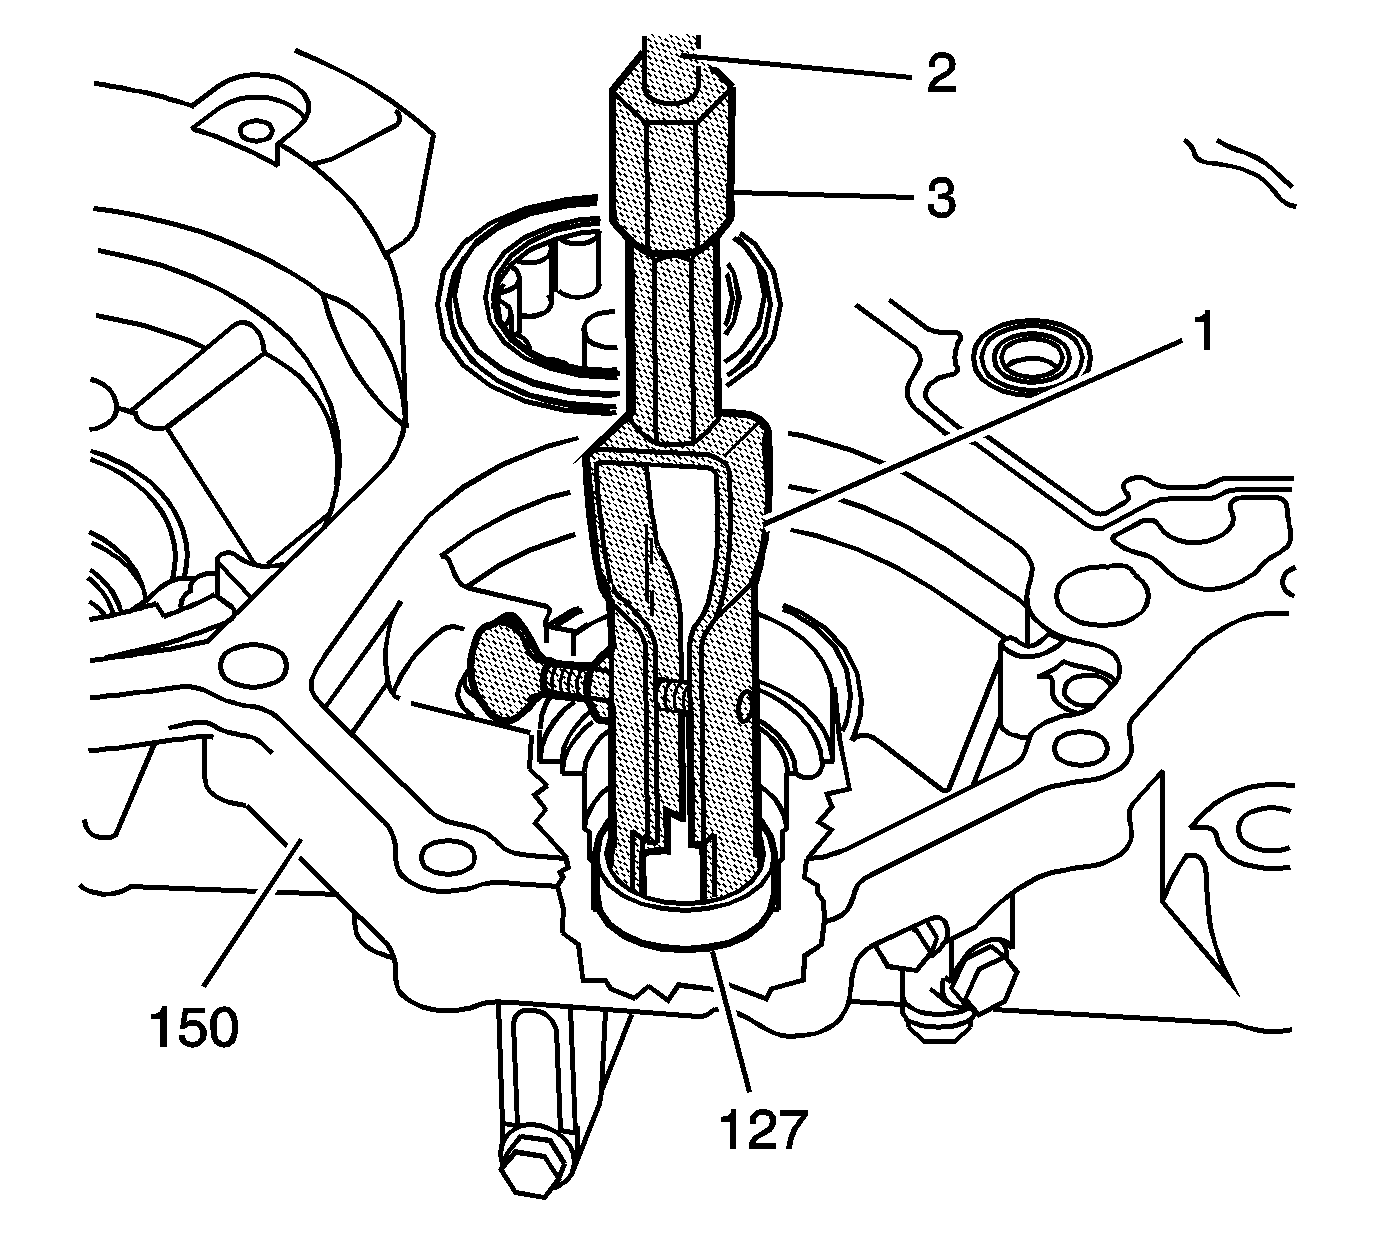
- Using the
J 29369-1
(1),
SA9133T
(2) and
SA9133T-1
(3),
remove the 1st/2nd clutch shaft front bearing (127) from the torque converter
housing (150).
- Inspect the bearing for wear or damage. Replace the bearing if necessary.
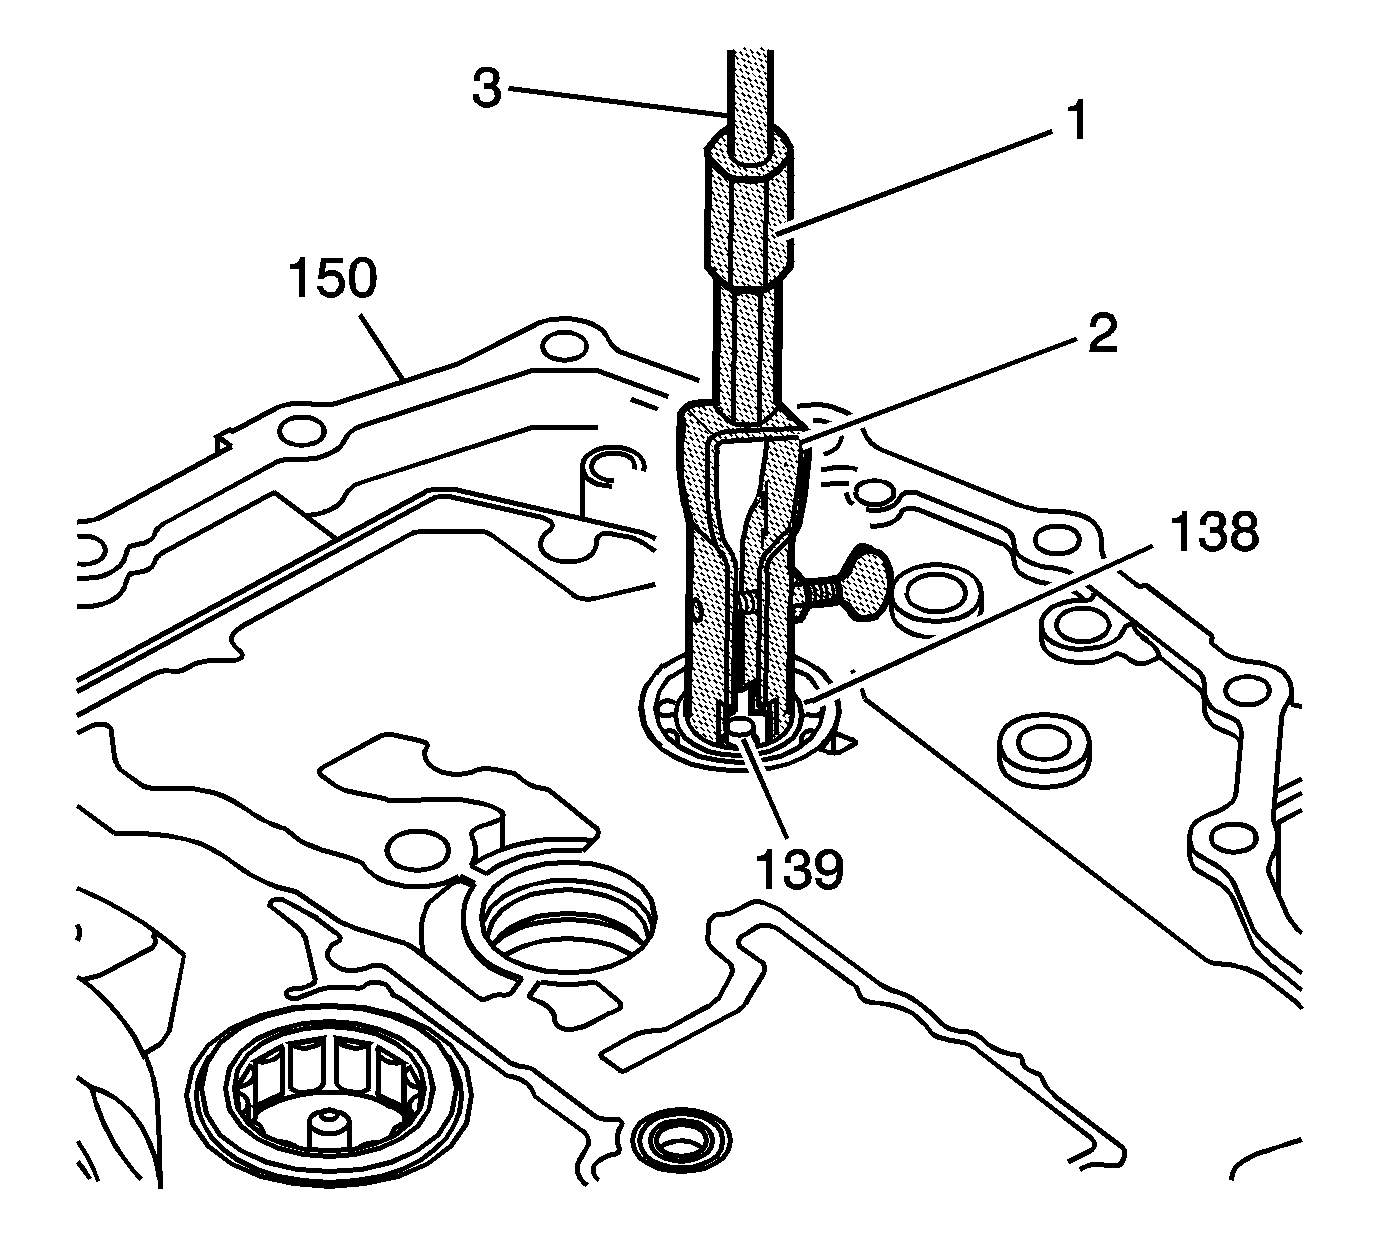
- Using the
J 29369-1
(2),
SA9133T
(3) and
SA9133T-1
(1),
remove the 3rd clutch shaft front bearing (138).
- Remove the 3rd clutch shaft lube feed plate (139).
- Inspect the bearing for wear or damage. Replace the bearing if necessary.
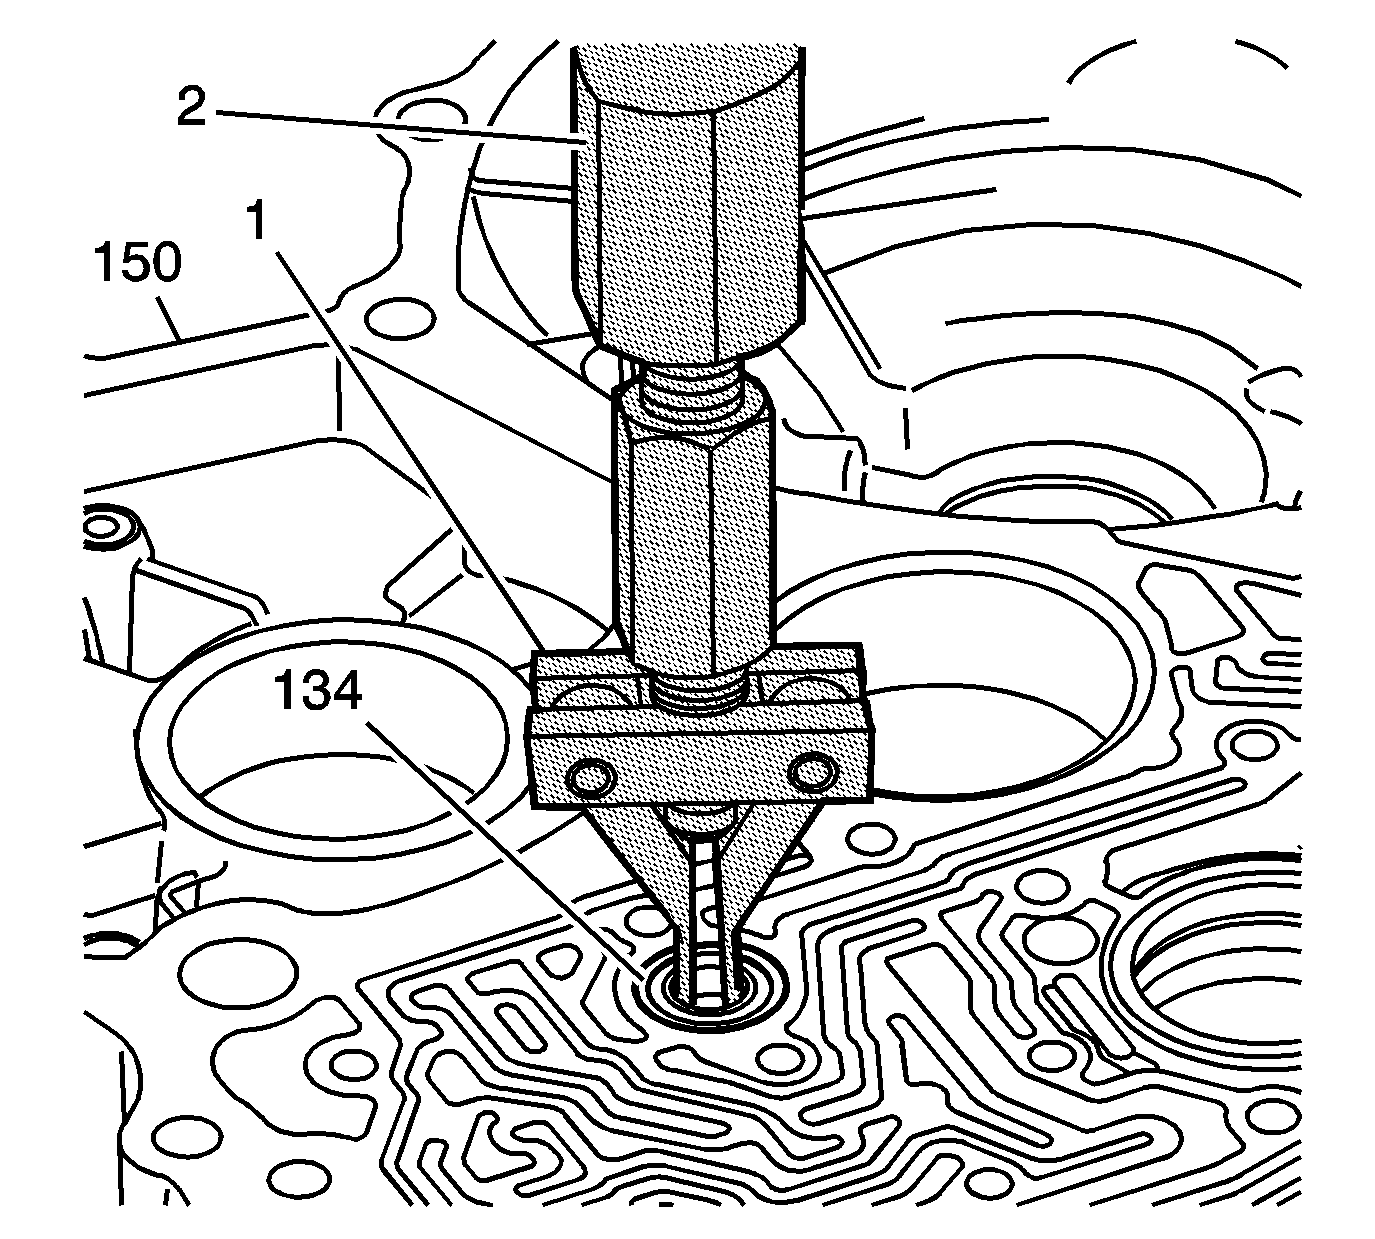
- Using the
DT 46424
(1) and
SA9133T-1
(2), remove the park pawl actuator shaft front bearing (134)
from the transmission torque converter housing (150).
- Inspect the bearing for wear or damage. Replace the bearing if necessary.
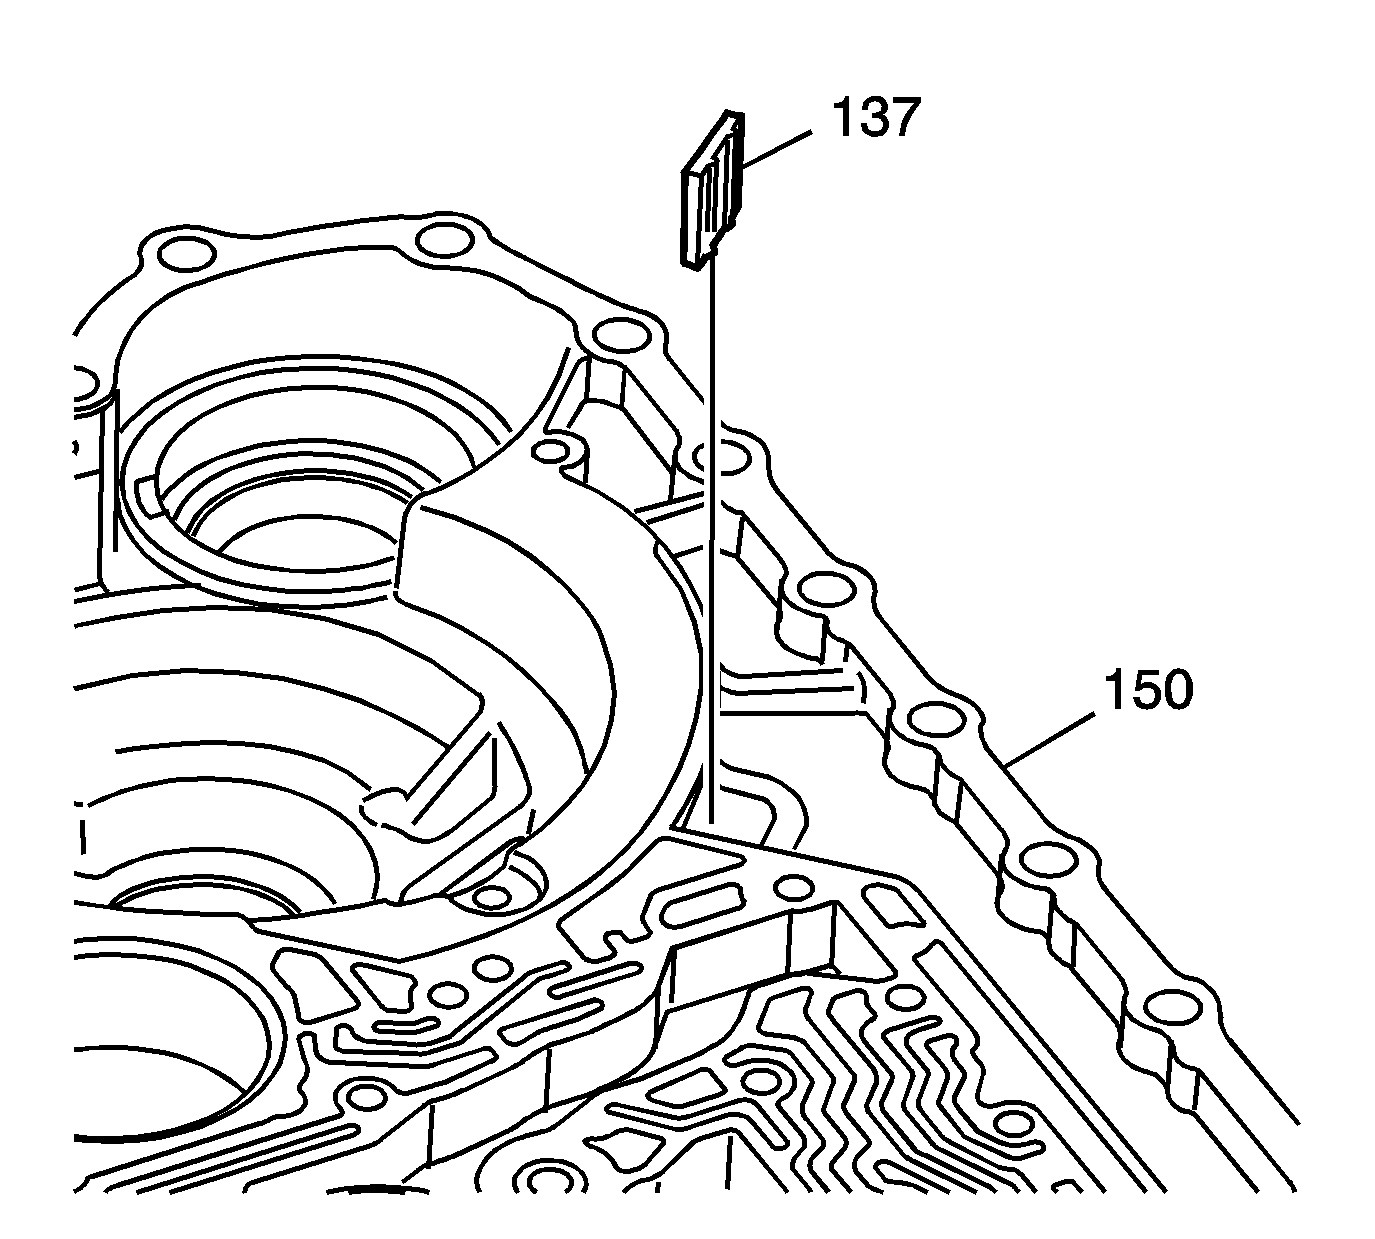
- Remove the magnetic chip collector (137)
from the torque converter housing (150).
- Clean and inspect the magnet.
If there is heavy build up on
the magnet, determine the cause of this build-up and correct as needed.
- If the chip collector is damaged, replace the complete assembly.
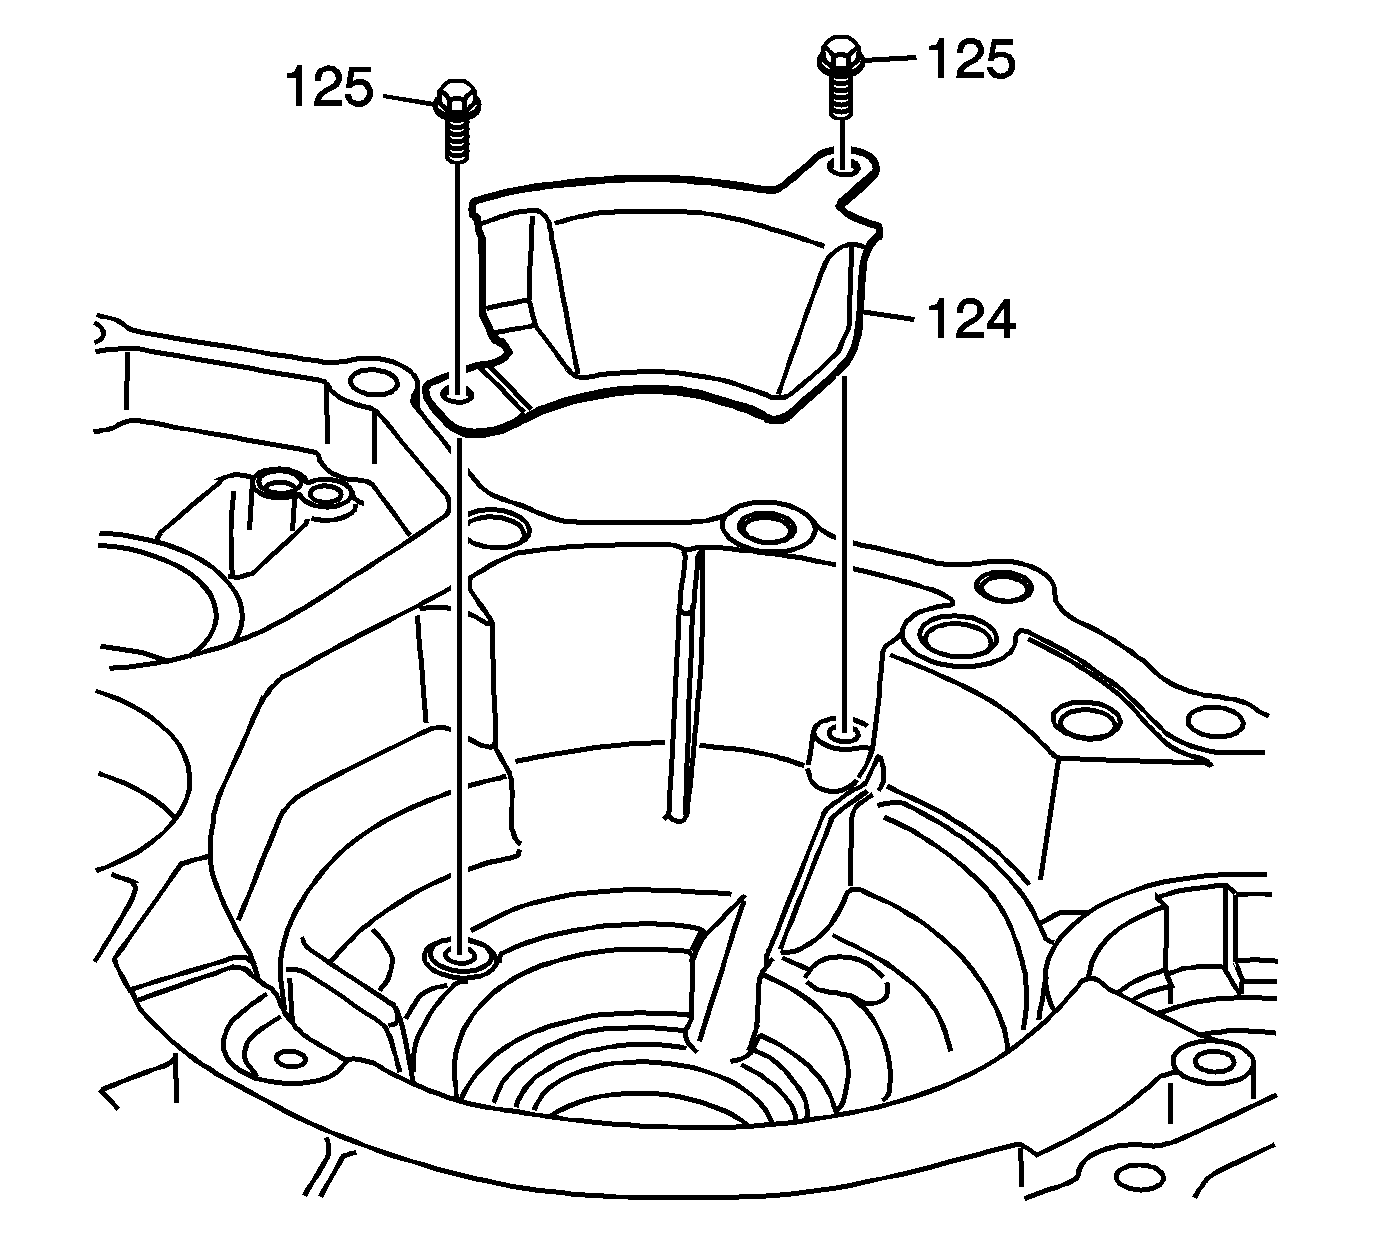
- Remove the fluid baffle bolts (125).
- Remove the fluid baffle (124).
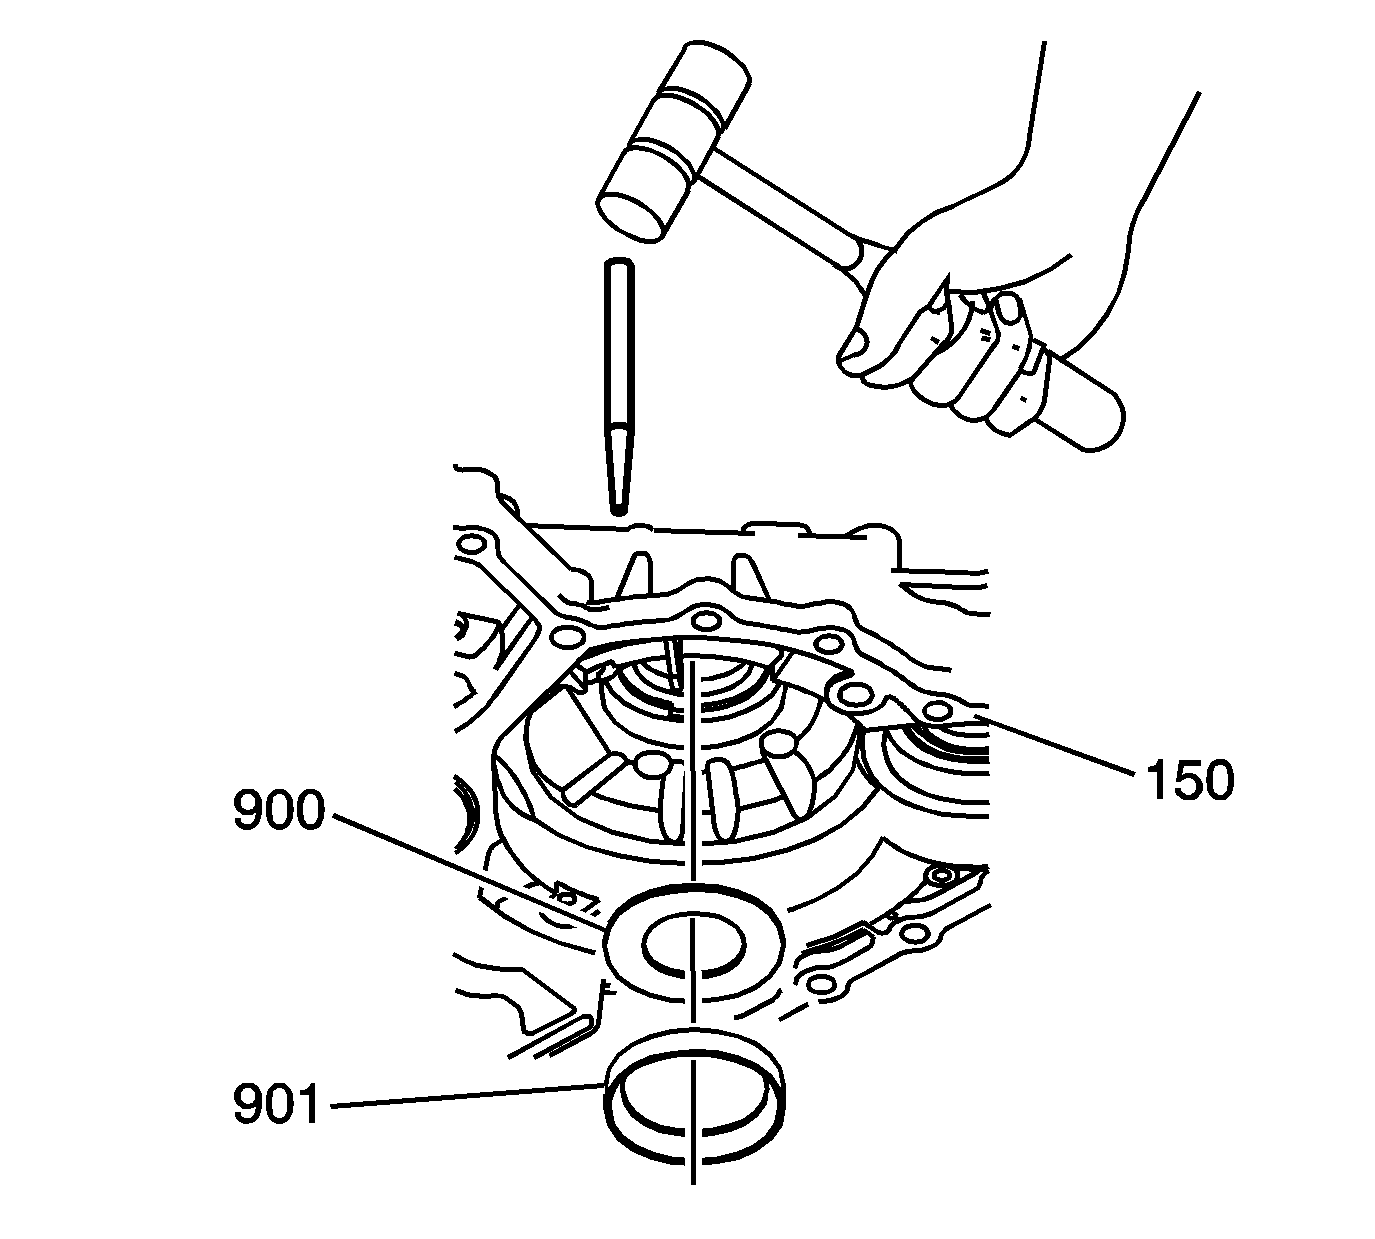
- Inspect the front differential bearing race (901) for damage or excessive
wear.
- Using a hammer and punch, remove the front differential tapered front
roller bearing race (901) and (900) from the torque converter housing (150)
Tap lightly and evenly around the race, the race will slide out if kept
even to the bore.
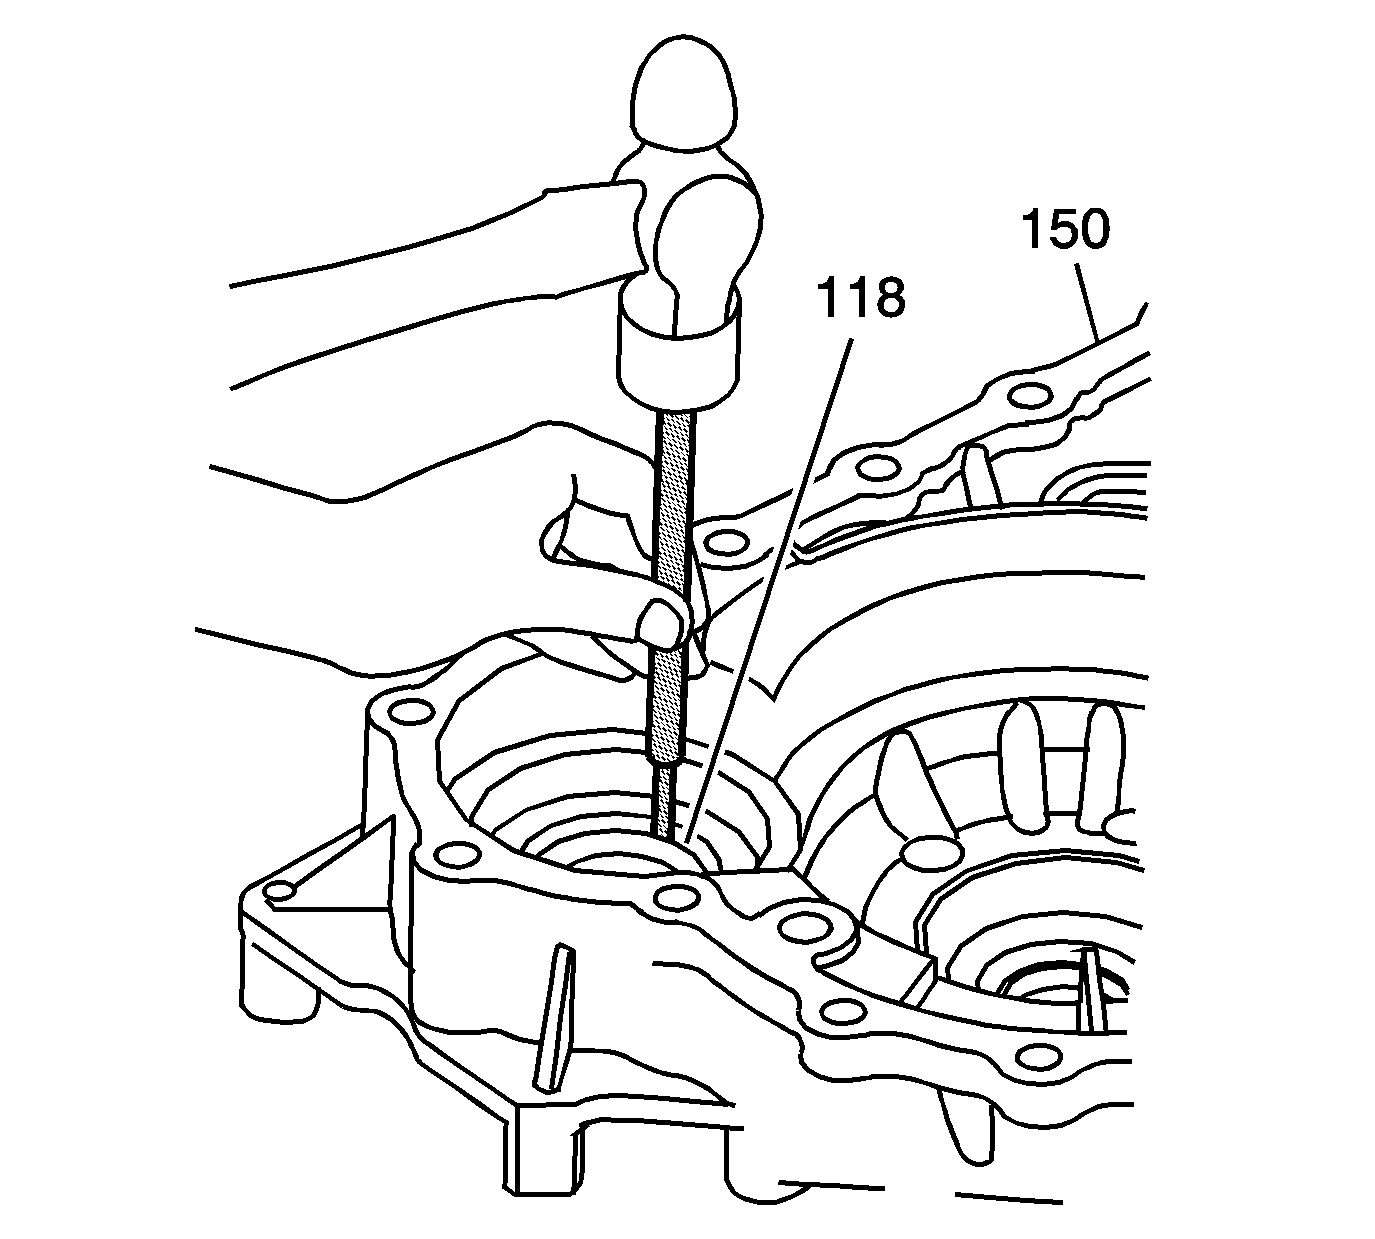
- Using a hammer and punch, remove the transfer
case input shaft seal (118) from the torque converter housing (150).
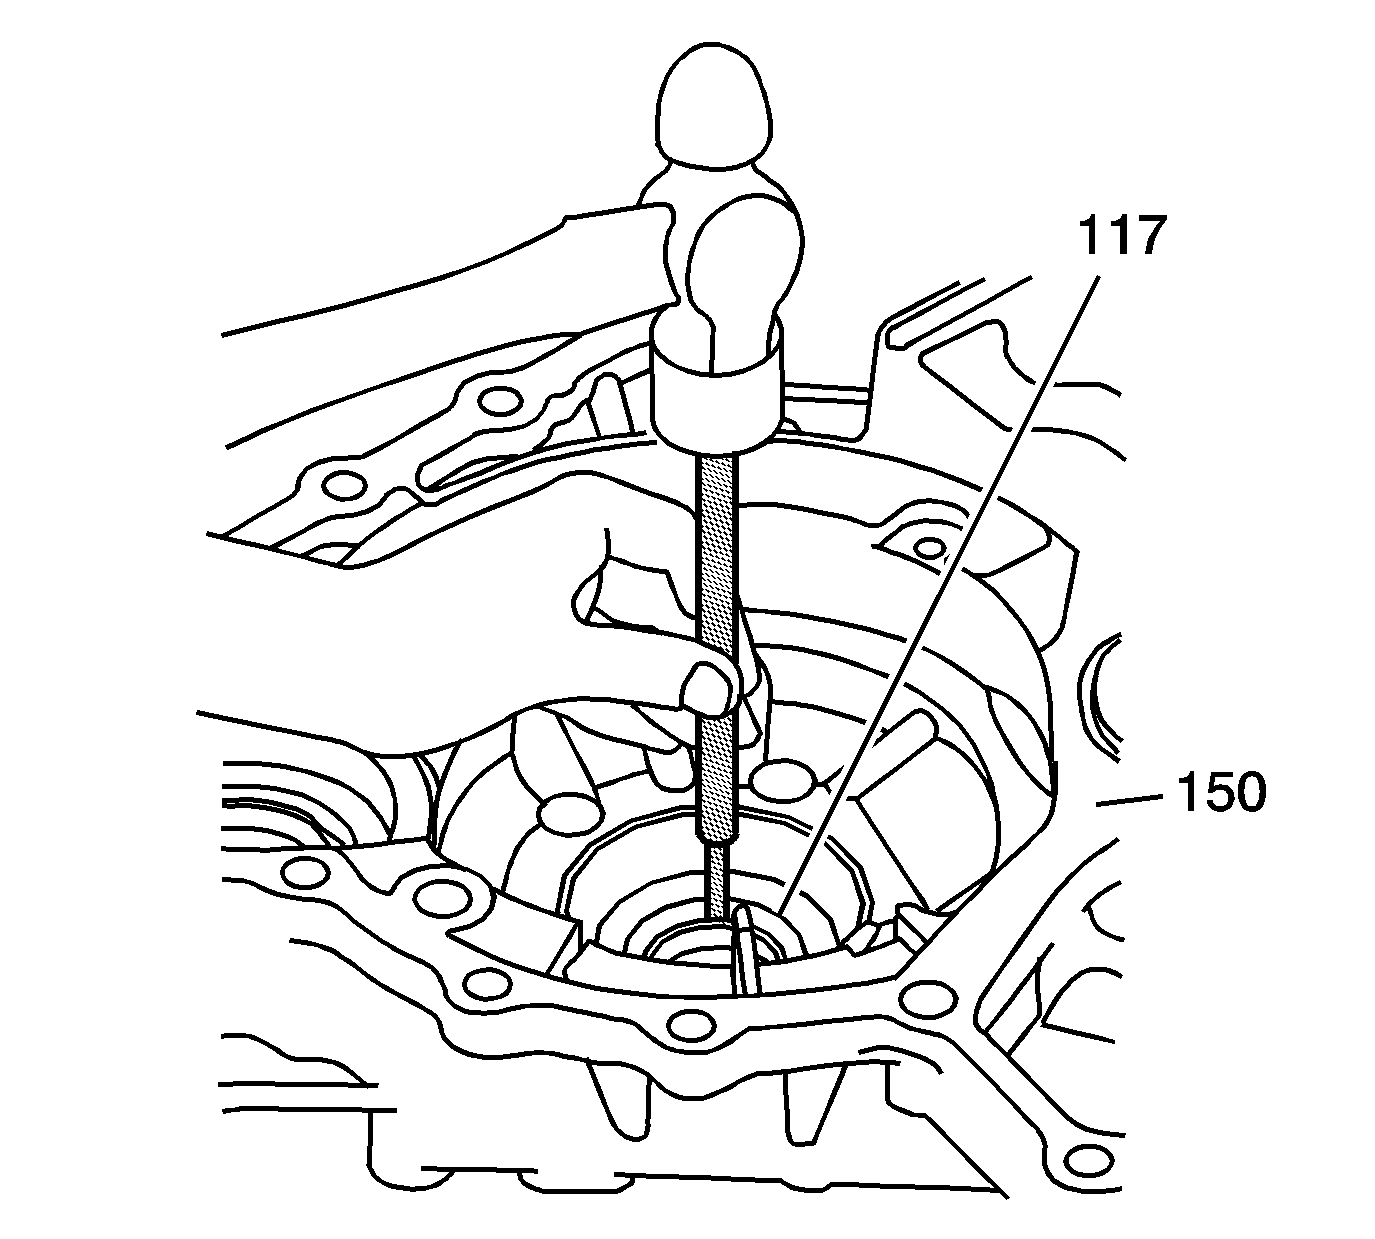
- Using a hammer and punch, remove the front
wheel drive shaft fluid seal (117) from the torque converter housing (150).
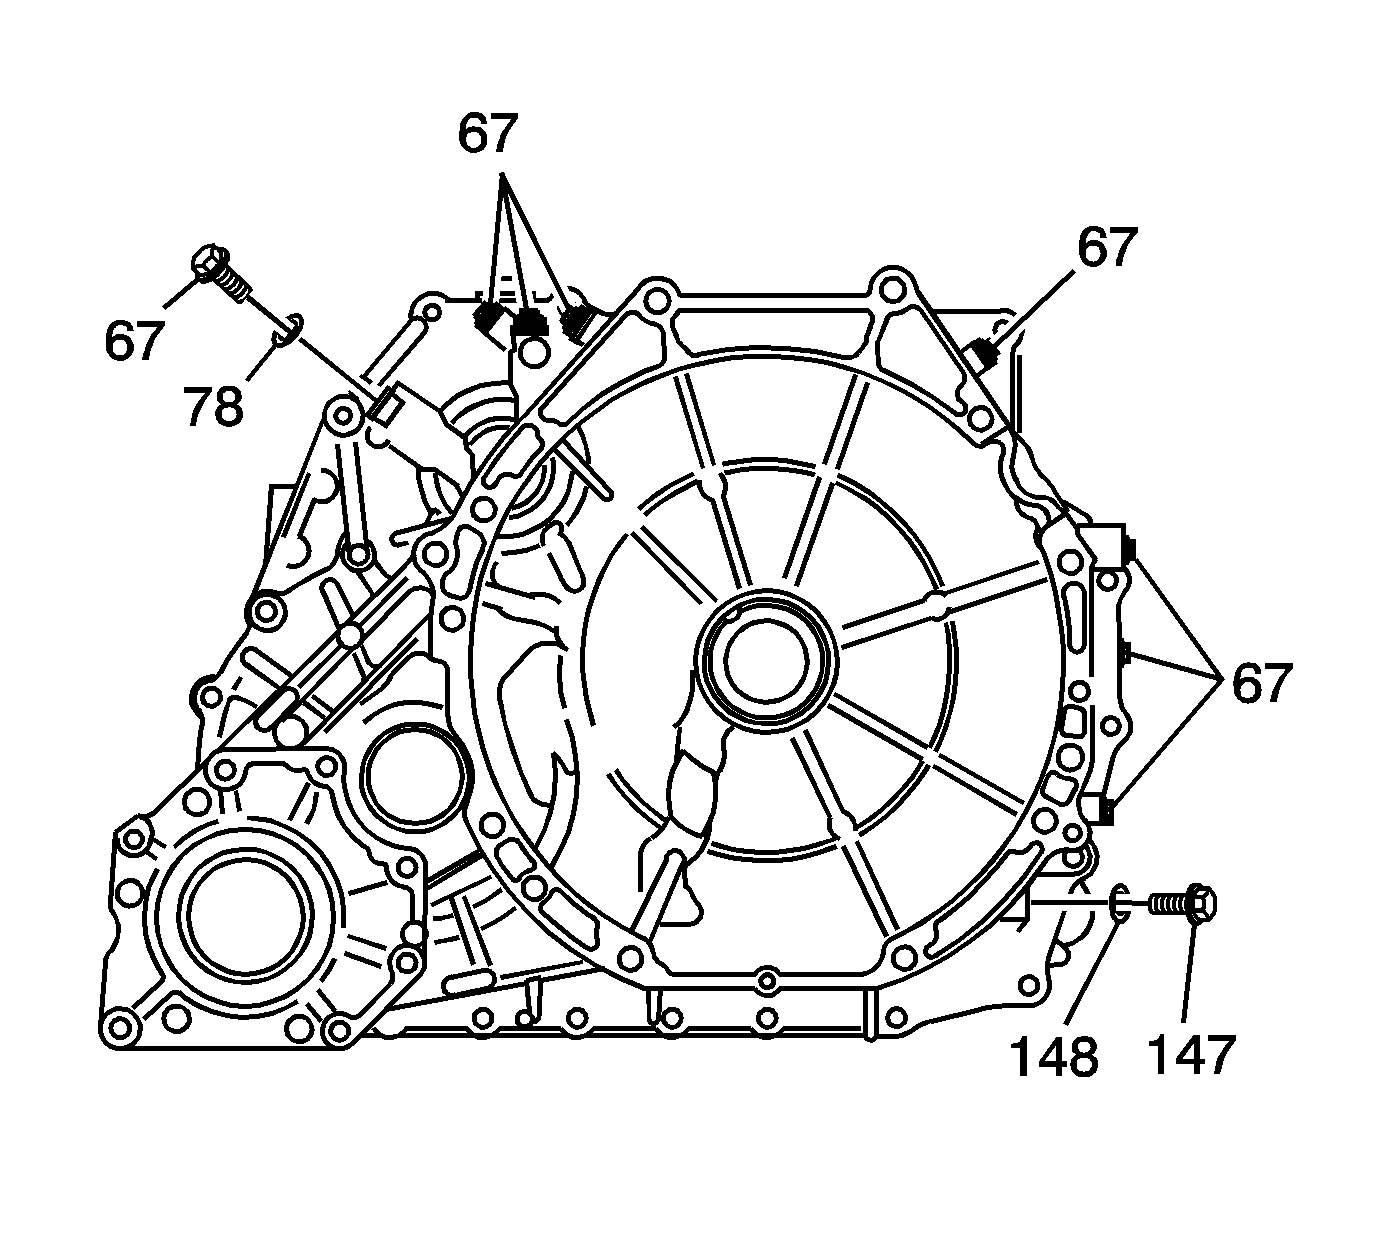
- Remove
the case plug (147) with the sealing washer (148).
- Remove the 8 fluid pressure test hole plugs (67) with sealing washer (78).
- Clean
the torque converter housing in solvent and air dry. Ensure that all cleaning solvent
is removed from the fluid passages.
- Inspect the torque converter housing for being broken or cracked.
- Inspect the control valve body mounting surface for damage.
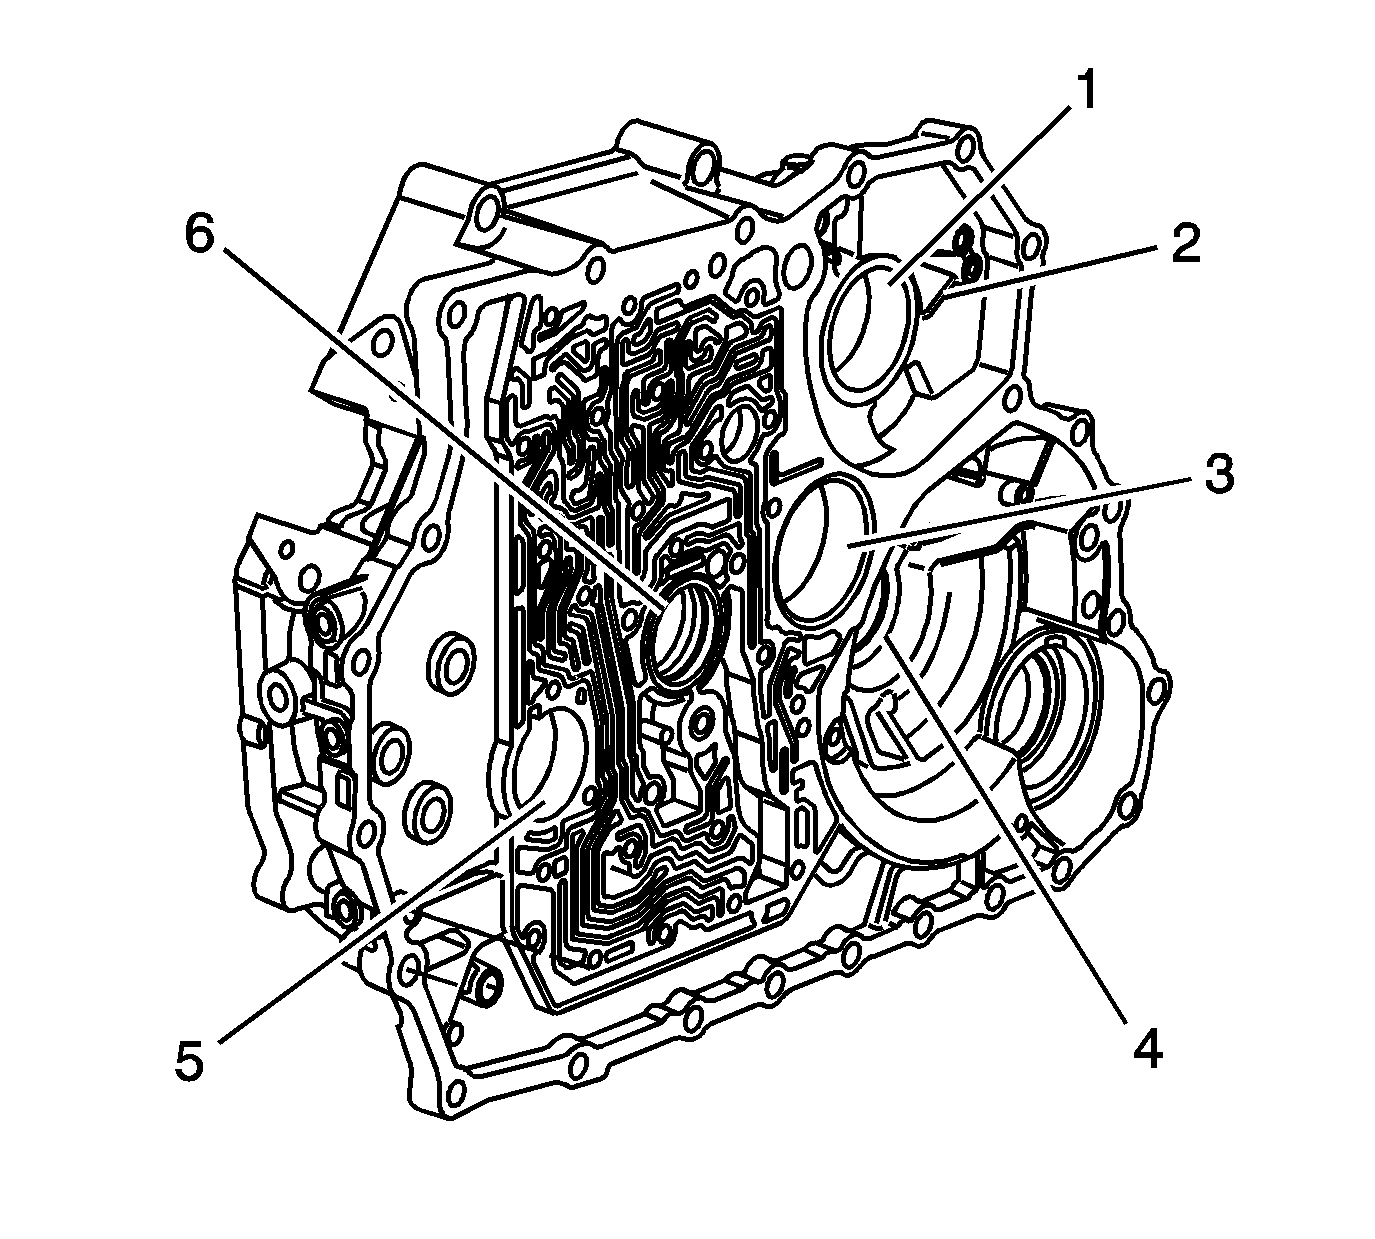
- Inspect the following bearing bores for cracks or a spun bearing:
| • | 1st/2nd clutch shaft front bearing (1) |
| • | 1st/2nd clutch shaft intermediate bearing (2) |
| • | Output shaft front bearing (3) |
| • | Front differential bearing race (4) |
| • | 3rd clutch shaft front bearing (5) |
| • | Torque converter bearing (6) |
- Replace the torque converter housing if any of the above conditions are
found.
- Inspect the sealing surfaces for damage.
- Repair small scratches or nicks with a soft stone.
- Inspect the transmission to torque converter housing mounting surface
for damage.
- Inspect the case threaded bolt holes for damage.
- Repair any damaged threads.


