For 1990-2009 cars only
Removal Procedure
- Disable the SIR system. Refer to SIR Disabling and Enabling .
- Remove the headliner. Refer to Headlining Trim Panel Replacement .
- Remove the sunroof. Refer to Sunroof Module Assembly Replacement .
- Remove the windshield. Refer to Windshield Replacement .
- Remove the lift gate. Refer to Liftgate Replacement .
- Remove the luggage carrier. Refer to Luggage Carrier Replacement .
- Repair as much of the damage as possible to factory specifications. Refer to Dimensions - Body .
- Note the location and remove the sealers and anti-corrosion materials from the repair area, as necessary. Refer to Anti-Corrosion Treatment and Repair .
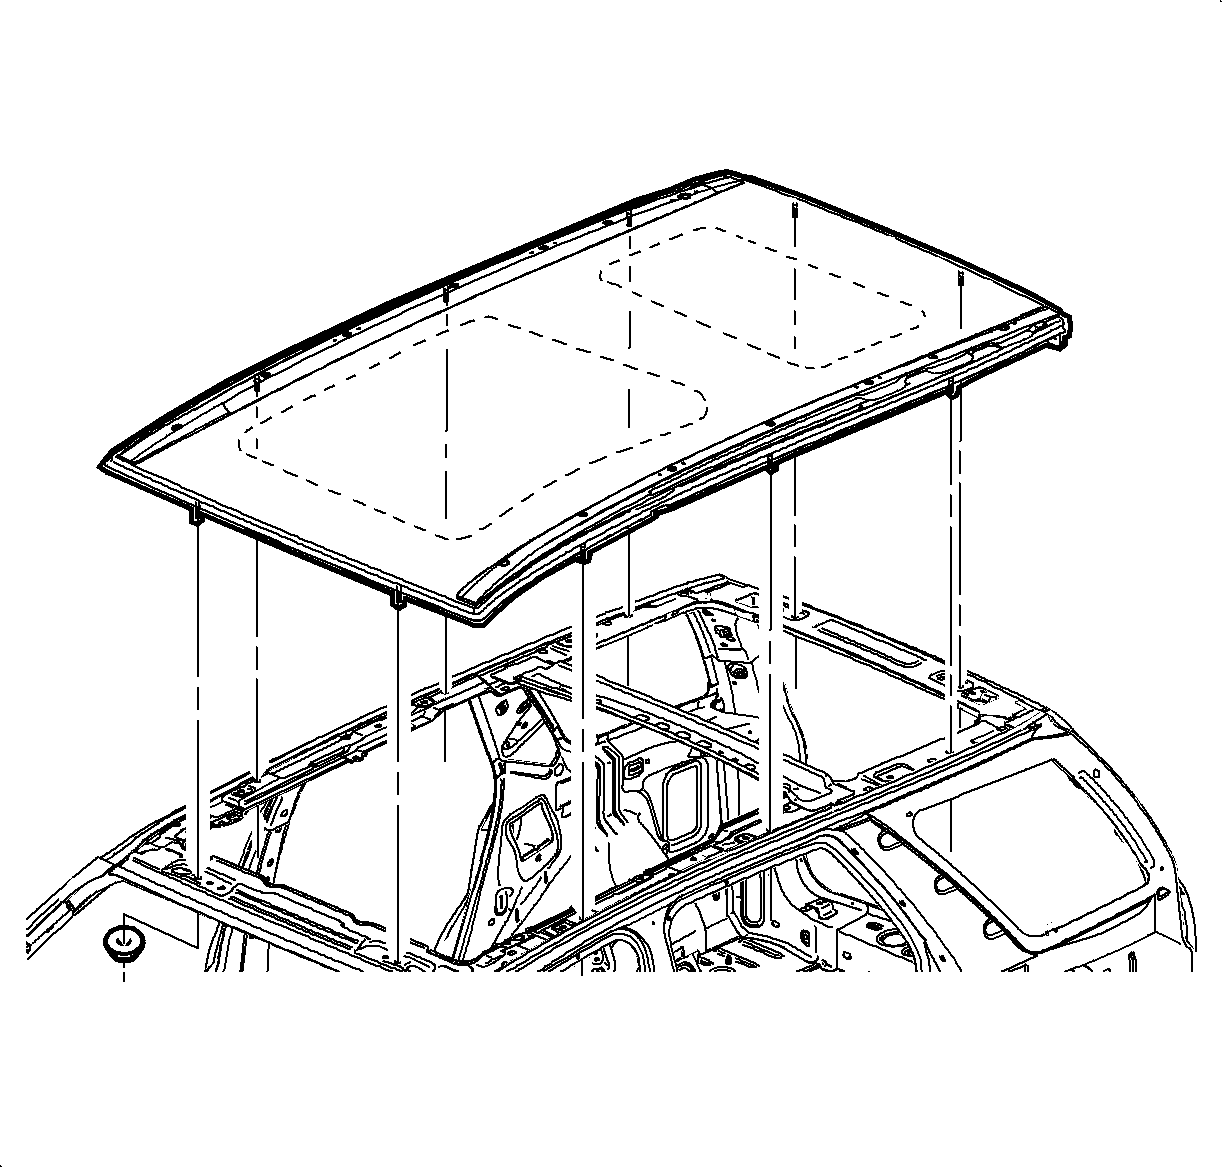
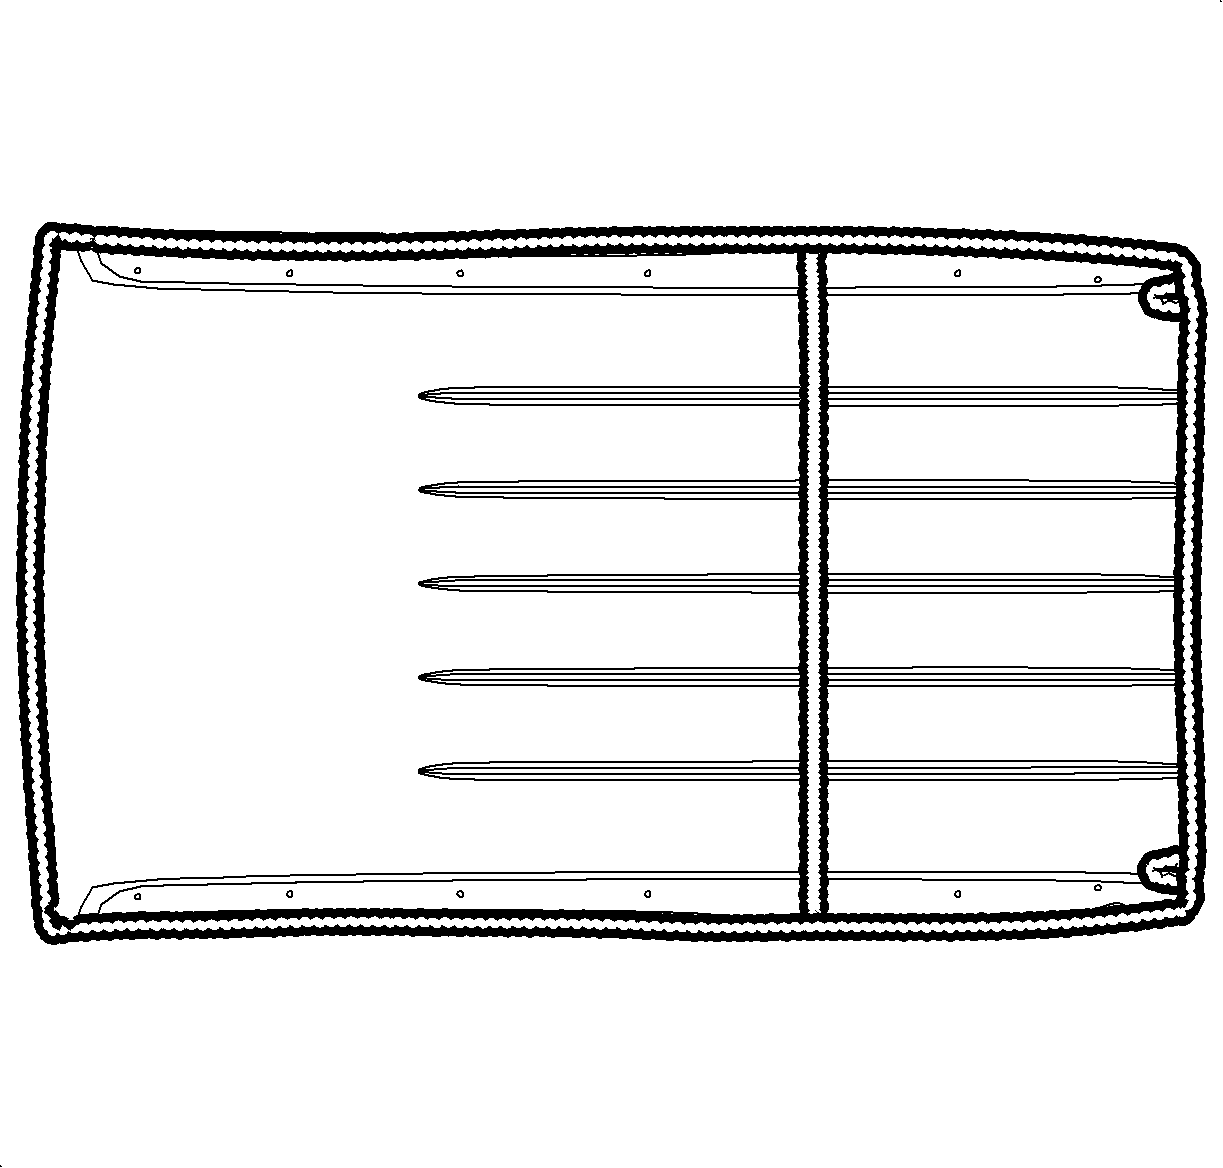
- Cut openings in roof panel as shown.
- Remove the nuts that attach the roof.
- Cut the adhesive around the roof panel and bows.
- Remove the damaged roof panel.
Caution: Refer to Approved Equipment for Collision Repair Caution in the Preface section.

Important: Do not damage any inner panels or reinforcements.
Installation Procedure
- Using a razor knife, remove the loose urethane and trim high spots in the remaining urethane to provide for an even application of new urethane.
- Use a lint free cloth and Varnish Makers and Painters (VMP) naphtha or a 50/50 mixture by volume of isopropyl alcohol and water to remove the adhesive.
- Install the lift gate. Refer to Liftgate Replacement .
- Prepare all mating surfaces as necessary.
- Apply a 8 mm (0.31 in) minimum bead urethane adhesive GM P/N 12345633 or equivalent to the roof panel. Urethane bead must cover the entire flange in order to ensure proper seal.
- Position the roof panel onto the spaceframe.
- Install the roof nuts.
- Apply the sealers and anti-corrosion materials to the repair area, as necessary. Refer to Anti-Corrosion Treatment and Repair .
- Paint the repair area. Refer to Basecoat/Clearcoat Paint Systems .
- Install the luggage carrier. Refer to Luggage Carrier Replacement .
- Install the windshield. Refer to Windshield Replacement .
- Install the sunroof, if equipped. Refer to Sunroof Module Assembly Replacement .
- Install the headliner. Refer to Headlining Trim Panel Replacement .
- Enable the SIR system. Refer to SIR Disabling and Enabling .

Important: Do NOT pull the panels apart after joined together. Slide the panels against each other to realign the panels.

Notice: Refer to Fastener Notice in the Preface section.
Tighten
Tighten the nuts to 10 N·m (89 lb in).
