GM Service Manual Online
For 1990-2009 cars only

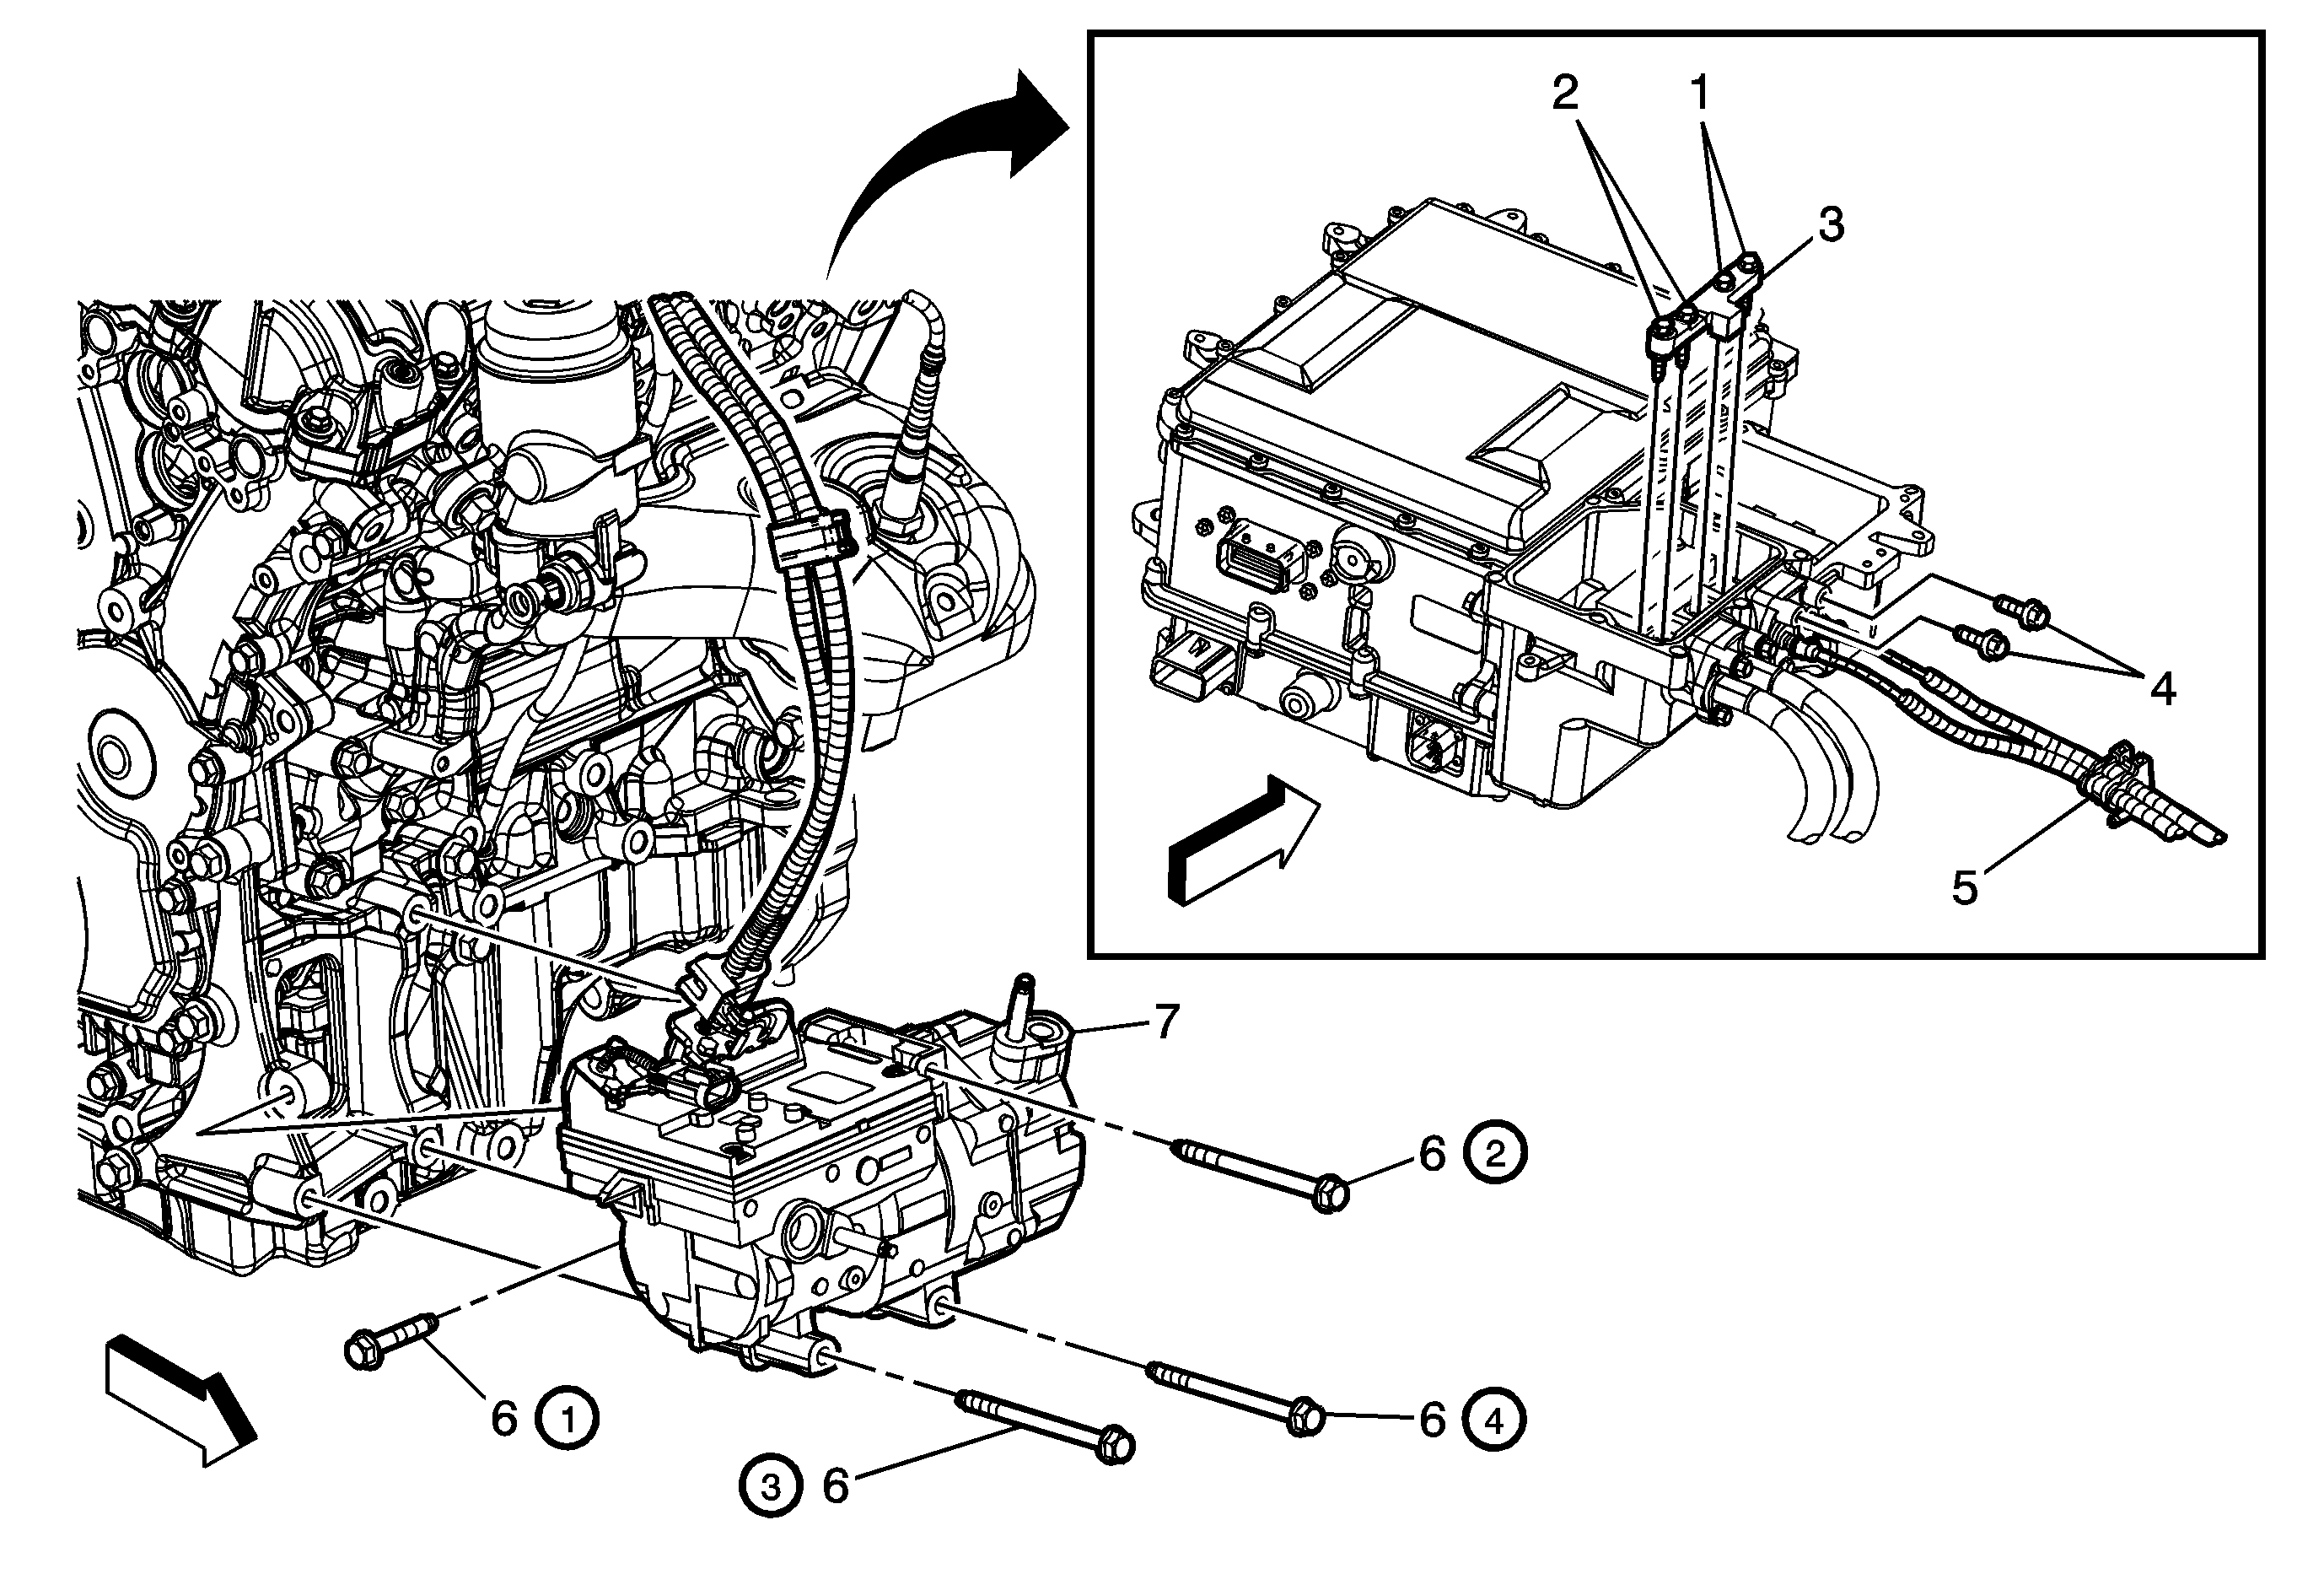
Air Conditioning Compressor Replacement HP5


Object Number: 2141912  Size: MF

Callout

Component Name

Danger: Always perform the High Voltage Disabling procedure prior to servicing any High Voltage component or connection. Personal Protection Equipment (PPE) and proper procedures must be followed.

The High Voltage Disabling procedure will perform the following tasks:

   • Identify how to disable high voltage.
   • Identify how to test for the presence of high voltage.
   • Identify condition under which high voltage is always present and personal protection equipment (PPE) and proper procedures must be followed.
Failure to follow the procedures exactly as written may result in serious injury or death.

Preliminary Procedures

  1. Disable hybrid high voltage system. Refer to High Voltage Disabling and High Voltage Enabling.
  2. Remove the fuel injector sight shield. Refer to Fuel Injector Sight Shield Replacement.
  3. Recover the refrigerant. Refer to Refrigerant Recovery and Recharging.
  4. Raise and support the vehicle. Refer to Lifting and Jacking the Vehicle.
  5. Remove the suction hose from the A/C compressor. Refer to Suction Hose Replacement
  6. Remove the discharge hose from the A/C compressor. Refer to Discharge Hose Replacement.
  7. Note:  Ensure to cap all HVAC line connections immediately after removal to avoid contamination. Refer to Handling of Refrigerant Lines and Fittings.

  8. Remove the generator control module cover to access the A/C compressor cable connector bolts.
  9. Remove A/C compressor bracket. Refer to Air Conditioning Compressor Bracket Replacement.

1

A/C Compressor Cable Bolt (Qty: 2)

Caution: High Voltage (HV) cables should never be removed from the mounting block. Removal of the individual HV cable from the mounting block may result in HV cable and/or component damage from improper:

   • Cable sealing
   • Electrical shielding
   • Terminal position assurance

Notice: Refer to Fastener Caution in the Preface section.

Tighten
9 N·m (80 lb in)

2

Battery Positive and Negative Cable Mounting Bolt (Qty: 2)

Tighten
9 N·m (80 lb in)

3

Battery Cable and A/C Compressor Cable Guide Assembly

4

A/C Compressor Cable Bolt (Qty: 2)

Tighten
9 N·m (80 lb in)

5

A/C Compressor Cable

Procedure

  1. Pull A/C Compressor Cable straight outward from module and discard seal.
  2. Remove any fasteners from A/C Compressor Cable brackets.

6

A/C Compressor Bolt (Qty: 4)

Tighten
50 N·m (37 lb ft)

Procedure

  1. Relocate and support the A/C compressor forward while removing the A/C compressor bracket.
  2. Mandatory torque sequence required per illustration.

7

A/C Compressor

Procedure

  1. Disconnect three wire low voltage electrical connector from compressor.
  2. The A/C Compressor Cable is part of the compressor and is serviced as an assembly.
  3. Insert bottom compressor bolts into compressor before installing compressor to vehicle.

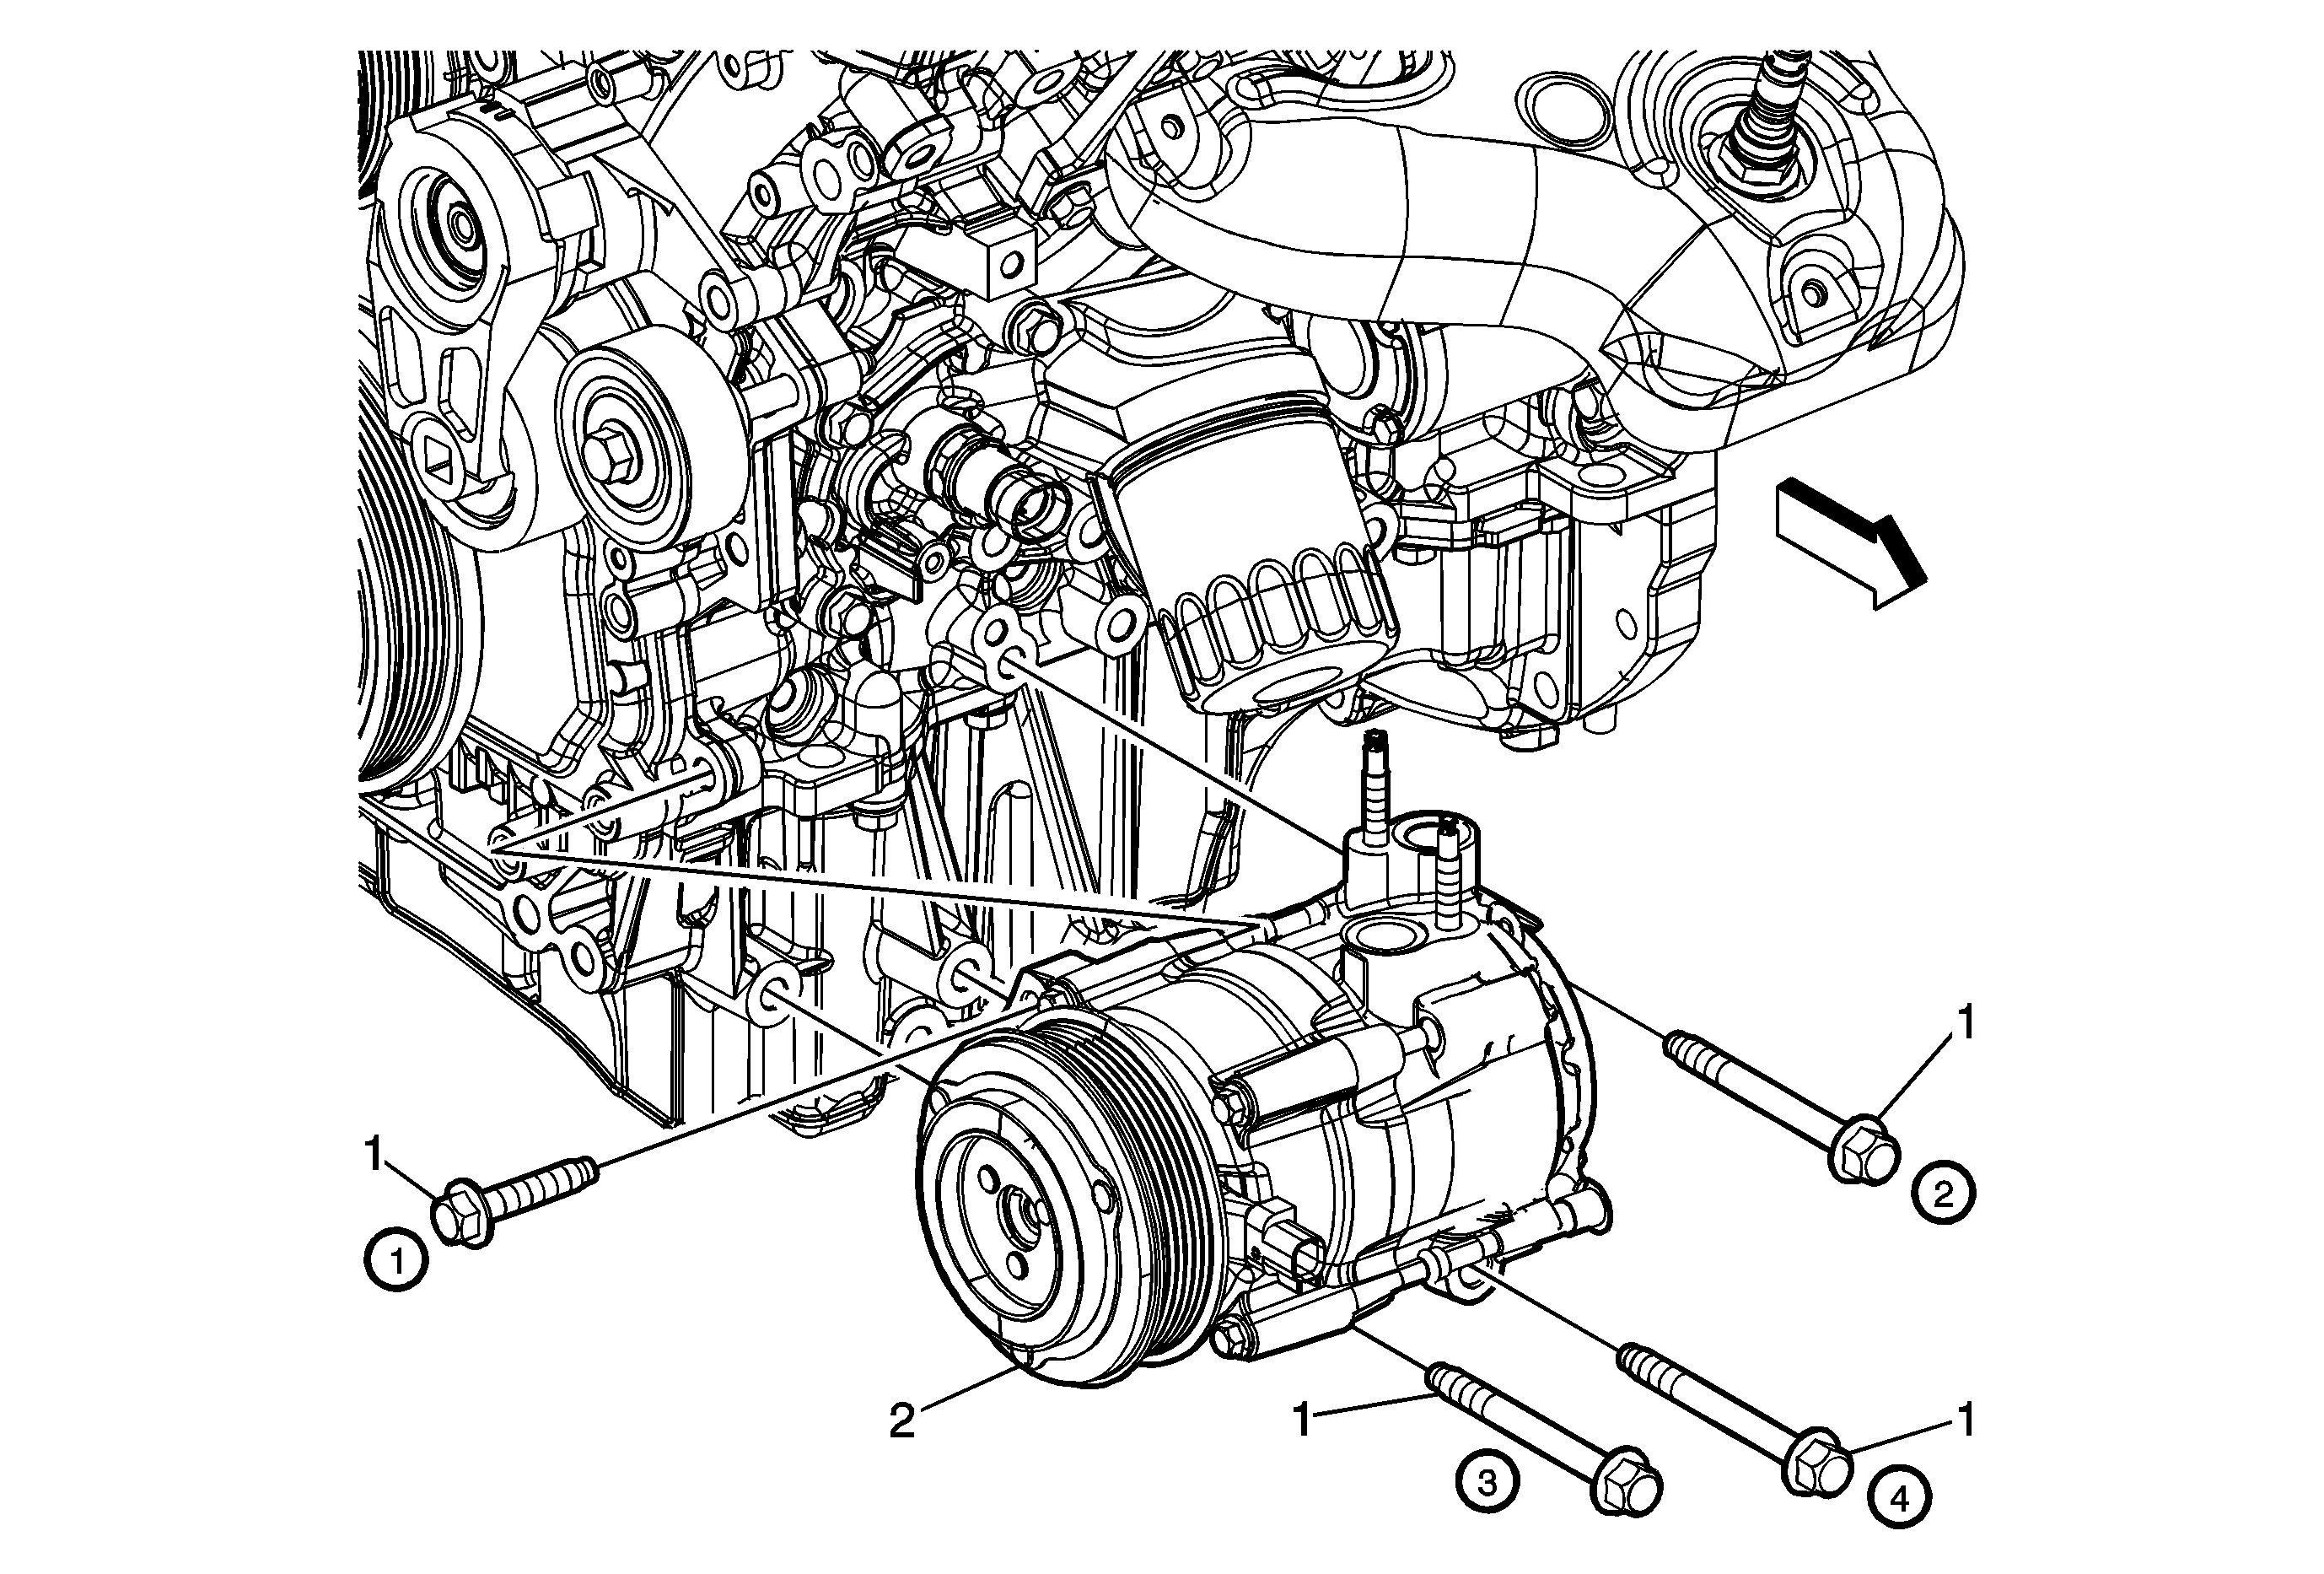
Air Conditioning Compressor Replacement LY7


Object Number: 1871833  Size: MF

Callout

Component Name

Preliminary Procedures

  1. Recover the refrigerant. Refer to Refrigerant Recovery and Recharging.
  2. Remove the drive belt. Refer to Drive Belt Replacement.
  3. Raise and support the vehicle. Refer to Lifting and Jacking the Vehicle.
  4. Disconnect the A/C compressor electrical connector.
  5. Remove compressor hose assembly. Refer to Air Conditioning Compressor Hose Replacement.

1

A/C Compressor Bolt (Qty: 4)

Caution: Refer to Fastener Caution in the Preface section.

TIP:

    • Tighten the A/C compressor mounting bolts in sequence shown in graphic.
    • Reposition the CRFM if necessary.

Tighten
22 N·m (16 lb ft)

2

A/C Compressor Assembly

Procedure

  1. Use a low viscosity, poly-alkylene glycol (PAG) oil. Use of the incorrect oil can result in compressor failure.
  2. When replacing the A/C compressor, balance the compressor oil. Refer to Air Conditioning Compressor Oil Balancing.
  3. Using J 39400 leak test A/C compressor fittings.

Special Tools

J 39400 Electronic Halogen Leak Detector

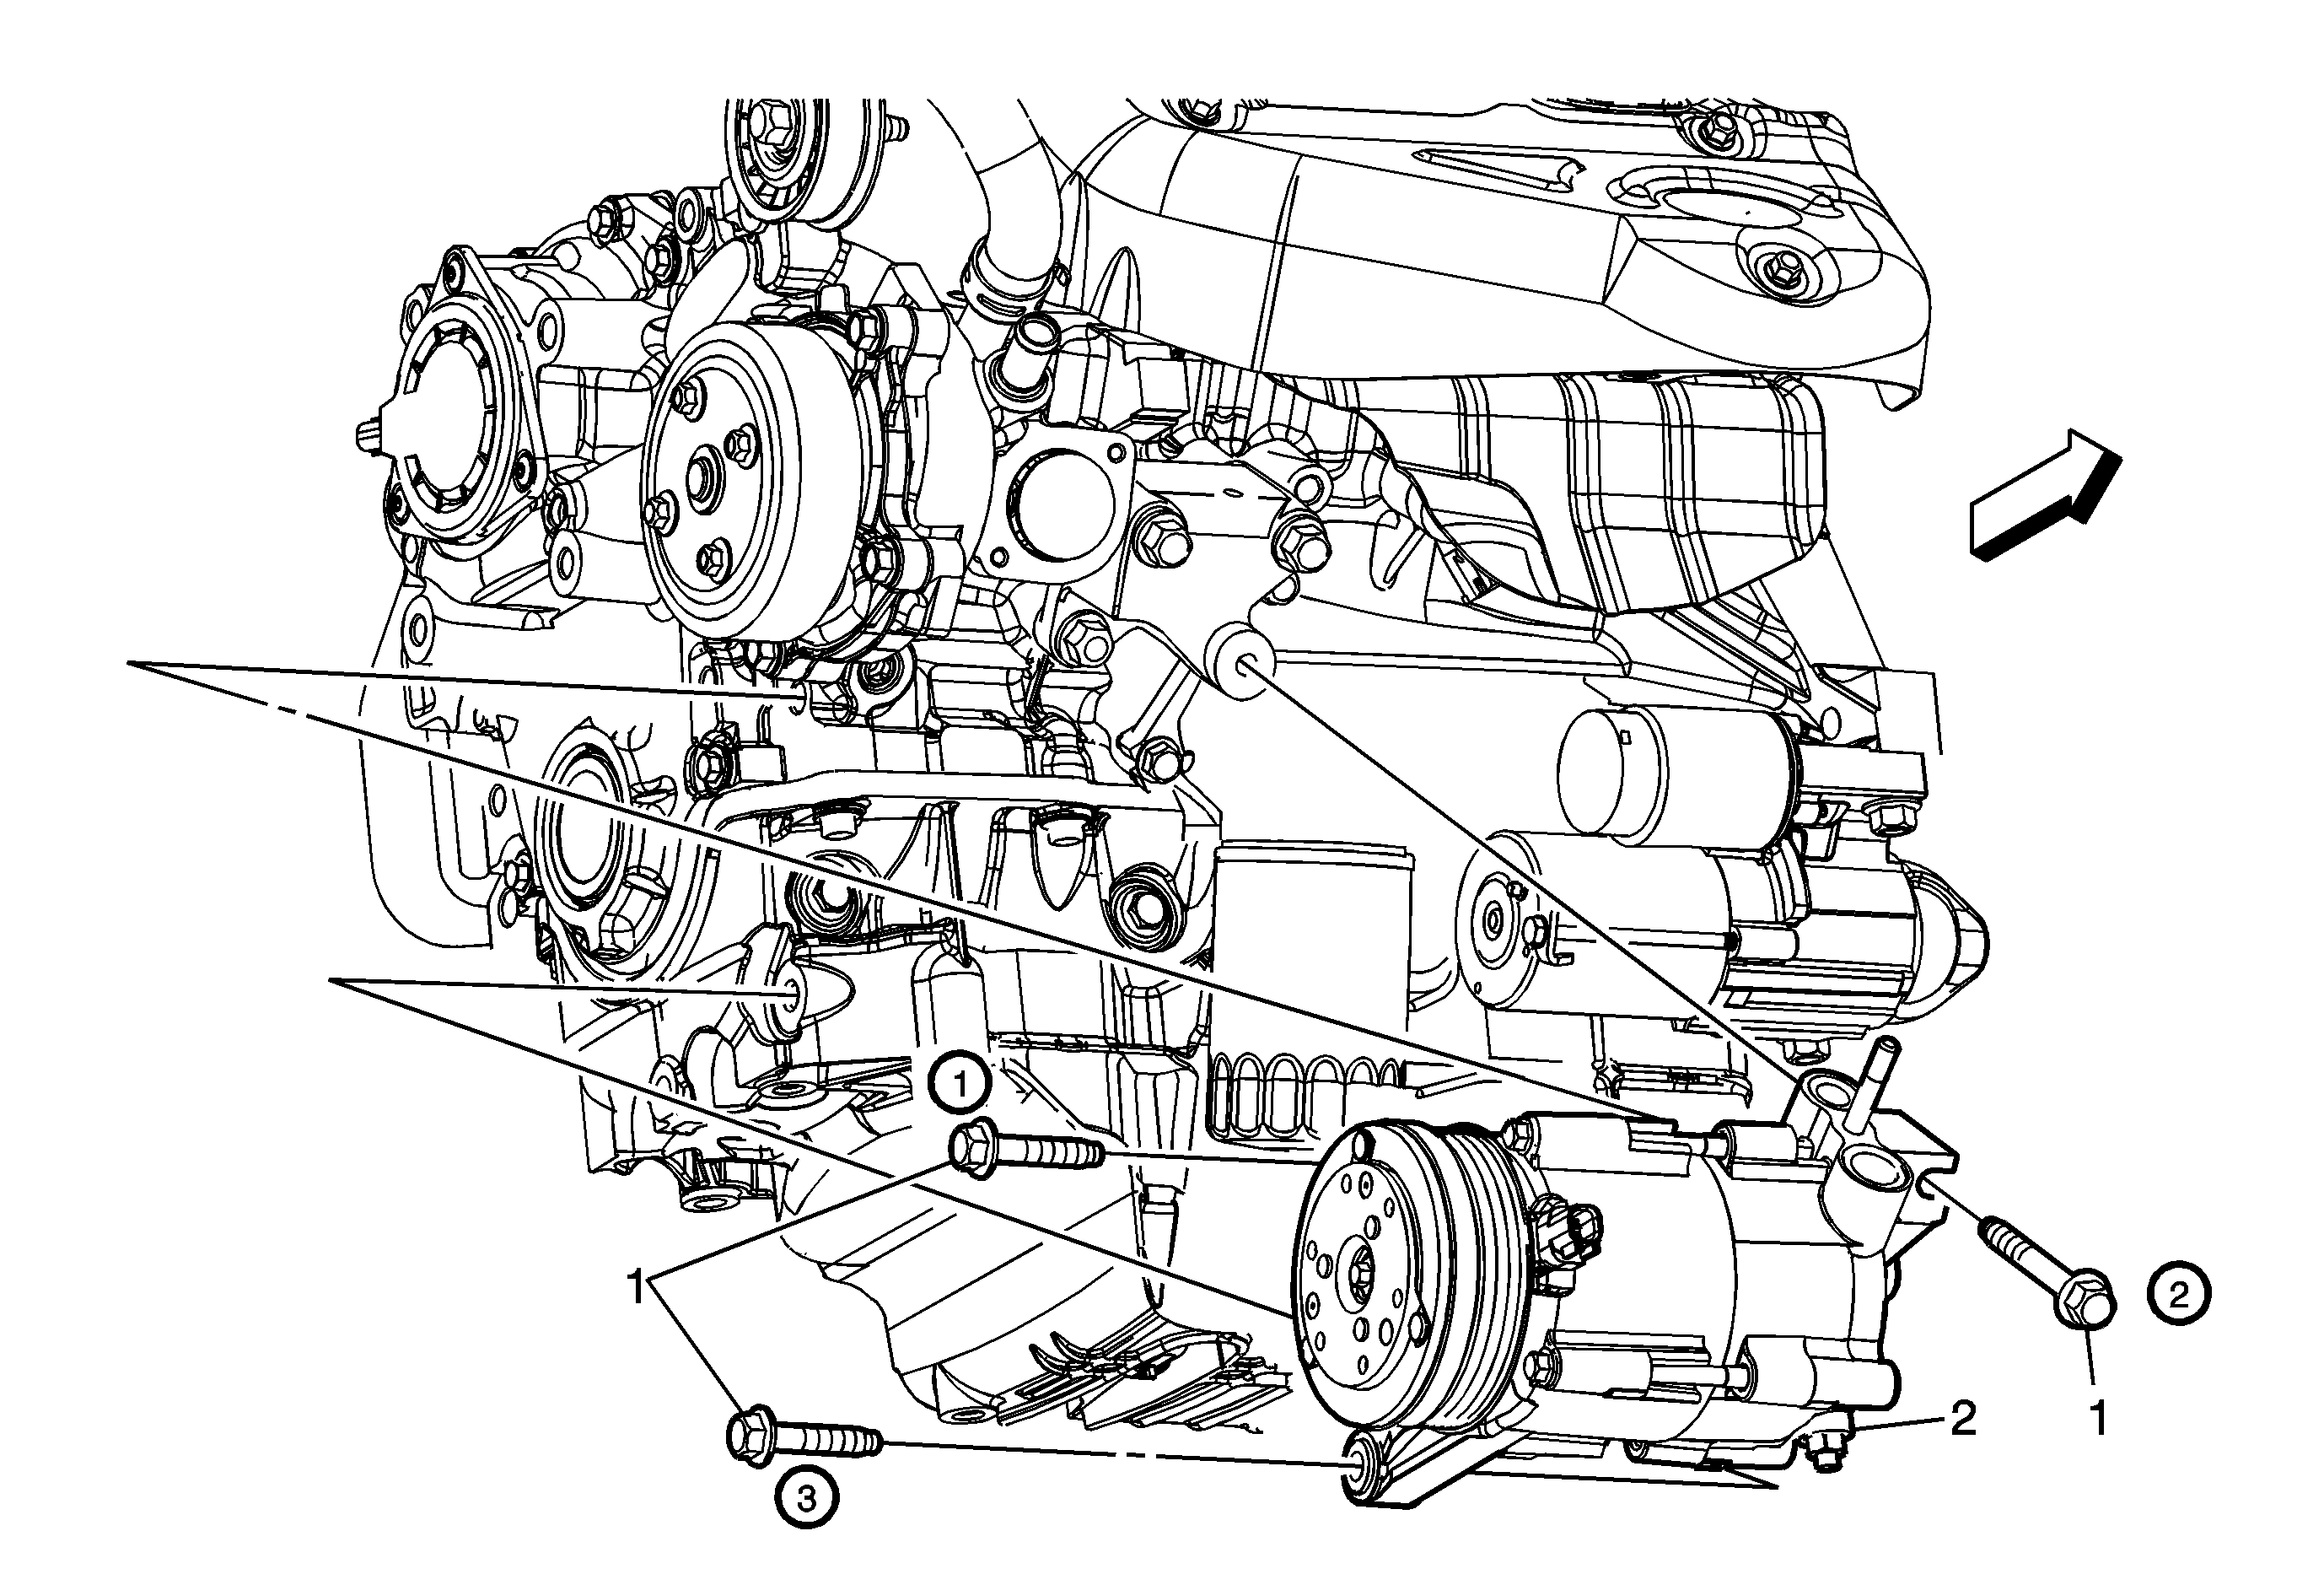
Air Conditioning Compressor Replacement LZ4


Object Number: 1871834  Size: MF

Callout

Component Name

Preliminary Procedures

  1. Recover the refrigerant. Refer to Refrigerant Recovery and Recharging.
  2. Remove the drive belt. Refer to Drive Belt Replacement.
  3. Raise and support the vehicle. Refer to Lifting and Jacking the Vehicle.
  4. Disconnect the A/C compressor electrical connector.
  5. Remove the compressor hose assembly. Refer to Air Conditioning Compressor Hose Replacement.

1

A/C Compressor Bolt (Qty: 3)

Caution: Refer to Fastener Caution in the Preface section.

Procedure

  1. Tighten the A/C compressor mounting bolts in sequence shown in graphic.
  2. Reposition the CRFM if necessary.

Tighten
50 N·m (37 lb ft)

2

A/C Compressor Assembly

Procedure

  1. When replacing the A/C compressor, balance the compressor oil. Refer to Air Conditioning Compressor Oil Balancing.
  2. Using the J 39400 leak test the A/C compressor fittings.

Tip
Use a low viscosity, poly-alkylene glycol (PAG) oil. Use of the incorrect oil can result in compressor failure.

Special Tools

J 39400 Electronic Halogen Leak Detector