For 1990-2009 cars only
Removal Procedure
- Place the front door window in the full down position.
- Remove the door trim panel. Refer to Rear Side Door Trim Panel Replacement.
- Remove the water deflector.
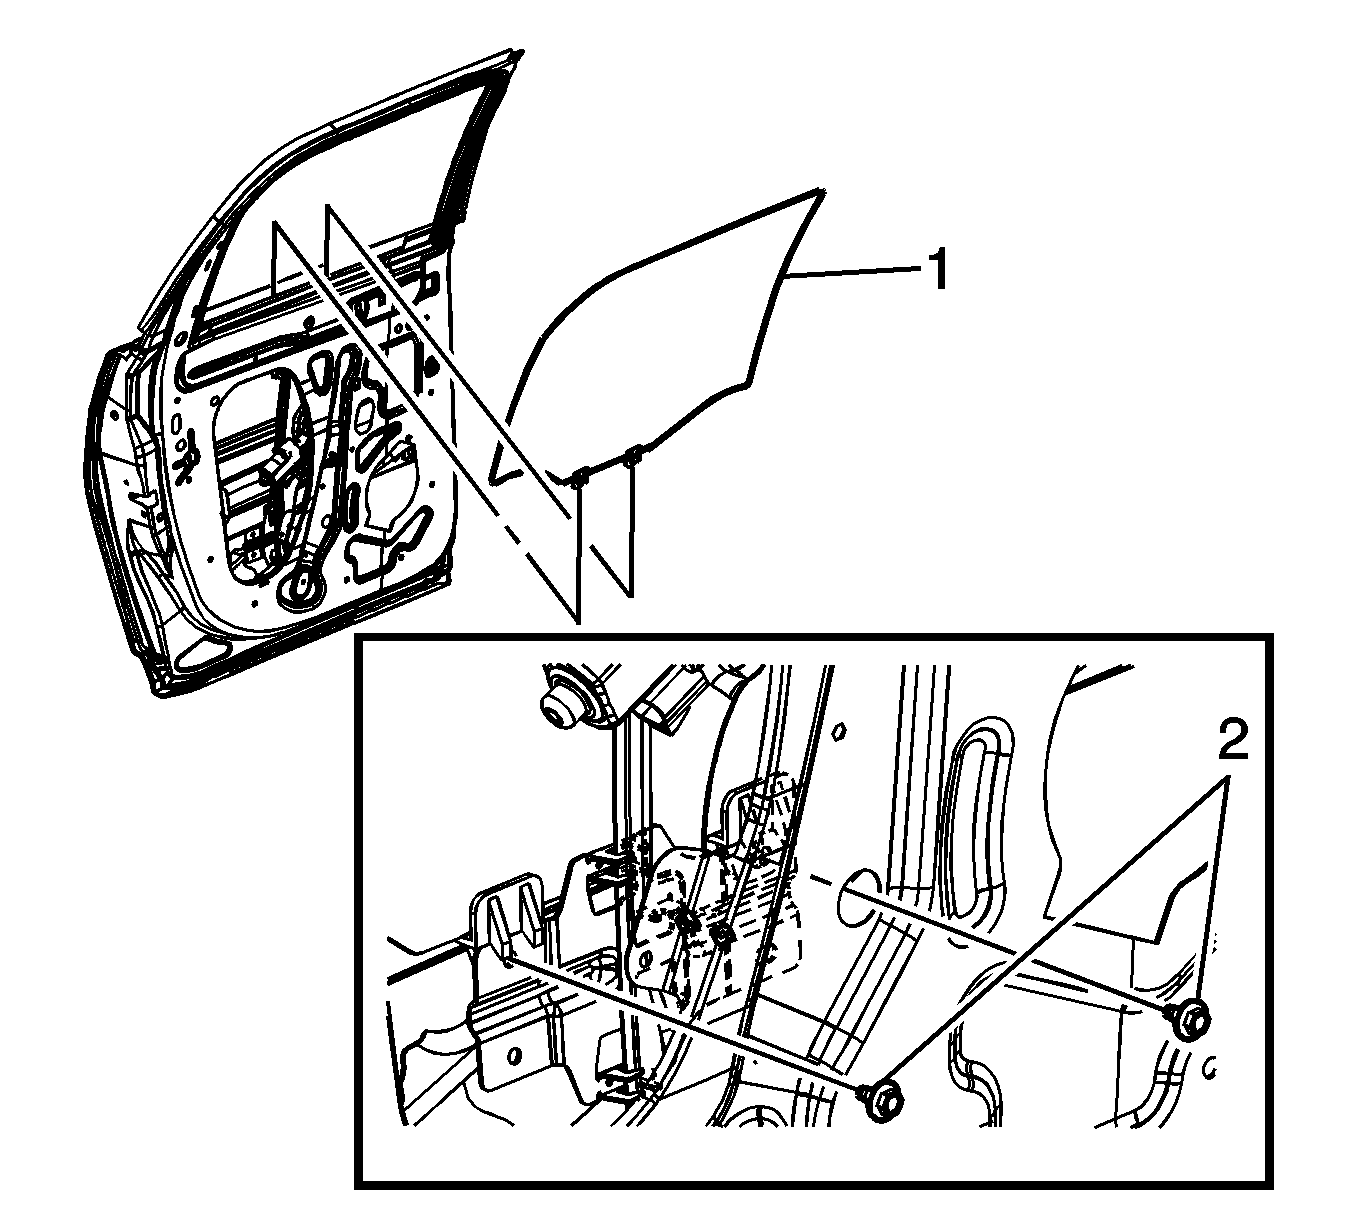
- Lower the window (1) to align the bolts with the access holes in the inner door panel.
- Remove the window guide bolts (2).
- Remove the front part of the rear door window channel weatherstrip this will allow the window to slide forward. Refer to Front Side Door Window Channel Replacement.
- Remove the rear door front applique. Refer to Rear Door Frame Applique Replacement.
- In order to remove the window out of the frame, carefully grasp and tilt the window as you guide the window up and forward.
- Remove the window from the door.

Warning: Refer to Glass and Sheet Metal Handling Warning in the Preface section.
Installation Procedure
- With the regulator in the remove/load position, install the window (1) to the door.
- Tilt the window forward and carefully guide the window into the rear channel.
- Position the window to an upright position.
- Install the rear door front applique. Refer to Rear Door Frame Applique Replacement.
- Install the front part of the rear door window channel weatherstrip. Refer to Front Side Door Window Channel Replacement.
- Loosely tighten the window guide bolts (2).
- Carefully move the regulator upward for short slow intervals, while ensuring that the window remains in the channels.
- Lower the window to the full down position.
- Tighten the 2 window guide bolts (2). Tighten the bolts to 10 N·m (89 lb in).
- Install the water deflector.
- Install the door trim panel. Refer to Rear Side Door Trim Panel Replacement.
- Inspect the window for proper operation.

Note: Ensure that the window is fully seated into the channels.
Note: Do not operate the regulator motor without supporting the window. Ensure that the window remains in the channels when operating the regulator motor.
Caution: Refer to Fastener Caution in the Preface section.
