Removal Procedure
- Remove the driver knee bolster reinforcement. Refer to Driver Knee Bolster Reinforcement Replacement.
- Remove the steering column upper trim cover. Refer to Steering Column Upper Trim Cover Replacement.
- Disconnect any electrical connectors as needed.
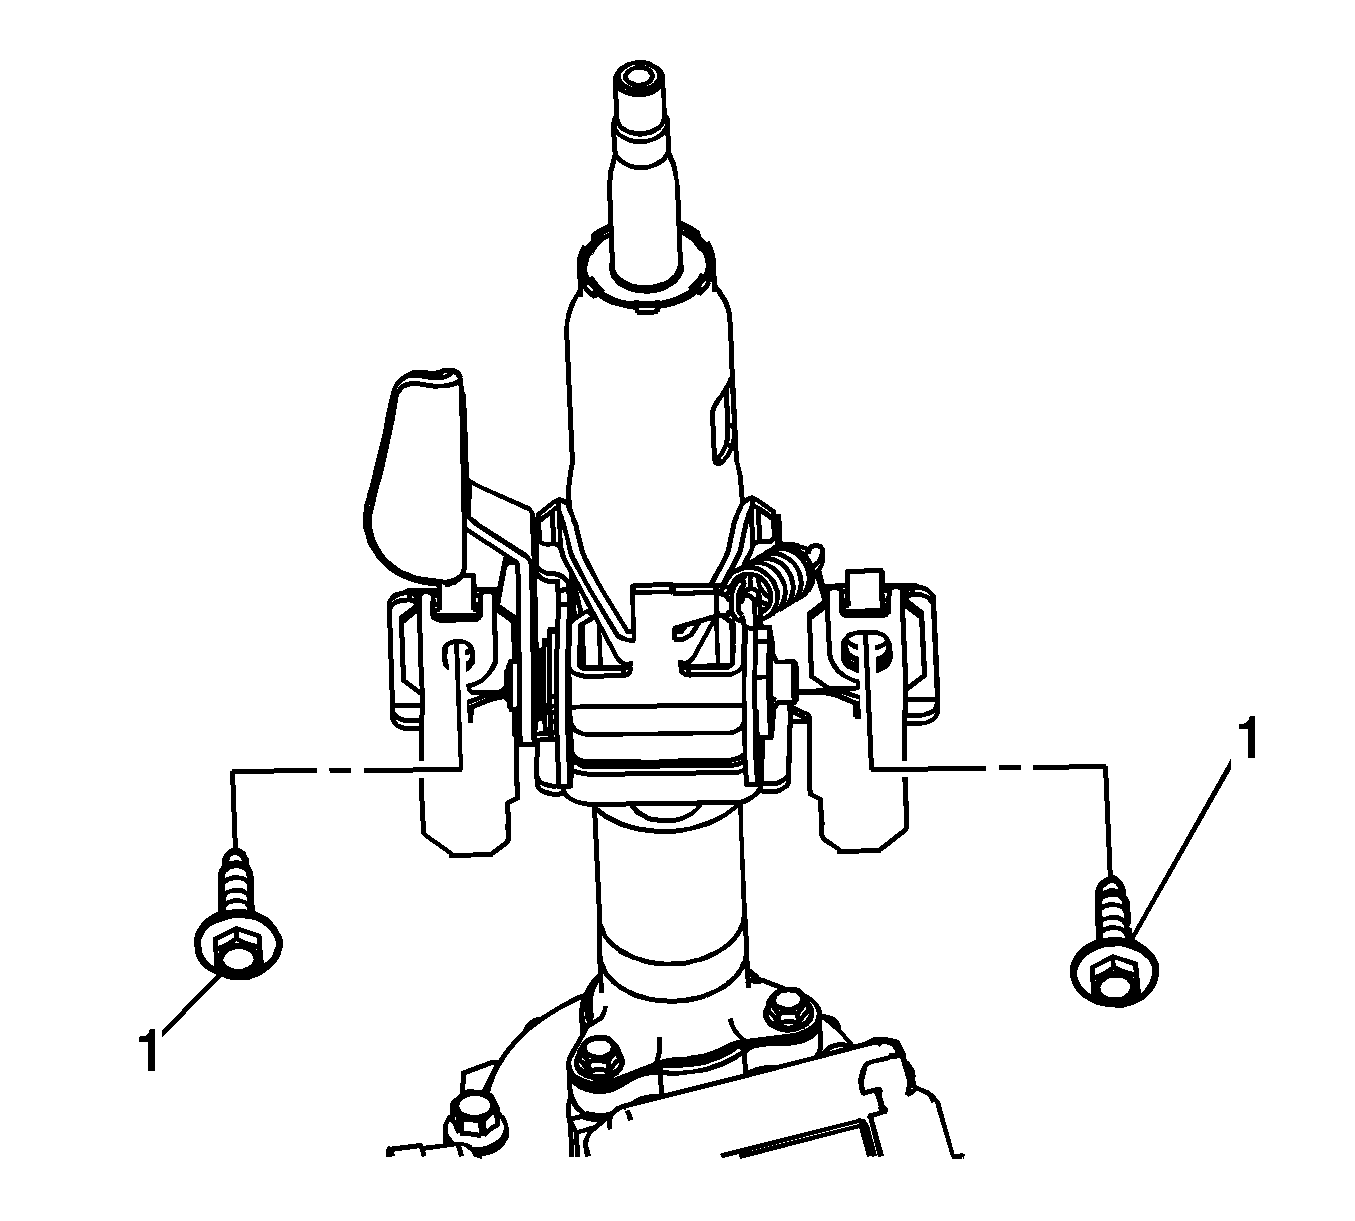
- If equipped with an electronic power steering column, remove the 3 electronic power steering motor control module bracket bolts (2) and the electronic power steering motor control module and bracket assembly (1).
- Remove the steering shaft coupling bolt (1) at the steering column and discard it.
- Separate the steering shaft coupling from the steering column.
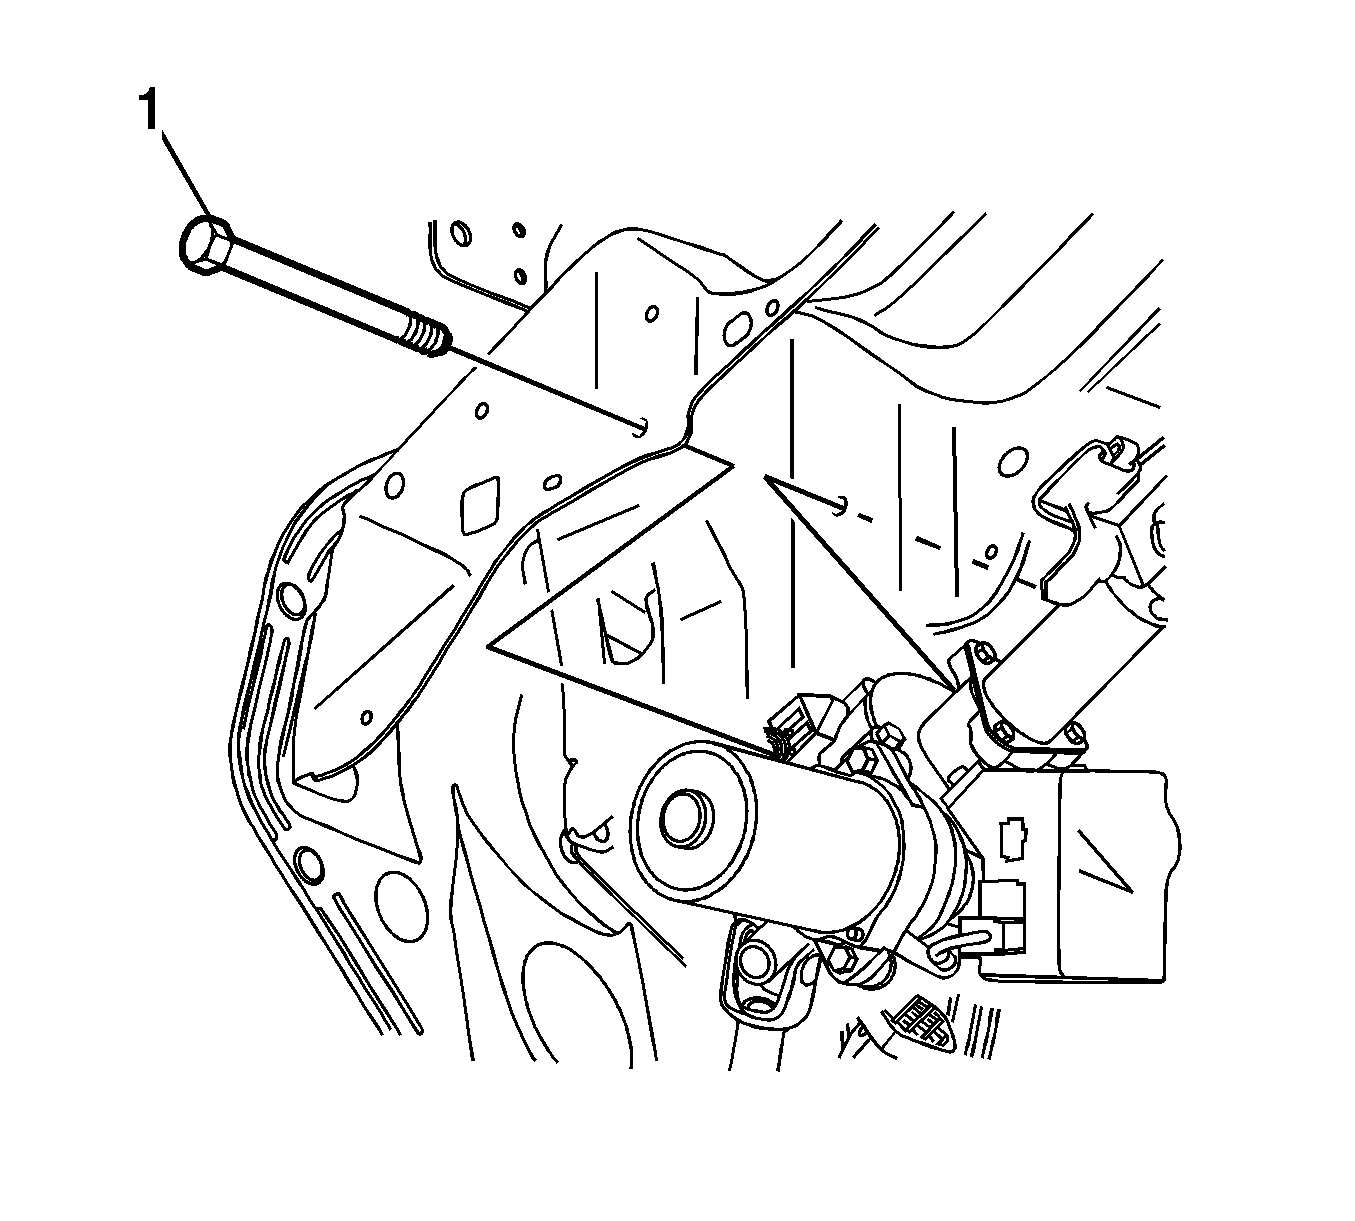
- Remove the steering column lower support bracket bolt (1).
- Remove the steering column upper support bracket bolts (1).
- Remove the steering column from the vehicle and transfer any parts as needed.
Caution: Secure the steering wheel utilizing a strap to prevent rotation. Locking of the steering column will prevent damage and a possible malfunction of the SIR system. The steering wheel must be secured
in position before disconnecting the following components:
• The steering column • The intermediate shaft • The steering gear

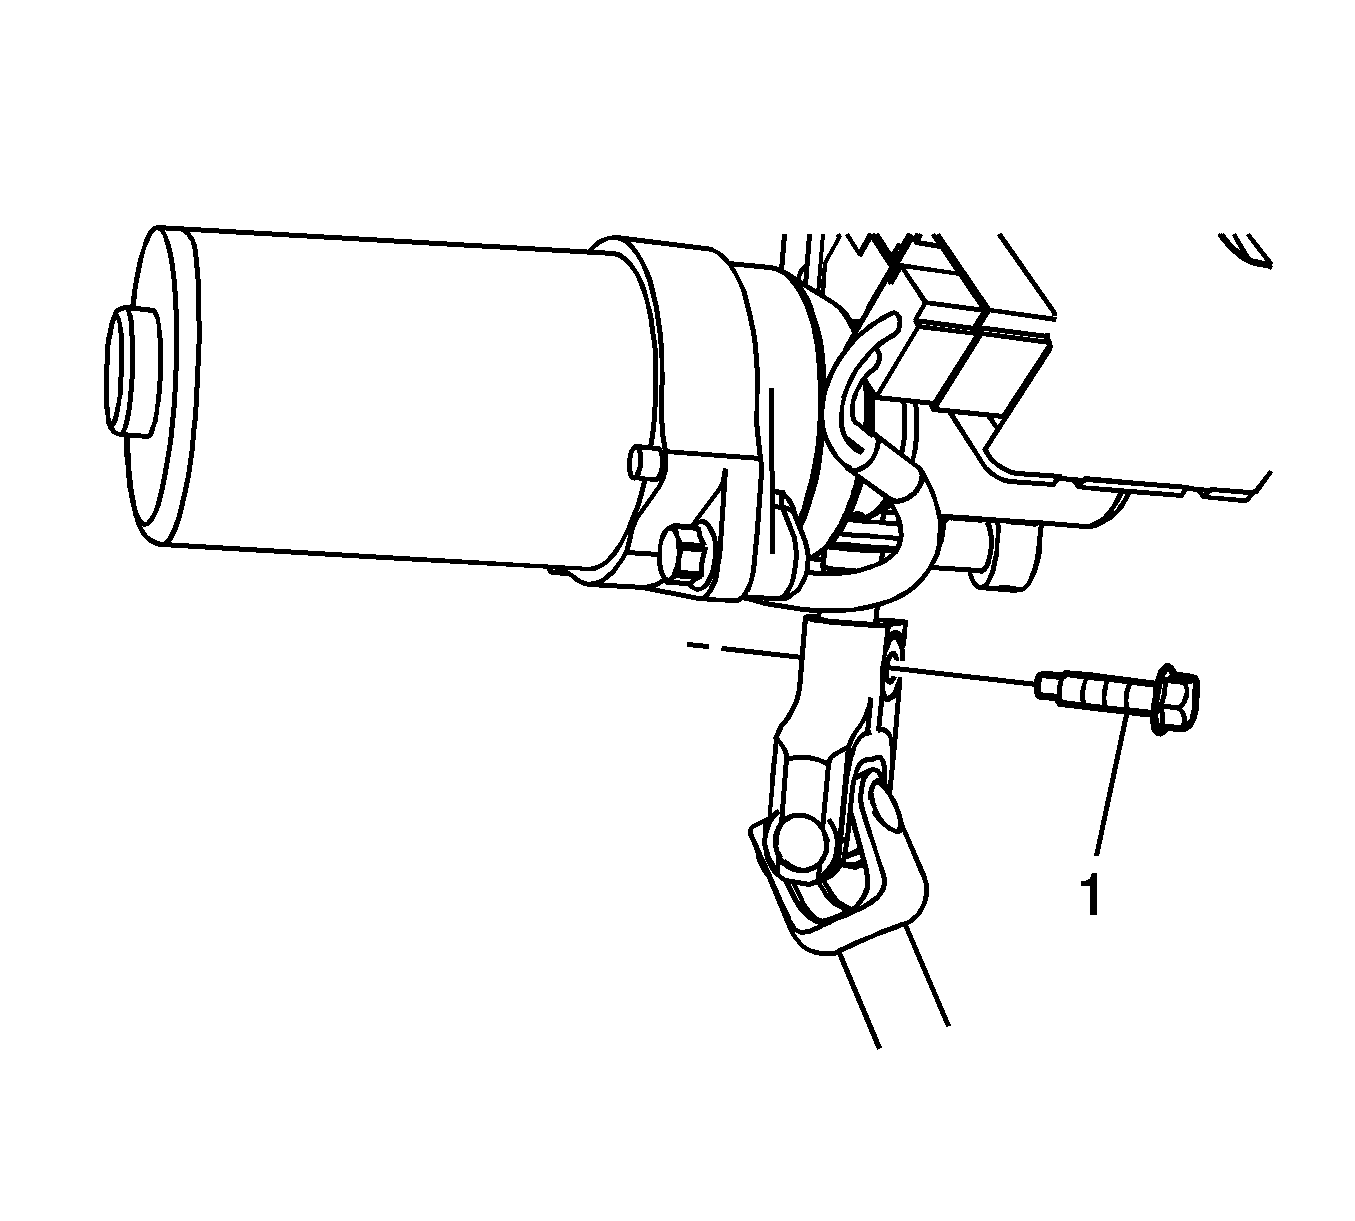
Note: Place alignment marks on the steering shaft coupling and the steering column shaft prior to removal in order to mark the correct alignment of the pieces.
An electronic power steering column is shown, a hydraulic power and two mode hybrid steering column is serviced the same way.
An electronic power steering column is shown, a hydraulic power and two mode hybrid steering column is serviced the same way.
An electronic power steering column is shown, a hydraulic power and two mode hybrid steering column is serviced the same way.
Installation Procedure
- If a new steering column is being installed then transfer the pre-scribed alignment marks on to the new part.
- Position the steering column to the vehicle.
- Install the steering column upper support bracket bolts (1) and tighten to 25 N·m (18 lb ft).
- Install the steering column lower support bracket bolt (1) and tighten to 25 N·m (18 lb ft).
- Align the scribed marks on the steering shaft coupling to the scribed marks on the steering column shaft and connect them.
- Install the new steering shaft coupling bolt (1) at the steering column and tighten to 34 N·m (25 lb ft).
- For vehicles with hydraulic power steering, install the new steering shaft coupling bolt at the steering column and tighten to 30 N·m (22 lb ft).
- For vehicles with two mode hybrid steering, install the new steering shaft coupling bolt at the steering column and tighten to 30 N·m (22 lb ft).
- If equipped with an electronic power steering column, position the electronic power steering motor control module and bracket assembly (1).
- Install the 3 electronic power steering motor control module bracket bolts (2) and tighten to 11.5 N·m (102 lb in).
- Connect any electrical connectors as needed.
- Refer to Control Module References for programming and setup information if equipped with electronic power steering.
- Install the steering column upper trim cover. Refer to Steering Column Upper Trim Cover Replacement.
- Install the driver knee bolster reinforcement. Refer to Driver Knee Bolster Reinforcement Replacement.
Note: If replacing the steering column, failure to transfer the scribed marks may result in an off-center steering wheel.
Caution: Refer to Fastener Caution in the Preface section.
Note: Hand tighten all steering column support bracket bolts before finalizing any torques.
An electronic power steering column is shown, a hydraulic power and two mode hybrid steering column is serviced the same way.
An electronic power steering column is shown, a hydraulic power and two mode hybrid steering column is serviced the same way.
An electronic power steering column is shown, a hydraulic power and two mode hybrid steering column is serviced the same way.
Note:
• When installing a NEW service replacement electronic power steering column (non-two mode hybrid), the Saturn Service Stall (SSS) must be utilized to properly program the electronic power steering controller contained with the electronic power steering
column. • Ensure the steering wheel alignment is in the 12 o'clock position.
