Tools Required
| • | J 38122-A Crankshaft Pulley Holder |
| • | J 44811 Accessory Belt Tensioner Unloader |
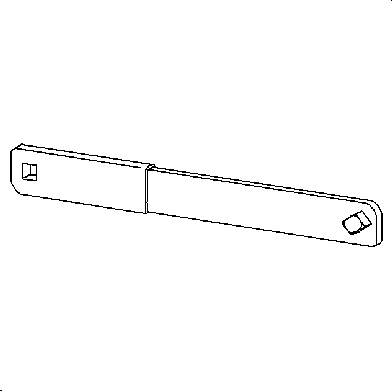
| • | SA9105E Engine Three-Bar Fixture |
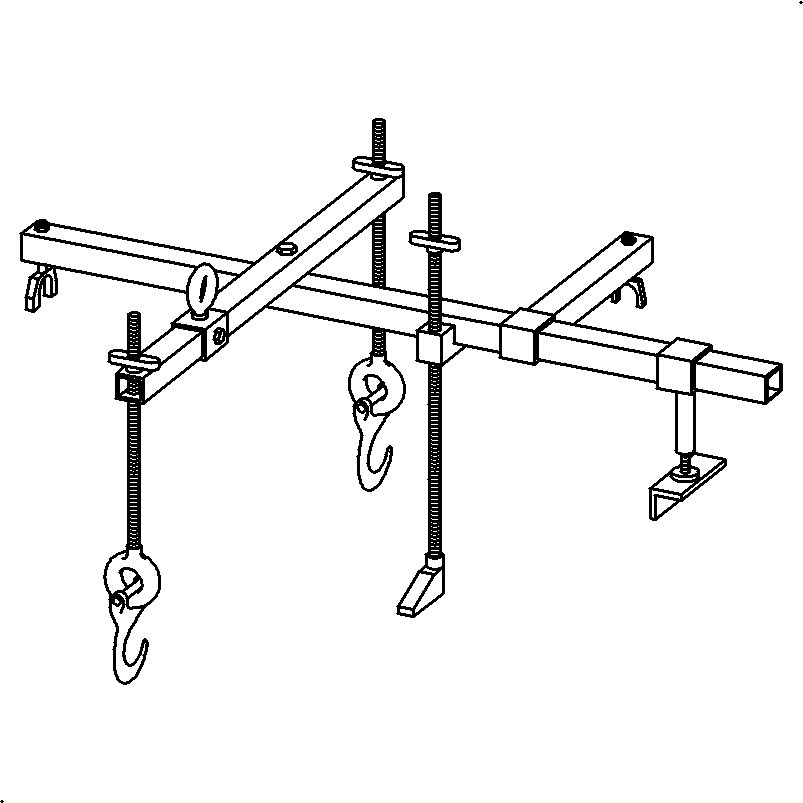
Removal Procedure
- Disconnect the negative battery cable. Refer to Battery Negative Cable Disconnection and Connection in Engine Electrical.
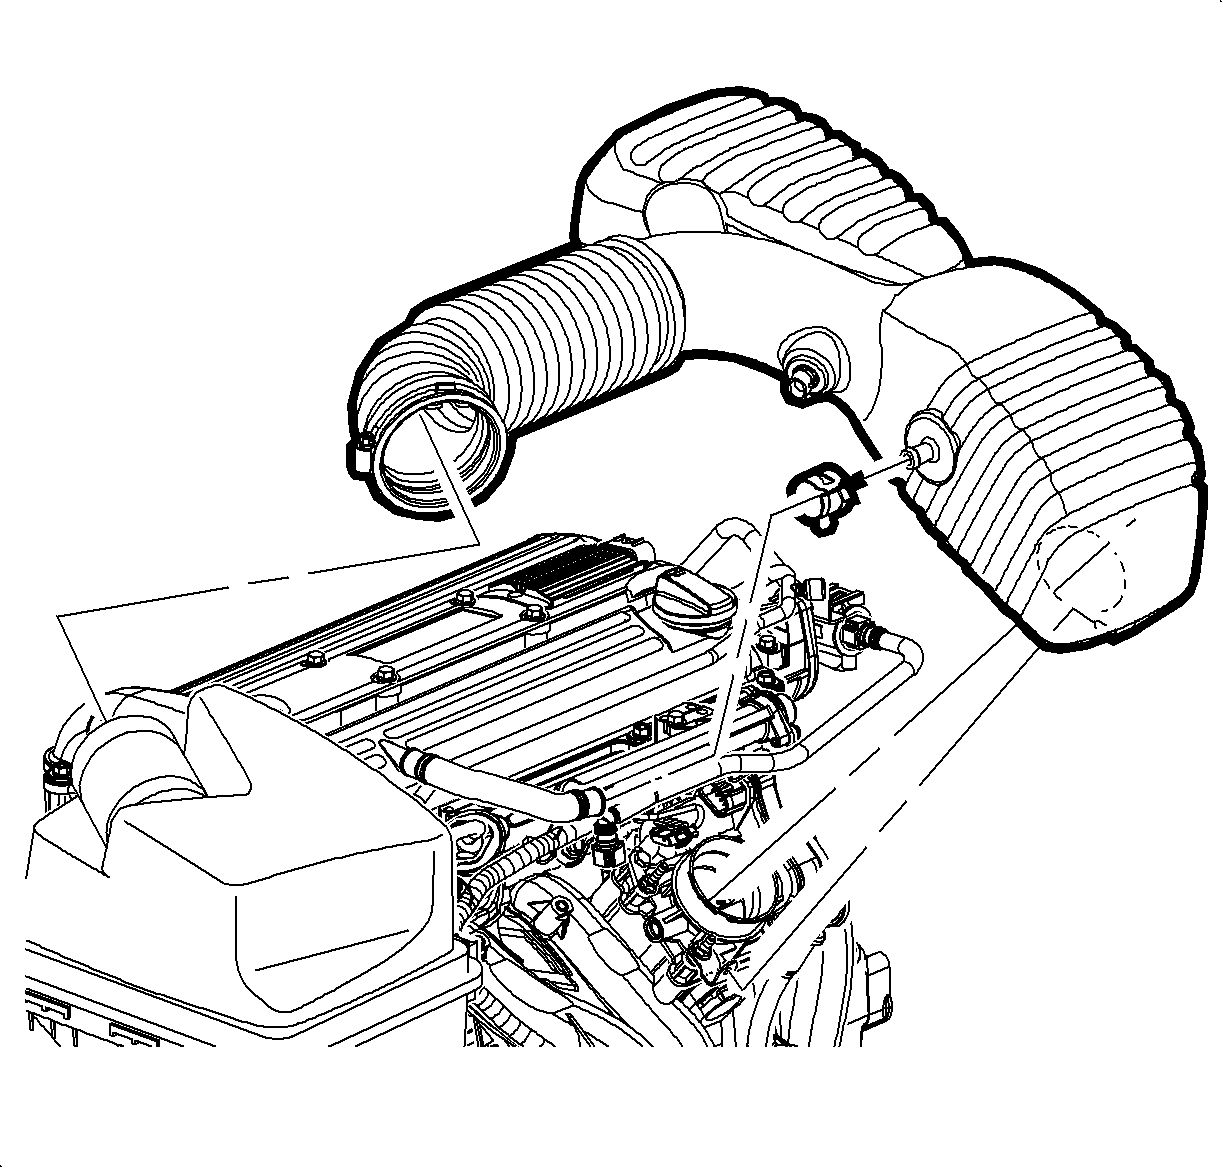
- Disconnect the intake air temperature (IAT) sensor connector.
- Loosen the clamp at the air cleaner assembly.
- Remove the push pin attachment from the outlet resonator/duct assembly to support bracket.
- Loosen the clamp at the throttle body assembly.
- Disconnect the PCV fresh vent hose at the cam cover.
- Remove the outlet resonator/duct assembly.
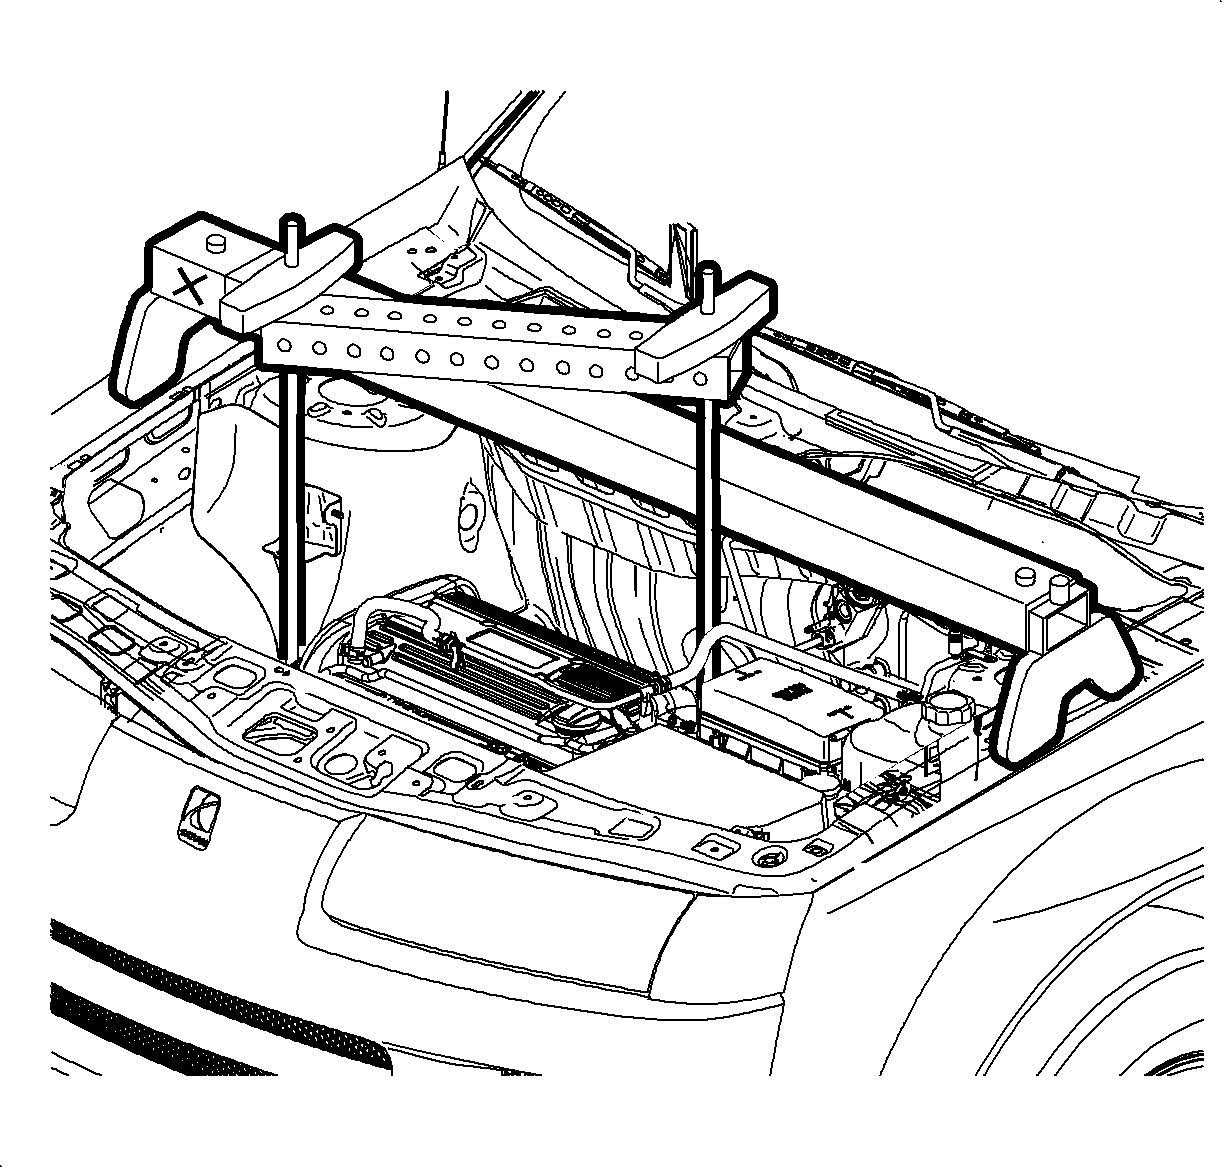
- Install the SA9105E setup for SUV application. Refer to Engine Support Fixture .
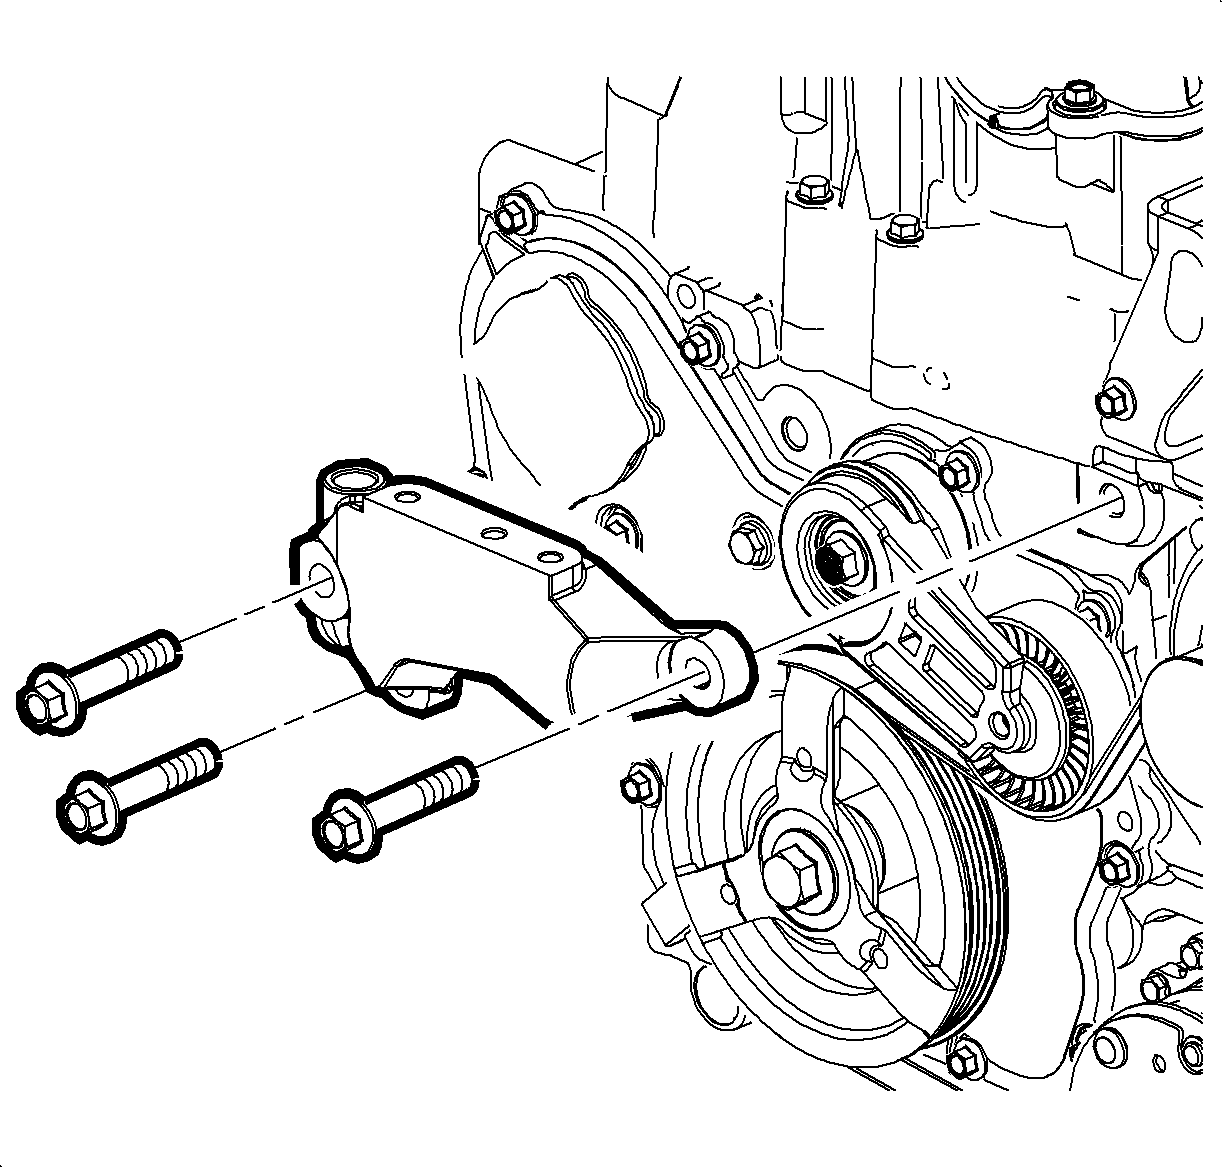
- Remove the right hand mount. Refer to Engine Mount Replacement .
- Remove the right hand engine mount bracket.
- Jack the vehicle or raise on a hoist Lifting and Jacking the Vehicle in General Information.
- Remove the right wheel and splash shield.
- Install the J 44811 .
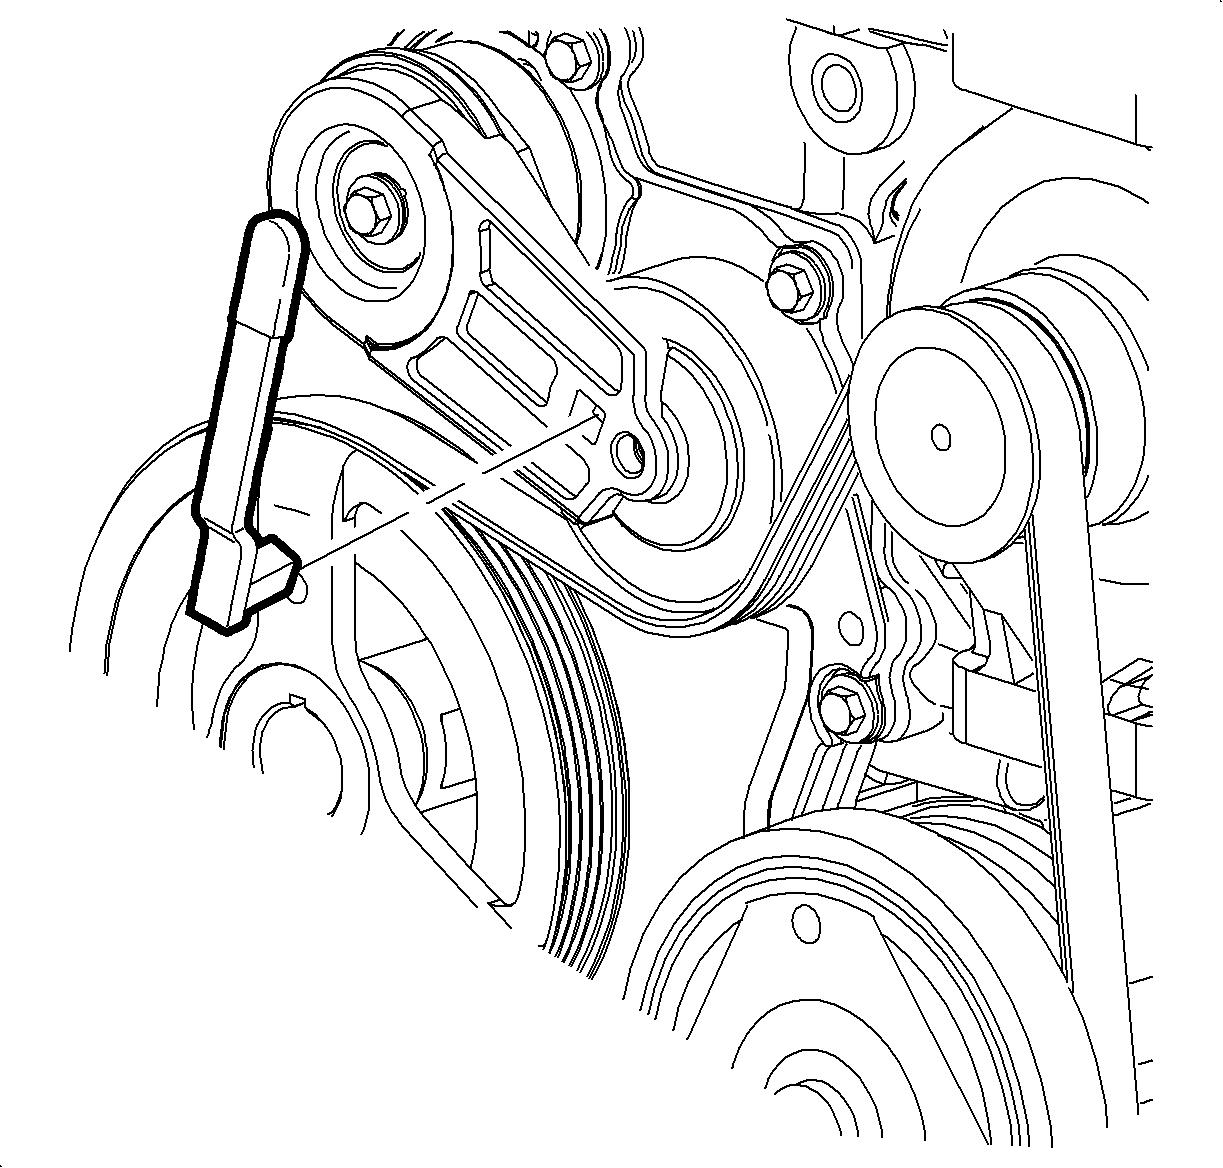
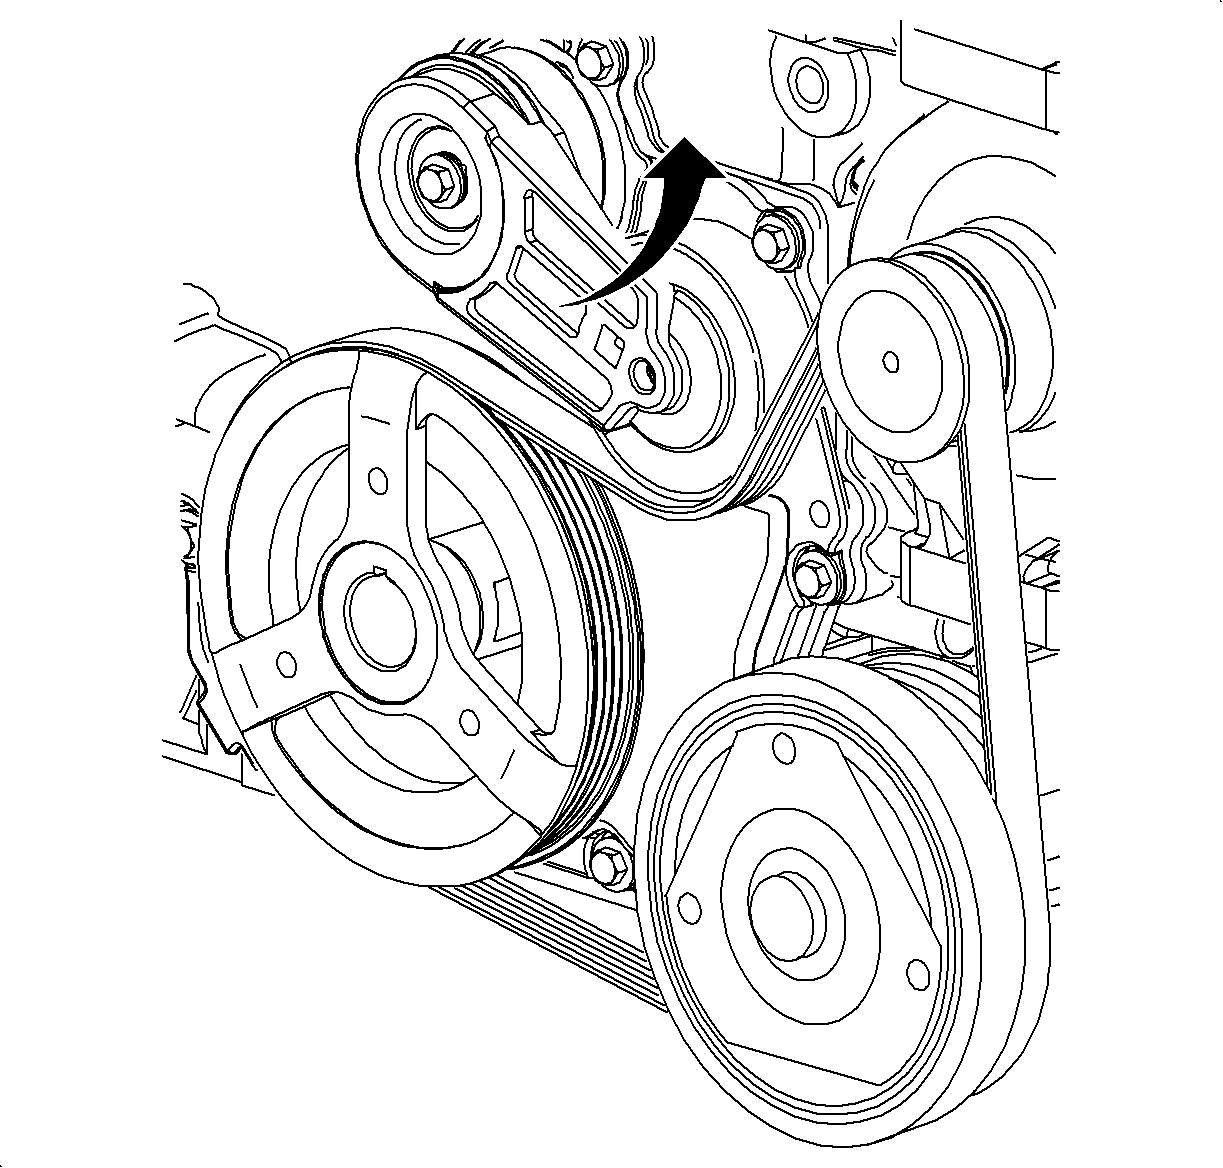
- Remove the accessory drive belt.
- Remove the tensioner bolt.
- Remove the tensioner assembly.
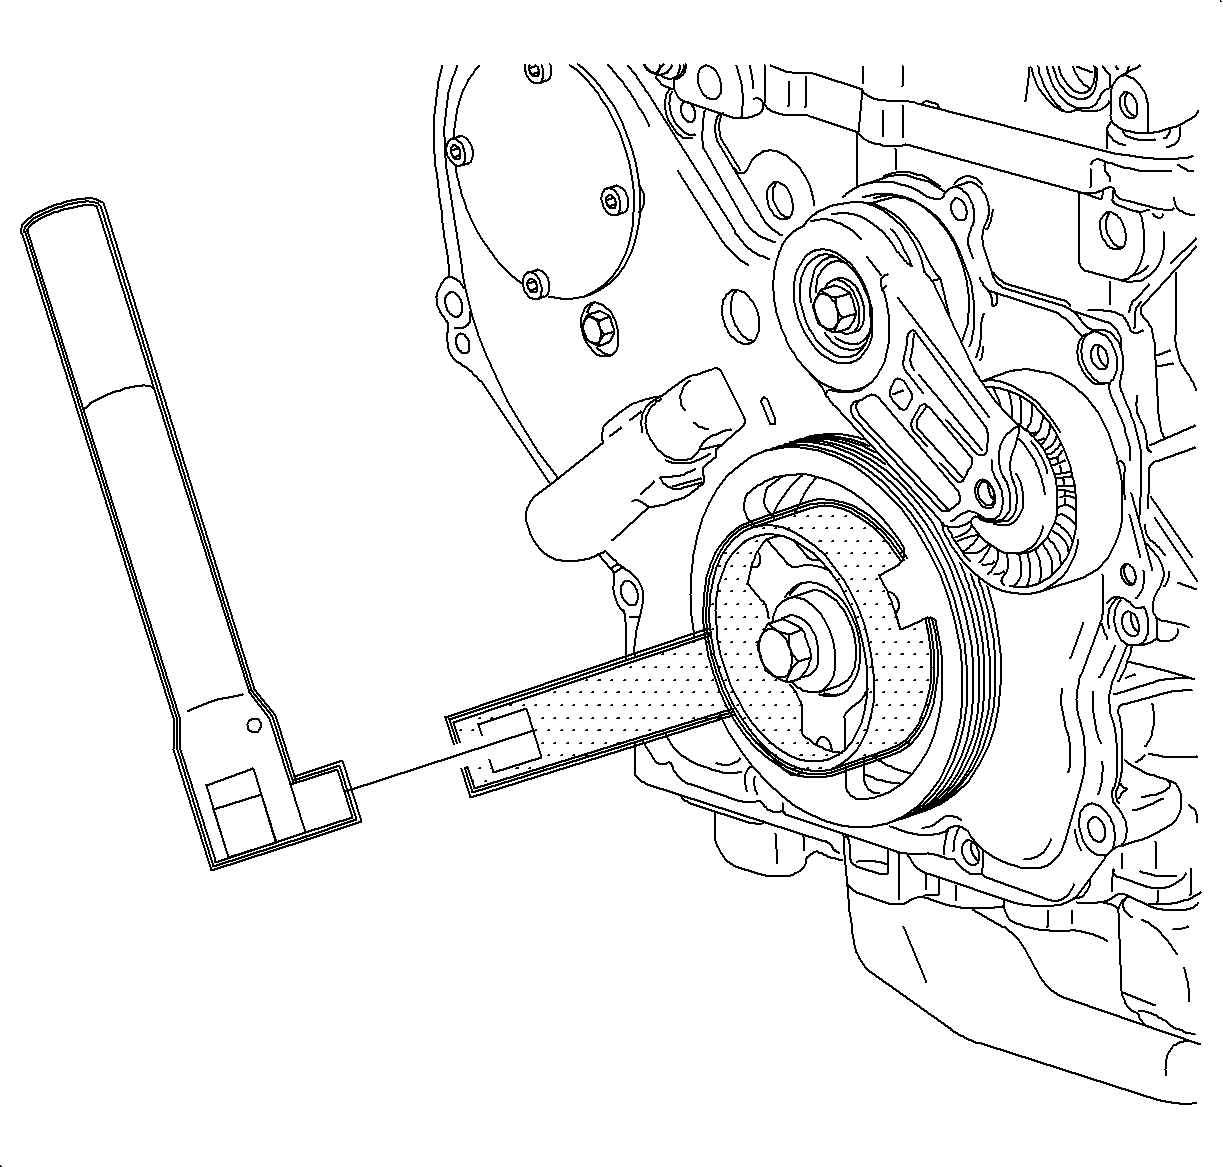
- Install the J 38122-A .
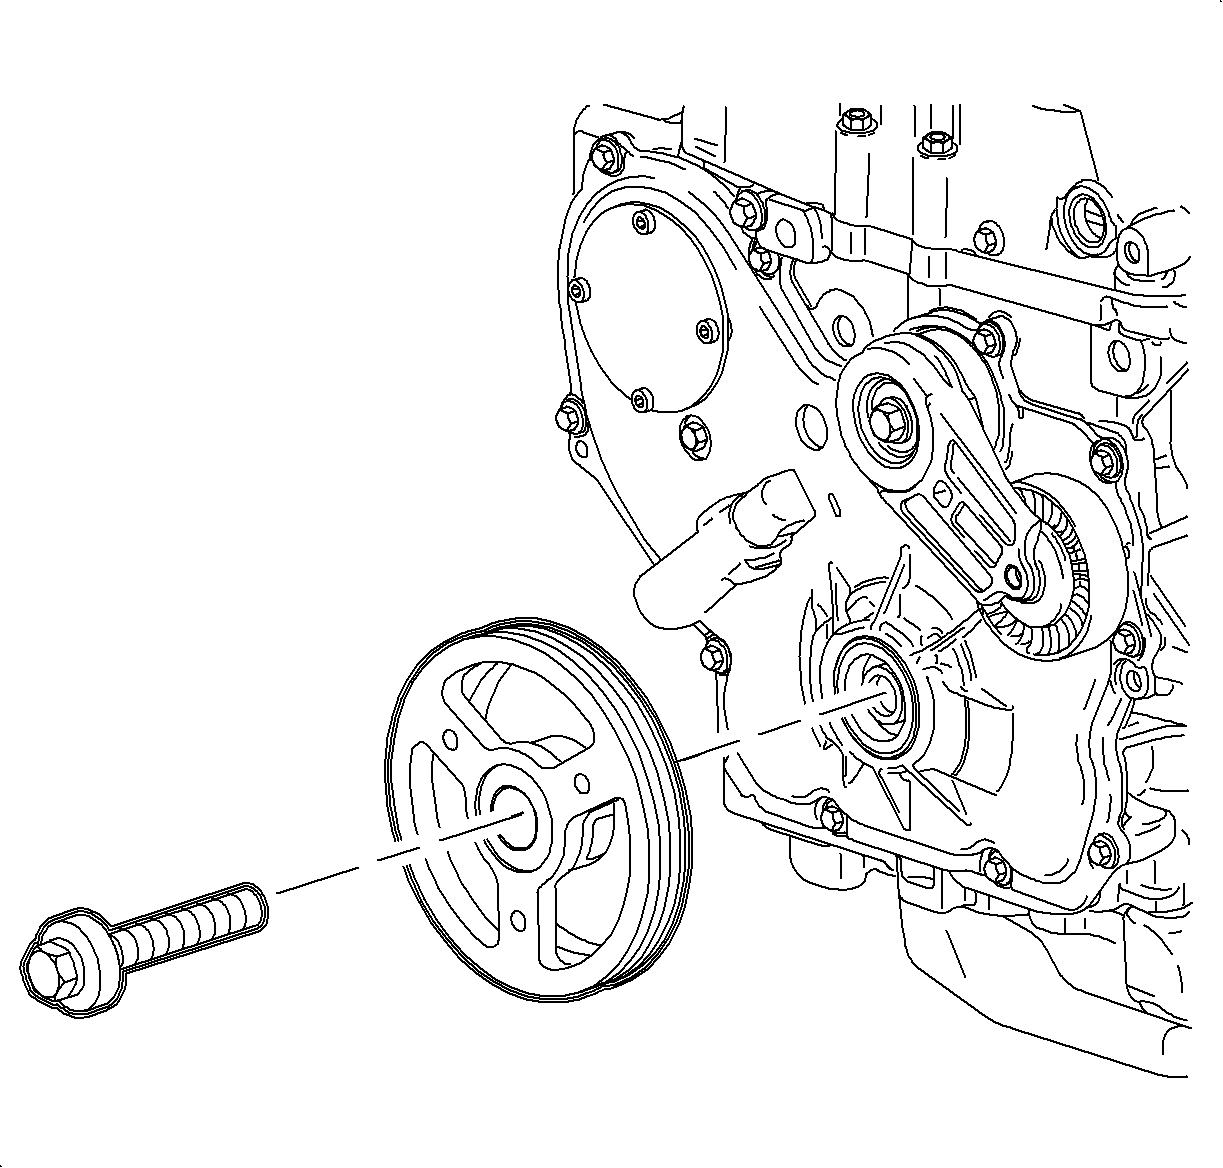
- Remove the crankshaft balancer pulley bolt and pulley. Discard the pulley.
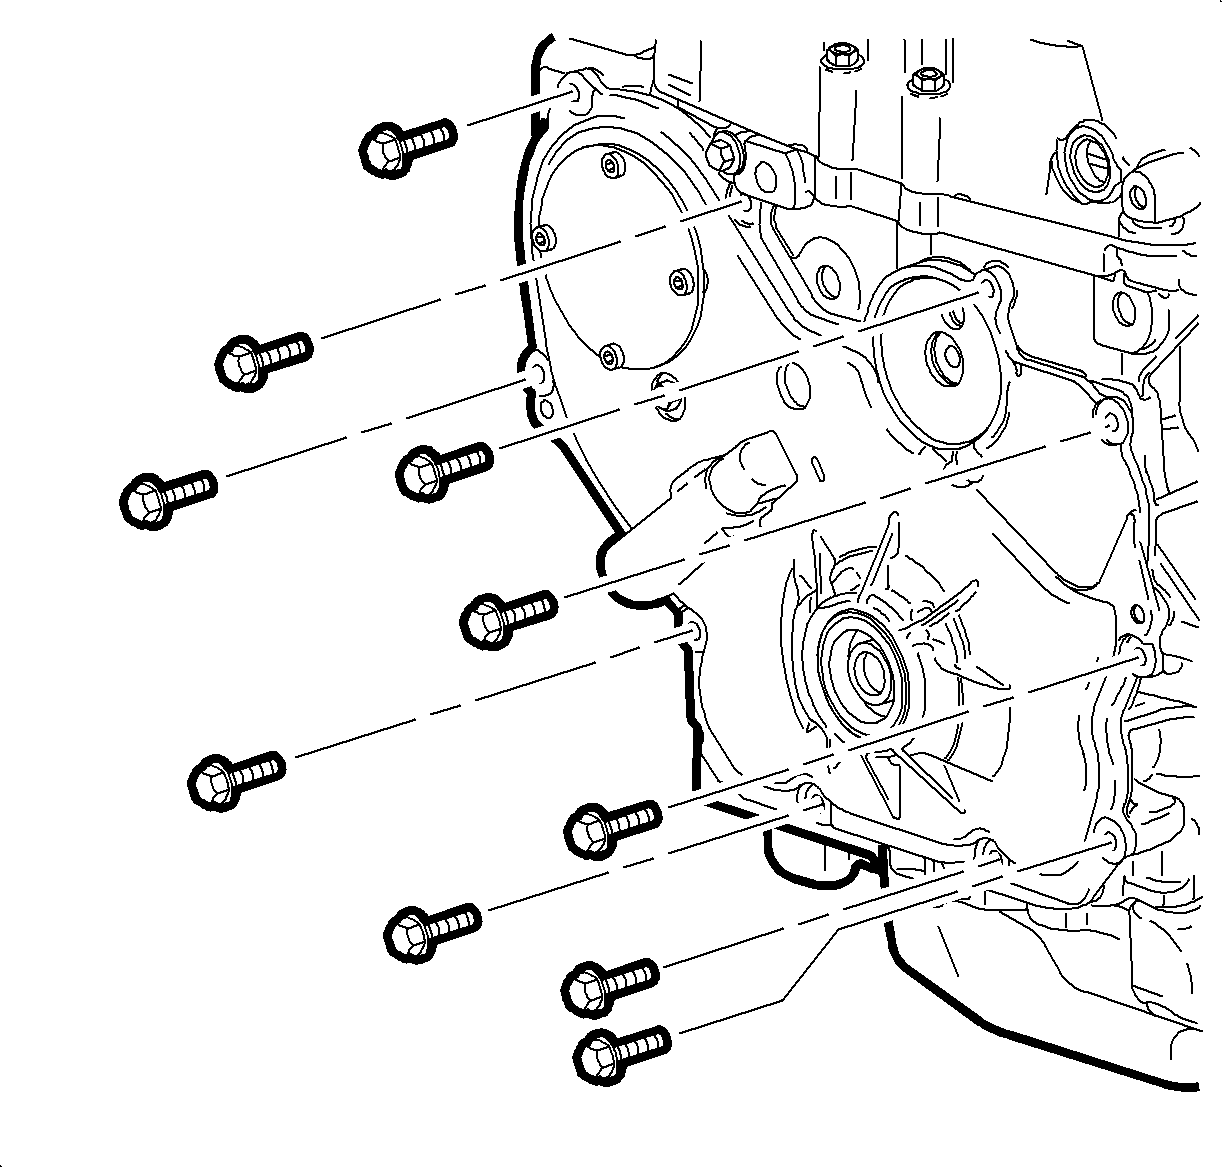
- Remove the front cover.
- Remove the lower water pump assembly bolt.
- Remove the front cover/oil pump assembly and gasket.
Caution: Ensure that the vehicle is properly supported and squarely positioned. To help avoid personal injury when a vehicle is on a hoist, provide additional support for the vehicle on the opposite end from which the components are being removed.
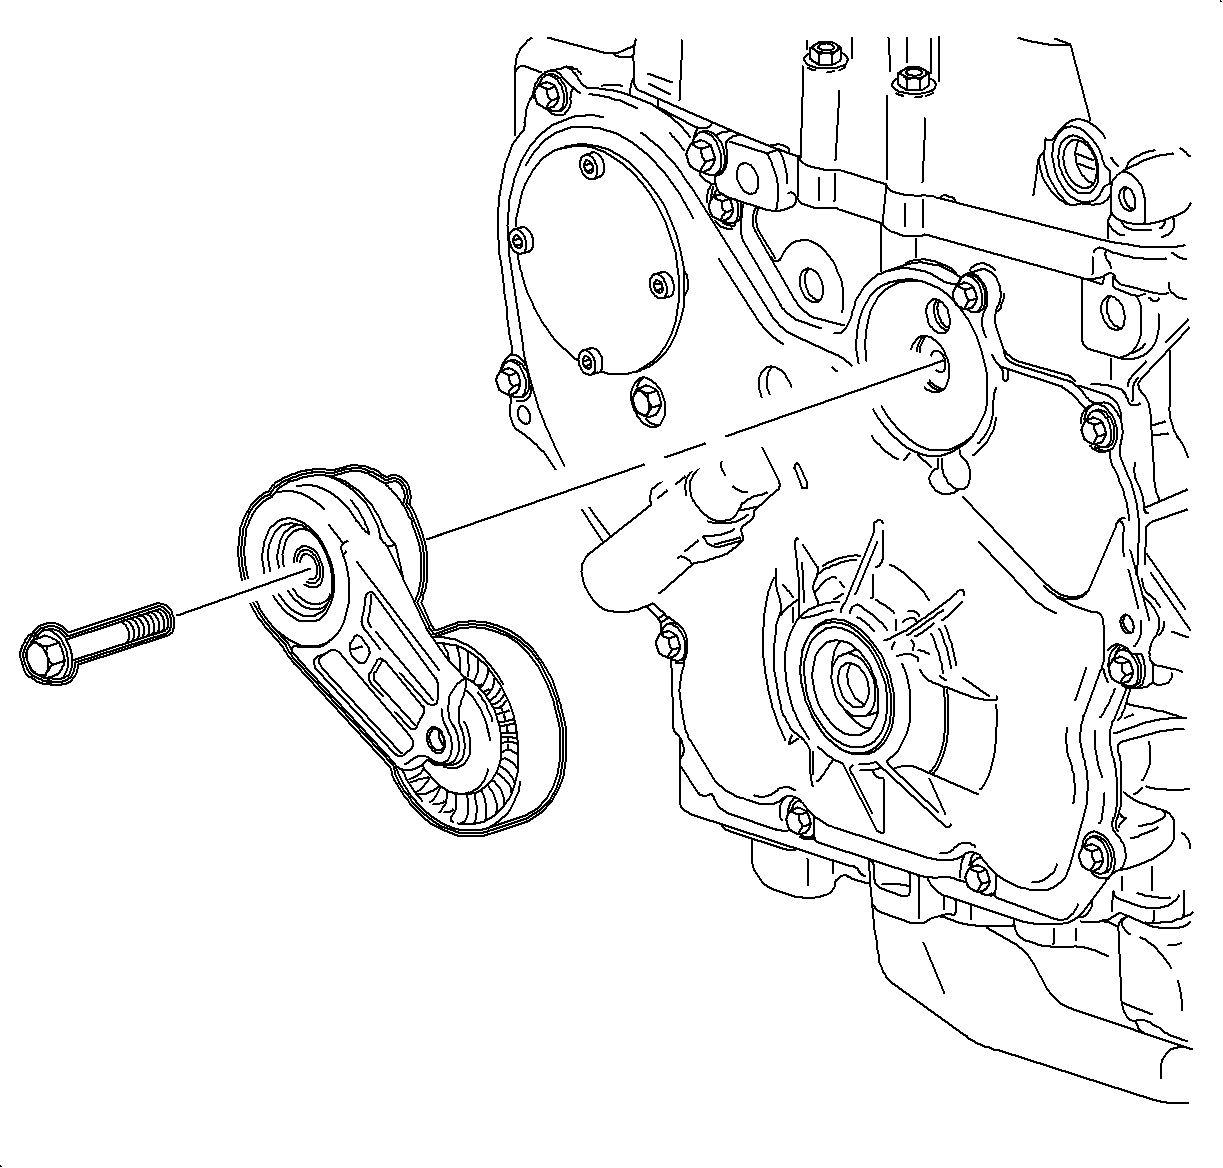
Important: To remove the tensioner bolt, an access hole has been provided through the inner and outer engine rail.
Notice: To avoid damage to the front cover assembly, do not pry against the cover.
Important: The crankshaft balancer pulley bolt head and washer assembly prevents oil leakage at the center of the pulley. Do not damage the sealing surfaces. If the pulley cannot be removed by pulling with your hand, use a three-jaw puller.
Installation Procedure
- Install the front cover assembly.
- Install the front cover assembly bolts and lower water pump bolt.
- Lubricate the front seal and sealing surface of the pulley with clean motor oil.
- Install the balancer pulley onto the crankshaft indexing keyway. Use care to properly align the flats on the balancer pulley with the flats on the oil pump drive in the front cover assembly.
- Install the crankshaft damper pulley.
- Install a new crankshaft balancer pulley bolt with washer assembly.
- Install the J 38122-A .
- Install the drive belt tensioner assembly.
- Route the belt around the alternator and A/C compressor. Install the J 44811 onto the tensioner and unload spring tension from the tensioner while positioning the belt.
- Release the tensioner and remove the tool.
- Install the right engine inner splash shield.
- Install the right wheel and hand tighten the wheel nuts.
- Lower the vehicle.
- Tighten the wheel nuts.
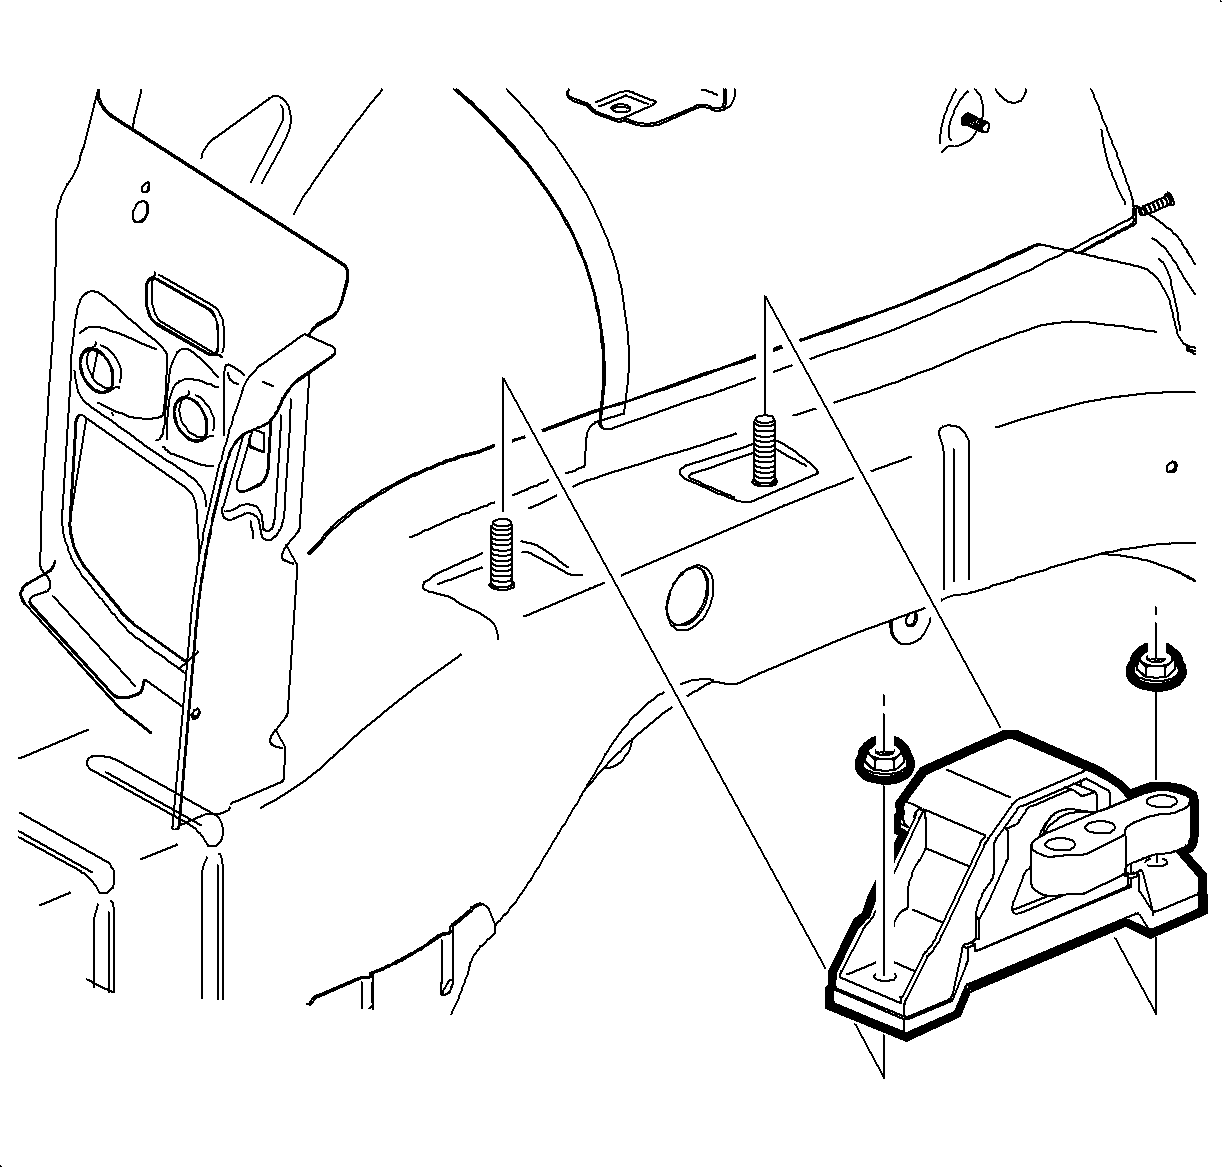
- Install the right hand engine bracket and bolts to the engine. Refer to Engine Mount Replacement .
- Install the shims on the right hand side rail studs.
- Install the right hand engine shims onto the studs.
- Install the right hand engine mount over the body side rail studs.
- Install the right hand engine mount nuts.
- Install the right hand engine mount bolts to the engine mount bracket.
- Remove the SA9105E .
- Position the outlet resonator/duct assembly into position.
- Connect the PCV fresh air vent hose assembly.
- Tighten the clamp at the throttle body assembly.
- Position the outlet resonator/duct assembly up with the support bracket and install the push-pin.
- Tighten the clamp at the air cleaner assembly.
- Connect the intake air temperature (IAT) sensor connector.
- Connect the negative battery cable.
Important: A new oil seal can be installed either in or out of the vehicle. Refer to Camshaft Timing Chain, Sprocket, and Tensioner Replacement .
Notice: Refer to Fastener Notice in the Preface section.
Tighten
| • | Tighten the cover-to-block bolts - L61 to 25 N·m (18 lb ft). |
| • | Tighten the water pump bolts - L61 to 25 N·m (18 lb ft). |
Tighten
Tighten the crankshaft pulley bolt - L61 to
100 N·m (74 lb ft) +75 degrees.
Tighten
Tighten the drive belt tensioner bolt - L61
to 45 N·m (33 lb ft).
Tighten
Tighten the wheel nuts to 125 N·m (92 lb ft).
Tighten
Tighten the engine mount bracket-to-engine bolts -
L61 to 110 N·m (81 lb ft).
Tighten
Tighten the engine mount bracket-to-body nuts to
110 N·m (81 lb ft).
Tighten
Tighten the engine mount-to-engine mount bracket
bolts to 50 N·m (37 lb ft).
Important: When starting the vehicle, check for excessive idle shake. Powertrain rebalance may be required.
Tighten
Tighten the negative battery terminal bolt to 17 N·m
(13 lb ft) + 75 degrees.
