For 1990-2009 cars only
Removal Procedure
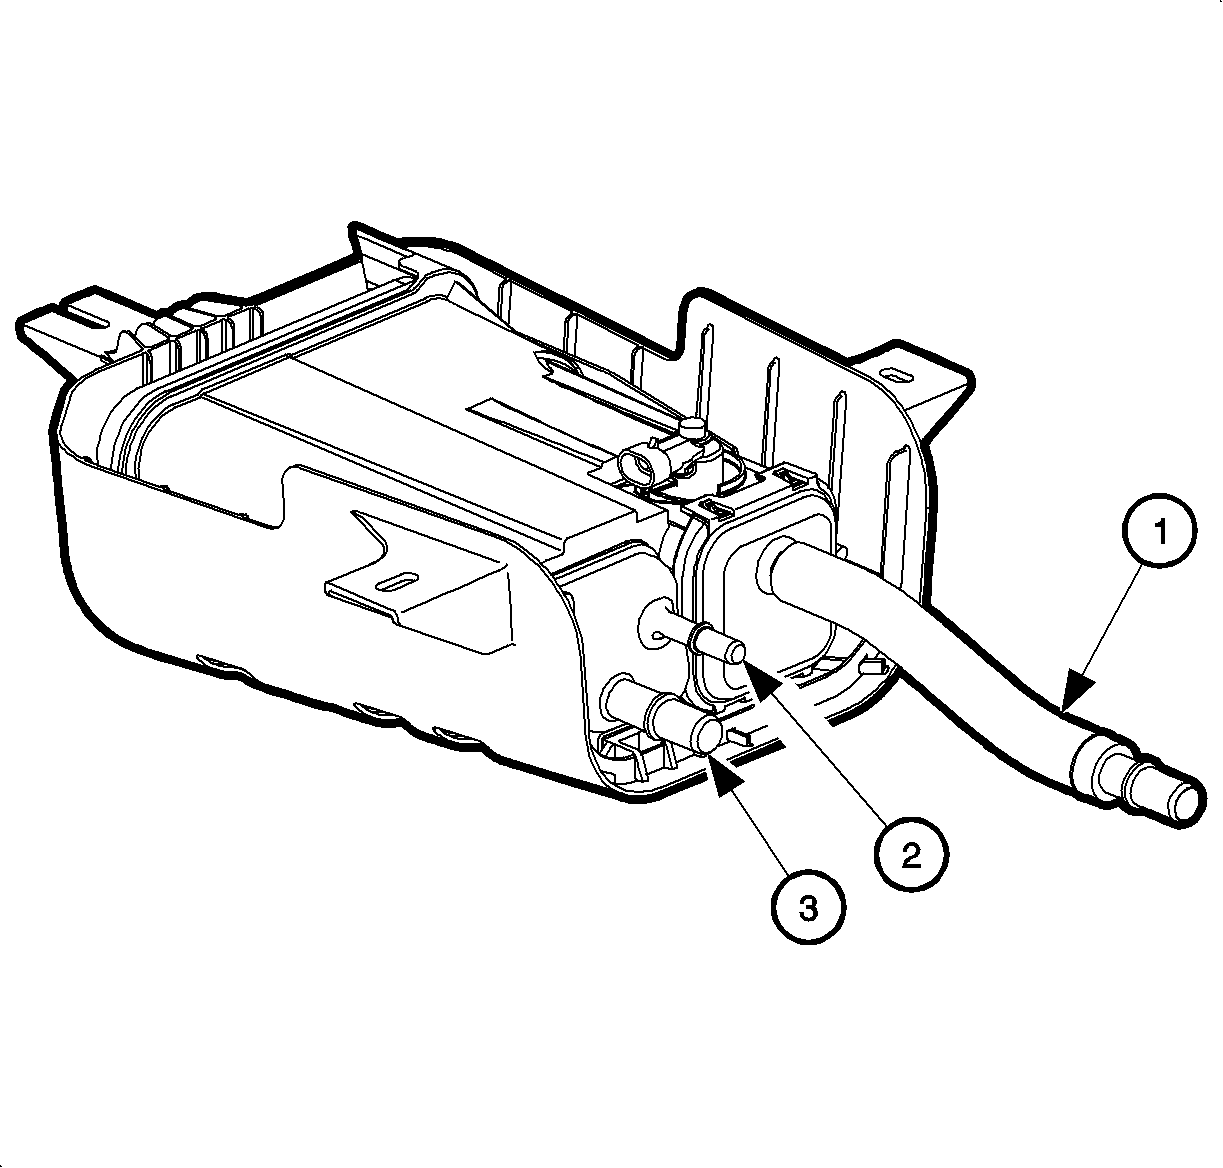
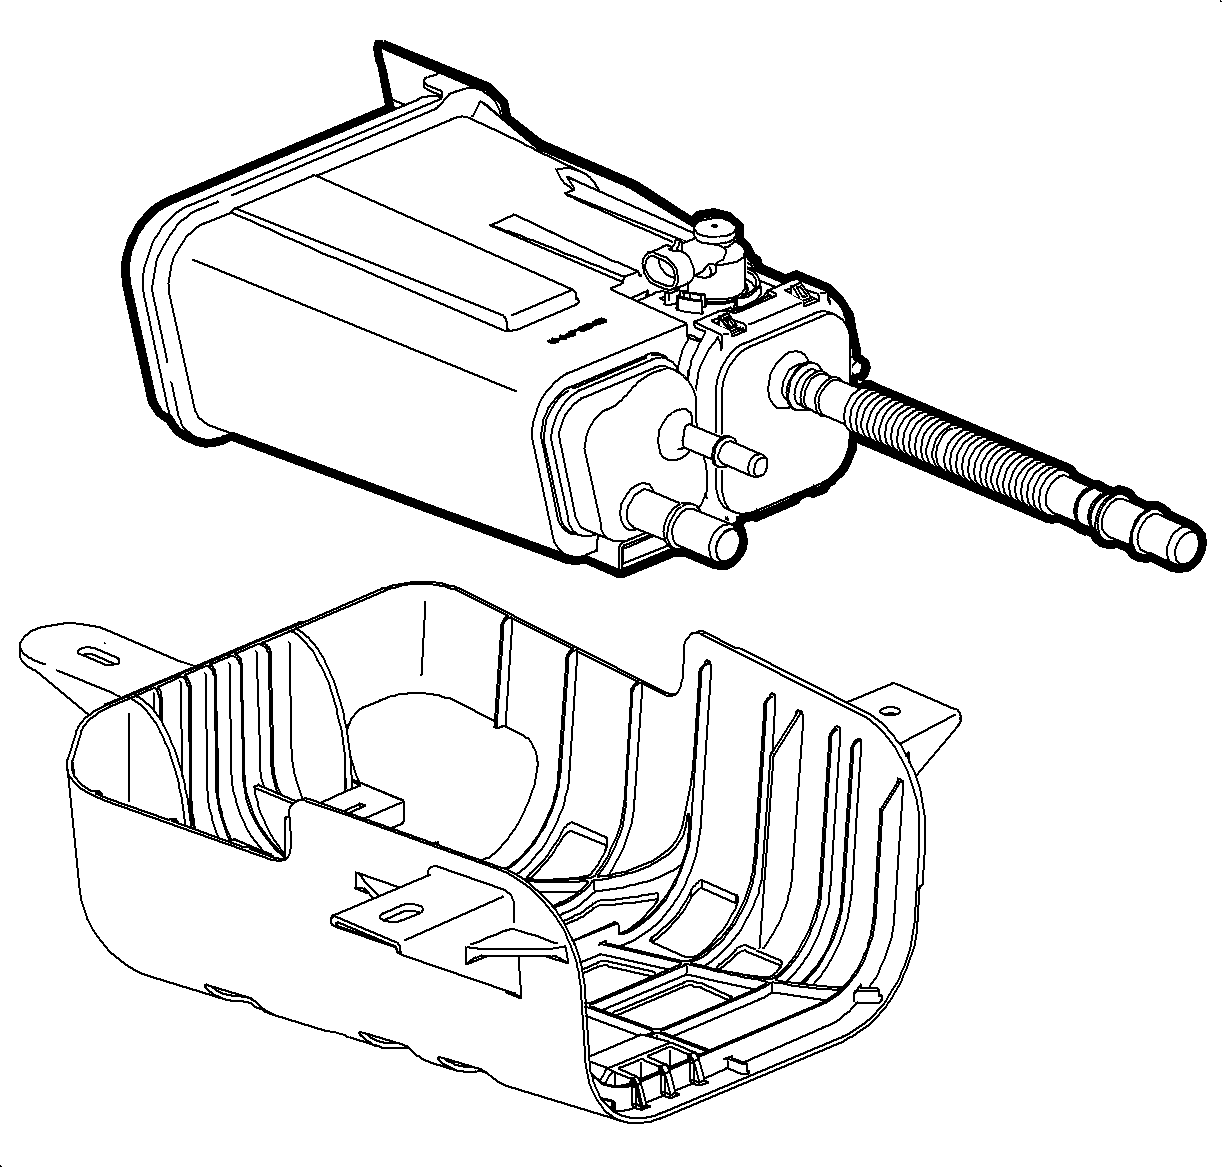
Important: The EVAP emissions canister is located under the center of the vehicle. It has 3 EVAP line connections:
| • | The EVAP fresh air hose (1) |
| • | The EVAP purge connection (2) |
| • | The EVAP vent connection (3) |
- Raise the vehicle on a hoist.
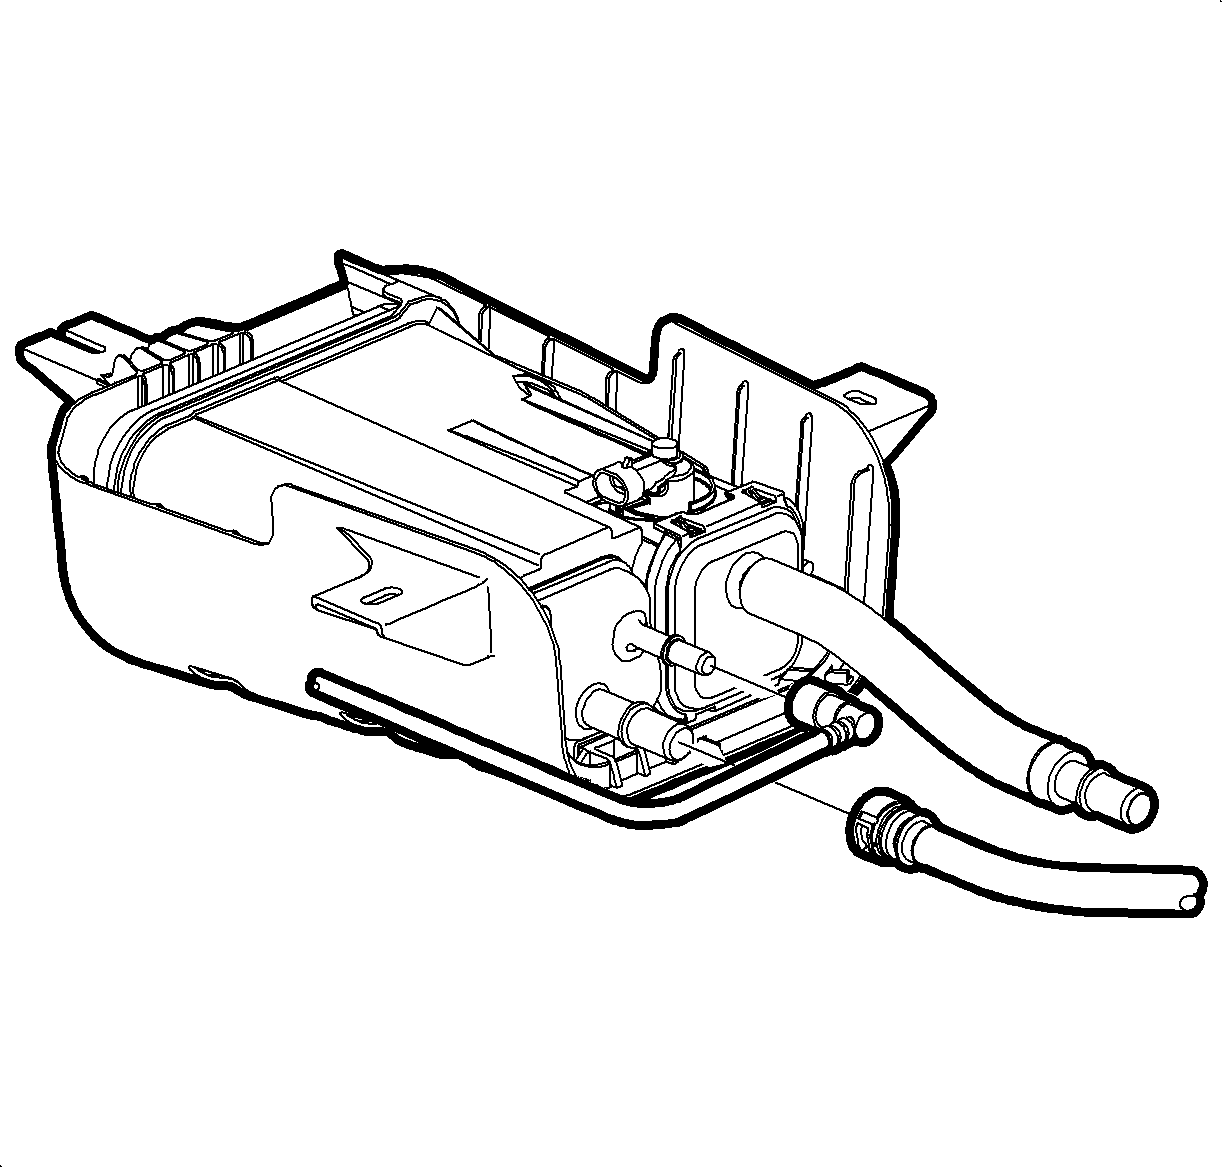
- Disconnect the EVAP canister fresh air line from the fuel tank fresh air line.
- Disconnect the EVAP canister purge line and vent line from the EVAP canister.
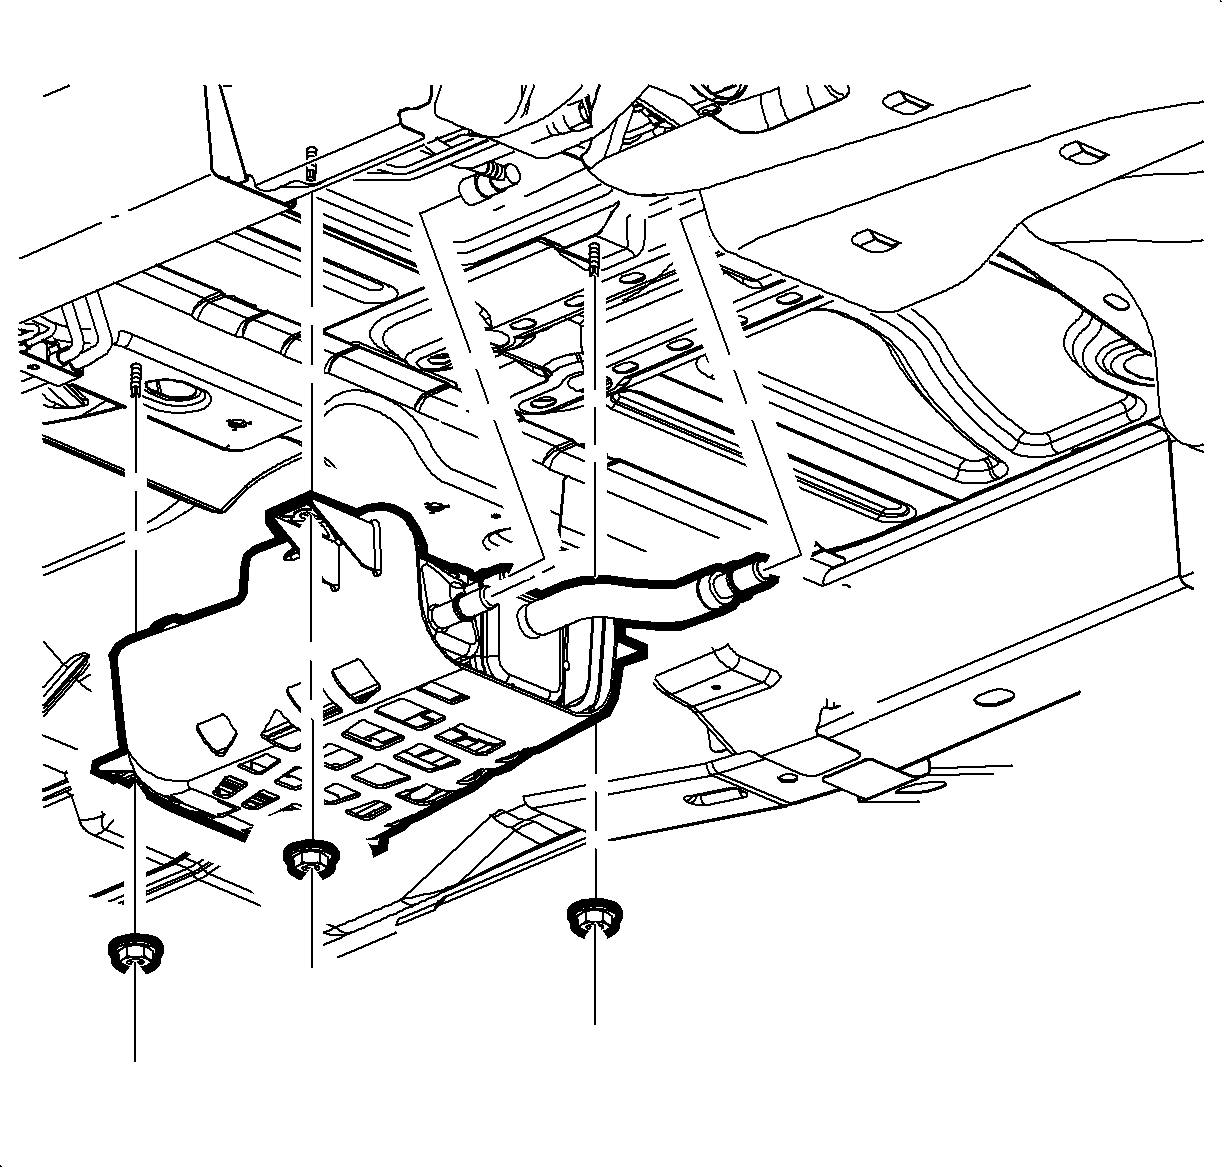
- Remove the 3 EVAP canister-to-underbody fasteners.
- Disconnect the EVAP vent solenoid electrical connector.
- Remove the canister from the vehicle.
- Remove the EVAP canister from the EVAP canister bracket.
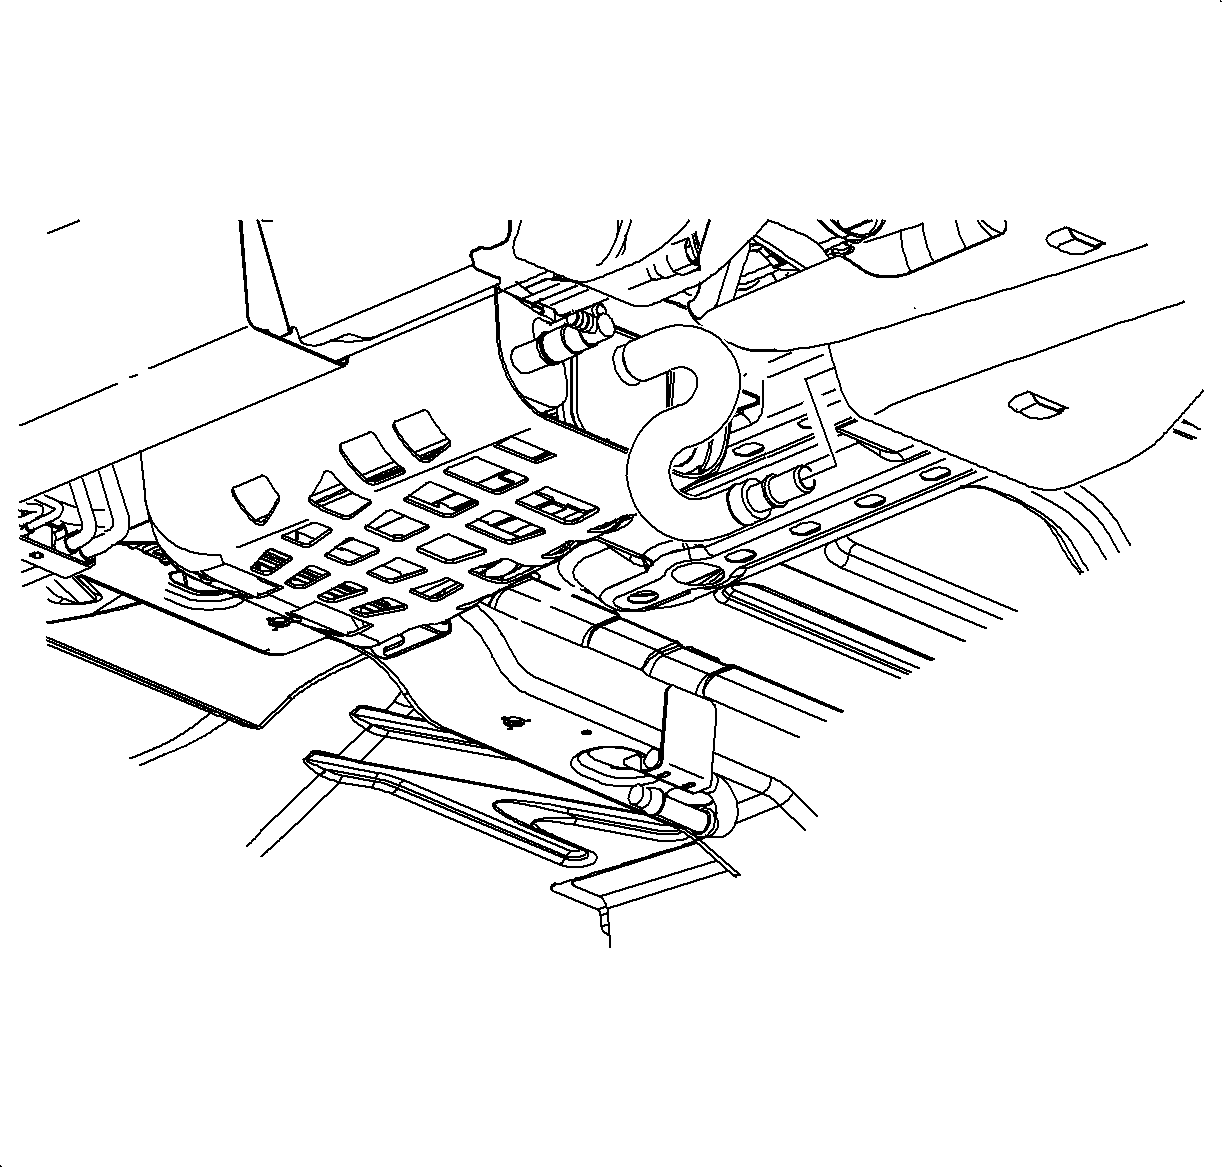
Caution: Ensure that the vehicle is properly supported and squarely positioned. To help avoid personal injury when a vehicle is on a hoist, provide additional support for the vehicle on the opposite end from which the components are being removed.
Installation Procedure
- Install the EVAP canister onto the EVAP canister bracket.
- Install the EVAP vent solenoid electrical connector.
- Install the 3 EVAP canister-to-body underbody fasteners.
- Connect the EVAP canister purge and vent lines to the EVAP canister.
- Connect the EVAP canister fresh air line to the fuel tank fresh air line.
- Lower the vehicle from the hoist.
Tighten
Tighten the EVAP canister-to-body nuts to 8 N·m
(71 lb in).
