For 1990-2009 cars only
Removal Procedure
- Turn ignition OFF.
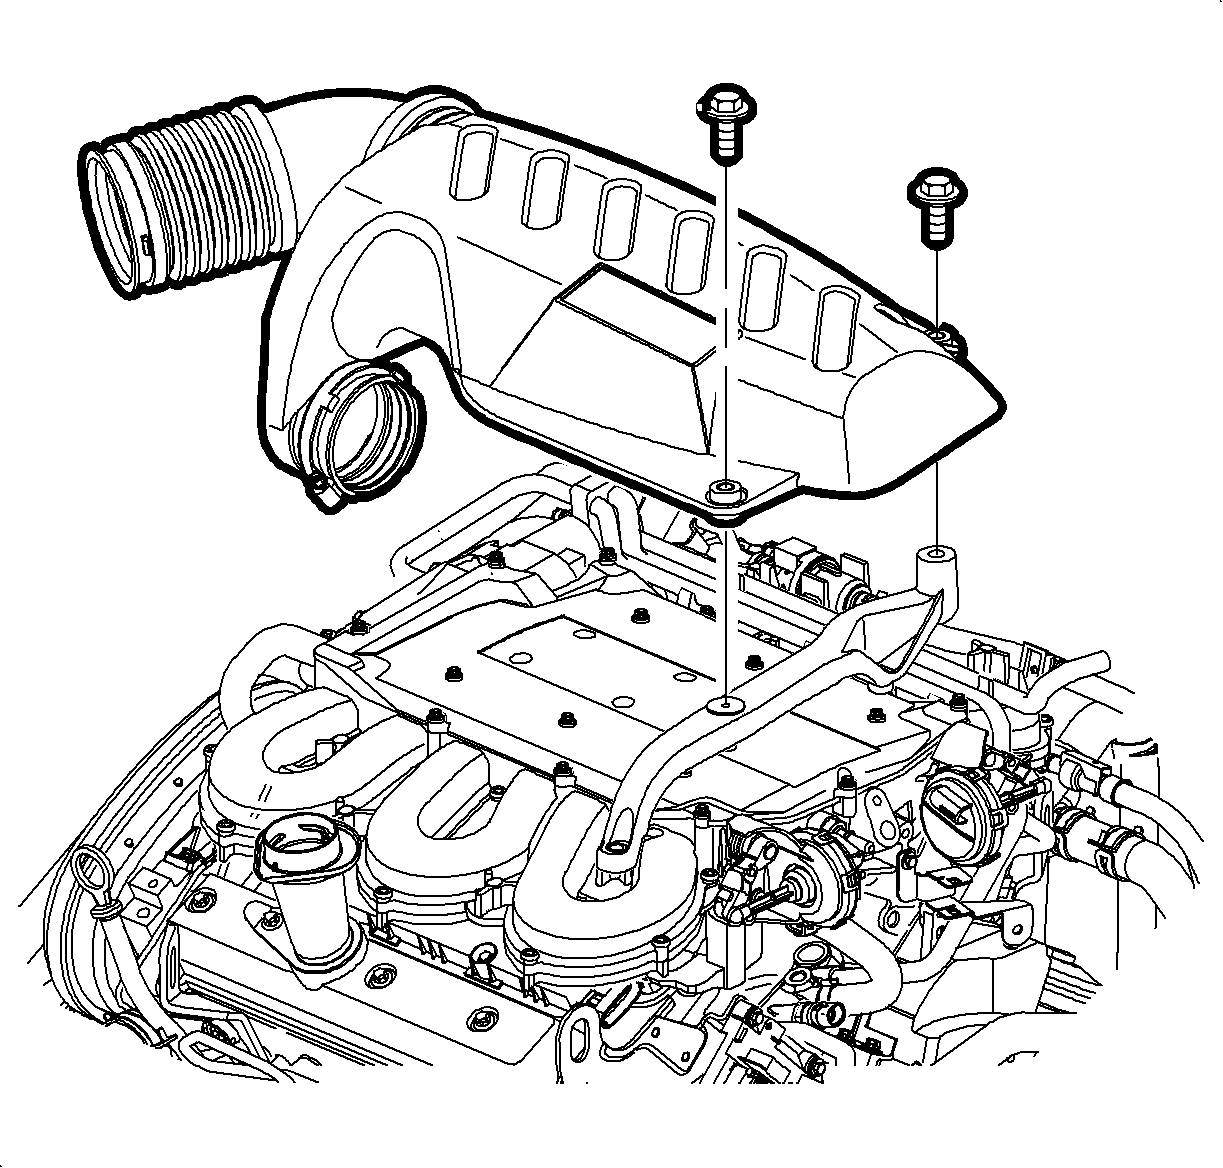
- Loosen clamp at air cleaner assembly and throttle body assembly.
- Remove attachment bolts from outlet resonator/duct assembly to support bracket.
- Remove outlet resonator/duct assembly.
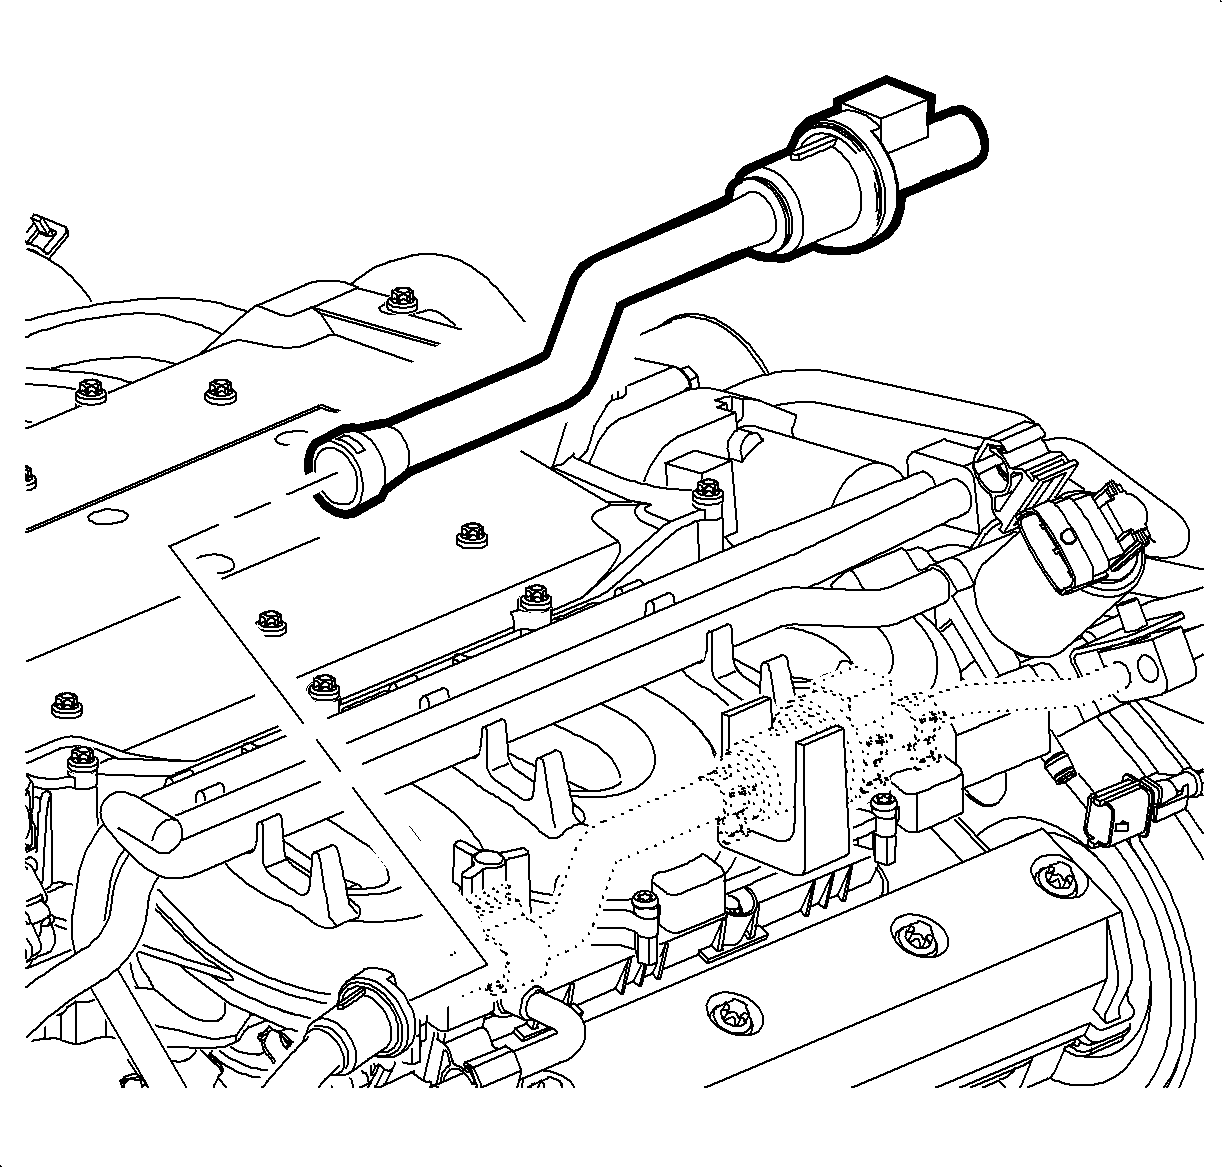
- Disconnect EVAP purge solenoid harness connector.
- Disconnect EVAP purge line quick connect between the EVAP purge solenoid and EVAP service port. Release by pressing the release tab to the left then upward while pulling the two lines apart.
- Remove the EVAP purge solenoid and line assembly from the solenoid attachment grommet and V-clamp.
- Remove EVAP purge solenoid manifold vacuum supply hose and remove solenoid and line assembly.

Caution: Do not allow smoking or the use of open flames in the area where work on the fuel or EVAP system is taking place. Anytime work is being done on the fuel system, disconnect the negative battery cable, except for those tests where battery voltage is required.

Installation Procedure
- Install EVAP purge solenoid vacuum supply hose to EVAP purge solenoid.
- Install EVAP purge solenoid and line assembly into attachment grommet and V-clamp.
- Connect EVAP purge line quick connect, then pull back on line to confirm locked engagement.
- Connect EVAP purge solenoid harness connector. Push in connector until a click is heard and pull back to confirm engagement.
- Install outlet resonator/duct assembly into position.
- Tighten clamp at throttle body assembly.
- Position outlet resonator/duct assembly to support bracket and install bolts.
- Tighten clamp at air cleaner assembly.


Notice: Refer to Fastener Notice in the Preface section.
Tighten
Tighten the outlet resonator/duct assembly-to-support bracket botls to 10 N·m
(89 lb in)
