Removal Procedure
- Record all pre-set radio stations.
- Turn the ignition OFF.
- Loosen the radiator drain plug and drain the coolant below the level of coolant in the coolant surge tank using a drain pan. Retighten the drain plug.
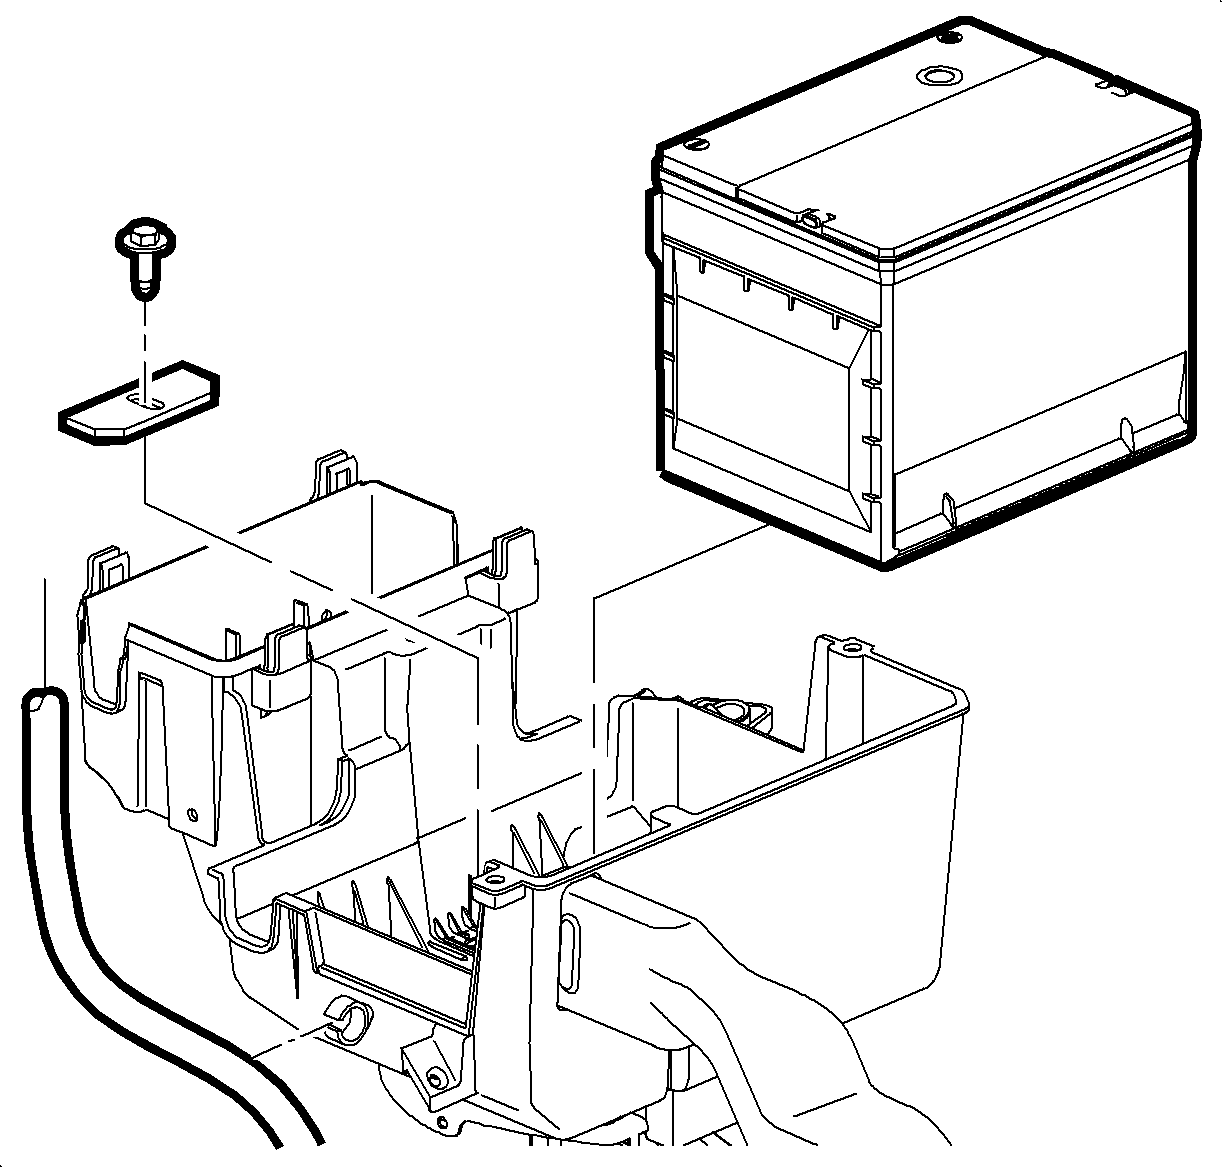
- Loosen the battery cover screw adn remove the battery cover.
- Disconnect the negative battery cable.
- Disconnect the positive battery cable.
- Loosen the battery hold down bolt and remove the battery and battery hold down.
- Remove the underhood fuse block (UHFB) cover.
- Remove the positive battery cable and electric power steering (EPS) wire from B+ terminal at UHFB.
- Open all retainer clips and remove all cables, lines and harnesses from battery cooling box.
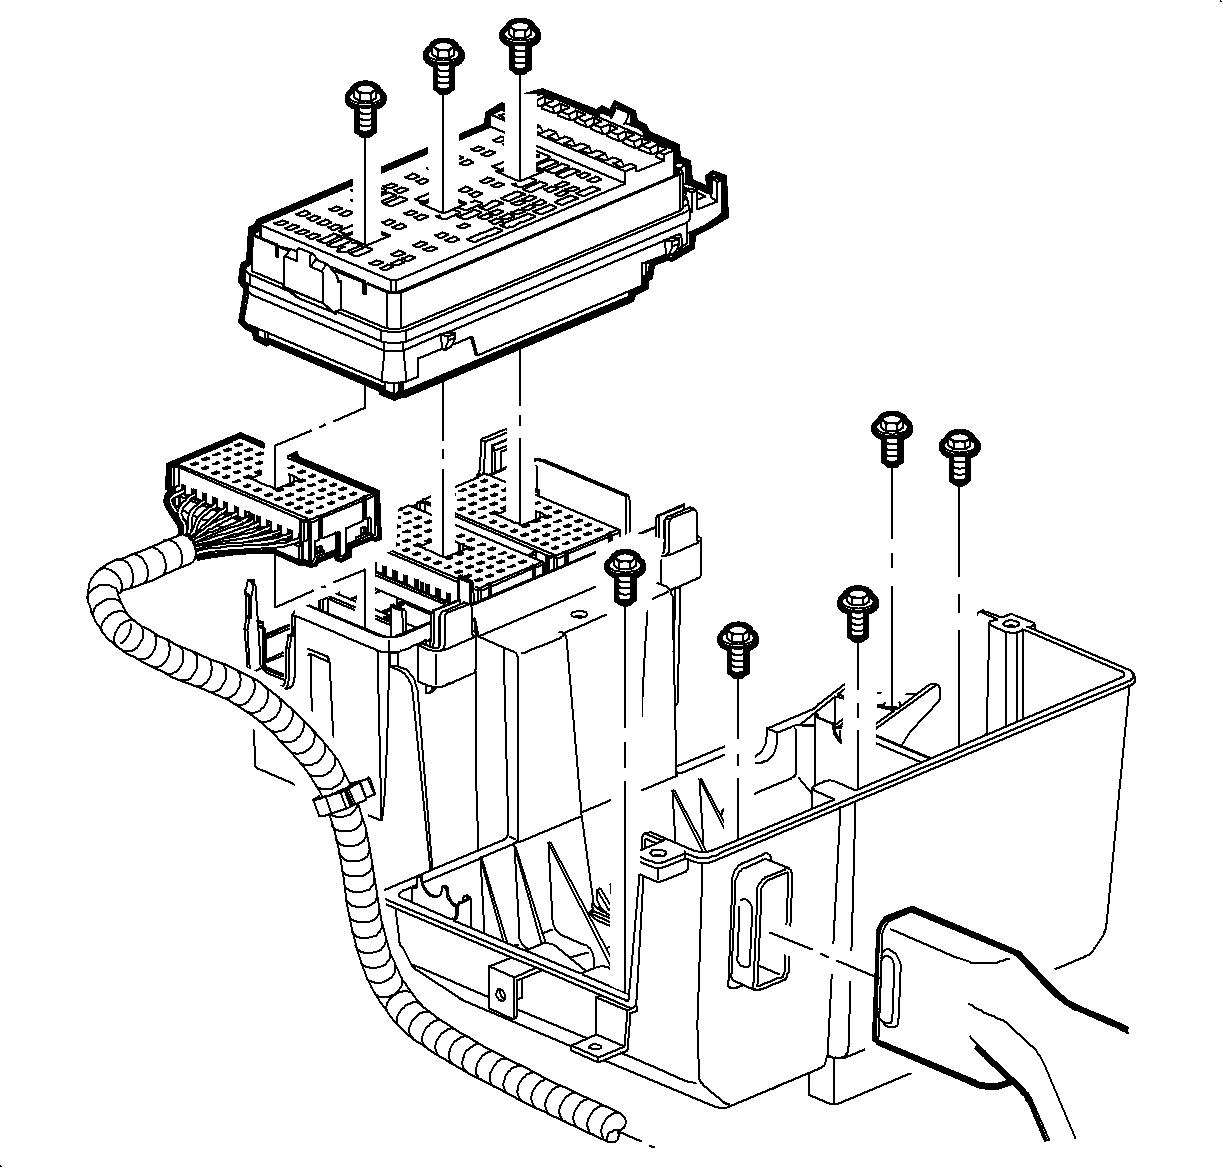
- Loose the UHFB block connector retaining bolts.
- Unfasten UHFB from its housing and disconnect forward lamp harness.
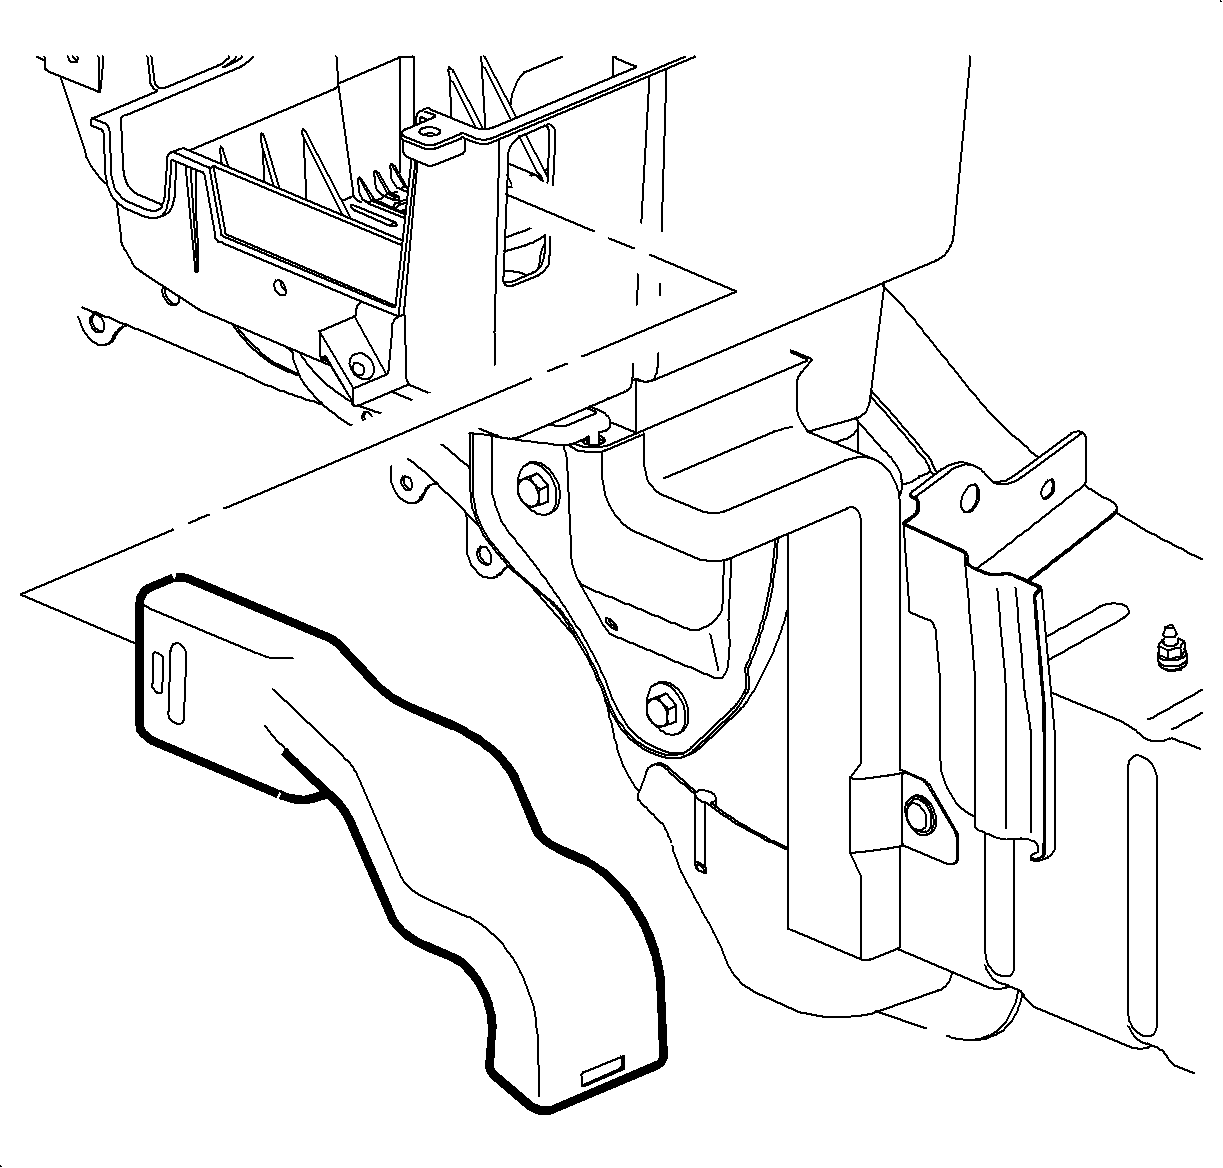
- Remove the battery cooling box bolts.


Installation Procedure
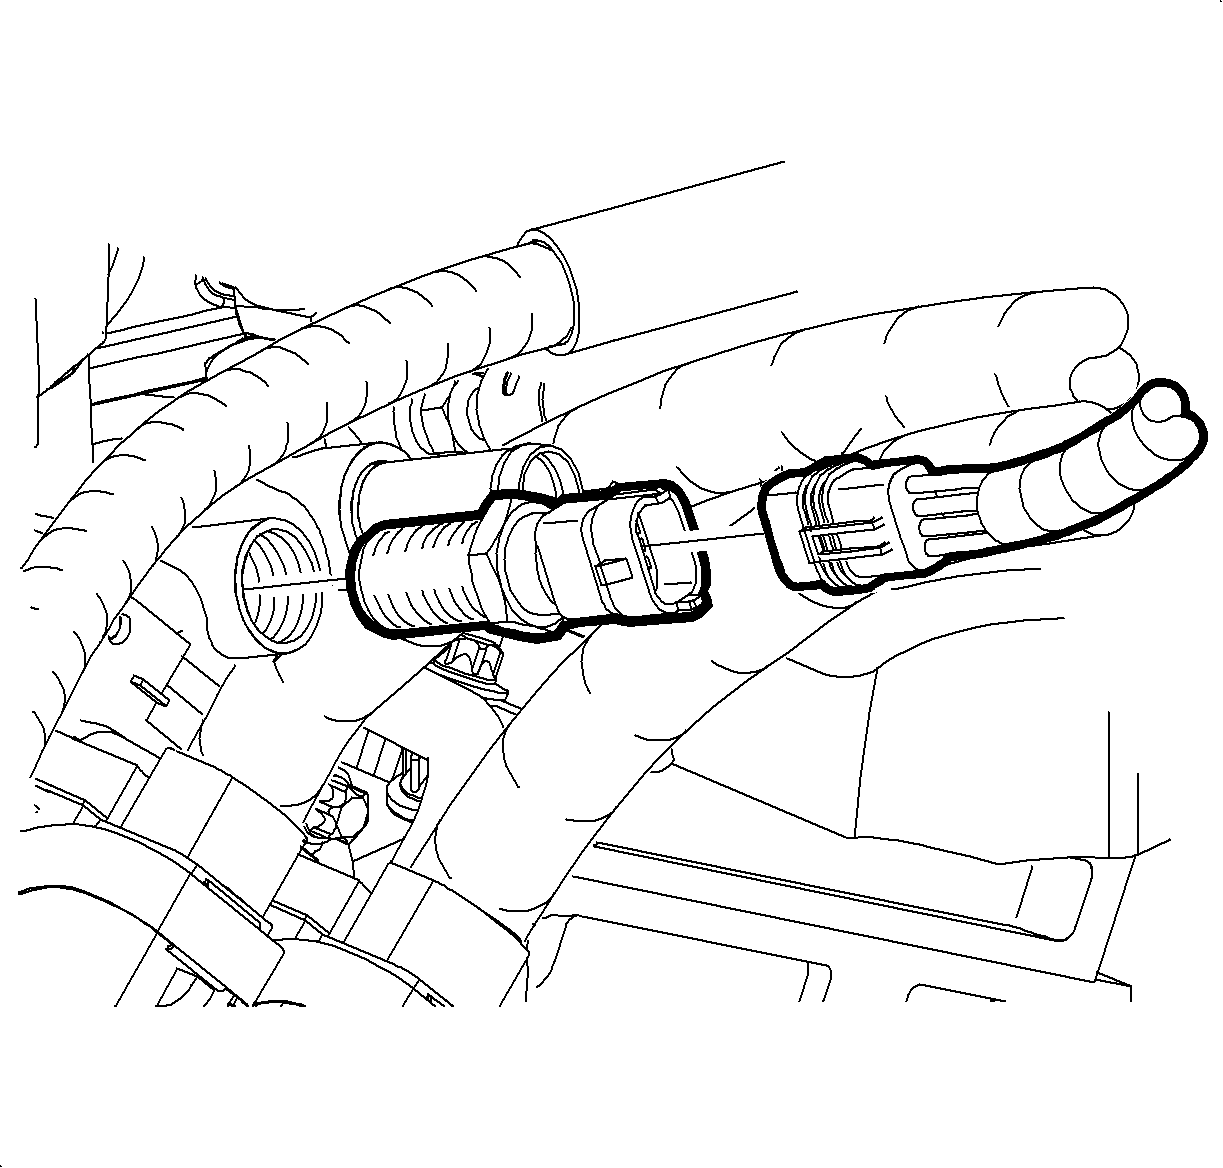
- Apply RTV sealant (or equivalent) to the sensor threads.
- Install the ECT sensor.
- Connect the ECT sensor harness connector. Push the connector in until the lock position is felt, then pull back to confirm engagement.
- Position the battery cooling box on the tray so that the inlet and outlet ducts are properly aligned.
- Install the battery cooling box bolts.
- Install the battery cooling box side support bolt.
- Connect the forward lamp harness to the UHFB and tat the UHFB into the housing.
- Install the UHFB connector retaining bolts.
- Secure all cables, lines and harnesses into the retaining clips.
- Attach the positive battery cable and the EPS wire to B+ terminal at UHFB and tighten the nut.
- Insert the battery and install the battery hold down bolt.
- Connect the positive battery cable to the battery.
- Connect the negative battery cable to the battery.
- Install the UHFB cover.
- Install the battery cooling box cover and tighten the screws.
- Refill the cooling system to the proper level. Refer to in Engine Cooling.
- Program the present radio stations.

Tighten
Tighten the engine coolant temperature sensor to 18 N·m (13 lb ft).

Important: Alignment of inlet and outlet ducts with the battery cooling box is critical to ensure proper airflow to the battery.

Important: Overtightening the battery cooling bolts will break/crack plastic.
Tighten
Tighten the battery cooling box bolts to 15 N·m (11 lb ft).
Tighten
Tighten the battery cooling box side support to 10 N·m (89 lb in).
Tighten
Tighten the harness connector retainer to 4 N·m (35 lb in).
Tighten
Tighten the UHFB B+ terminal nut to 10 N·m (89 lb in).

Tighten
Tighten the battery hold down bolt to 16 N·m (11 lb ft).
Tighten
Tighten the battery terminal bolts to 17 N·m (13 lb ft).
Tighten
Tighten the battery terminal bolts to 17 N·m (13 lb ft).
Tighten
Tighten the battery cooling box cover screws to 2 N·m (18 lb in).
