Tools Required
| • | J 37088-A Fuel Line Disconnect Tool Set |
| • | J 44095 Fuel Pressure Adapter Fitting |
| • | SA9127E Gage Bar Set |
Removal Procedure
- Disconnect the negative battery cable.
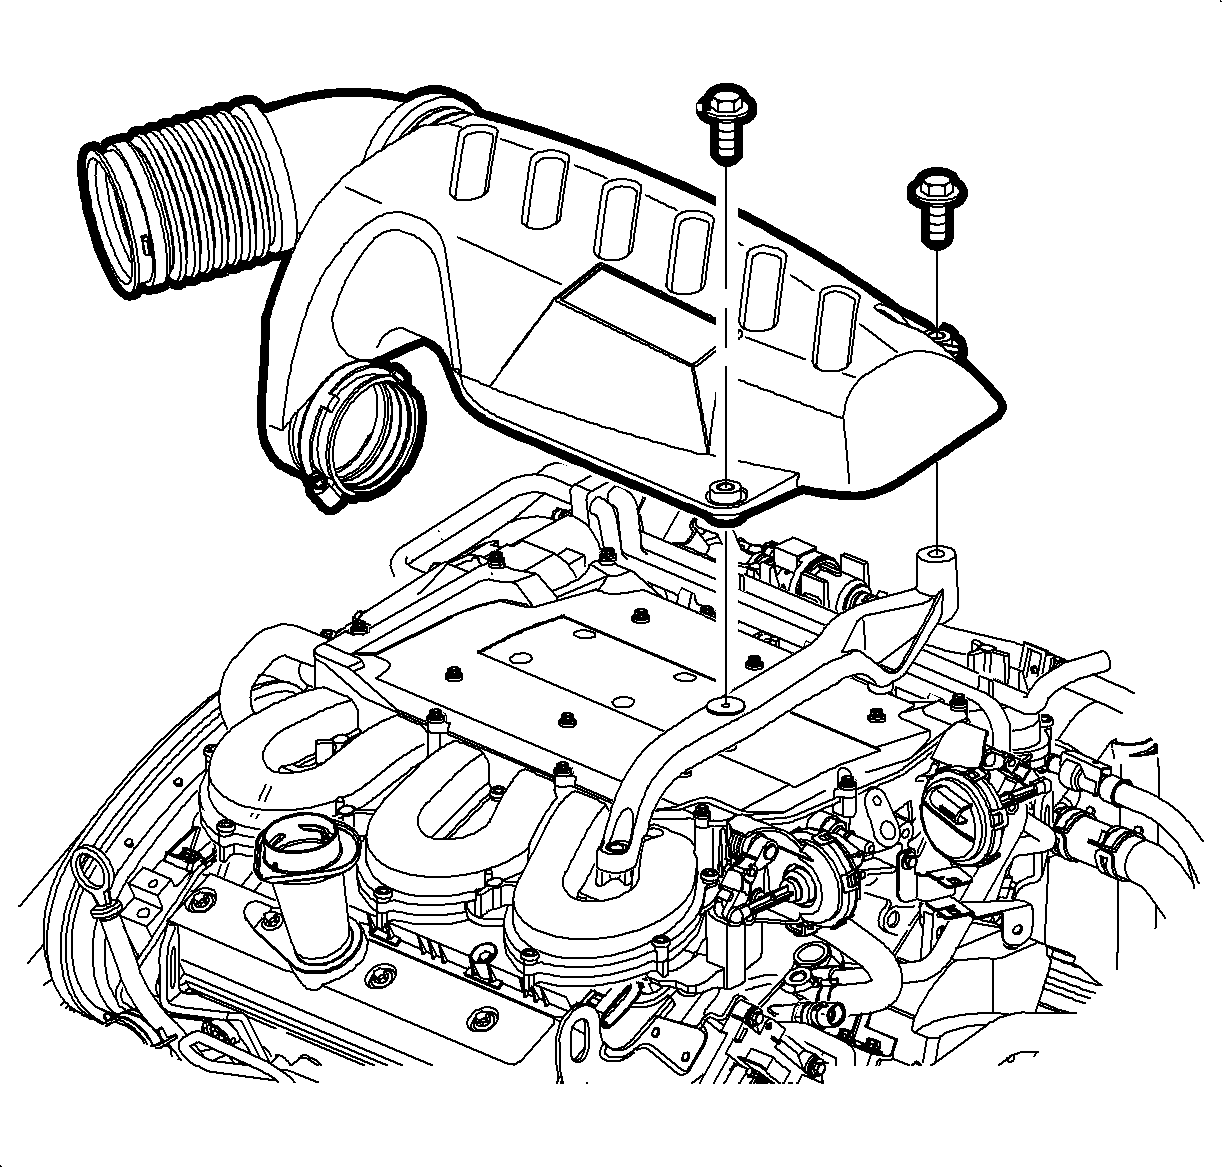
- Loosen the clamp at the air cleaner assembly and throttle body assembly.
- Remove the attachment bolts from the outlet resonator/duct assembly to support bracket.
- Remove the outlet resonator/duct assembly.
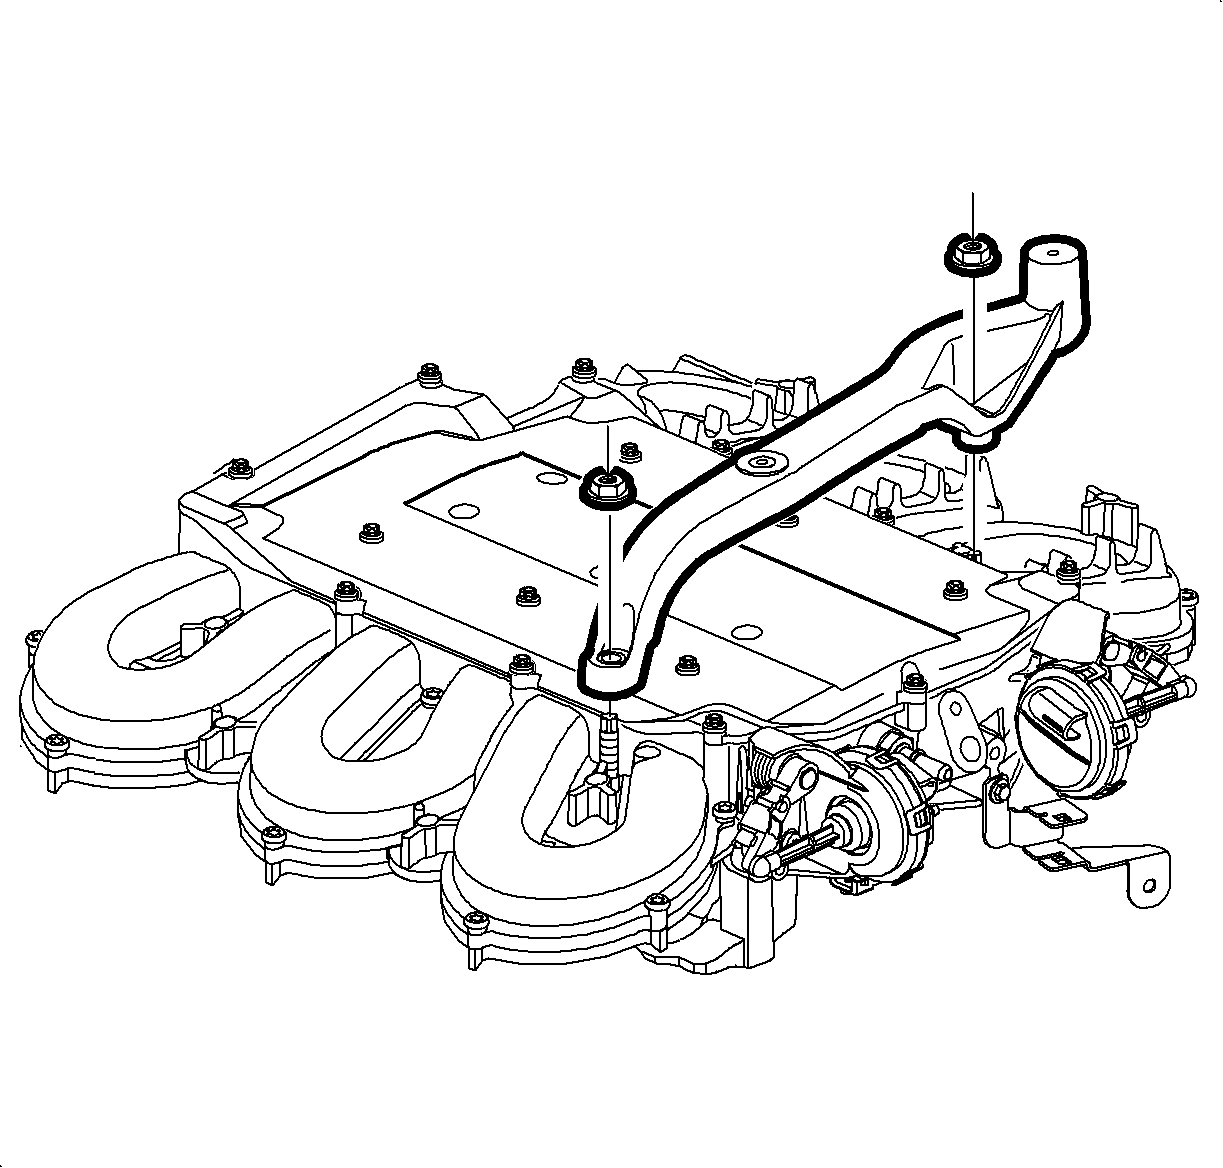
- Remove the resonator outlet duct assembly bracket from the manifold.
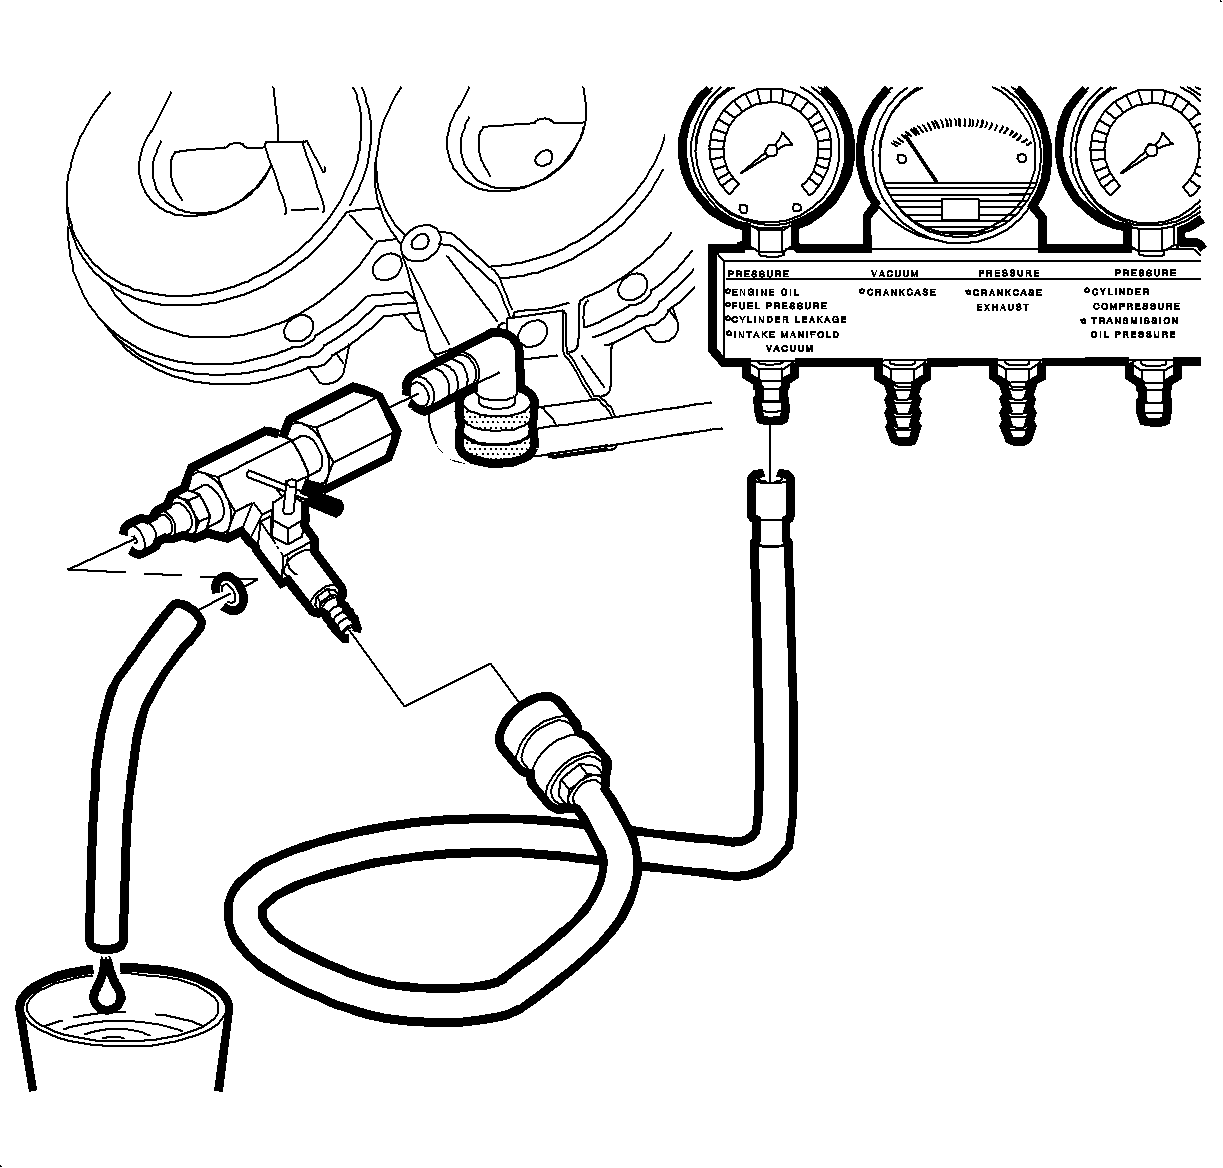
- Relieve the fuel system pressure. Refer to Fuel Pressure Relief .
- Disconnect the SA9127E or equivalent, and the J 44095 or equivalent, after the pressure has been relieved.
- Disconnect the fuel transfer line at quick connect from the fuel line using the J 37088-A , or equivalent.
- Remove the fuel rail bracket bolt to manifold at the rear of the intake manifold.
- Lift and support the intake manifold. Refer to Intake Manifold Replacement .
- While supporting the fuel rail assembly with an open-end wrench, loosen the transfer line fitting at fuel rail.
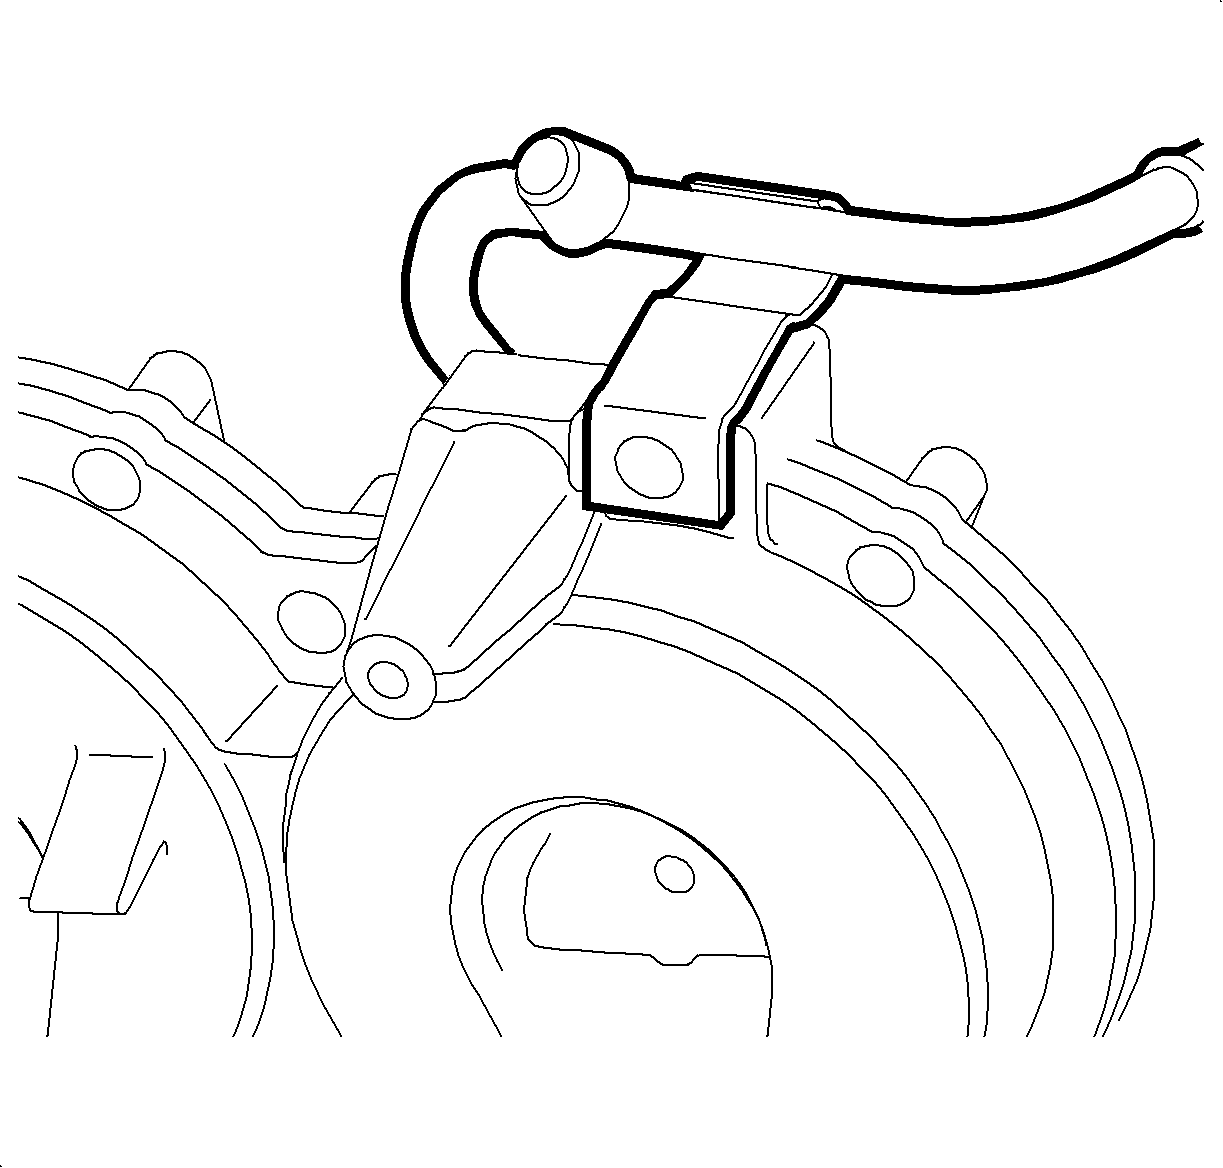
- Remove the fuel line bracket bolt to manifold.
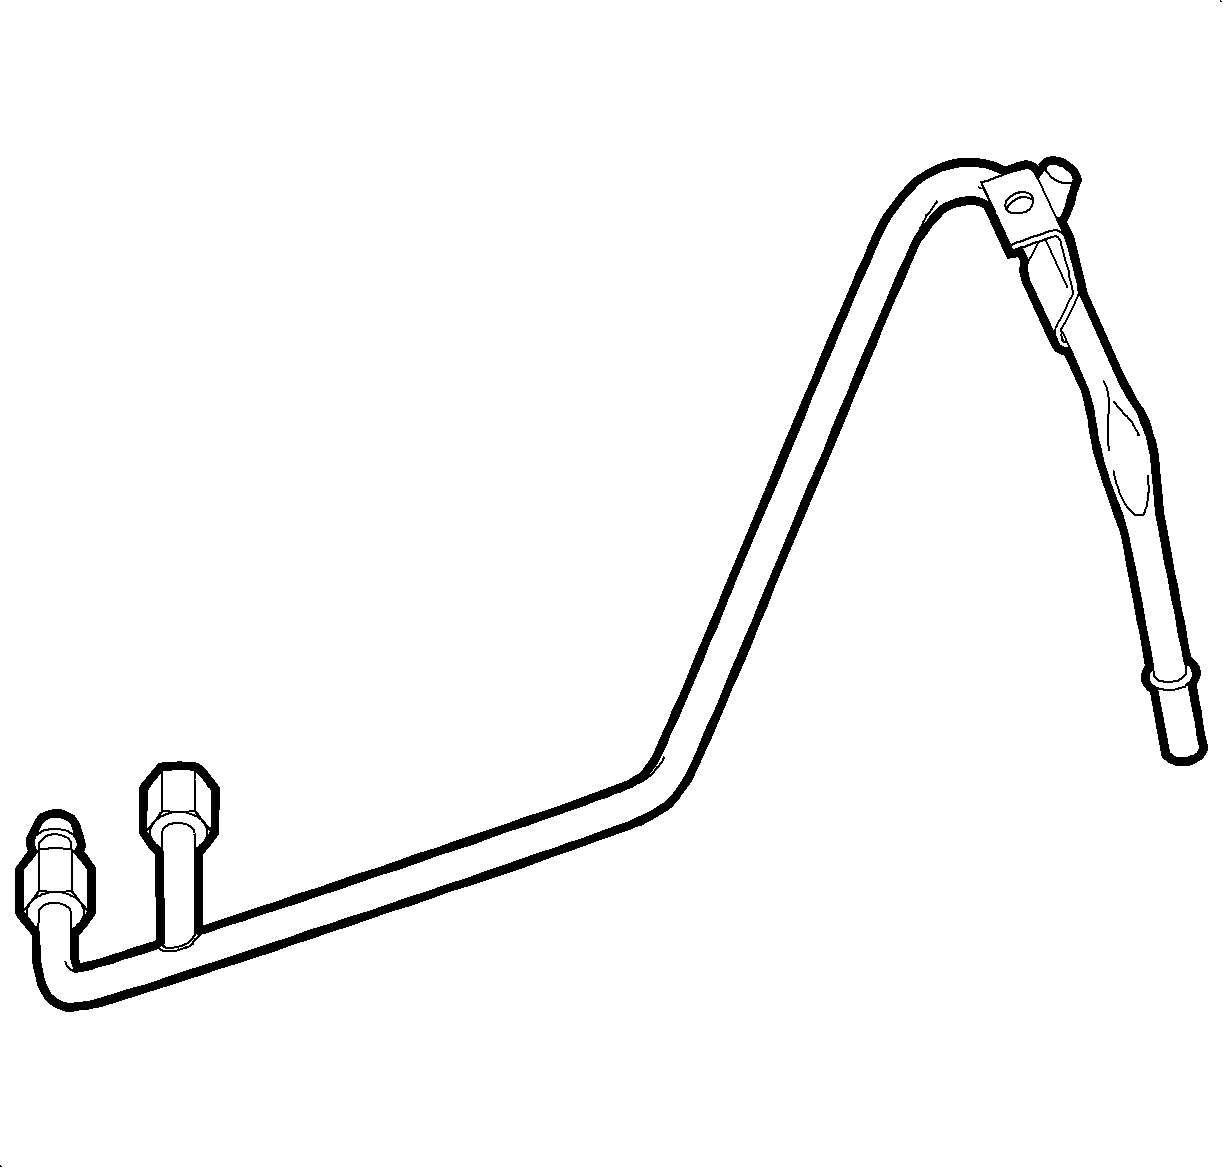
- Remove the fuel transfer line.
Caution: Do not allow smoking or the use of open flames in the area where work on the fuel or EVAP system is taking place. Anytime work is being done on the fuel system, disconnect the negative battery cable, except for those tests where battery voltage is required.
Caution: Whenever fuel line fittings are loosened or disconnected, wrap a shop cloth around the fitting to collect fuel. Place the cloth in an approved container.
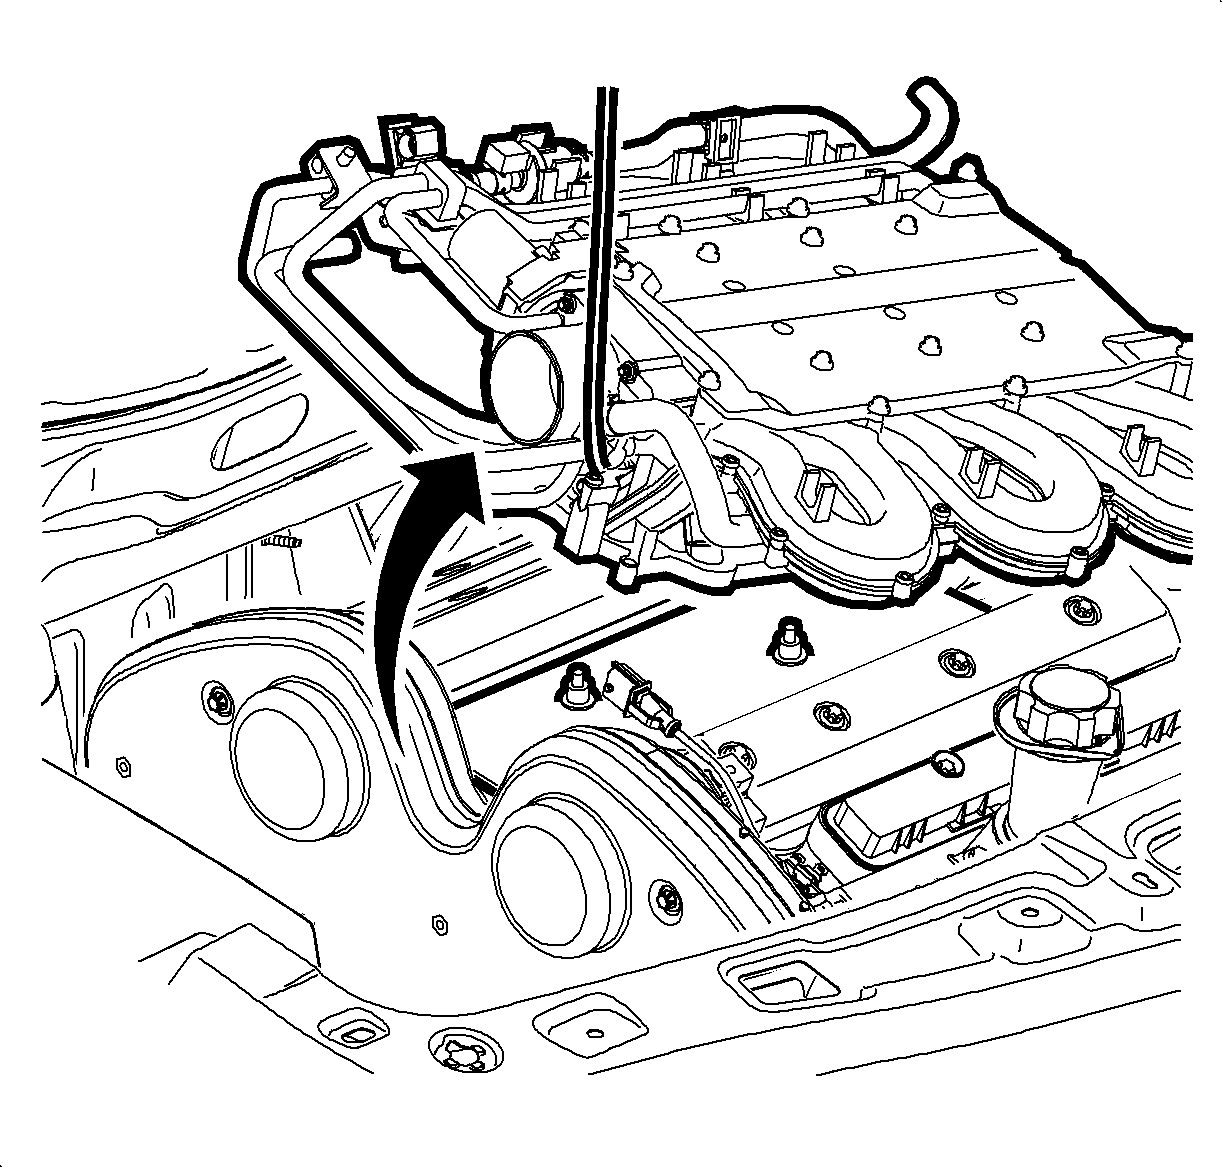
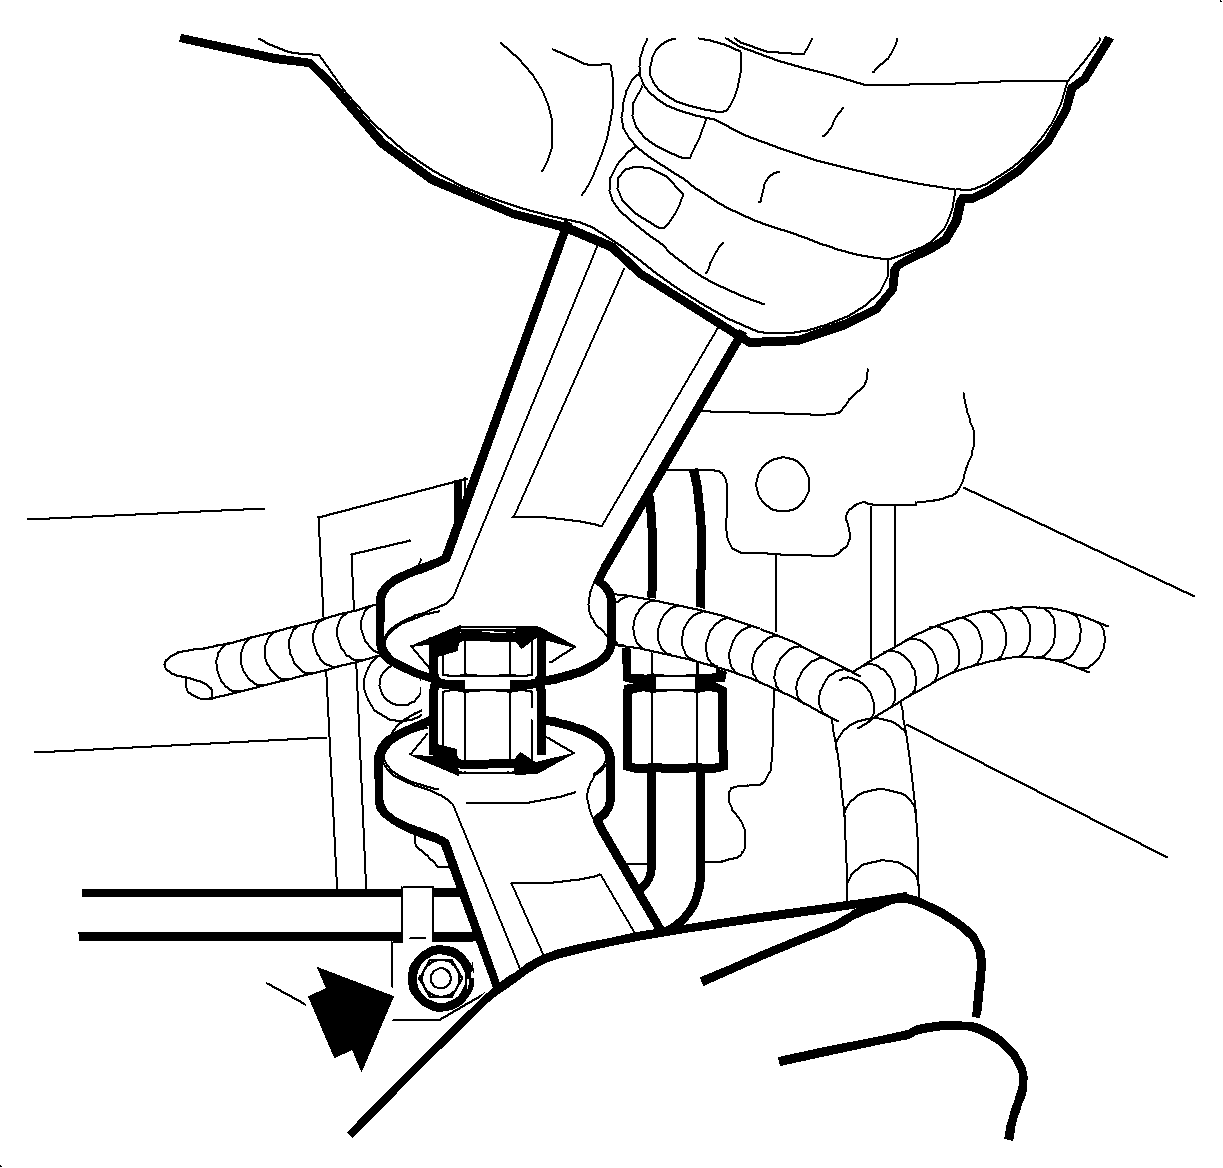
Notice: An open-end wrench must be used to support the fuel line to rail connection during loosening/tightening to avoid damaging the fuel rail assembly.
Installation Procedure
- Install the fuel transfer line into position.
- Hand tighten both fuel transfer line fittings to fuel rails.
- Install the fuel line bracket to manifold.
- Install the intake manifold. Refer to Intake Manifold Replacement .
- Install the fuel transfer line bracket bolt intake manifold.
- Install the outlet resonator/duct assembly bracket to manifold.
- Install the outlet resonator/duct assembly bracket nuts.
- Connect the fuel line to fuel transfer line.
- Install the outlet resonator/duct assembly into position.
- Tighten the clamp at the throttle body assembly.
- Position the outlet resonator/duct assembly to the support bracket and install the bolts.
- Tighten the clamp at the air cleaner assembly.
- Connect the negative battery cable.

Notice: An open-end wrench must be used to support the fuel line to rail connection during loosening/tightening to avoid damaging the fuel rail assembly.
Tighten
Tighten the fuel transfer line fittings-to-fuel
rail L81 to 15 N·m (11 lb ft).
Tighten
Tighten the fuel line bracket-to-manifold bolt to
6 N·m (47 lb in).

Tighten
Tighten the fuel transfer line bracket bolt-to-intake L81
to 4.4 N·m (39 lb in).

Tighten
Tighten the outlet resonator/duct assembly bracket-to-intake
manifold nuts L81 to 5 N·m (44 lb in).
Important: An audible click can be heard when the fuel line is installed. Slightly pull rearward on the line to assure the connection is fully seated.

Tighten
Tighten the outlet resonator/duct assembly-to-support
bracket bolts L81 to 10 N·m (89 lb in).
Tighten
Tighten the battery terminal bolts to 17 N·m
(13 lb ft).
