Tools Required
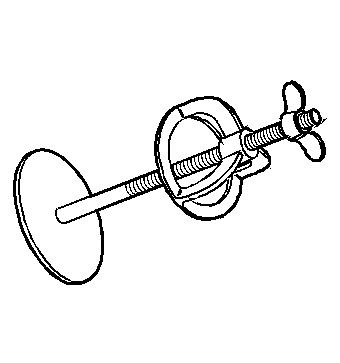
| • | J 23327 Clutch Spring Compressor |
| • | J 25024-A Servo Piston/Clutch Spring Compressor |
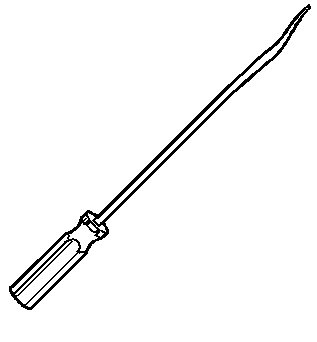
| • | J 28585 Snap Ring Remover |
| • | J 45186 Forward and Direct Clutch Spring Compressor |
- Inspect the sliding surface of the disc and the plate for being worn or burnt. Replace the disc if it is worn or burnt.
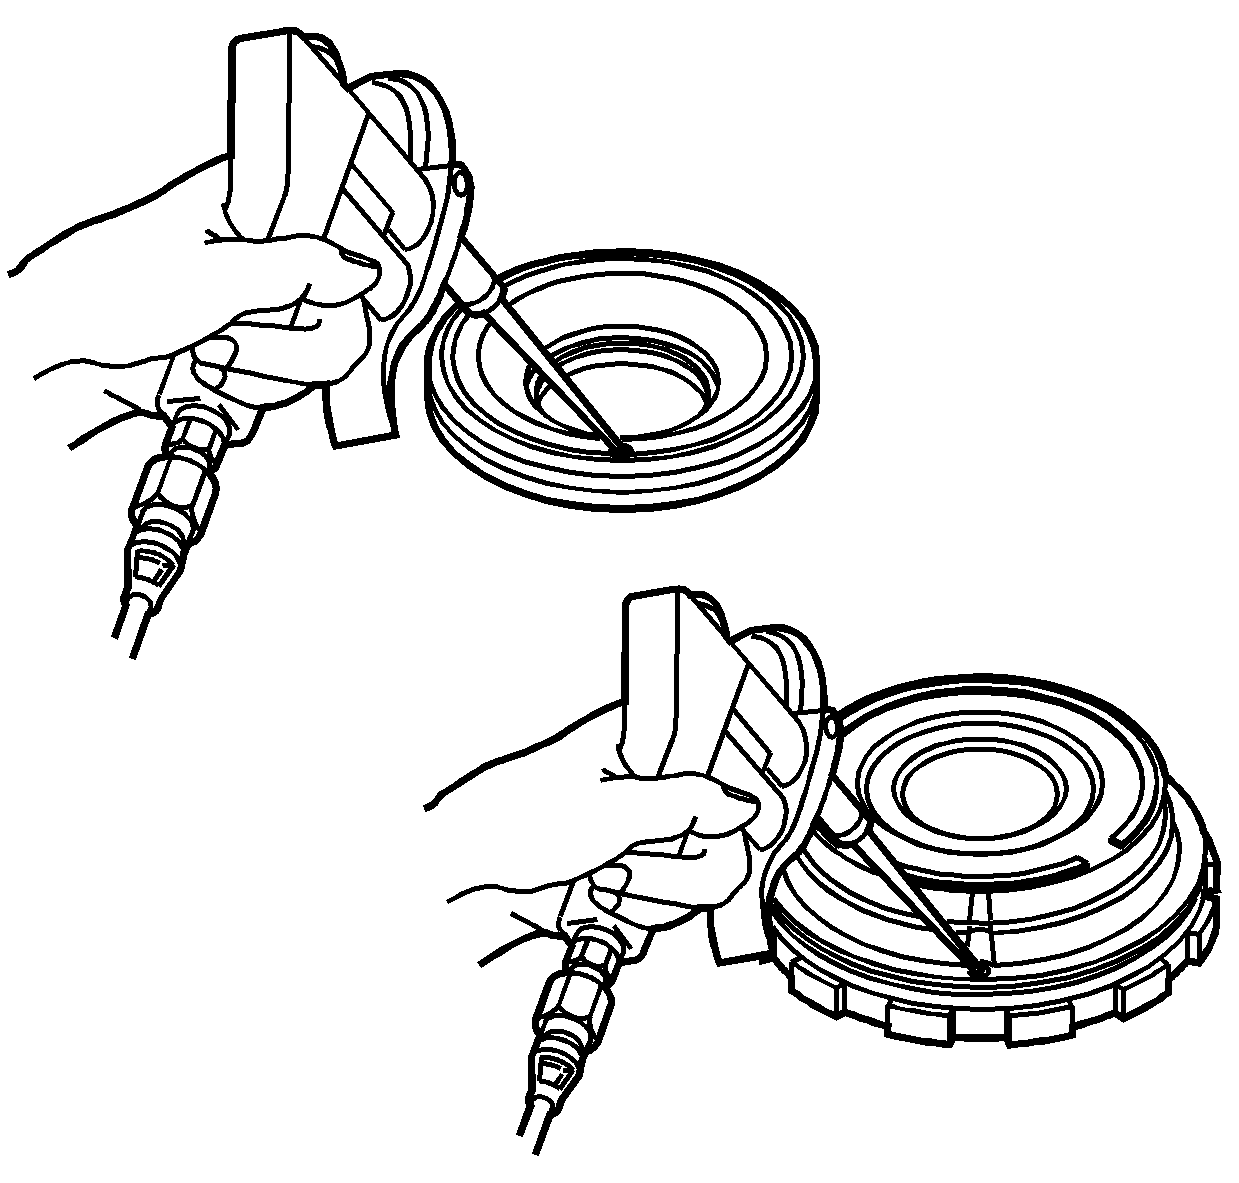
- Shake the piston to be sure the ball check valve is free.
- Apply compressed air to the ball check valve to be sure it is not leaking.
- Apply automatic transmission fluid to the new forward clutch piston seals.
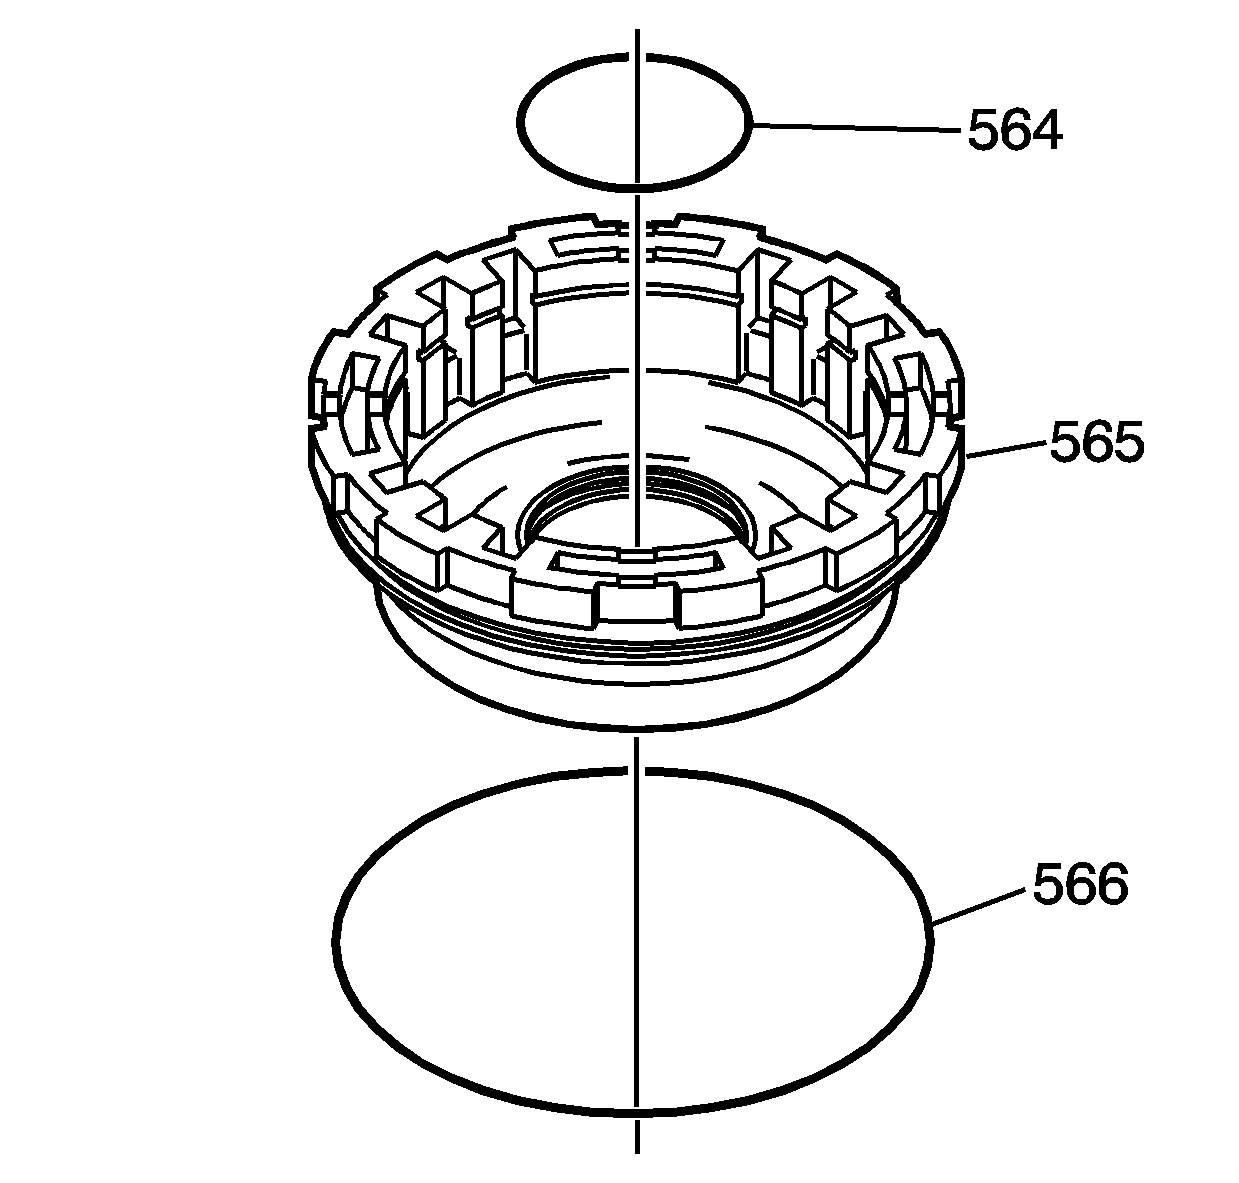
- Install the forward clutch piston inner seal (564) and the forward clutch piston outer seal (566) onto the forward clutch piston (565).
- Apply automatic transmission fluid to the inner surface of the forward clutch drum.
- Press the forward clutch piston (565) into the forward and direct clutch housing assembly - with input shaft.
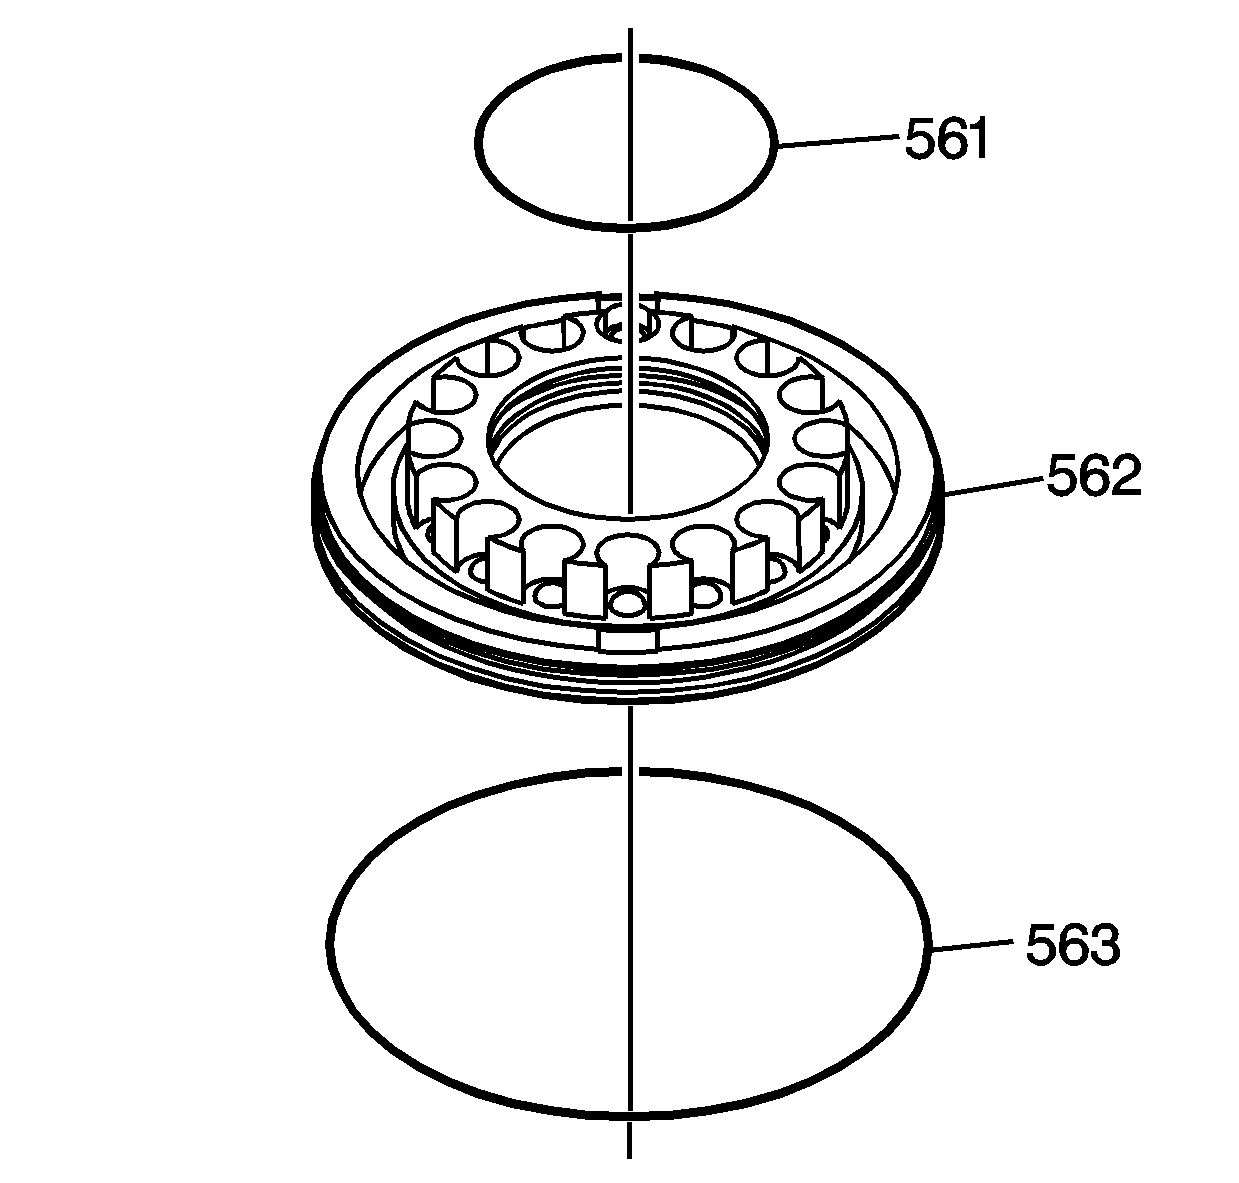
- Apply automatic transmission fluid to the new direct clutch piston seals.
- Install the direct clutch piston inner seal (561) and the direct clutch piston outer seal (563) onto the direct clutch piston (562).
- Apply automatic transmission fluid to the inner surface of the forward clutch piston.
- Press the direct clutch piston (562) into the forward clutch piston.
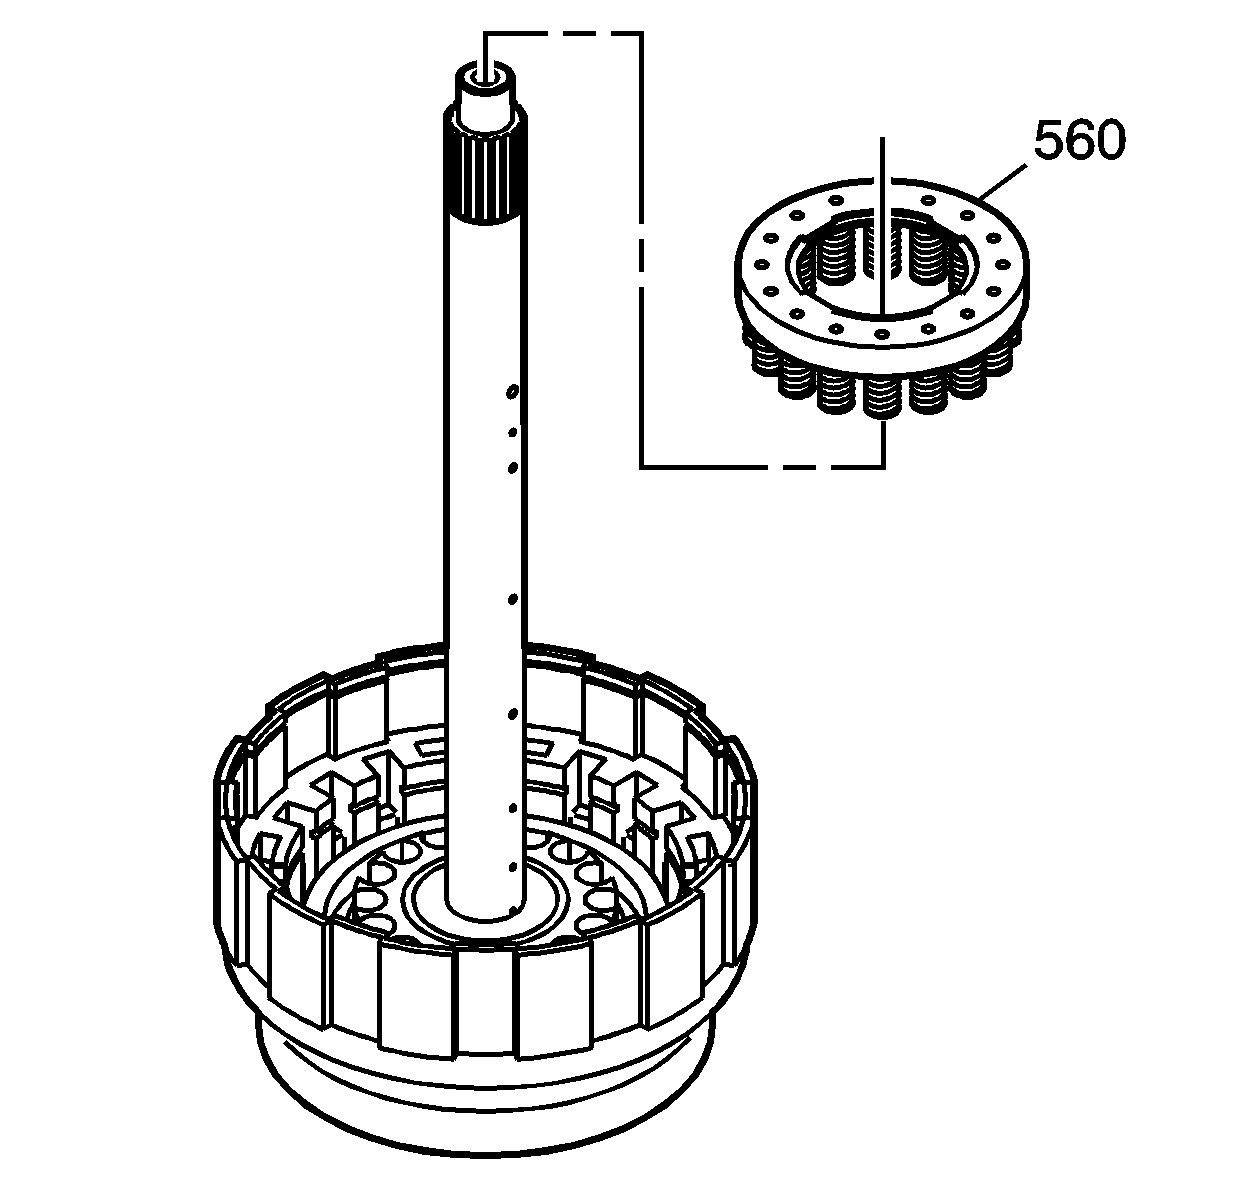
- Install the direct clutch spring assembly (560) onto the direct clutch piston, indexing the springs into the holes in the direct clutch piston (562).
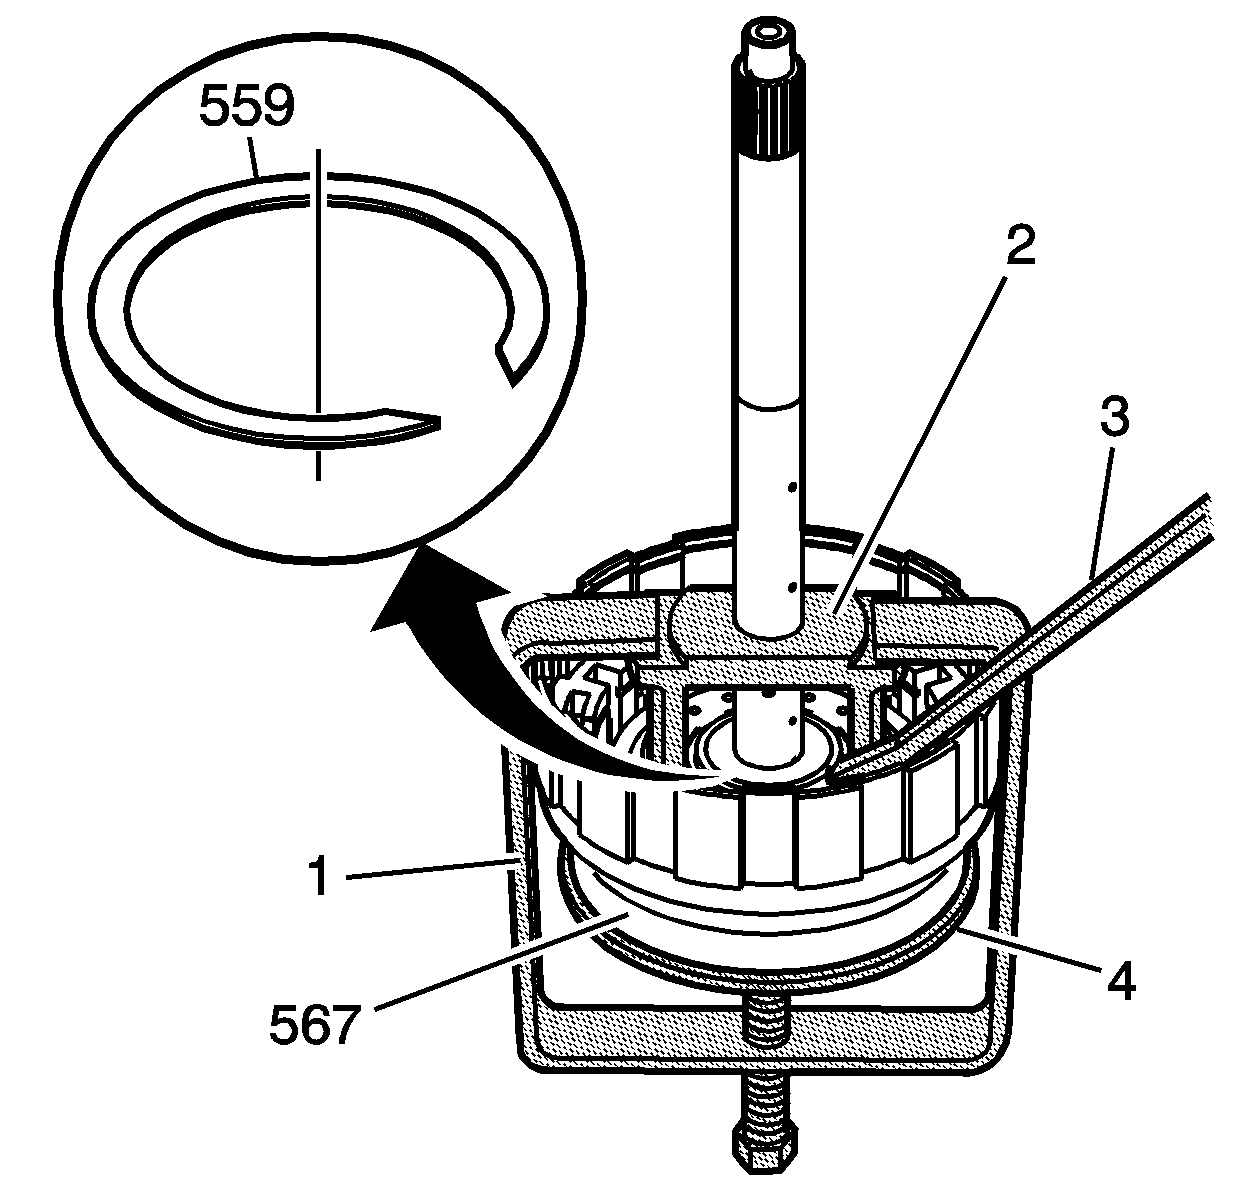
- Install J 45186 (2) onto the shaft of the forward and direct clutch housing assembly - with input shaft (567). Place J 21420-2 (4), which is part of J 23327 , on the bottom of the forward and direct clutch housing assembly - with input shaft (567). Position J 25024-A (1) as shown and compress the direct clutch spring assembly.
- Place the assembly in a vise, holding by J 25024-A (1).
- Install the direct clutch spring retaining ring (559) in the groove of the input shaft assembly with J 28585 (3).
- Remove the tools.
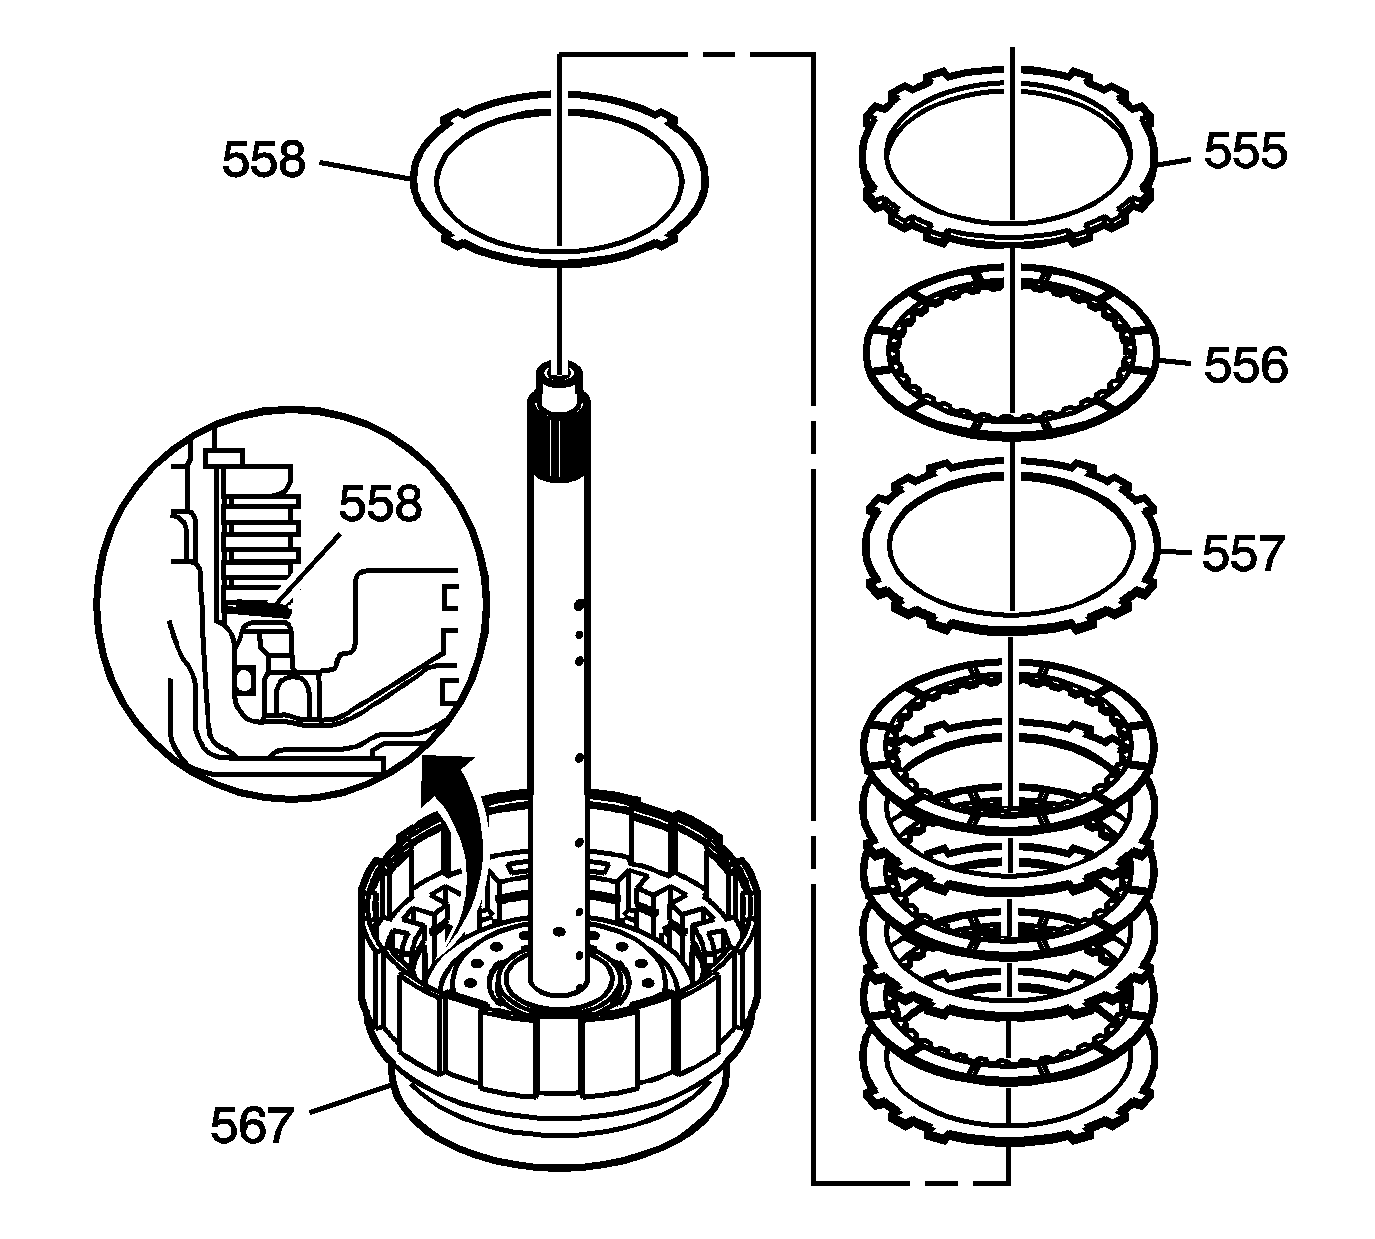
- Install the direct clutch apply plate (558).
- Install the 4 direct clutch steel plates (557) and the 4 direct clutch fiber plates (556).
- Install the direct clutch backing plate (555).
- Install the direct clutch backing plate retaining ring (554) into the groove in the forward and direct clutch housing assembly - with input shaft (567) using J 28585 .
- Install the 4 forward clutch steel plates (553) and the 4 forward clutch fiber plates (552).
- Install the forward clutch backing plate (551).
- Install the forward clutch backing plate retaining ring (550) into the groove in the forward and direct clutch housing assembly - with input shaft (567) using J 28585 .
- Install a new 0.81 mm (0.032 in) thick forward clutch housing thrust bearing race (568) without any markings.
- Install the forward clutch housing thrust bearing (569).
- Apply automatic transmission fluid to the new input shaft O-ring seal (570).
- Install the new input shaft O-ring seal (570) into the groove of the forward and direct clutch housing assembly - with input shaft (567).
Important: Soak the new clutch discs in automatic transmission fluid for at least 2 hours before installation.
Caution: Wear safety glasses when using compressed air in order to prevent eye injury.
Important: Do not damage the forward clutch piston seals.
Important: Do not damage the direct clutch piston seals.
Important: Do not align the end gap of the direct clutch spring retaining ring (559) with the spring retainer claw.
Important: Make sure the direct clutch apply plate is facing the correct direction.
Important: Make sure you have the correct number of plates, and that they are installed in the proper direction.
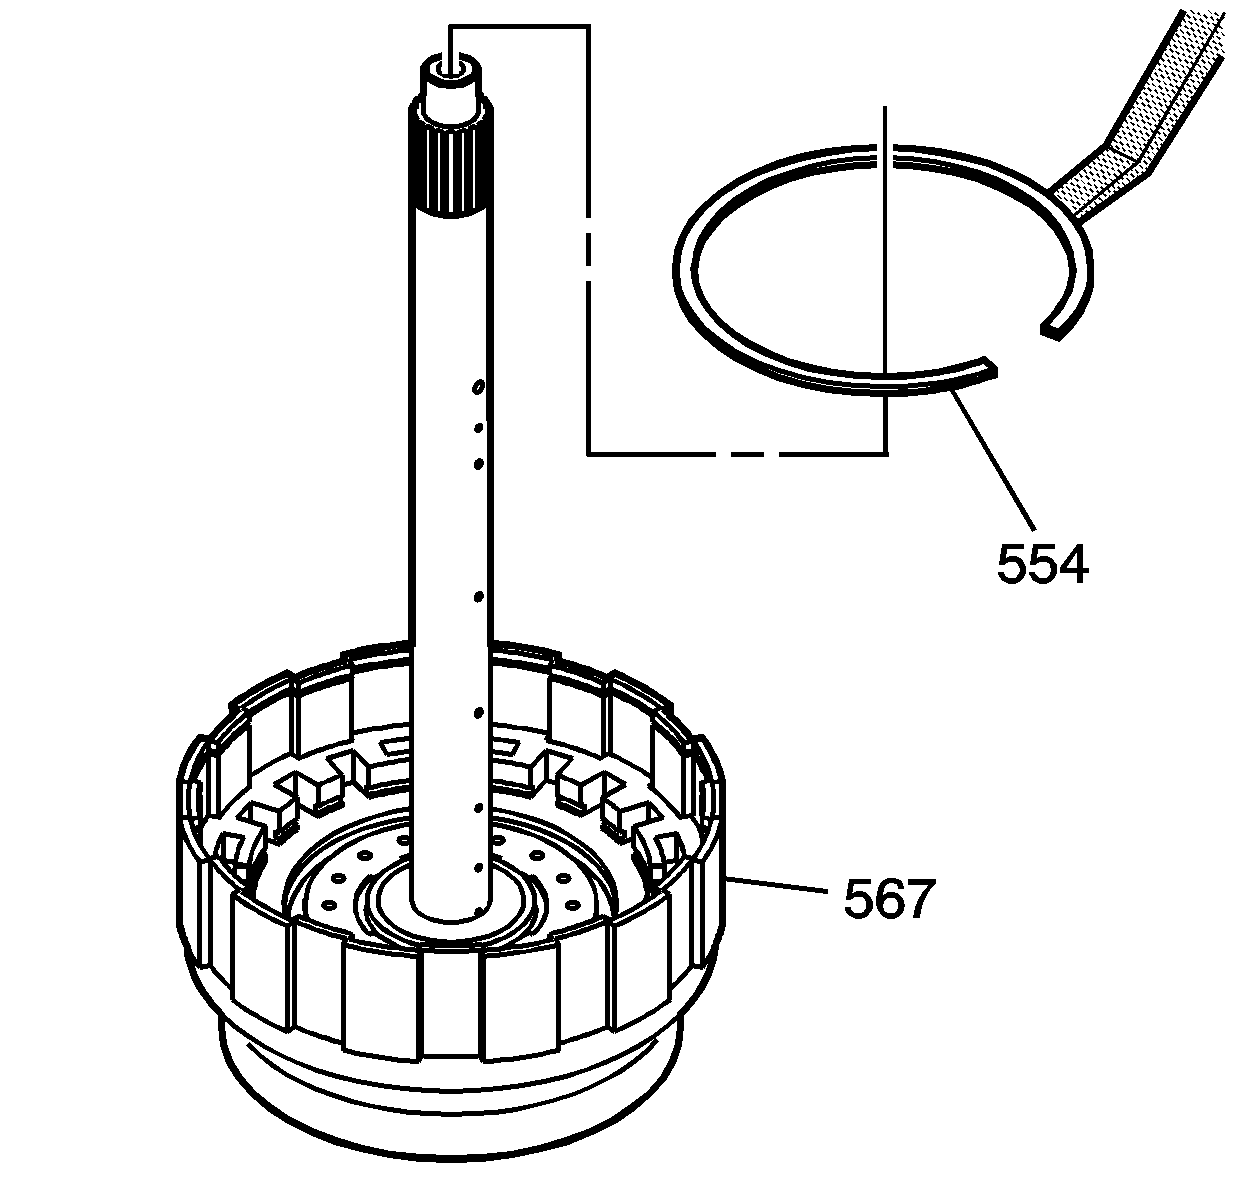
Important: Make sure that the end gap of the direct clutch backing plate retaining ring (554) is not aligned with any of the cut-outs.

Important: Make sure you have the correct number of plates, and that they are installed in the proper order.
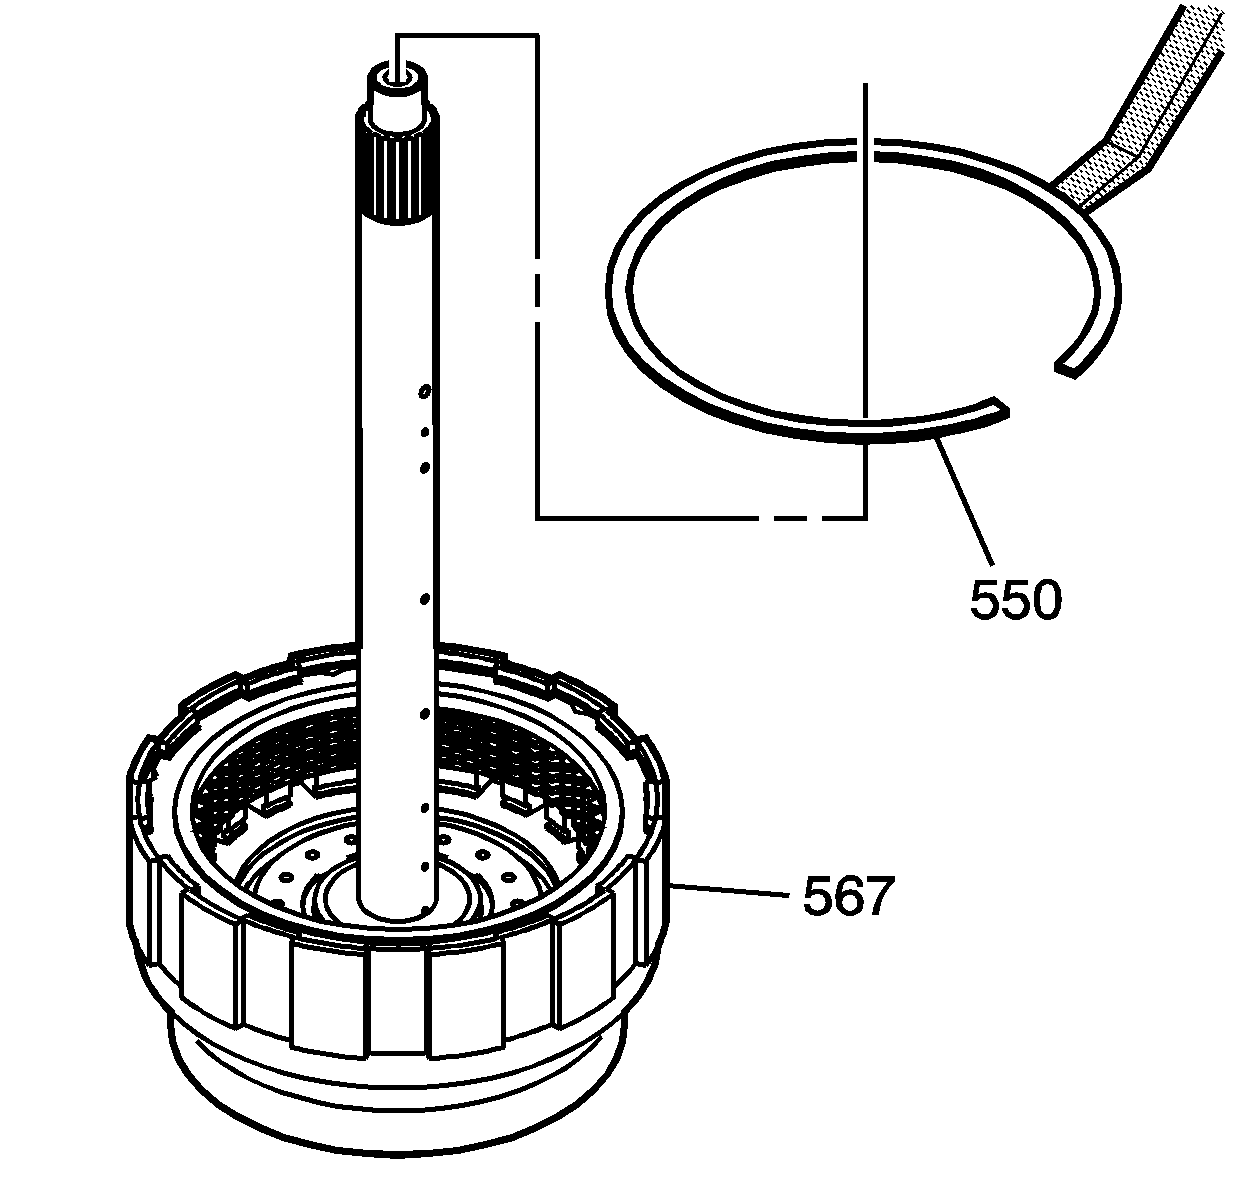
Important: Make sure that the end gap of the forward clutch backing plate retaining ring (550) is not aligned with any of the cut-outs.

Important: Depending on the transmission build, the forward clutch housing thrust bearing race could be 0.81 mm (0.032 in) or 1.15 mm (0.045 in) thick. Replace with only the 0.81 mm (0.032 in) thick race.

