For 1990-2009 cars only
Removal Procedure
- Remove the rear compartment closeout panel. Refer to Rear Compartment Closeout Panel Replacement .
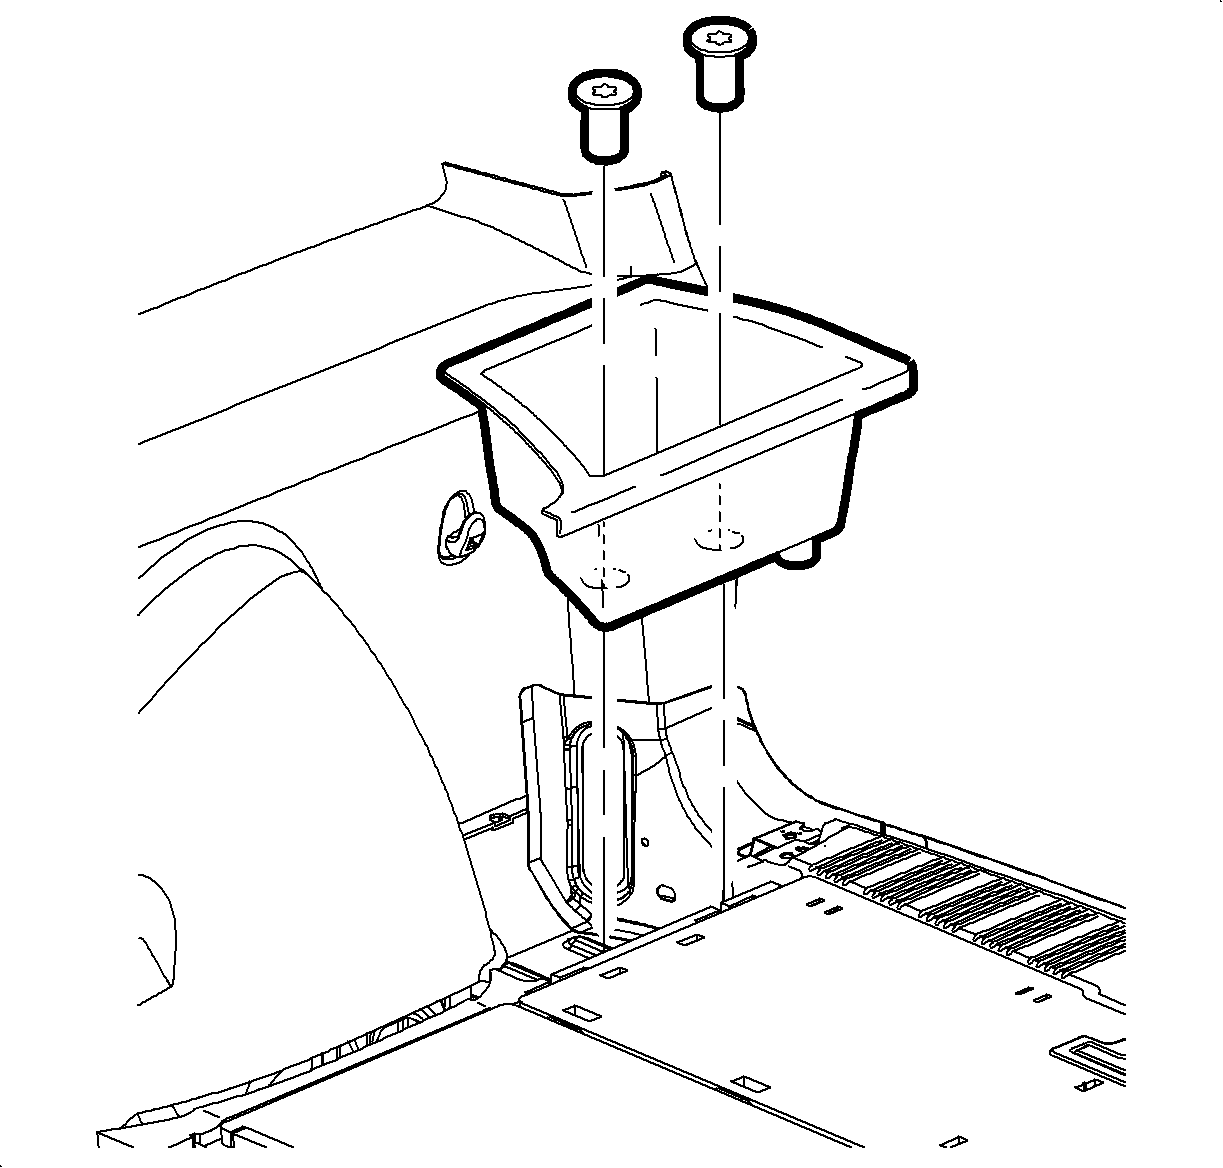
- Remove the side stowage tray fasteners and remove the stowage tray.
- Remove the right passenger quarter trim. Refer to Rear Quarter Lower Trim Panel Replacement .
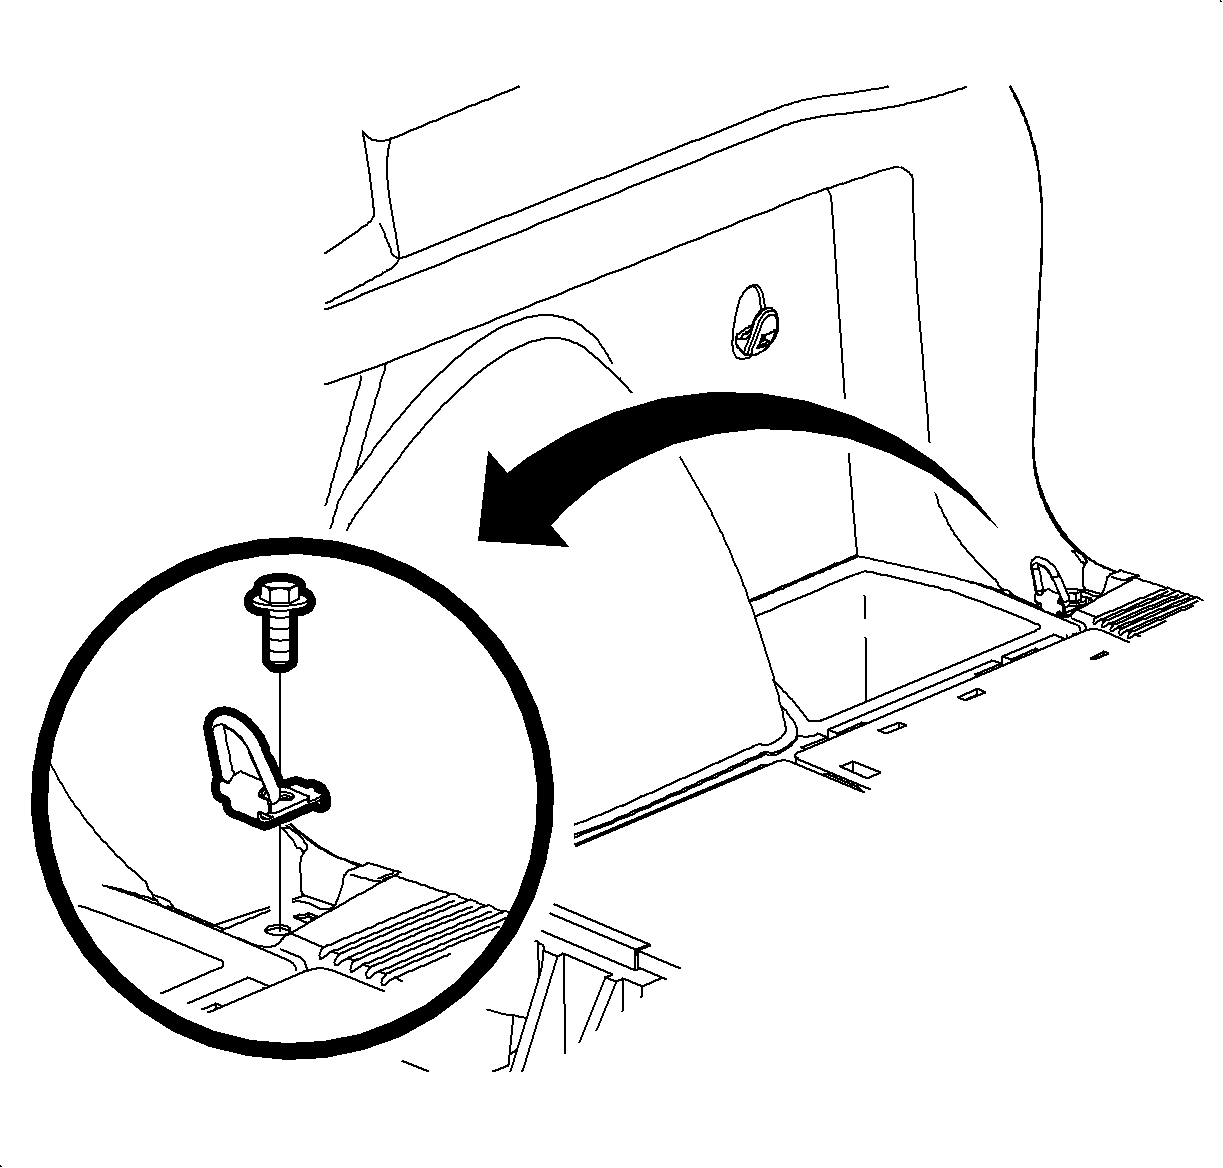
- Remove the driver rear hold down hook fasteners and remove the hold down hooks
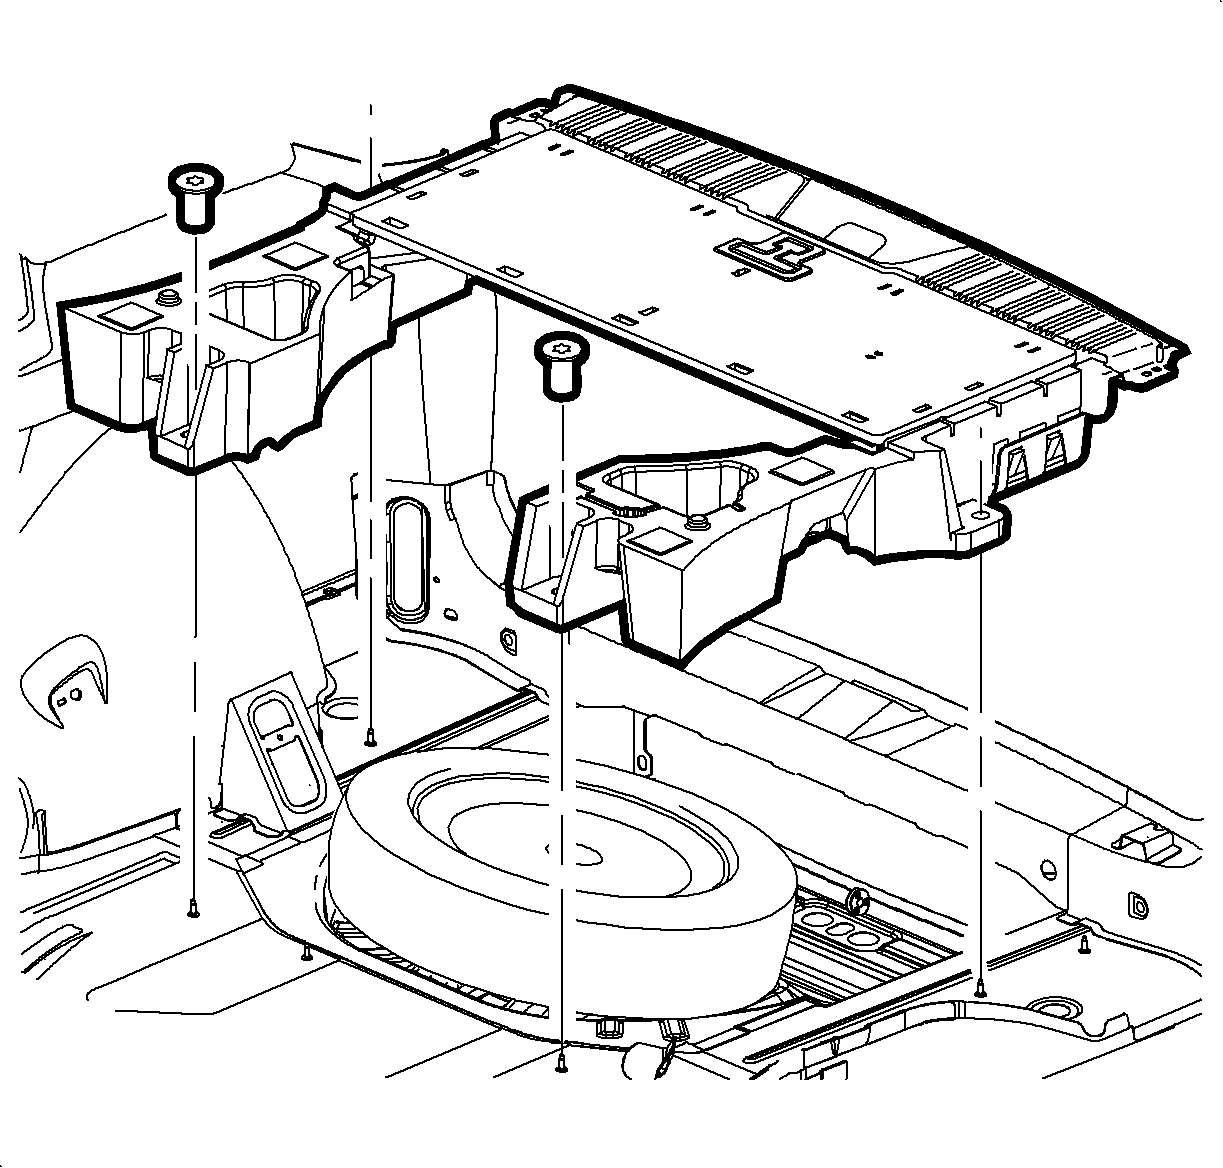
- Remove the load floor fasteners.
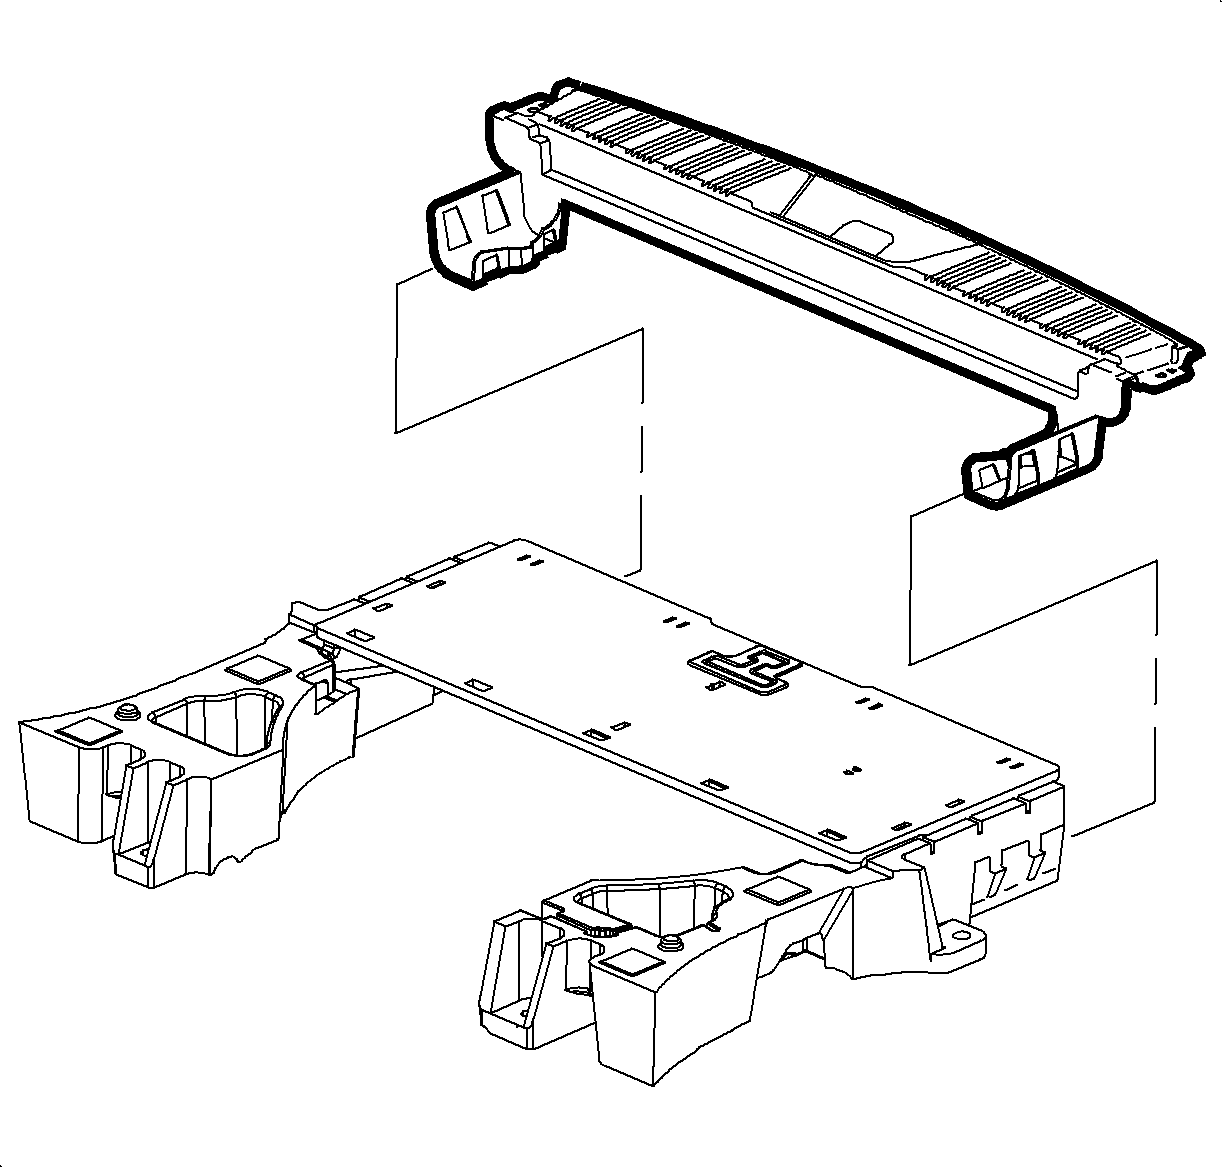
- Pull upward on the sill molding to disengage the sill molding clips.
- Carefully slide the driver side load floor leg out from under the side trim.
- Remove the sill molding from the load floor substrate.


Installation Procedure
- Attach the sill molding to the load floor substrate.
- Position the load floor substrate to the vehicle.
- Push on the sill molding to engage the clips.
- Secure the weatherstrip over the edge of the sill molding.
- Install the load floor substrate fasteners.
- Install the driver side quarter trim. Refer to Rear Quarter Lower Trim Panel Replacement .
- Install the driver side hold down hooks with fasteners.
- Position the stowage tray into the load floor.
- Install the stowage tray fasteners.
- Install the rear compartment closeout panel. Refer to Rear Compartment Closeout Panel Replacement .


Notice: Refer to Fastener Notice in the Preface section.
Tighten
Tighten the fasteners to 2.5 N·m (22 lb in).


Tighten
Tighten the fasteners to 2.5 N·m (22 lb in).
