Creaking Noise from Rear of Vehicle While Driving

| Subject: | Creaking Noise from Rear of Vehicle While Driving (Replace and Secure all Four Insulators to Rear Coil Springs) -- Due to a change in coil spring orientation and a new coil spring insulator P/N 22705168, this bulletin has been revised and supersedes bulletin 02-T-14 which should be discarded. |
| Models: | 2002 Saturn VUE vehicles up to and including VIN 2S825308 |
Condition
Some customers may comment about a creaking noise coming from the right or left rear of the vehicle while driving.
Cause
This condition may be caused by a dislodged coil spring insulator from a seated position during installation, allowing metallic contact of the coil spring to seat.
Correction
To correct this condition, replace upper and lower coil spring insulators (both sides of vehicle) with new coil spring insulator P/N 22705168. Secure insulators to coil springs and reinstall springs ensuring that part number identification tape located on the coil spring is oriented inboard of the vehicle and at the top of the spring. Refer to service procedure in this bulletin.
Service Procedure
Removal
Caution: Make sure vehicle is properly supported and squarely positioned on the hoist. To help avoid personal injury when a vehicle is on the hoist, provide additional support for the vehicle opposite from which components are being removed.
- Raise vehicle.
- Remove wheel and tire.
- Remove stabilizer link to lower control arm nut.
- Securely position a screw type jack stand under lower control arm. Using the jack stand, apply a small force to assist with bolt removal.
- Remove lower shock absorber bolt.
- Remove lower control arm to knuckle bolt.
- Using jack stand slowly unload coil spring.
- Remove coil spring and spring insulators.
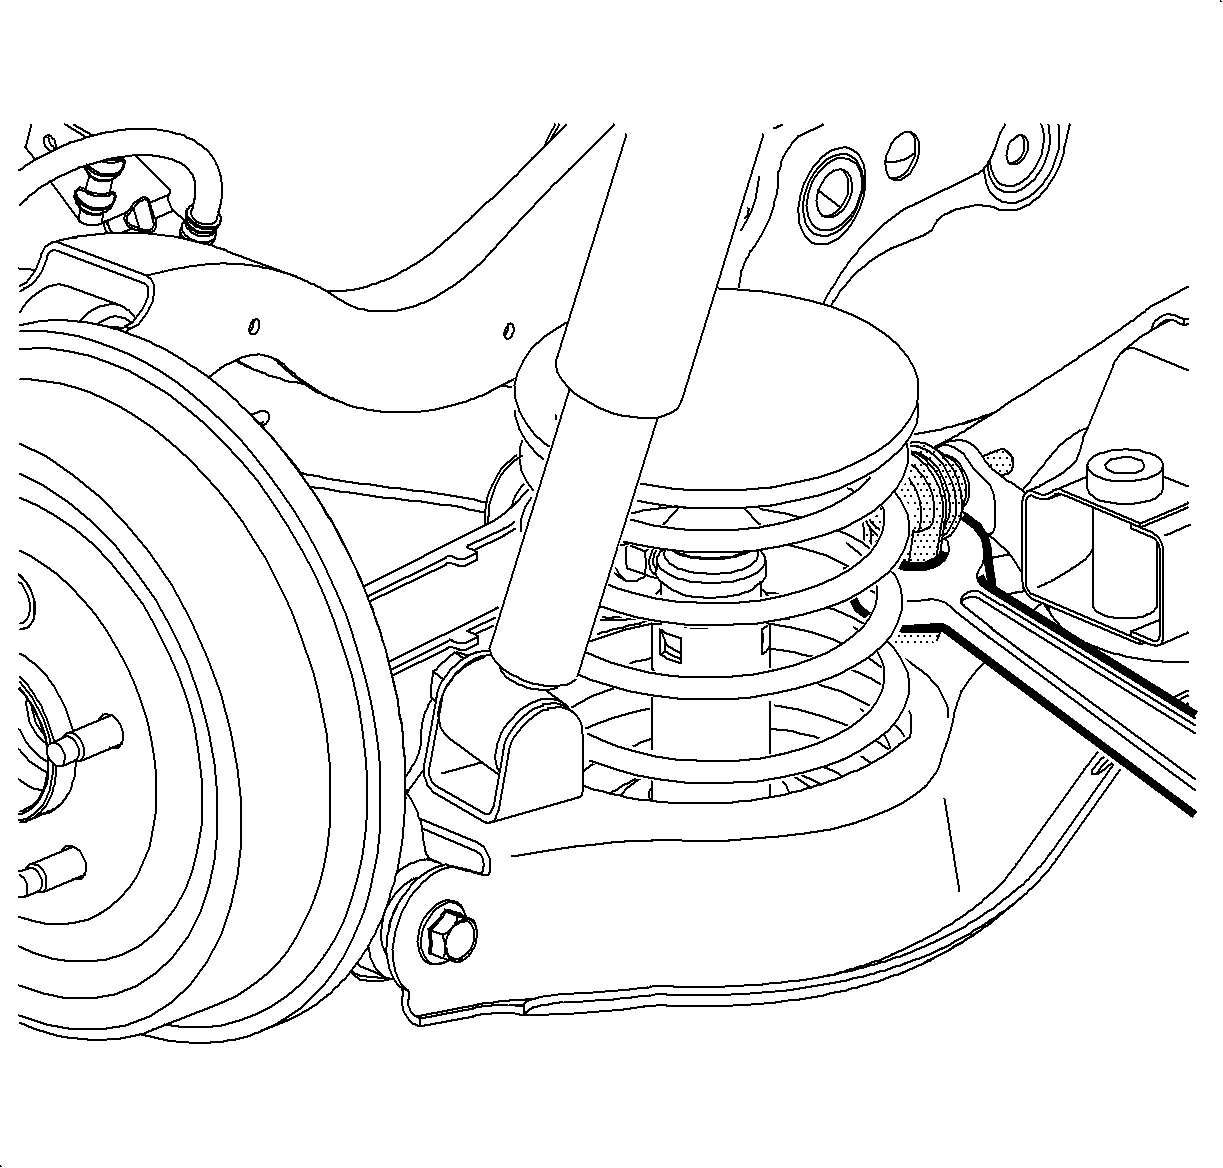
Important: Hold stabilizer link with wrench to avoid damage to stabilizer link.
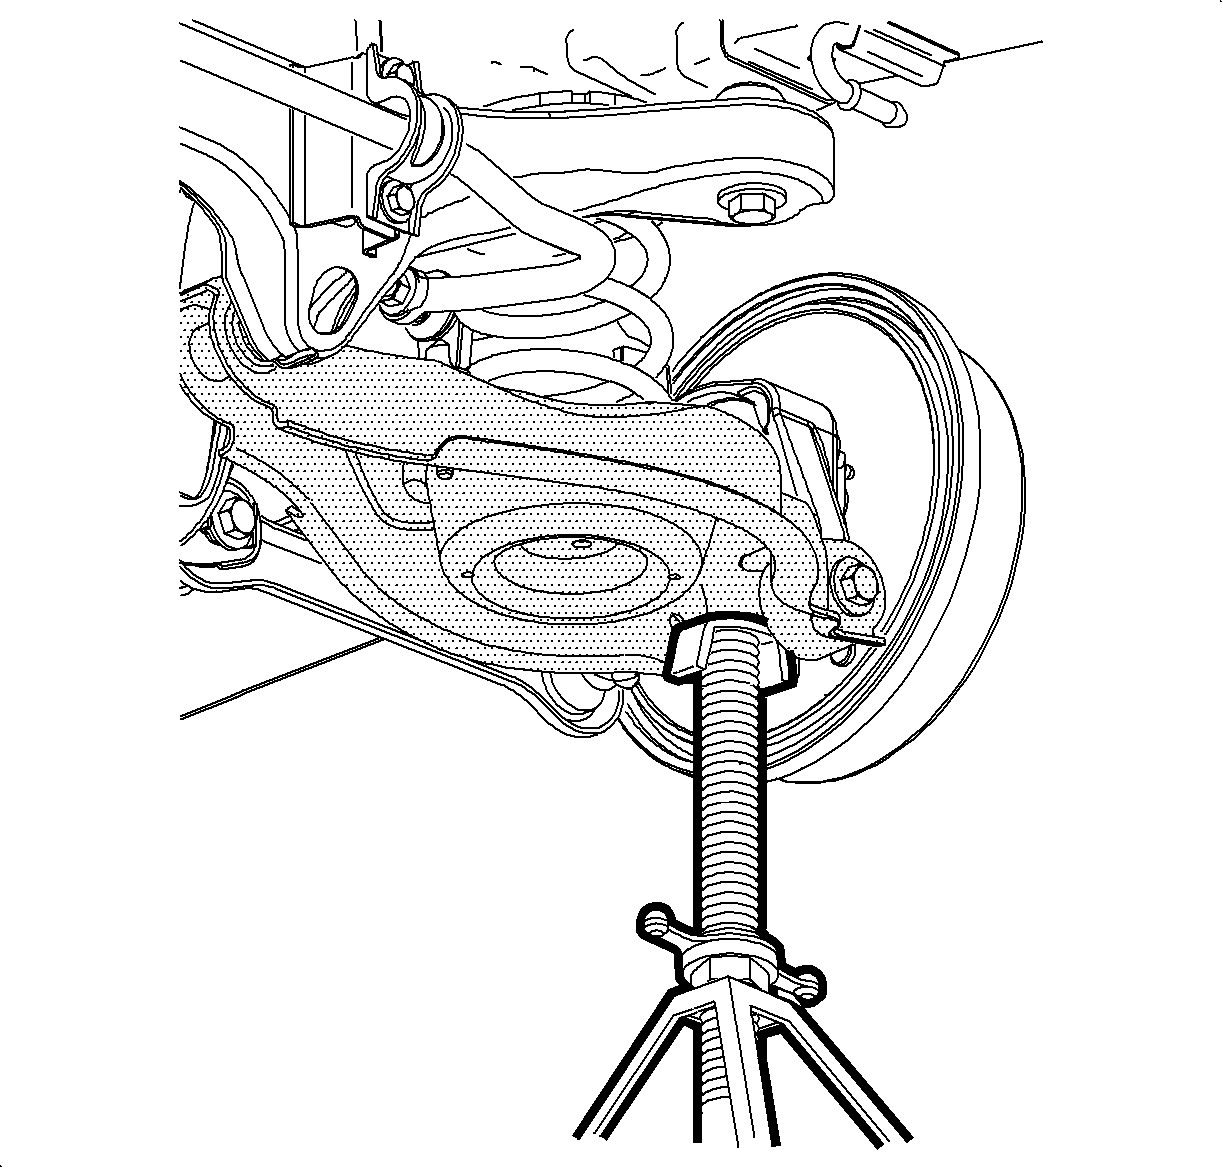
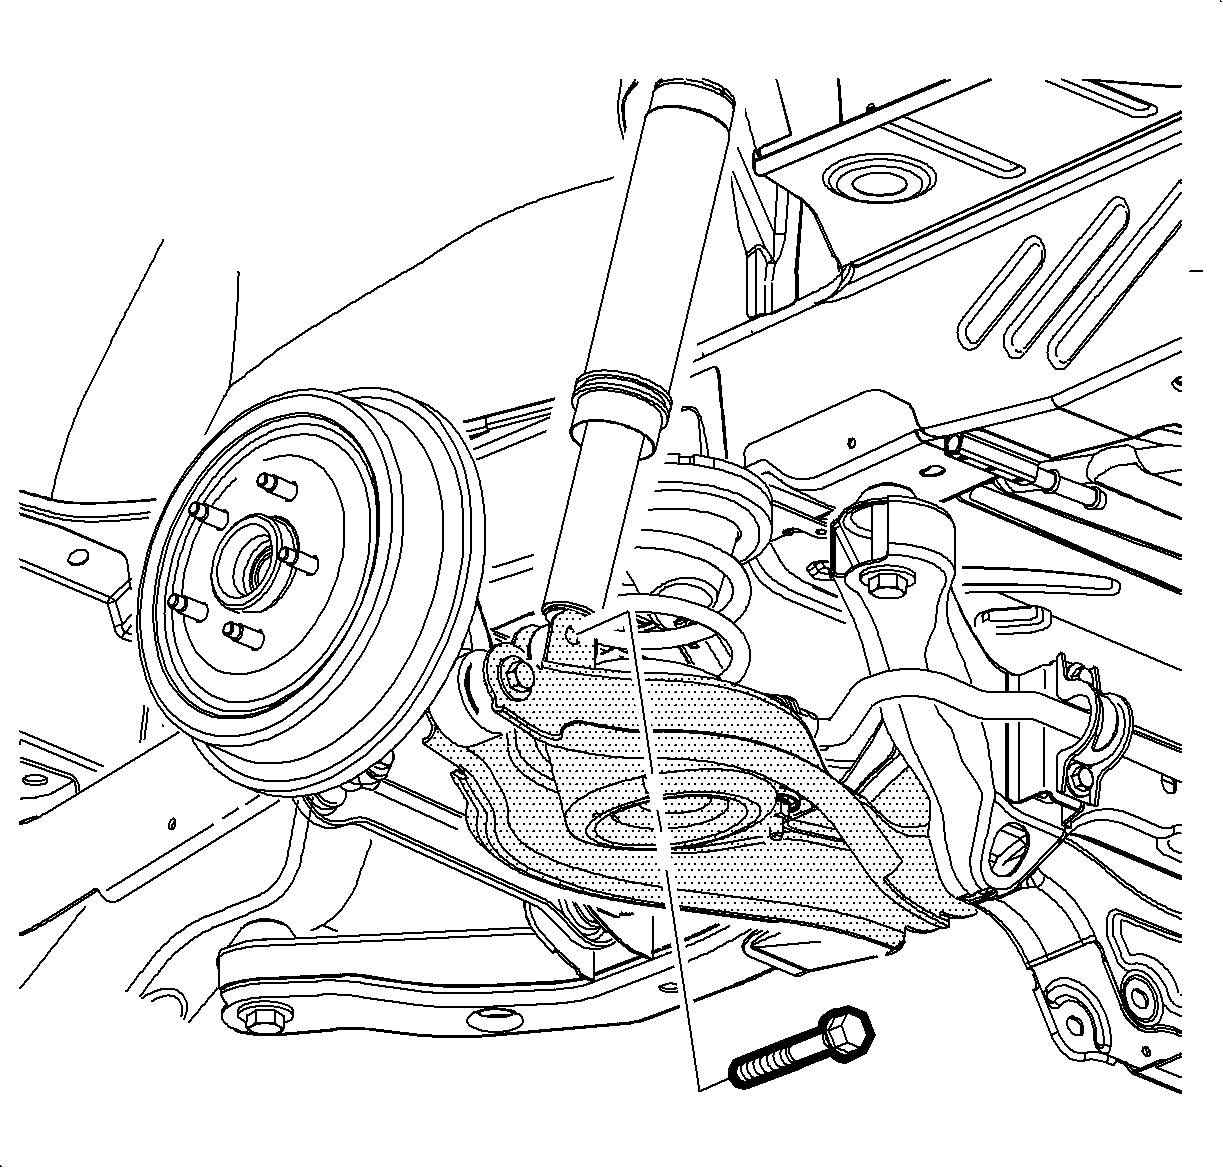
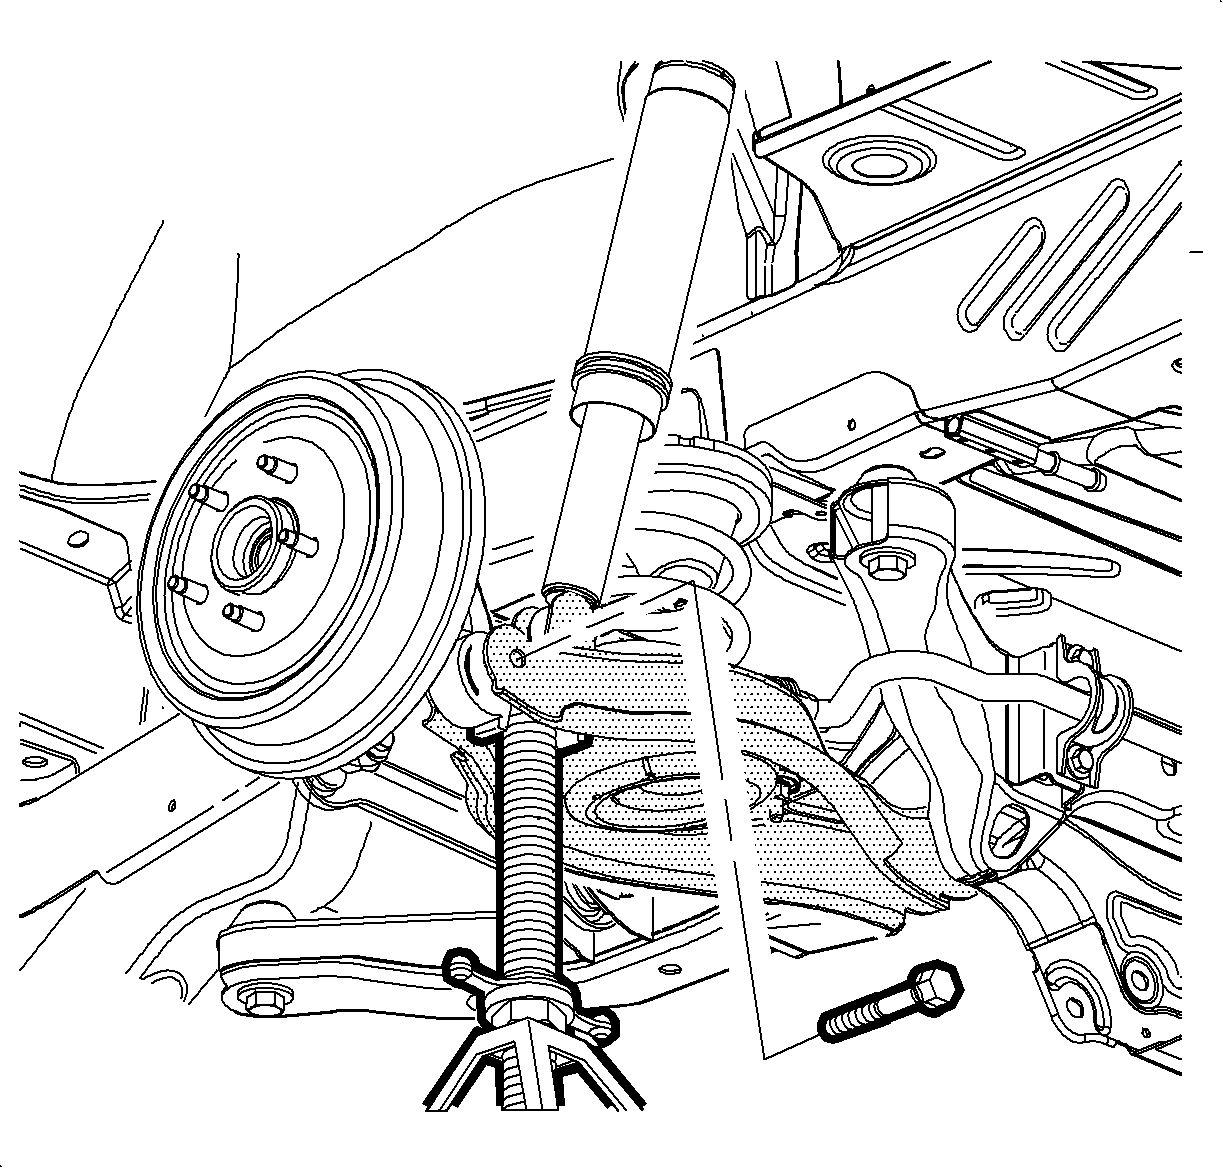
Caution: Lower jack stand slowly to avoid personal injury.
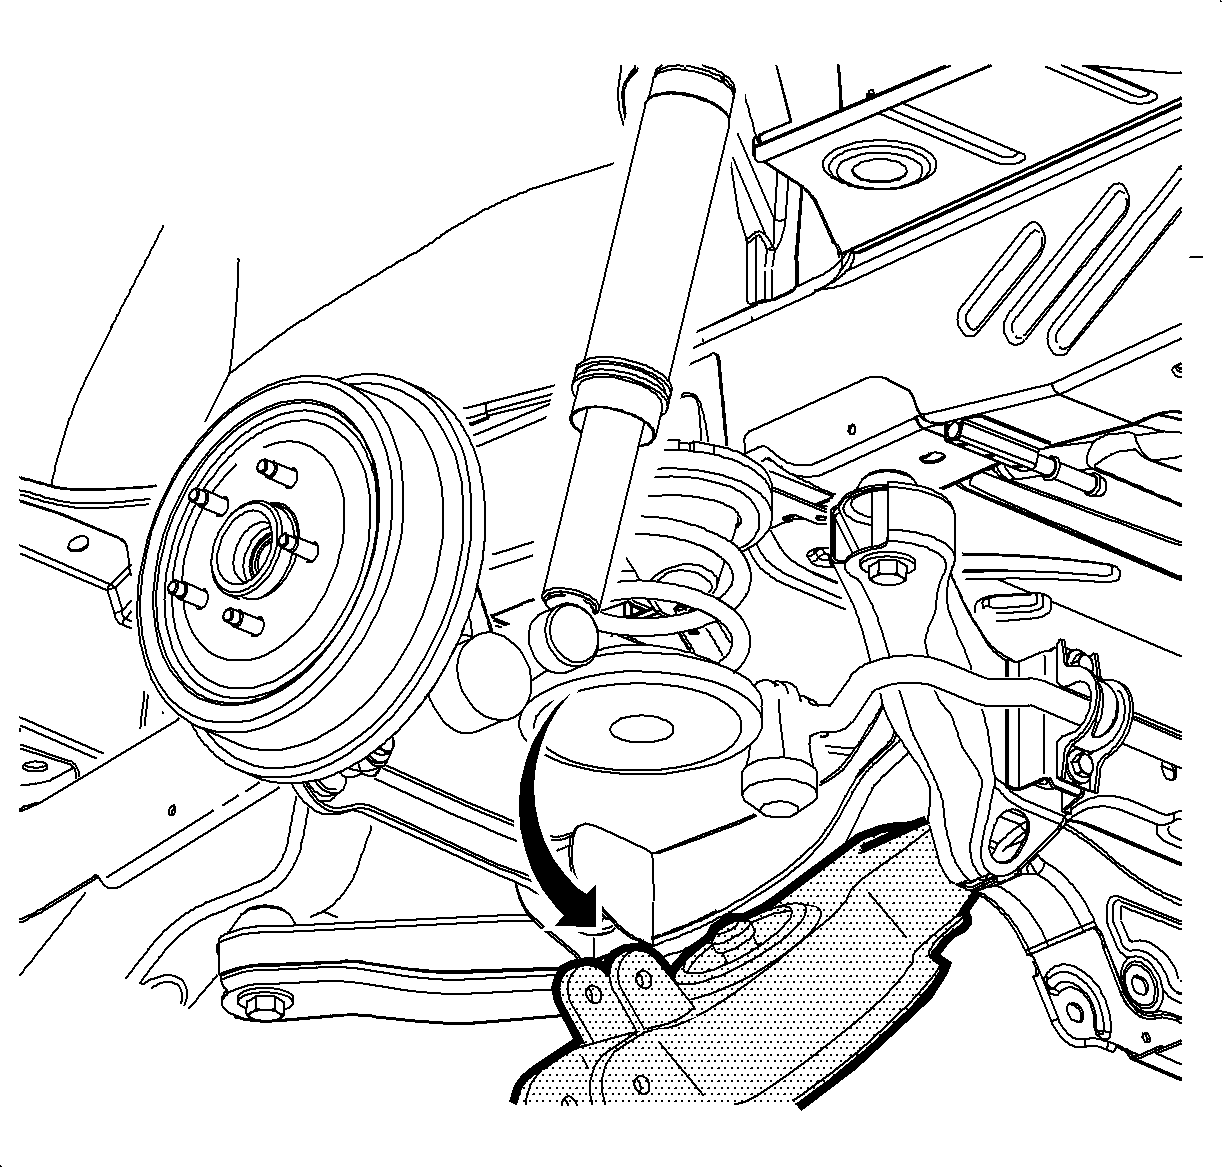
Installation
Notice: Inspect coil spring for abrasion. If the black protective coating on coil spring is worn through, replace the spring.
- Fully seat new top and bottom coil spring insulators to the spring.
- Using 1/8 x 6 in. plastic tie straps, secure insulator to coil spring using two straps on top and two straps on the bottom for each spring.
- Install coil spring with insulators onto lower control arm.
- Reposition screw type jack stand under lower control arm and slowly raise control arm towards knuckle. While aligning upper coil spring onto its seat, ensure the ID tape is oriented inboard of the vehicle and at the top of the spring.
- Align lower control arm to knuckle, insert bolt, install new nut and tighten.
- Cut and remove all tie straps from upper and lower coil spring locations.
- Align shock absorber to lower control arm mount, insert bolt and tighten.
- Install jounce bumper nut and tighten.
- Position stabilizer link to lower control arm, install nut and tighten.
- Position wheel and tire onto hub, install wheel nuts and tighten in a criss-cross pattern.
- Repeat procedure for other side of vehicle.
- Lower vehicle from hoist.
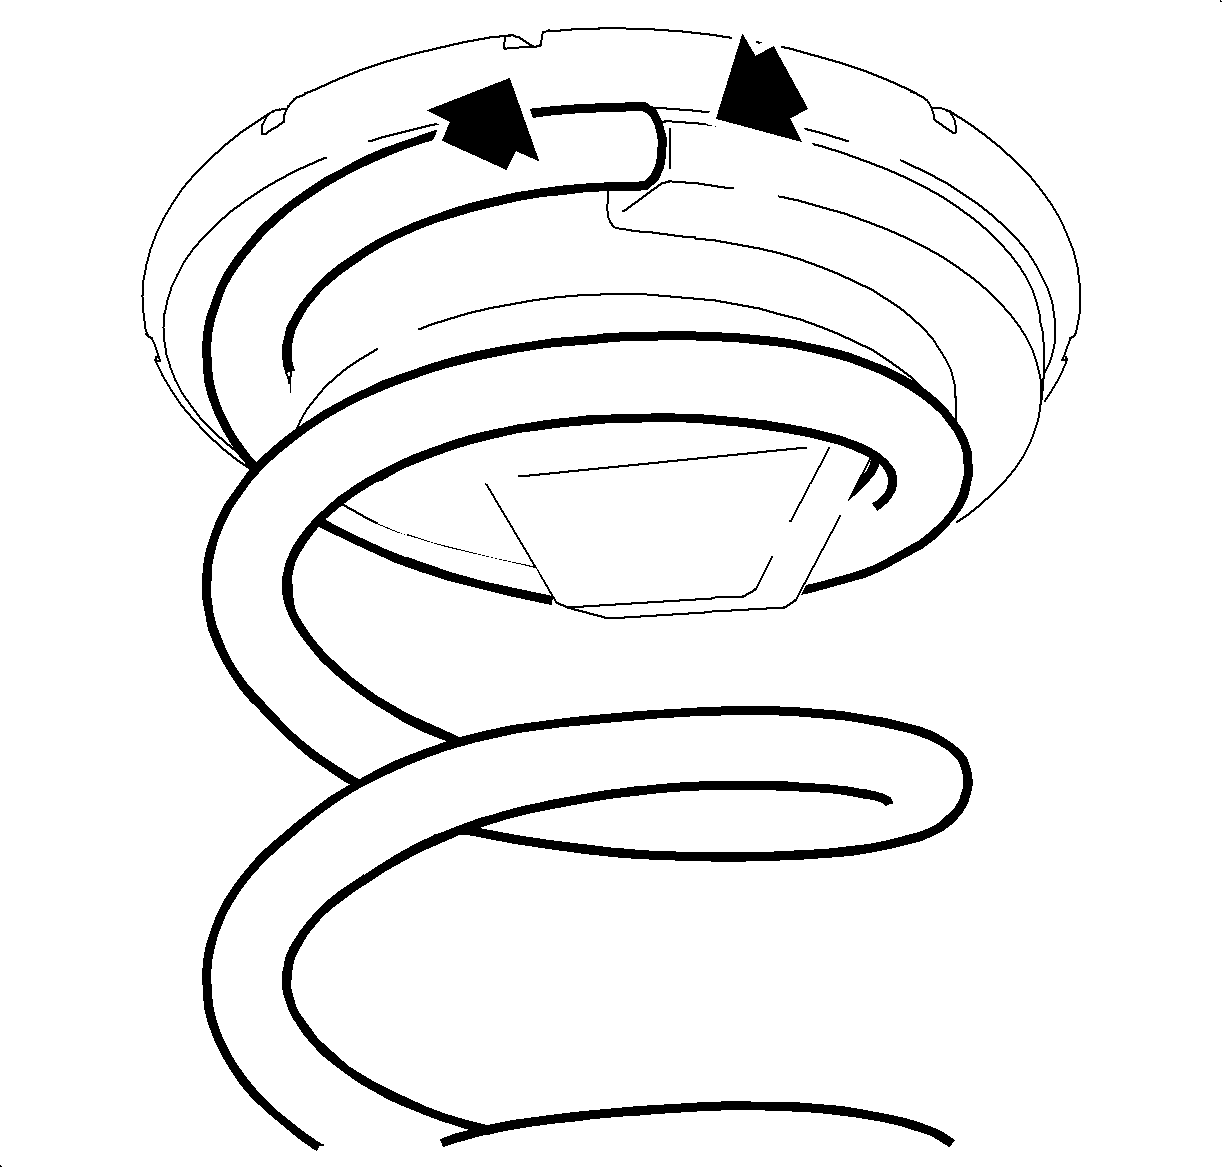
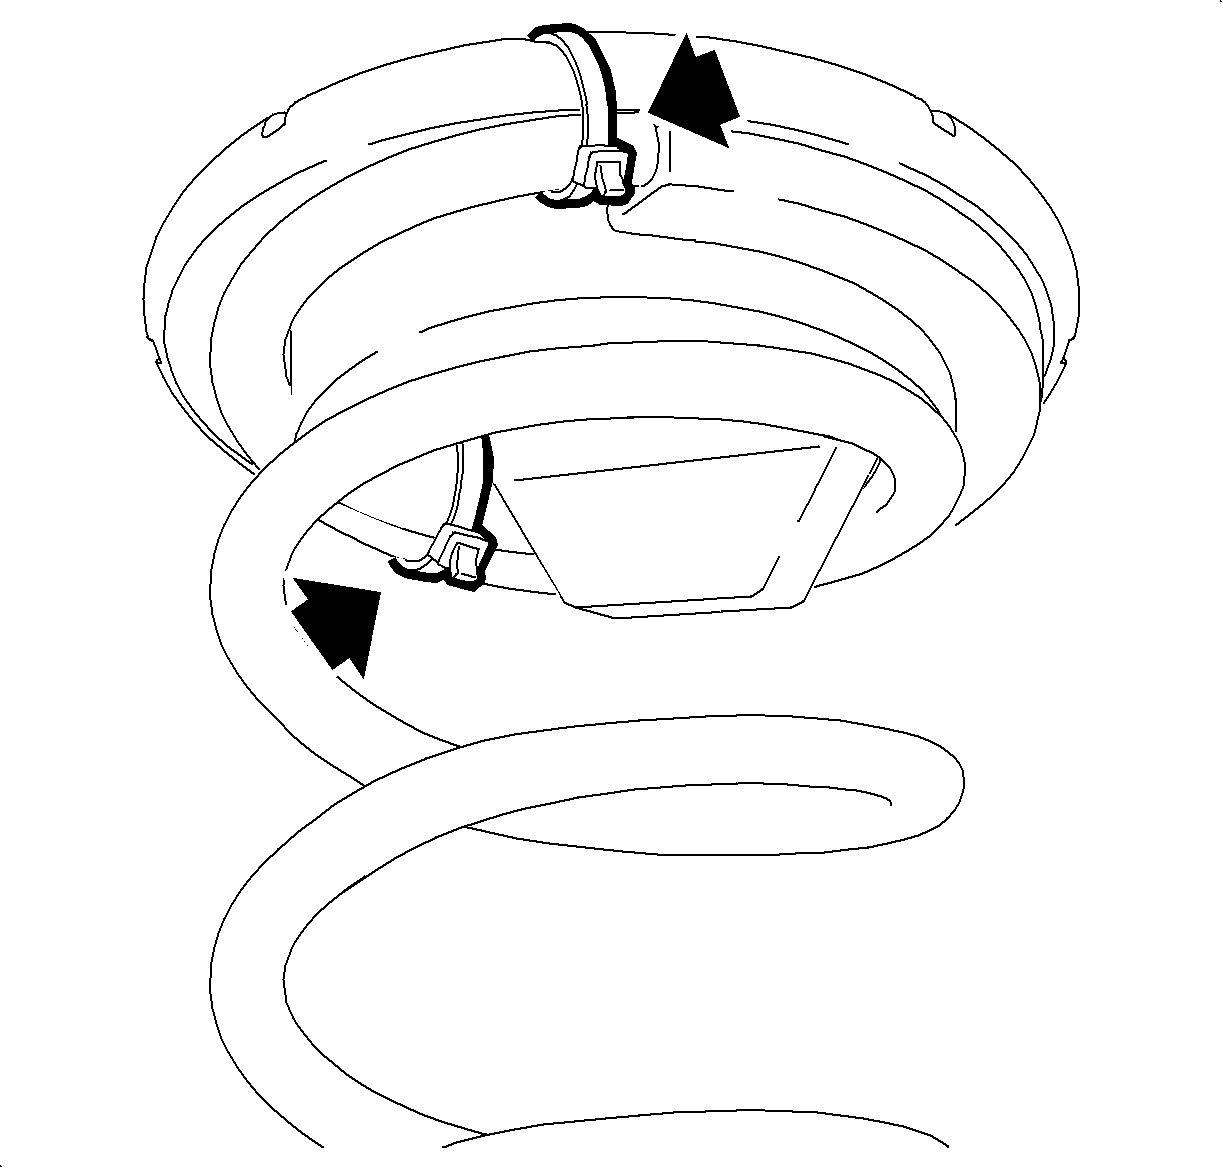
Important: There are six slots molded into the insulator. When securing the insulator, use slot as shown in illustration (second slot in the clockwise direction closest to the end of the coil spring) and position a tie strap at that location around insulator and spring. Snug the tie strap by hand and cut off any excess. Install second straps 180° from the first.
Important: Ensure that part number identification tape located on the coil spring is oriented inboard of the vehicle and at the top of the spring.
Important: Silicon spray lubricant can be used on the insulator to lower control arm contact area to assist with installation.

Notice: Ensure coil spring is properly seated.

Important: Bolt head must face towards rear of vehicle.
Tighten
Tighten the lower control arm to the knuckle bolt
to 110 N·m (81 lb ft).
Notice: Tie straps must be removed to ensure noise does not persist.
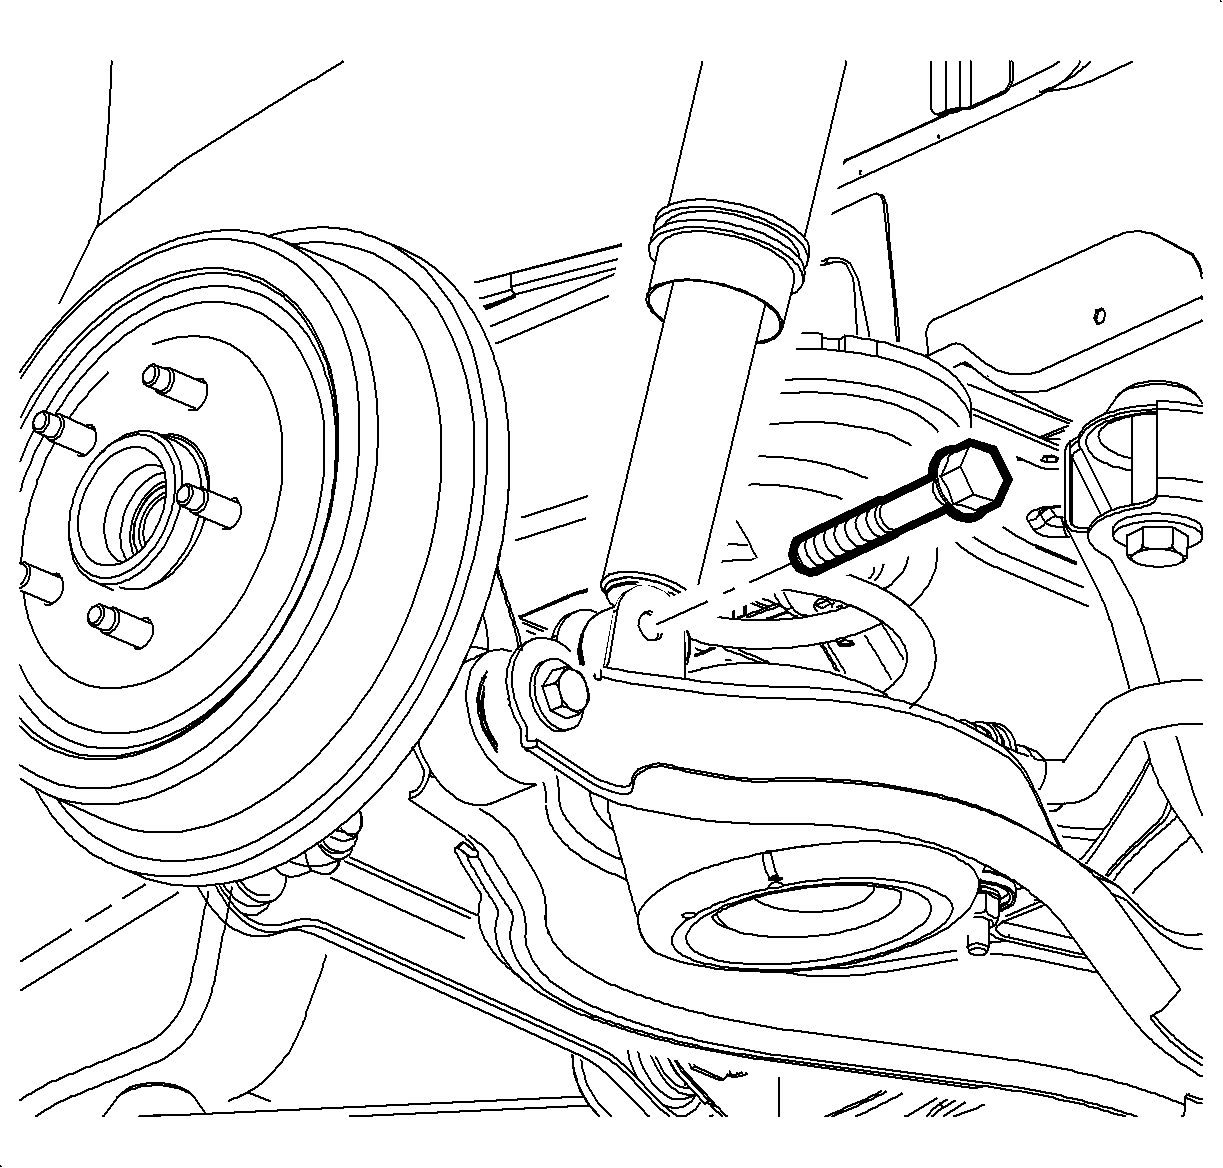
Tighten
Tighten the lower control arm bolt to 110 N·m
(81 lb ft).
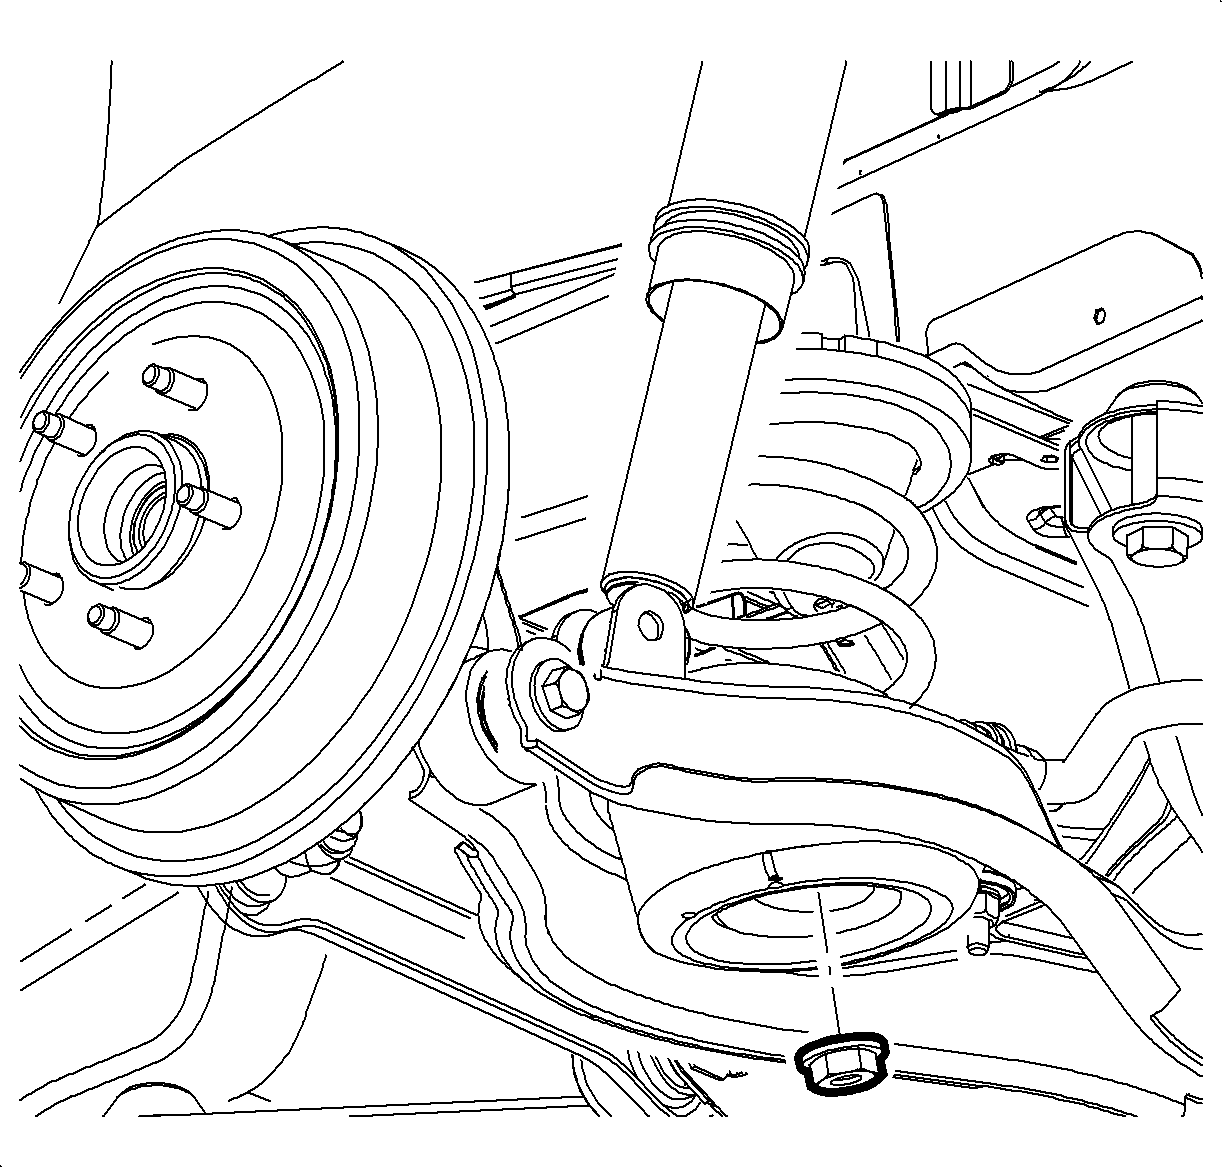
Tighten
Tighten the jounce bumper nut to 63 N·m
(46 lb ft).

Notice: Hold stabilizer link with wrench to avoid damage to the link.
Tighten
Tighten the stabilizer link to lower control arm
to 15 N·m (11 lb in).
Tighten
Tighten the wheel nuts to 125 N·m (92 lb ft).
Parts Requirements
Part Number | Description | Qty |
|---|---|---|
22705168 | Insulator-RR SPR LWR | 4 per vehicle |
Claim Information
To receive credit for this repair during the warranty coverage period, submit a claim through the Saturn Dealer System for E5027 (Spring, Rear Coil, Both - R&R or Replace), refer to the appropriate Electronic Labor Time Guide for the correct Labor Operation Code and Time.
