Inoperative HVAC Rear Defrost Recirc, or Air Condition (AC) Mode Switches and/or Reduced or No Airflow from Vents (Calibrate HVAC Module Controller and/or Inspect C1 HVAC Controller Connector)

| Subject: | Inoperative HVAC Rear Defrost, Recirc, or Air Condition (AC) Mode switches and/or Reduced or No Airflow from Vents (Calibrate HVAC Module Controller and/or Inspect C1 HVAC Controller Connector) |
| Models: | 2002-2004 Saturn VUE Vehicles |
| Attention: | Technician |
Condition
Customers may comment that one or both of the following conditions exist:
| • | Condition 1 - The HVAC controller rear defrost, recirc, and/or A/C switch is inoperative. |
| • | Condition 2 - Reduced or no airflow from outlets and/or selected HVAC modes are inoperative when the HVAC blower motor is on. |
Cause
The cause may be one of the following:
| • | Cause for Condition 1 - HVAC controller C1 connector is not fully inserted. |
| • | Cause for Condition 2 - HVAC controller out of calibration or C1 connector is not fully inserted. |
Correction
| • | Correction for Condition 1 - Remove control head and ensure the C1 connector is fully inserted. |
| • | Correction for Condition 2 - Re-calibrate the controller and retest. If concern is not resolved, remove controller and ensure C1 connector is fully inserted. |
Procedure
Condition 1 - The HVAC controller rear defrost, recirc, and/or A/C switch is inoperative.
To inspect the C1 (20-way black) HVAC controller connector, perform the following:
HVAC Controller/Radio Bezel Removal
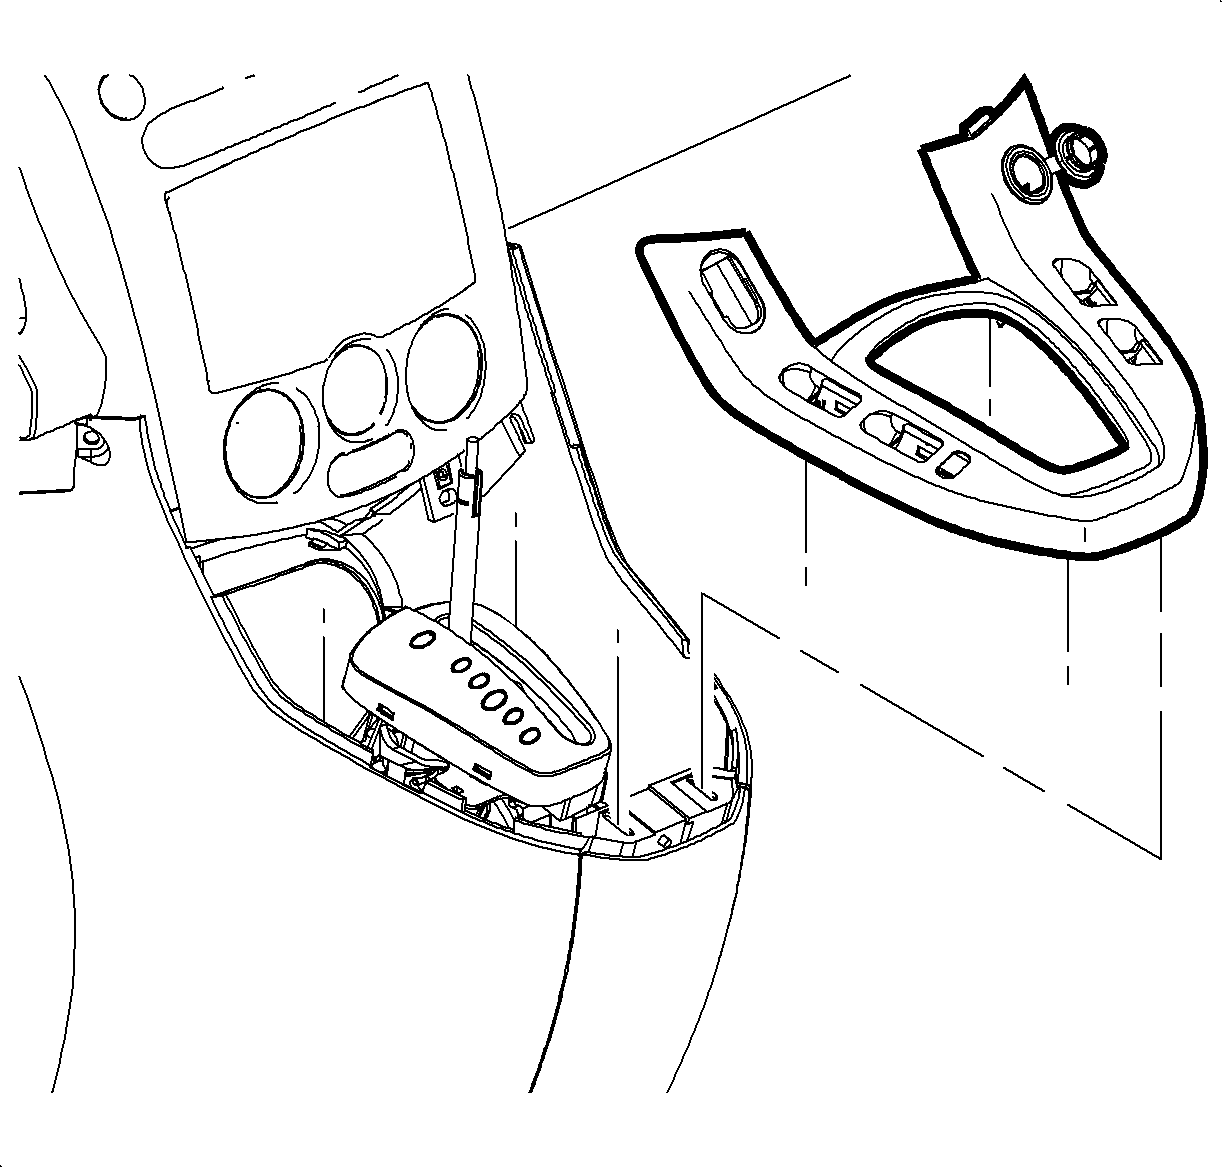
- While applying the brake, move shifter to neutral position.
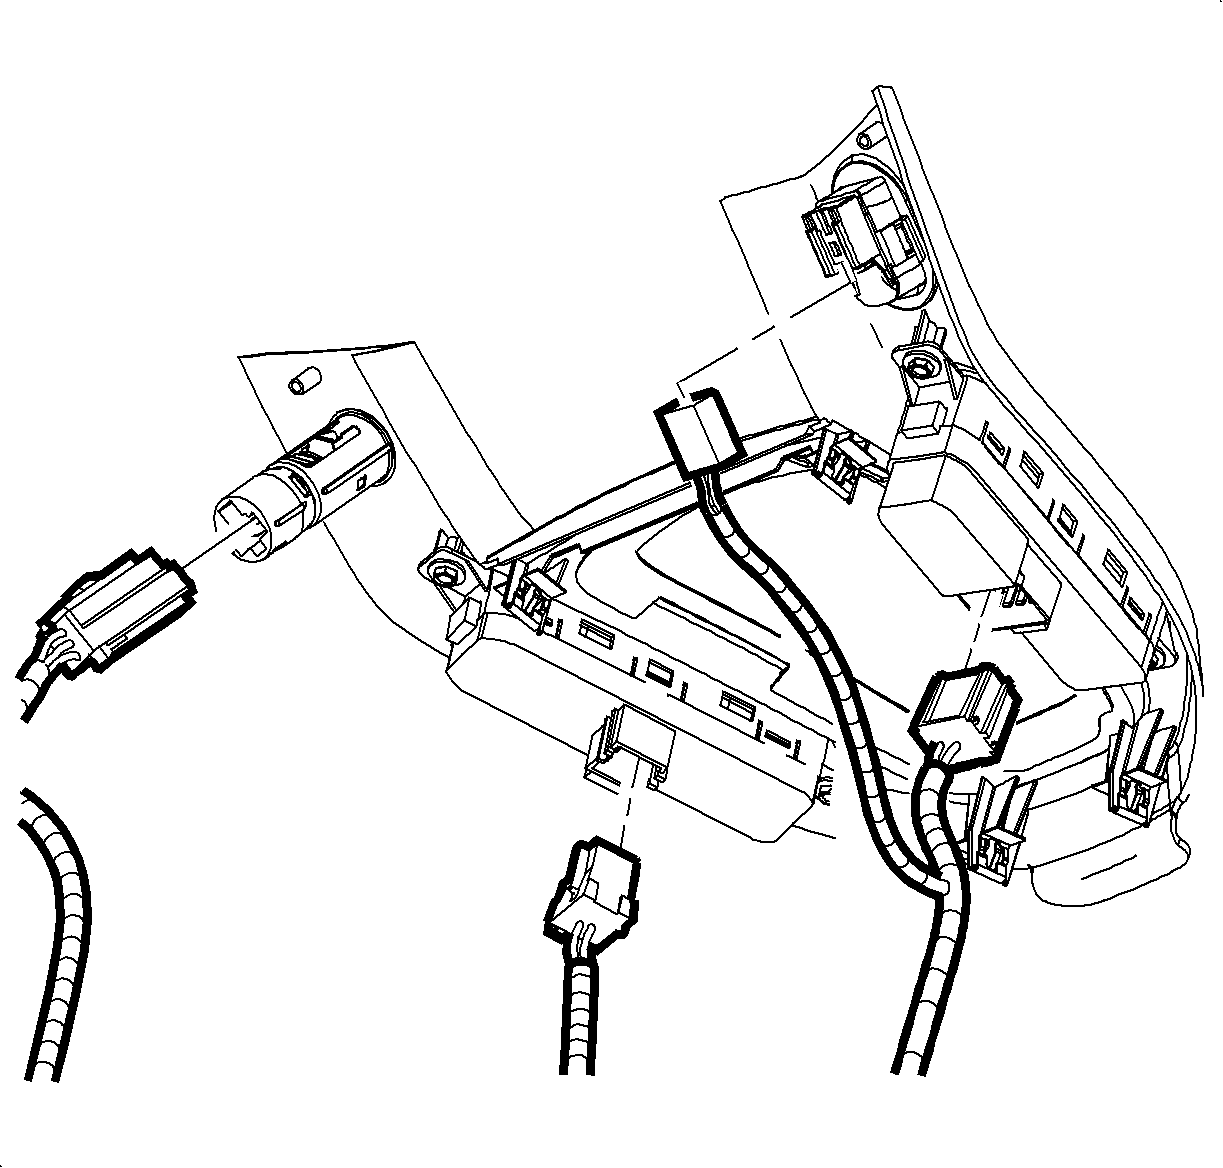
- Pull up at rear edge of horseshoe bezel disengaging retention clips to gain access to underside switch connections.
- Disconnect window switches, mirror switch, cigar lighter and remove horseshoe bezel.
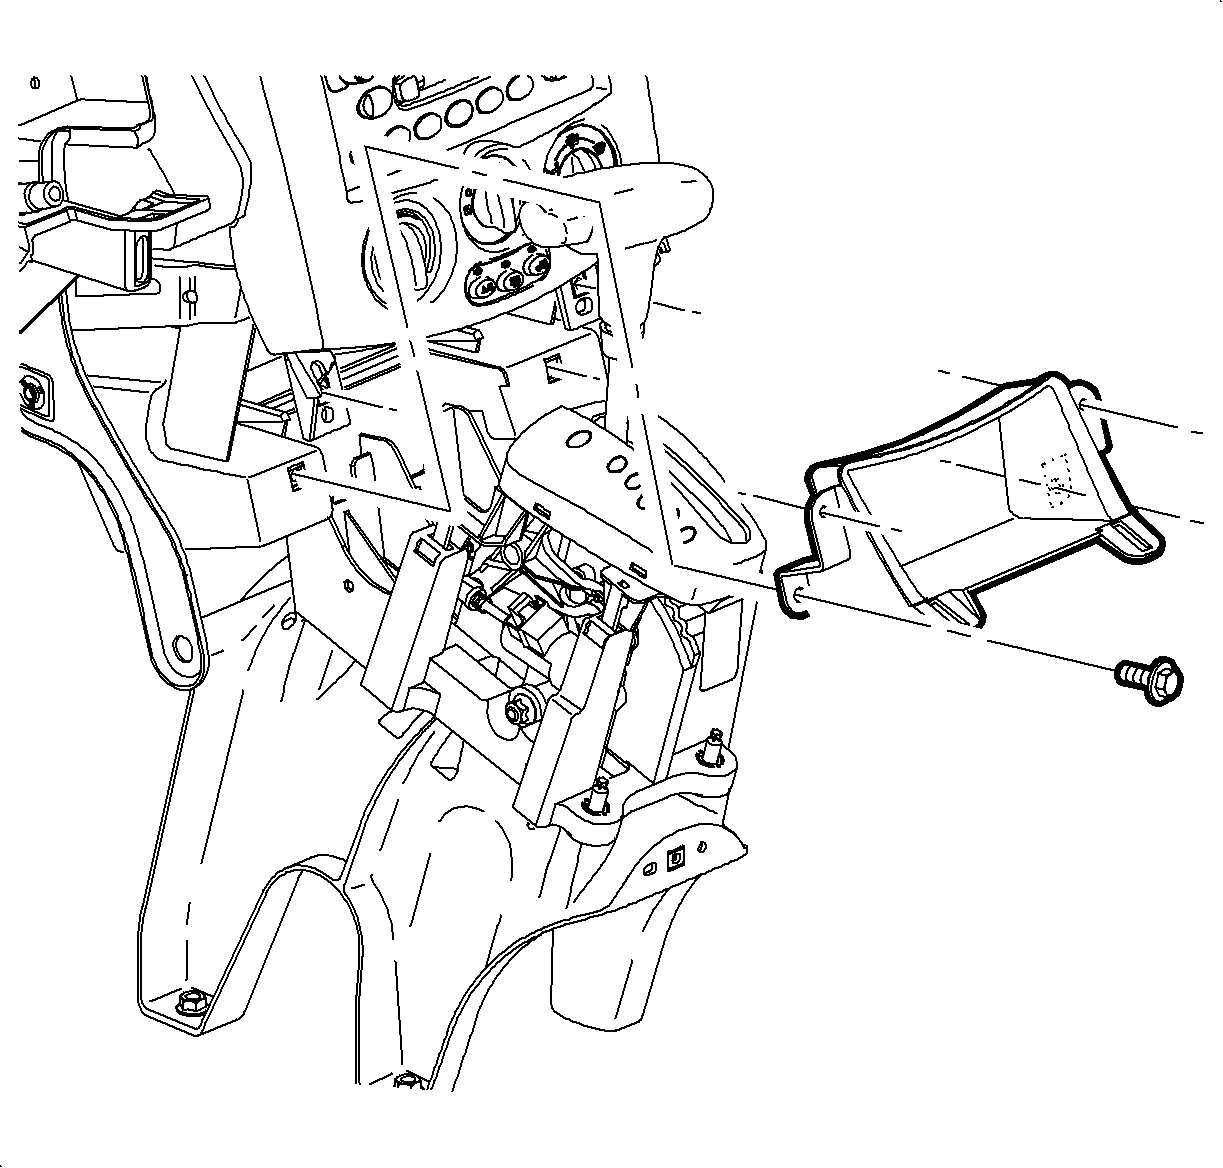
- Remove lower I/P front console storage compartment to I/P retainer screws and upper storage to radio bezel screws and I/P front console storage compartment.
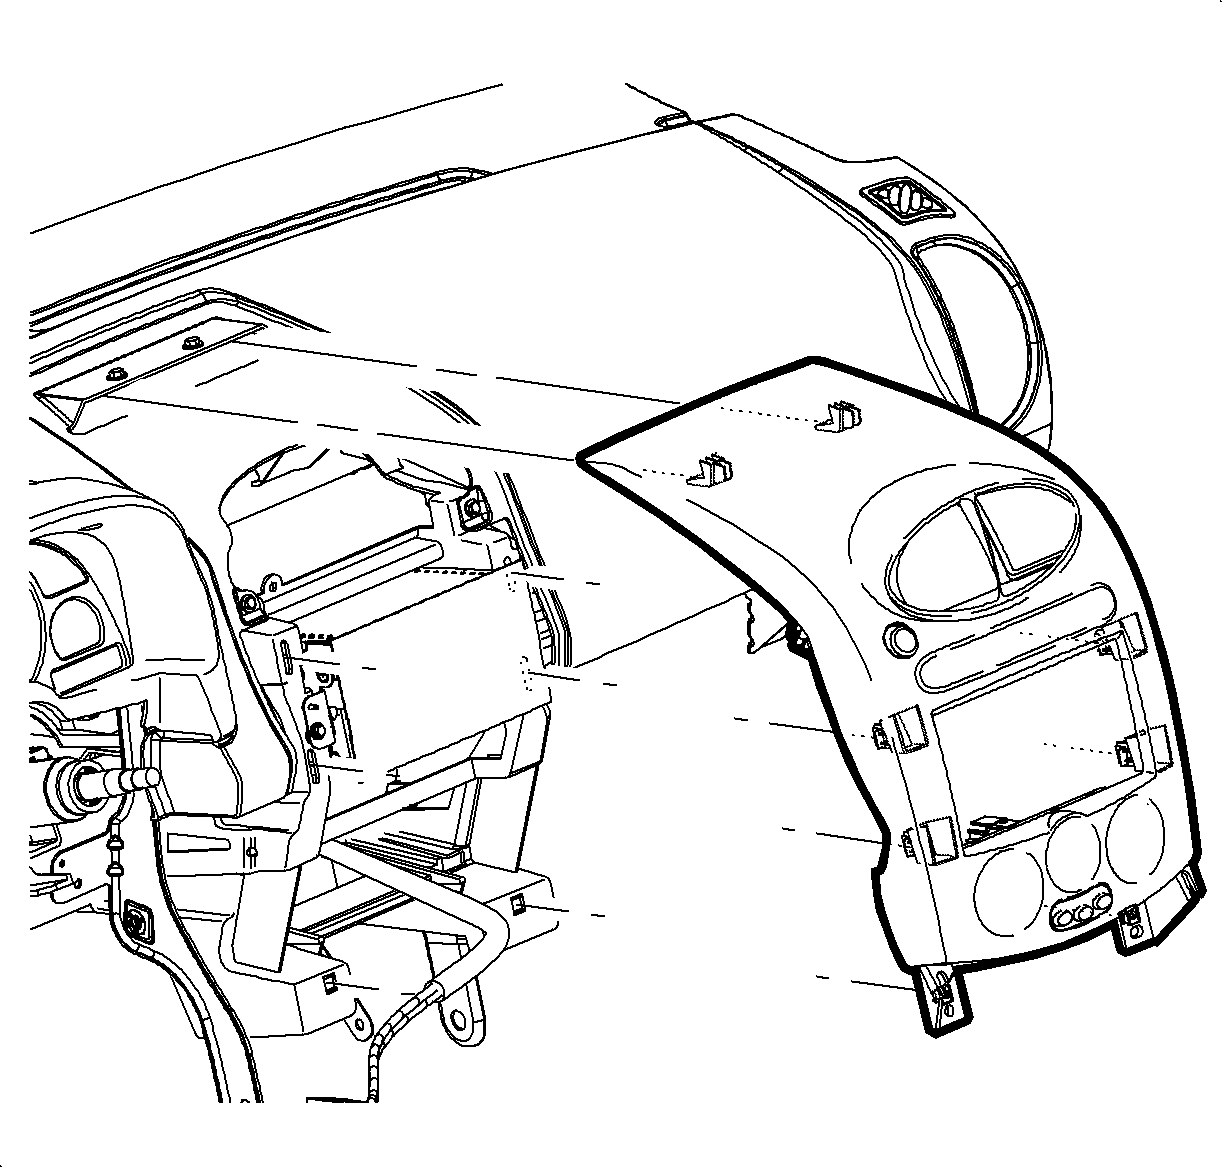
- Pull lower edge of radio bezel rearward disengaging lower clips, then pull upper portion rearward disengaging upper clips.
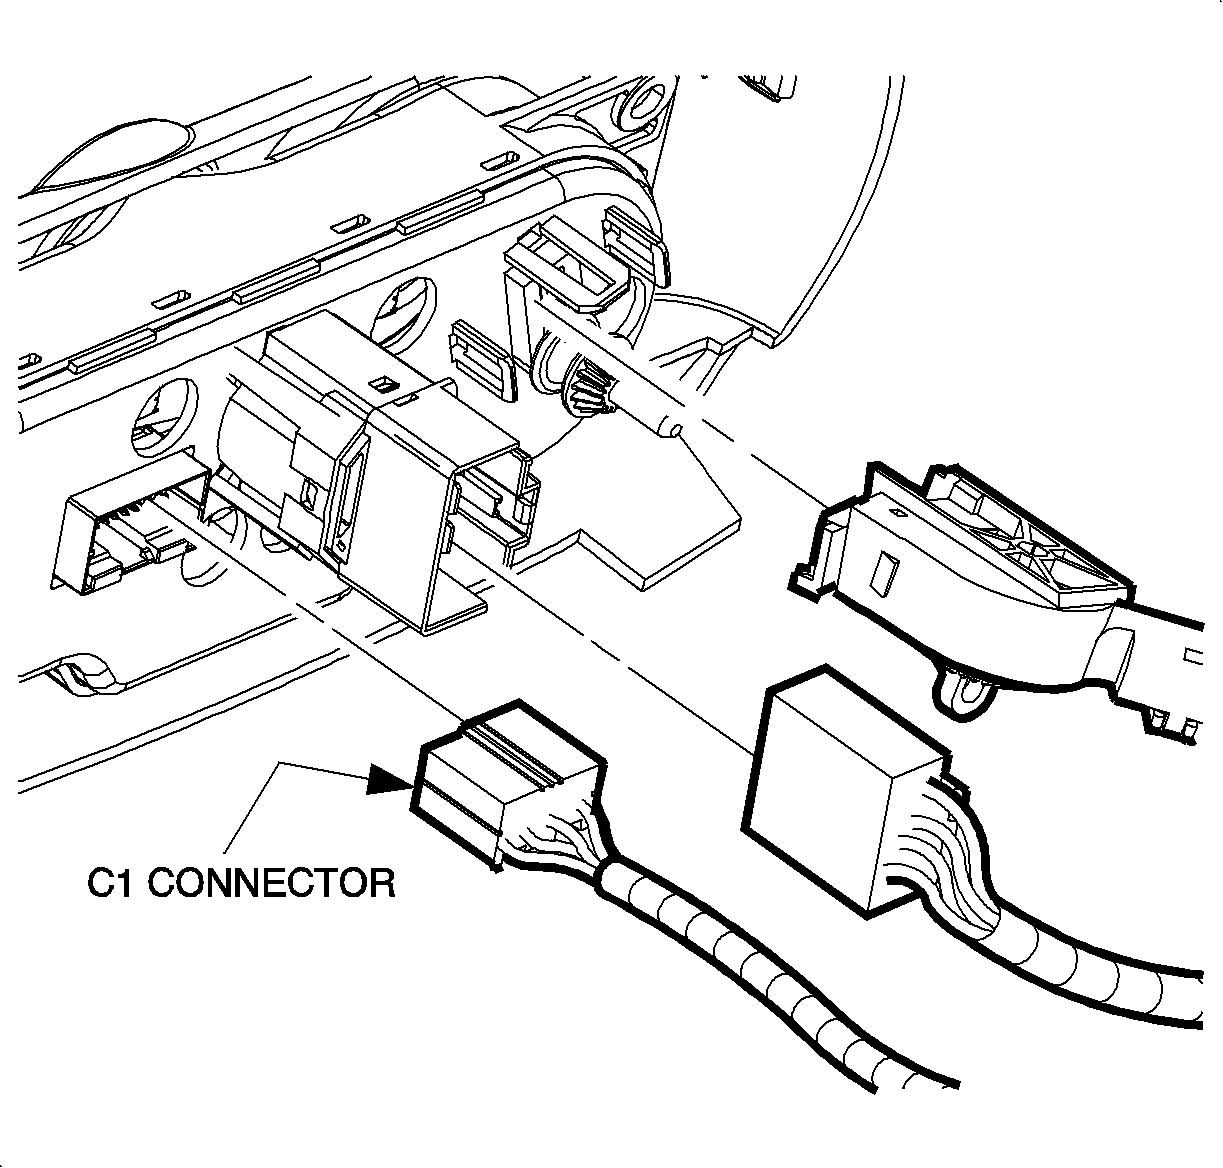
- Once the radio bezel has been removed, remove the C1 connector (20-way black) and reinstall ensuring that the connector is locked into place.
- Test HVAC system and make sure initial condition is resolved. If the condition is resolved, proceed with next step. If the condition still exists and the electrical connector is locked into place, refer to the diagnostic information in the HVAC section of the appropriate Saturn Service Manual.
HVAC Controller/Radio Bezel Installation
- Install radio bezel by inserting upper front edge clips first, then slide bezel forward while holding down on front edge of bezel to engage upper retention clips.
- Press forward at lower clip location to engage and secure the lower clips.
- Install I/P front console storage compartment and screws.
- Connect the wire harness to the window switches, mirror switch and cigarette lighter.
- Install front edge of horseshoe bezel over shift assembly making sure to engage alignment pins, then snap bezel into place by pressing down.
- While applying the brake, return shifter to the "P" Park position.
Tighten
Tighten the storage compartment screws to 2.2N·m(22 in-lbs).


Procedure
Condition 2 - Reduced or no airflow from outlets and/or selected HVAC modes are inoperative with HVAC blower motor on.
For HVAC Controller Calibration, perform the following:
Important: Any time an HVAC module mode actuator or HVAC controller is replaced, the HVAC controller will need to be calibrated to ensure proper air distribution.
- Calibrate mode door by simultaneously pushing the A/C and Recirc buttons on the HVAC controller 3 times each within 2 seconds of the initial push.
- Cycle ignition and verify proper operation of mode doors.
- If the calibration does not correct the reduced or no airflow from outlets or inoperative mode doors, proceed to next step.
| • | A/C and RECIRC button LEDs will flash while this calibration is taking place. |
| • | Calibration will take anywhere between 10 to 30 seconds depending on battery voltage. |
| • | LEDs will quit flashing when calibration is complete. |
To inspect C1 (20-way black) HVAC Controller Connector for Condition 2, refer to the HVAC Controller/Radio Bezel Removal and Installation procedures contained in this bulletin.
Claim Information
To receive credit for this repair during the warranty coverage period, submit a claim through the Saturn Dealer System for D0362 (Control Assembly, A/C - Replace) or D4707 (Module or Assembly, HVAC Control Head - Reprogram).
