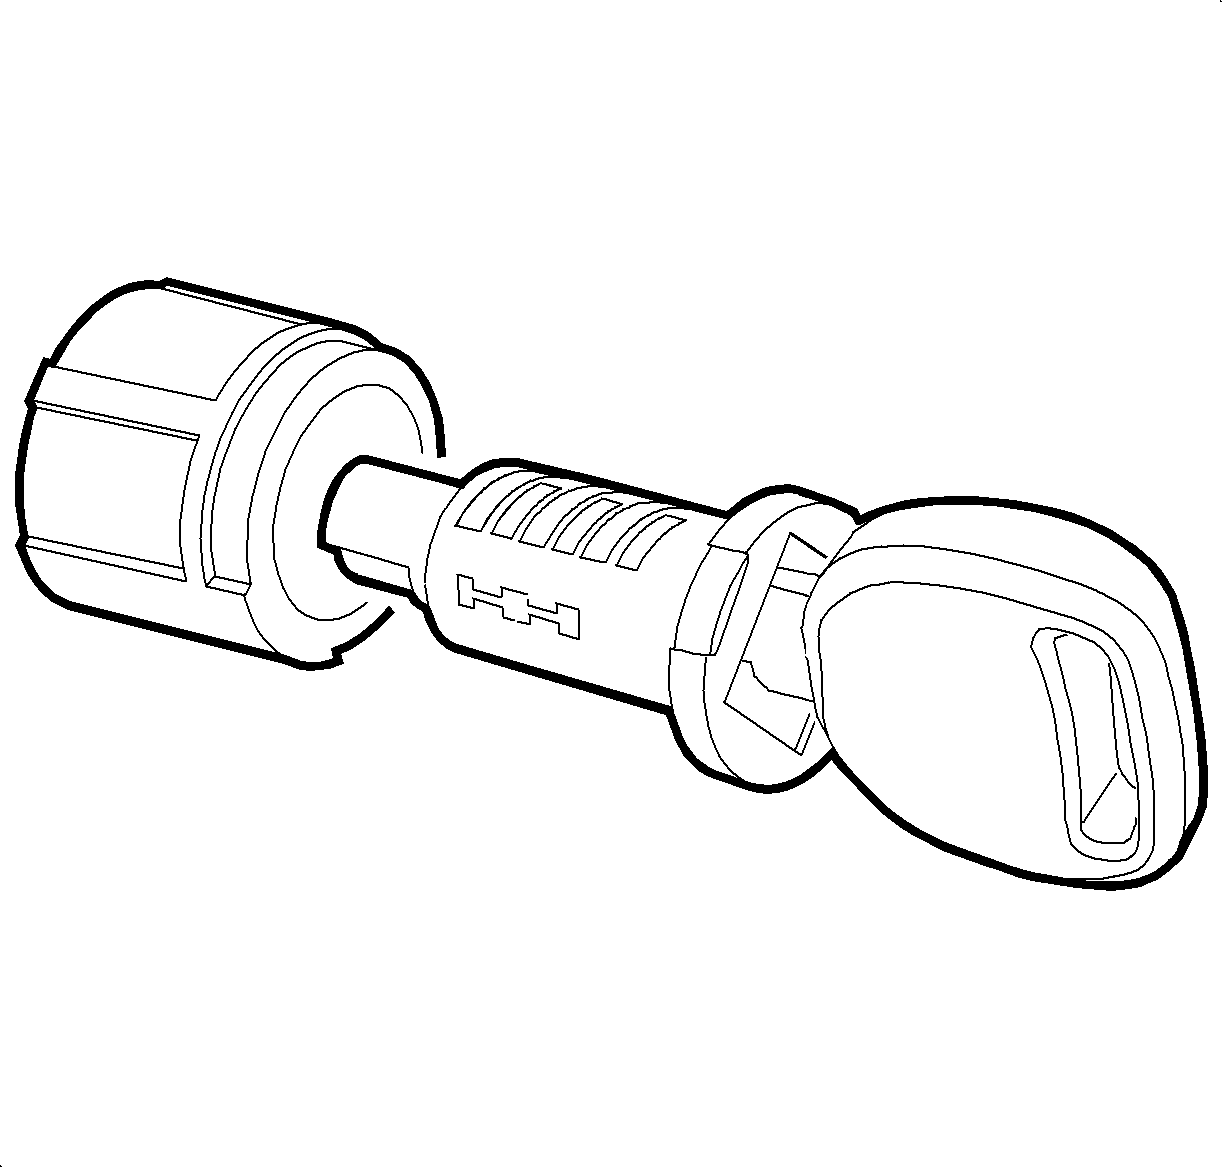
Key Identification and Usage
The lock system used for the Saturn vehicle is a one key system with a key profile that has a two-sided cut and milled grooves that are unique to the Saturn lock system. The teeth of the key locate the tumblers and sidebar, flush to the outside of the lock cylinder from both sides of the cut.
Cutting Keys
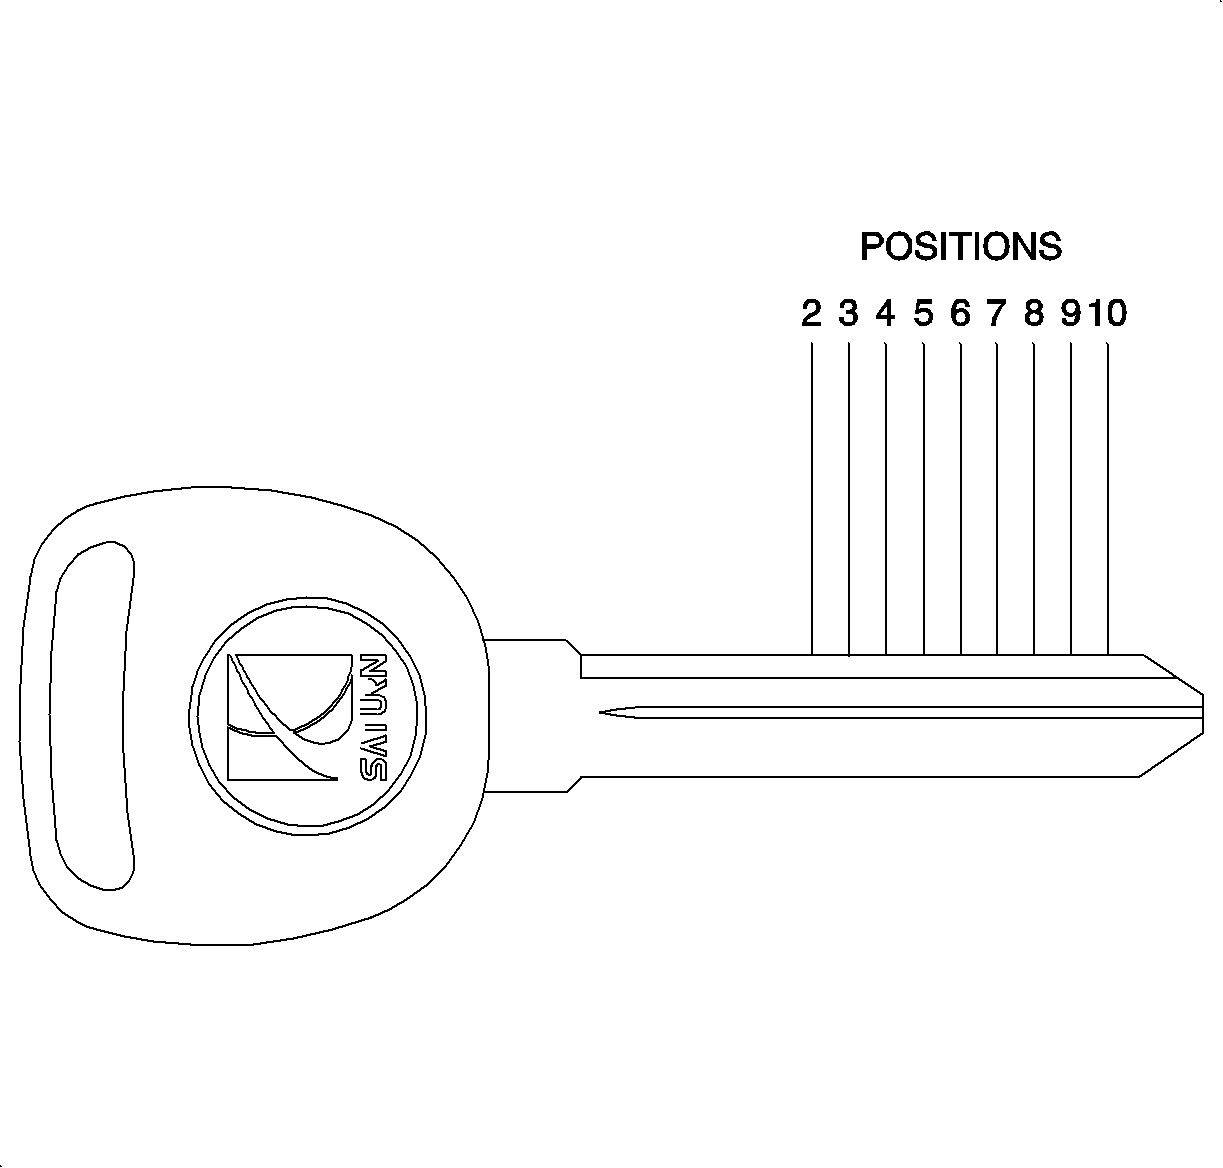
The Saturn approved key cutting tool requires adapter kit SA9703B-3. The kit consists of a 10-position spacing plate, only positions two through ten are used, and a key insert. To install the adapter kit to the key cutting tool, follow the steps in the instruction manual provided with the key cutting tool.
The customer information card or the retailer records will show the key code as a four-digit numeric code. To determine the actual cut sequence of the key for this code, look up the code in the appropriate Key Code book. The cut sequence will be shown to the right of the code listing. The ignition cut sequence should be used to cut new keys, as it has all of the cuts necessary for the key to work properly in all the locks on the vehicle.
Determining Key Code
- Insert the key in the Saturn approved key cutting tool with the tip of the key against the stop.
- With the cutting die in the down position, move the carriage toward the die until it bottoms out. Record the depth 1, 2, 3, or 4.
- Repeat for each position.
Lock Service Kit
The Saturn lock service parts are packaged in small packages and are disassembled. The door lock cylinder, rear compartment lid lock, liftgate lock, glovebox lock, and ignition lock service units are all available this way. The lock cylinder service units have all the parts necessary to build up a lock cylinder except the tumblers and the tumbler springs. The lock service kit, normally found in the parts department, has the tumblers and springs necessary to build up the lock cylinder service unit to the customer's original key code. To determine the vehicle key code, refer to the key identification and usage section. The ignition module is also serviced and disassembled as a unit.
The lock service kit also contains the other components of the door, rear compartment lid, liftgate , and ignition lock systems such as clips, pawls, lock cylinder caps, shutters, and springs. This kit is provided so that the retail facilities will have the components necessary, at all times, to service the Saturn lock system and maintain its one key integrity for the Saturn customer.
Lock Cylinder Lubrication
Lubricate the lock cylinders with a light oil or graphite lubricant. Never use a silicon spray lubricant.
Lock Cylinder Tumblers
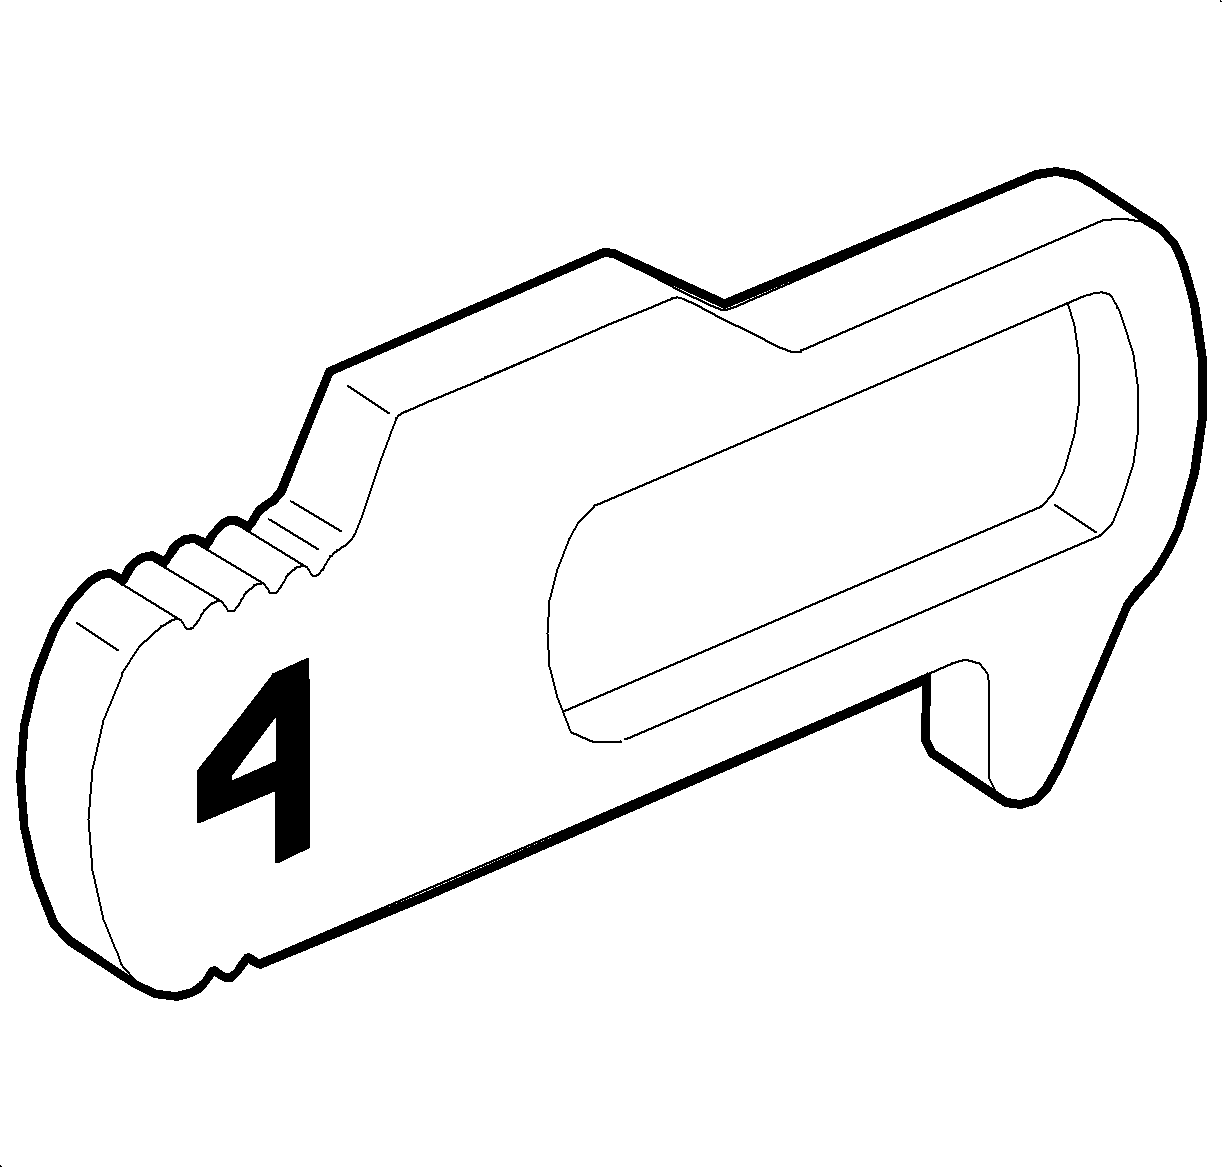
Each of the 4 depths on the key has corresponding tumblers, sometimes referred to as plates or wafers. The numbers are stamped on the tumblers for identification. Door and liftgate tumblers and ignition tumblers represent 3 different series. There are also three different compression springs. It is essential that the correct components be used in the tumbling of locks. The compression springs are inserted into the springs wells, and then the correct tumblers are inserted into the tumbler wards for the door and liftgate. The ignition is tumbled differently. Insert the correct tumbler into the tumbler wards then insert the tumbler springs on top of the tumblers.
Ignition Lock Cylinder Coding
Tools Required
J 41340
Lock Cylinder Holding Fixture and Staking Tool
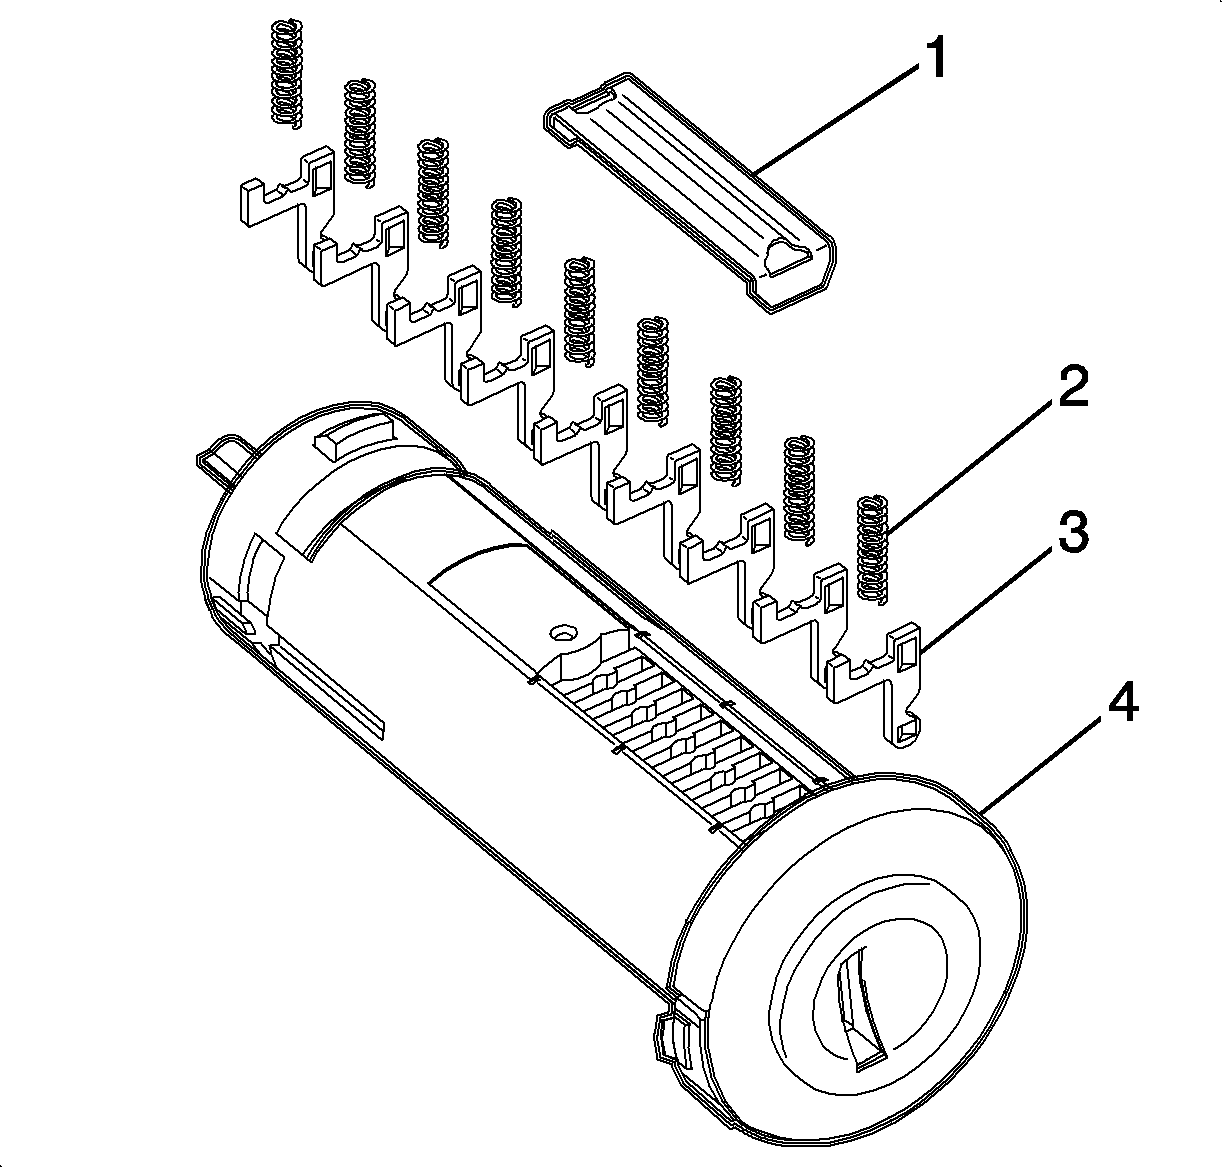
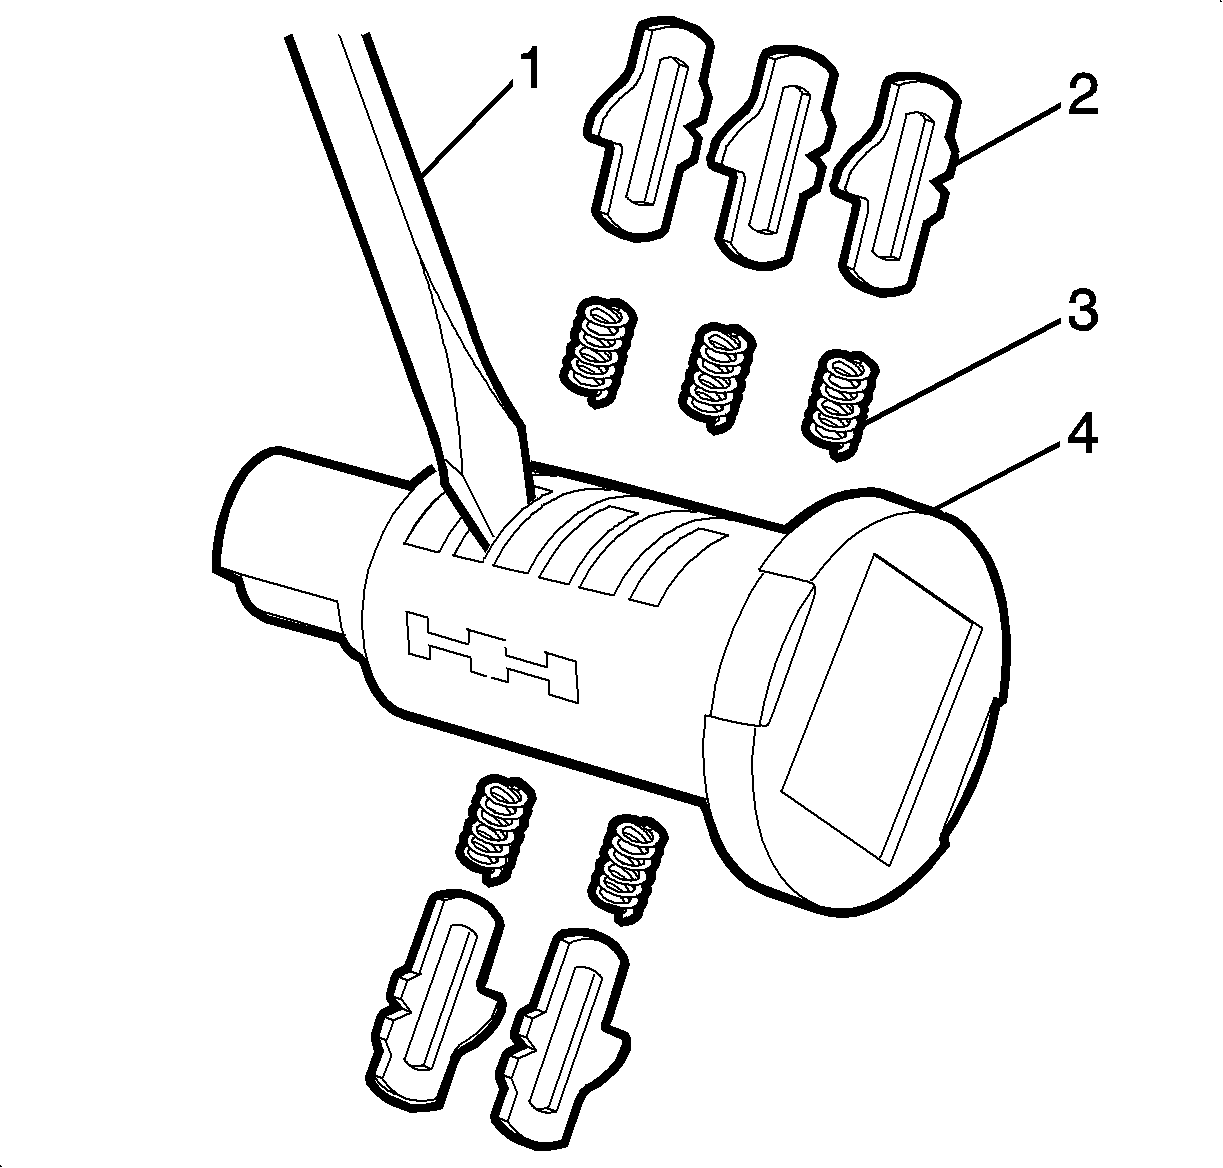
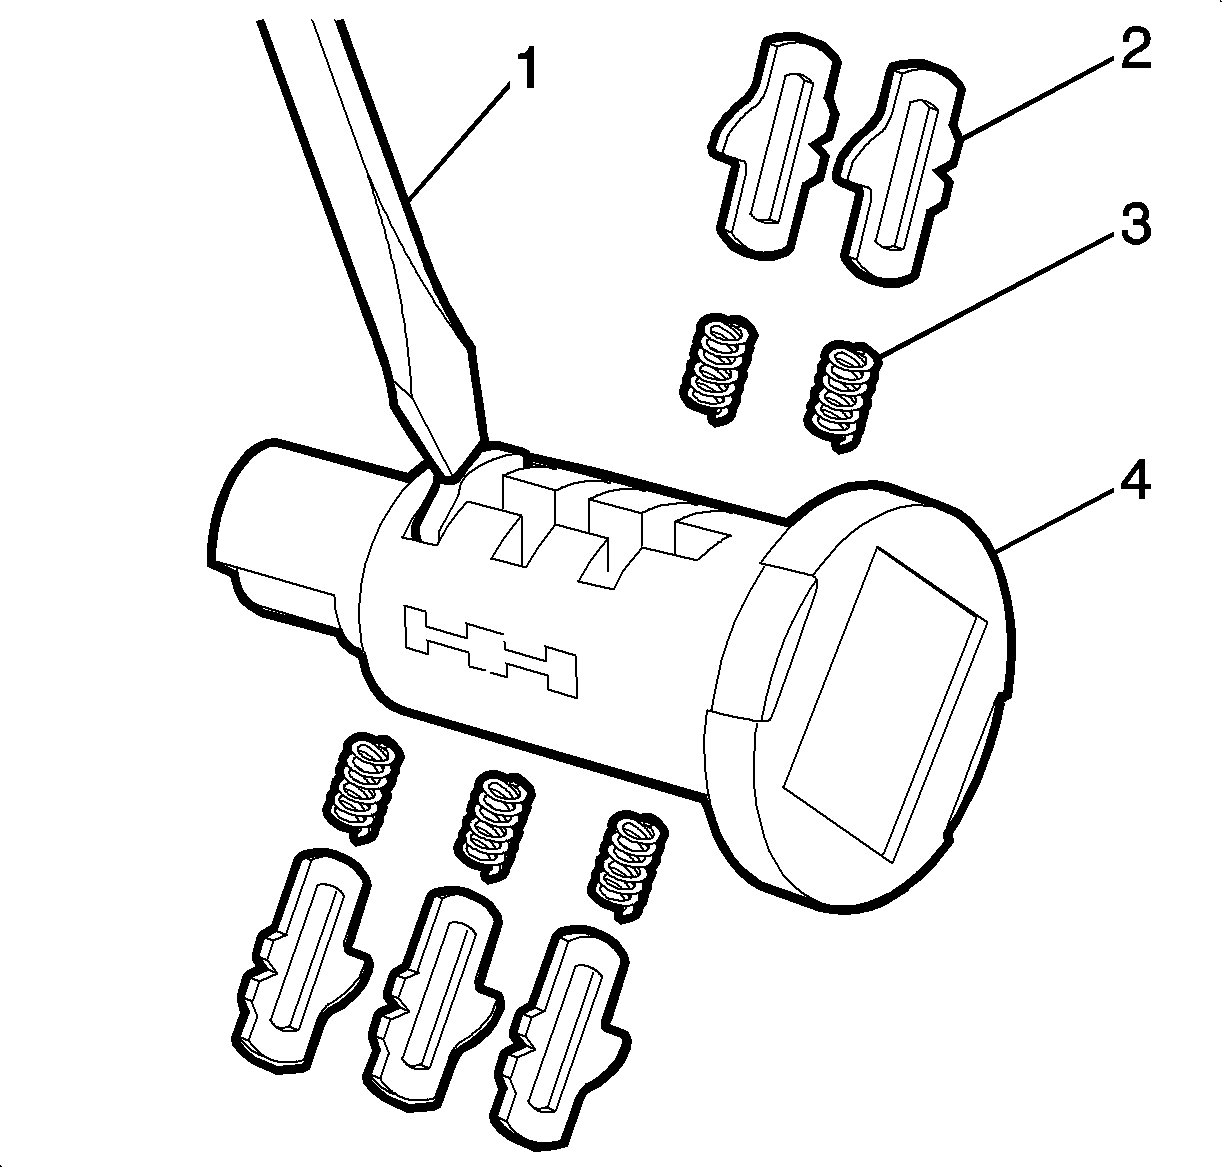
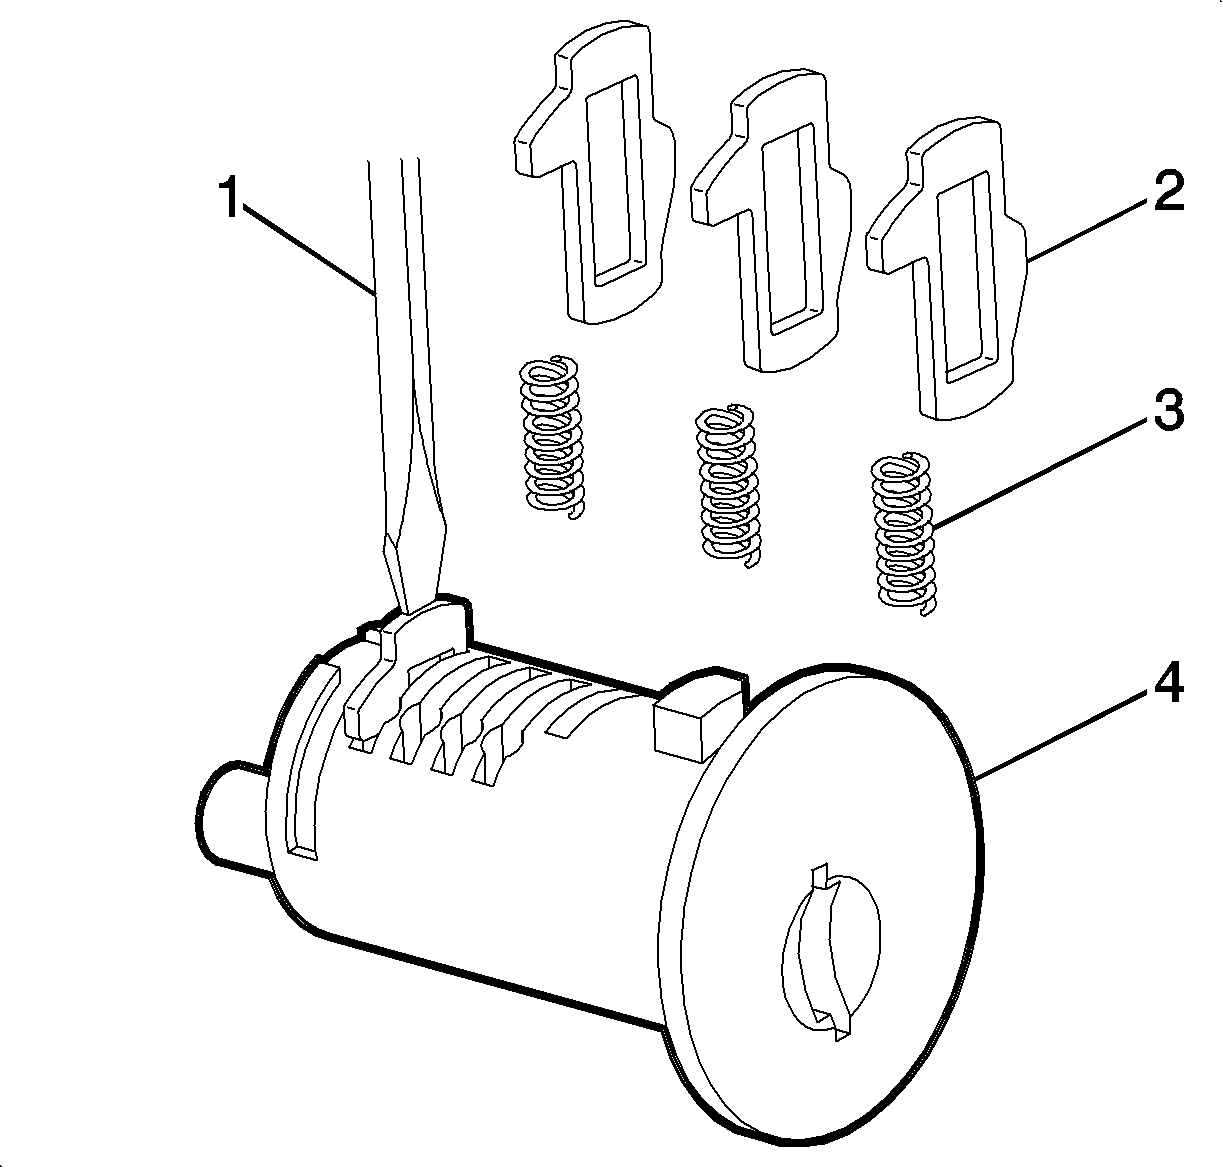
- Insert the appropriate tumbler (3) according to the key code into the corresponding tumbler ward.
- The tumblers will not immediately seat into position because the sidebar has been pre-assembled. The tumblers will have to be pushed past the sidebar with a small flat screwdriver or pocket knife.
- The tumbler springs (2) should then be inserted into the spring wells in the cylinder (4) where they will sit on top of the tumblers.
- The seal plate (1) will be installed and crimped.
- Insert the seal plate locator legs into the receptacle slots in the cylinder--seal plate will seat into position only when the two locator legs have been properly inserted into the receptacles on the cylinder.
- While holding the seal plate in position with the thumb, insert the key into the cylinder and watch for the side bar to drop. If the side bar does not drop, the lock is tumbled wrong and you need to start over.
- Ensure that the side bar does not drop on an angle. The side bar must be completely flush to the cylinder diameter.
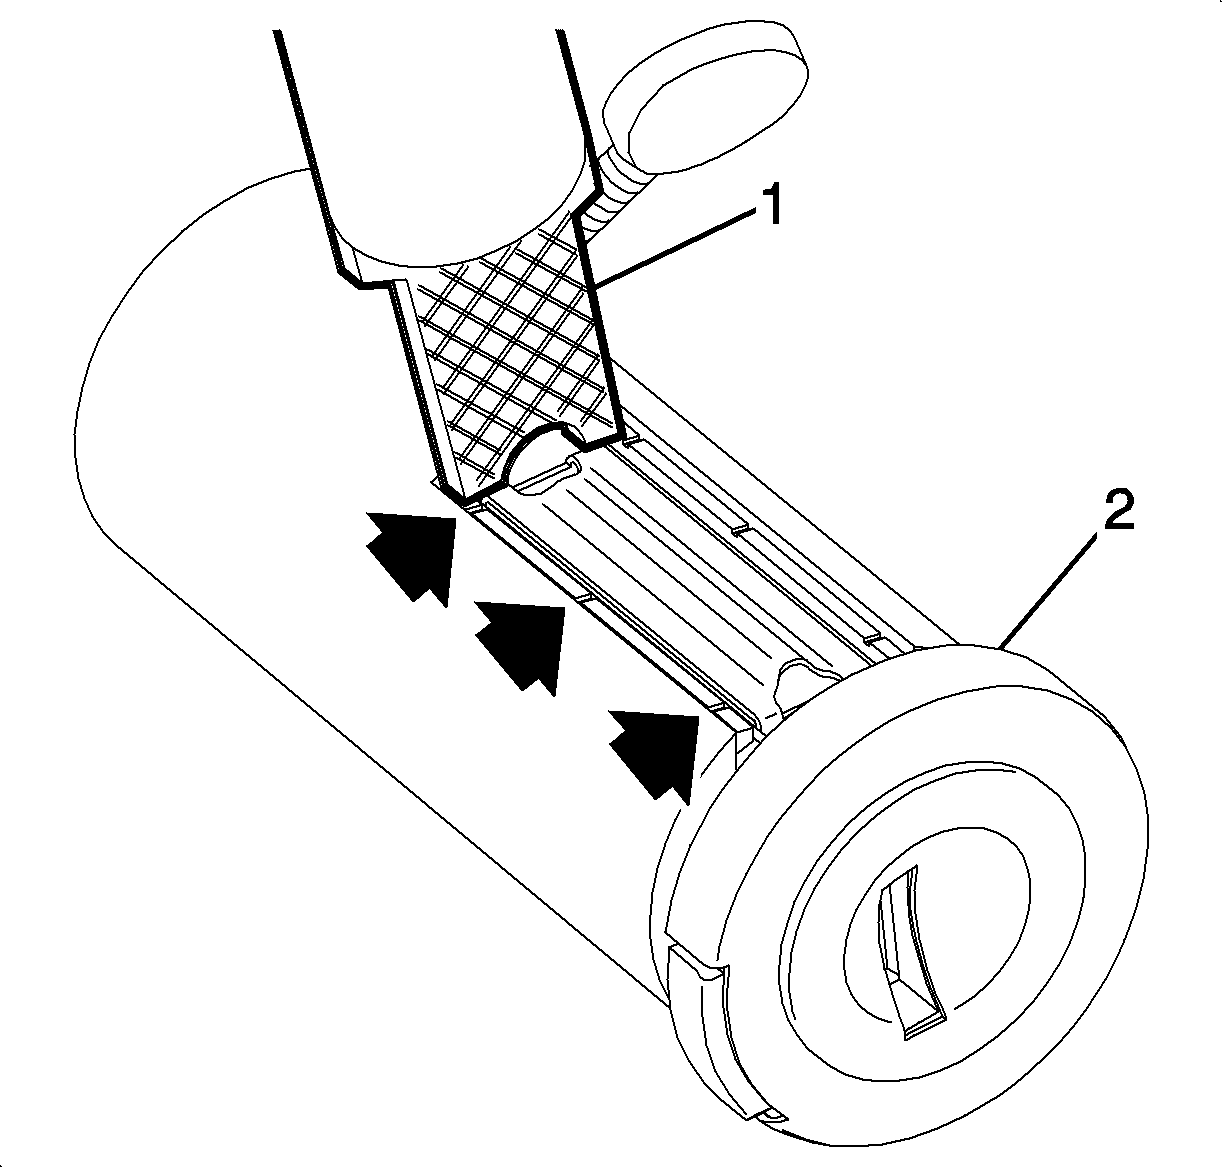
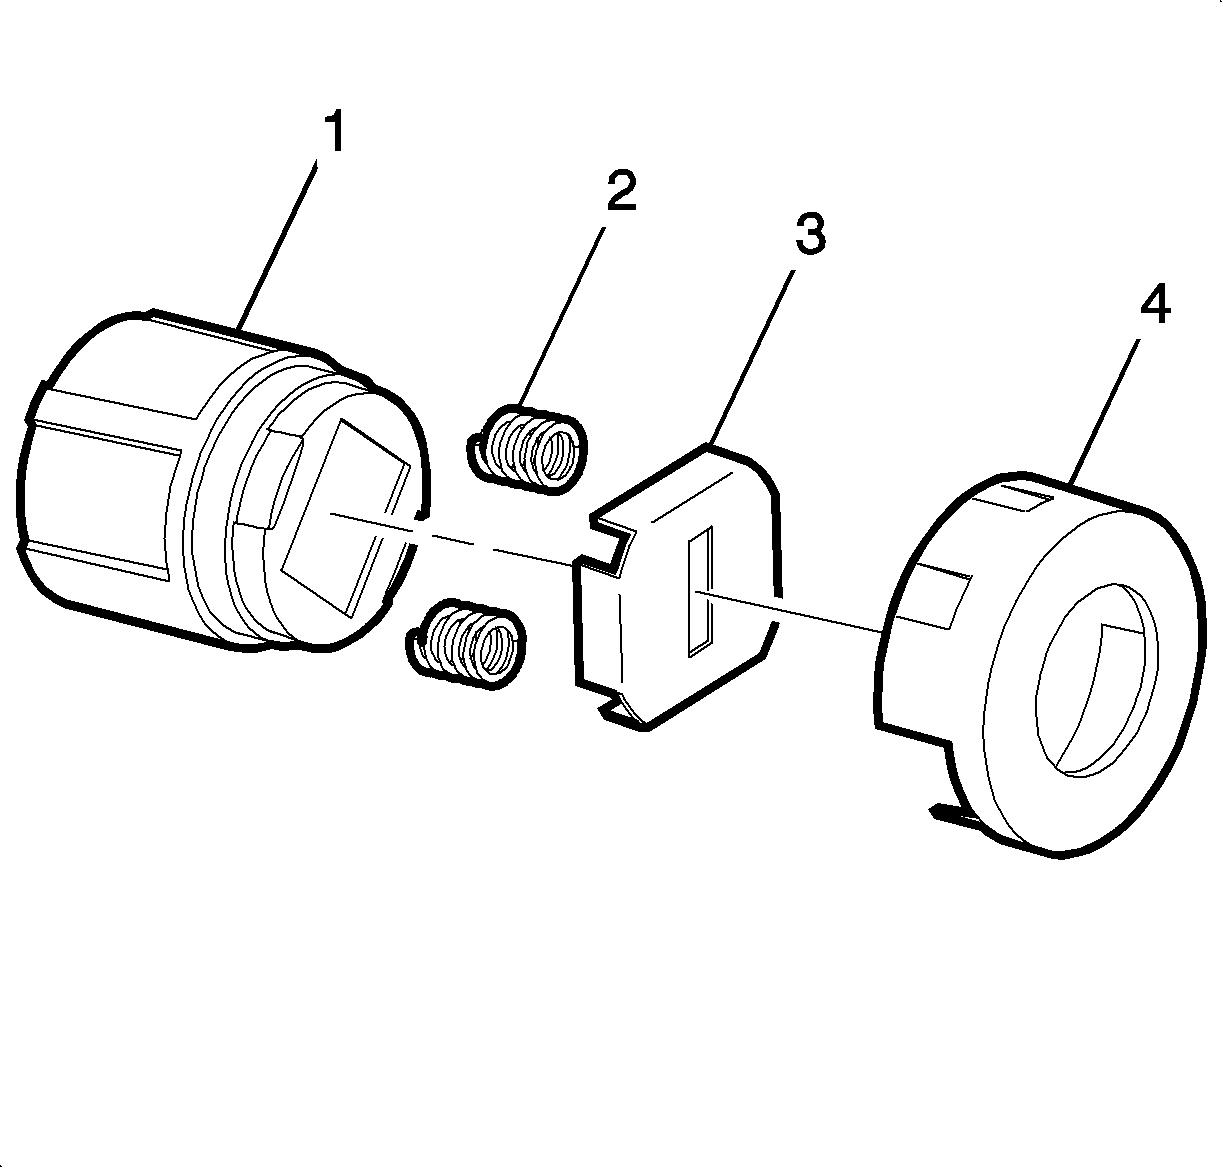
- Stake (1) the two metal areas of the cylinder (2) directly over the seal plate legs with a hammer and punch or chisel.
- Repeat this stake on the areas of the cylinder directly opposite of the first to stakes.
Important: Ignition lock cylinder reads key cut position 1 through 9.

Door Lock Cylinder Coding
- Handing is determined by color of pawl. Orange is left hand and green is right hand.
- Insert the appropriate tumbler (5) according to the key code into the corresponding tumbler ward.
- The tumblers will not immediately seat into position because the sidebar has been pre-assembled. The tumblers will have to be pushed past the sidebar with a small flat screwdriver or pocket knife.
- The tumbler springs (4) should then be inserted into the spring wells in the cylinder (3) where they will sit on top of the tumblers.
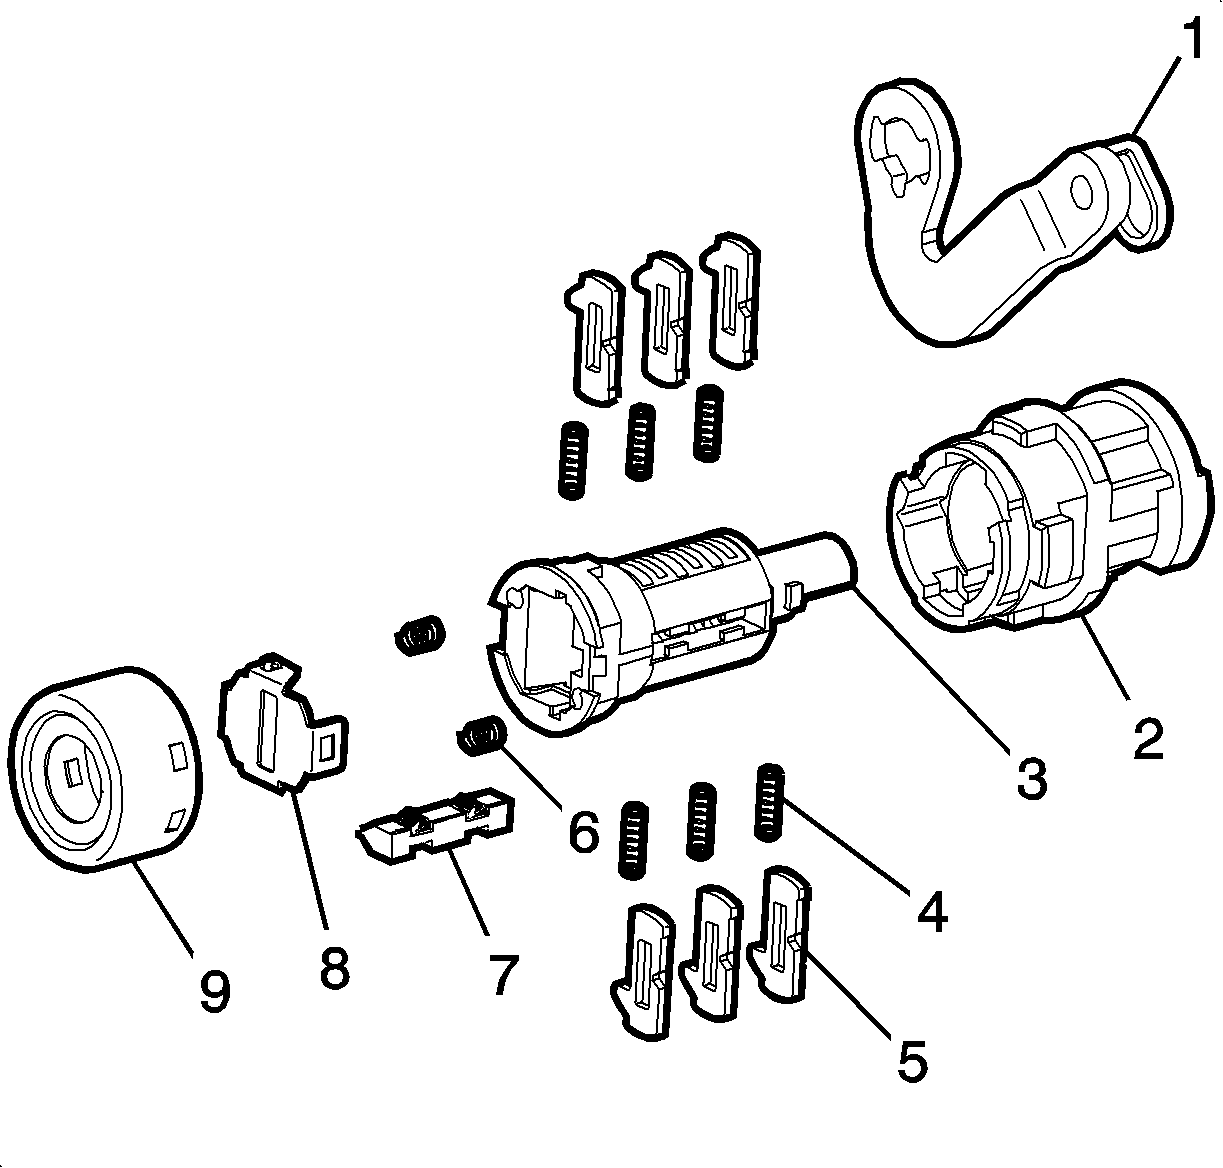
Important: Ignition lock cylinder reads key cut position 4 through 9.
Balance of Assembly
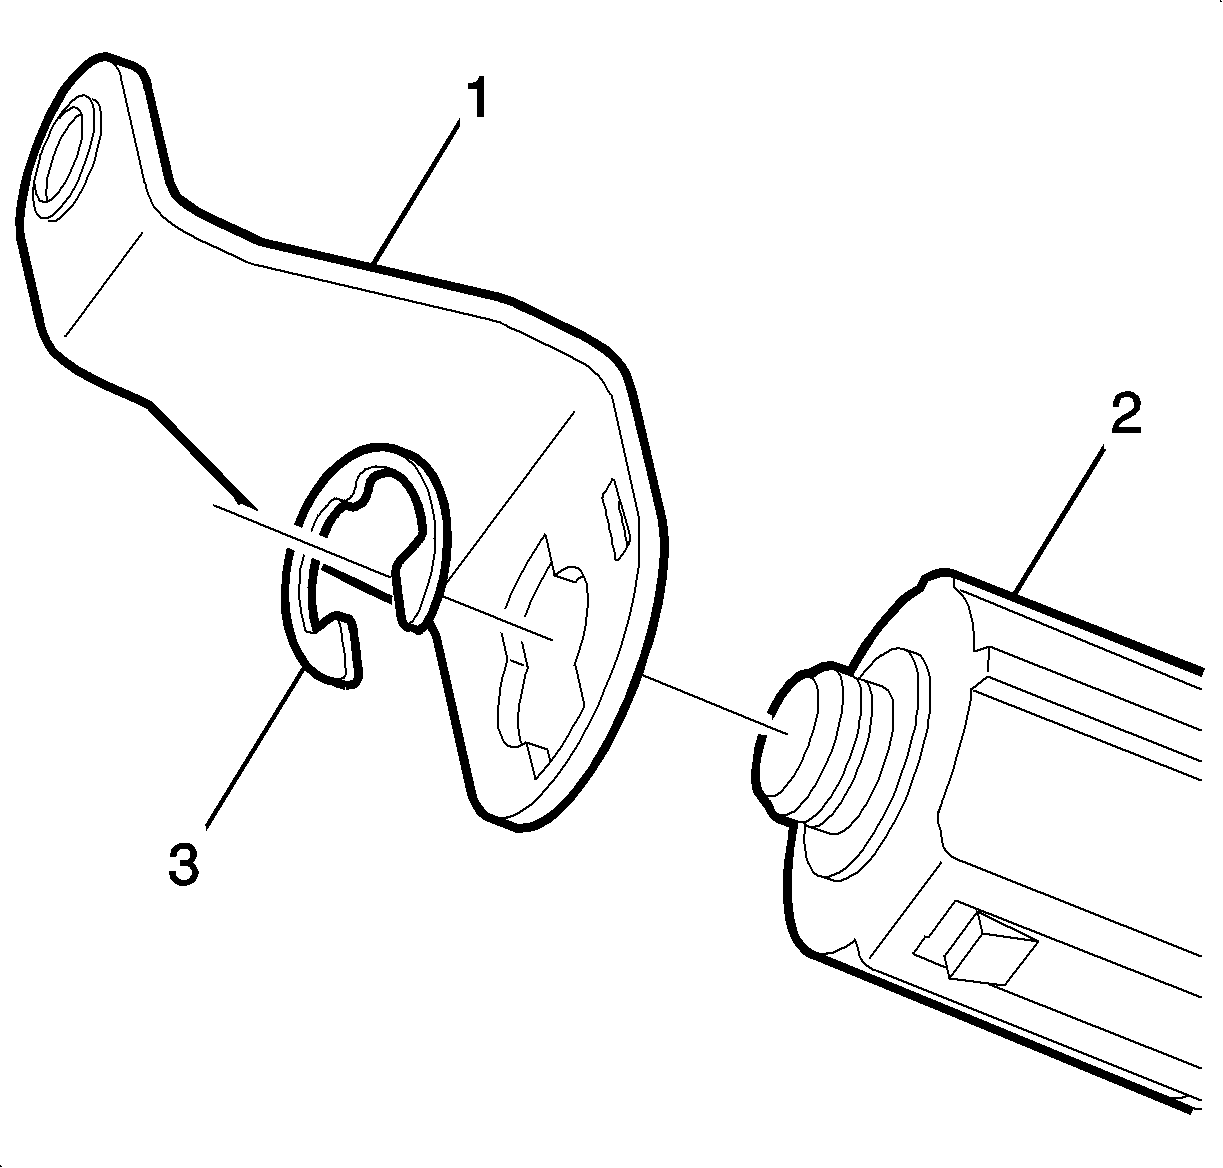
- With key inserted into cylinder, insert cylinder into housing (2). This will hold the pawl (1) into position once the cylinder is inserted into the housing.
- Shutter (8) and compression spring (6) are pre assembled to the cylinder in the service package.
- Install the cap (9) by aligning the notch in the cap with the large drain slot in the housing and pressing the cap until it bottoms out and snaps onto the housing (2).
Liftgate Lock Cylinder Coding
- Start at the position nearest the front of the cylinder (8)-also begin with the side with four spring holes (7).
- Select the correct tumblers for the desired code by the number stamped on the tumbler.
- Install tumblers into lock cylinder.
- Depress tumblers and insert key into lock cylinder. If lock cylinder is coded correctly, tumblers will be flush with cylinders.
- Insert lock cylinder into housing and align tumblers with the two channels inside housing.
- Remove key.
- Install shutter springs (2), shutter (3) and cap (4).
- Install Pawl (1) and retainer clip (3).
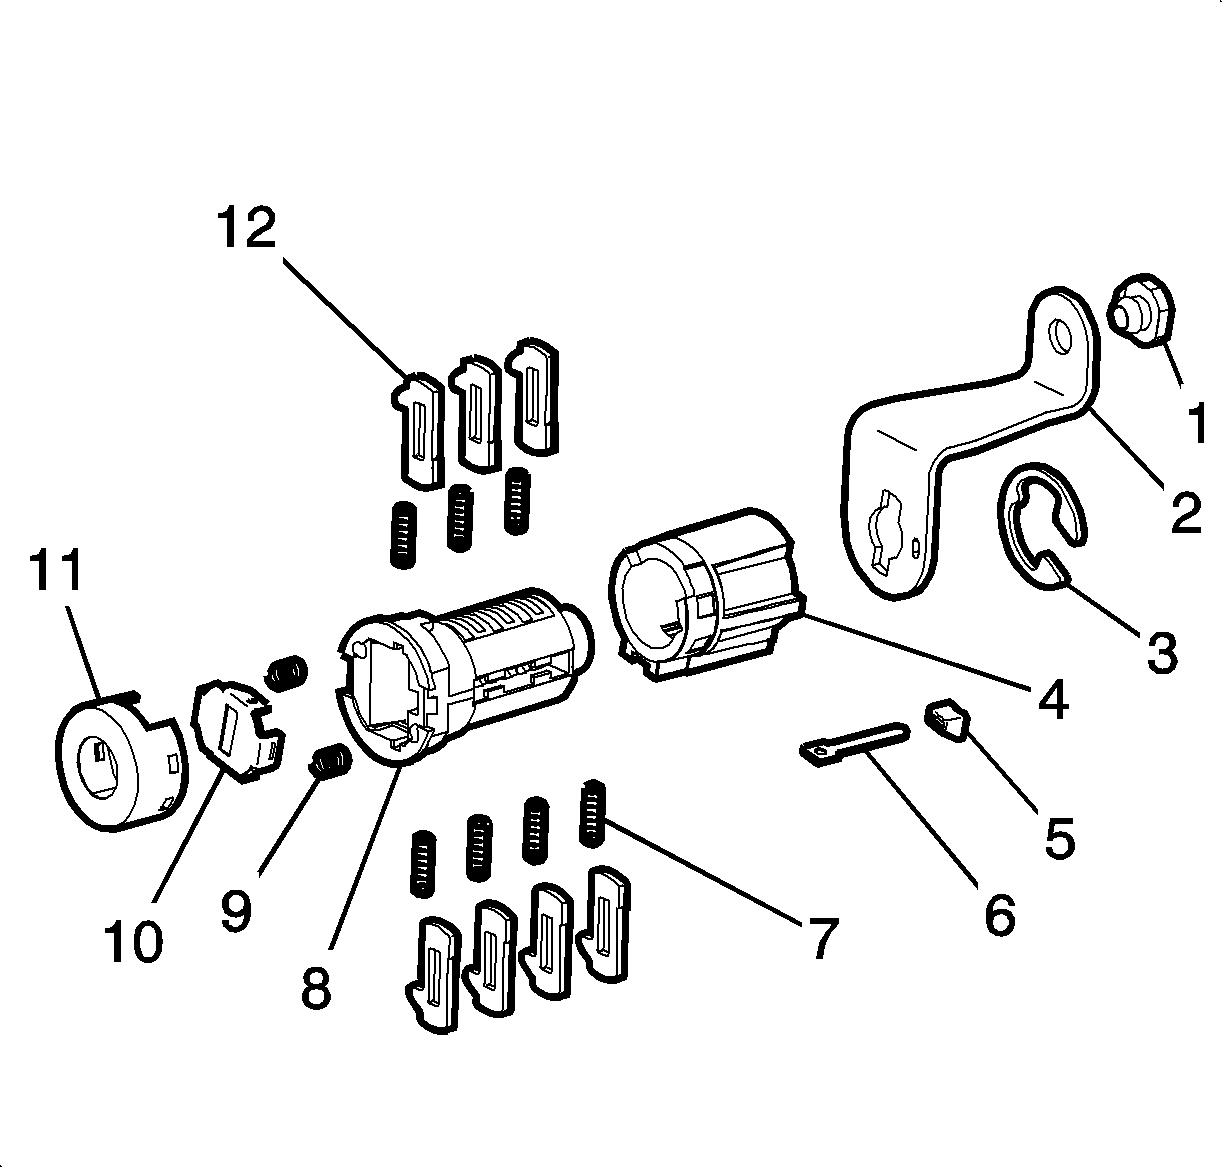
Important: Liftgate lock cylinder reads key cut position 2 through 8.
Balance of Assembly
- Insert cylinder (8) into housing (4).
- Place compressor springs (3) into head of cylinder (4).
- Place shutter assembly (3) onto cylinder by snapping legs of shutter into place of cylinder.
- Install the cap by aligning the notch in the cap with the large drain slot in the housing and pressing the cap until it bottoms out and snaps onto the housing.
- Install lever onto cylinder end and place clip (3) onto lever to hold lever. Clip is formed to fit into position.
- Place clip on lock assembly with legs up and snap over cylinder tail.
- Use a file push on legs to snap clip into correct position.
- Install rod clip onto lever by inserting small end into lever and forcing the clip to snap in tightly.
Glove Compartment Door Lock Cylinder Coding
- Select the correct lock tumblers for the desired code by the number stamped on the tumbler.
- Install lock tumblers (2), by applying downward pressure until locked into position.
- Check coding of lock cylinder (4). Insert key.

Important: When key is inserted into correct coded lock cylinder, all tumblers except the retainer is flush with the lock cylinder.
