Tools Required
J 44337 Build Plate Assembly
- Ensure that the driven pulley retainer extension (1) is properly aligned to the case cover assembly.
- Ensure that the drive belt assembly is installed and that the driven pulley assembly is still in the compressed position. Refer to Drive Belt Installation .
- Position the case cover assembly onto the drive and driven pulley assemblies.
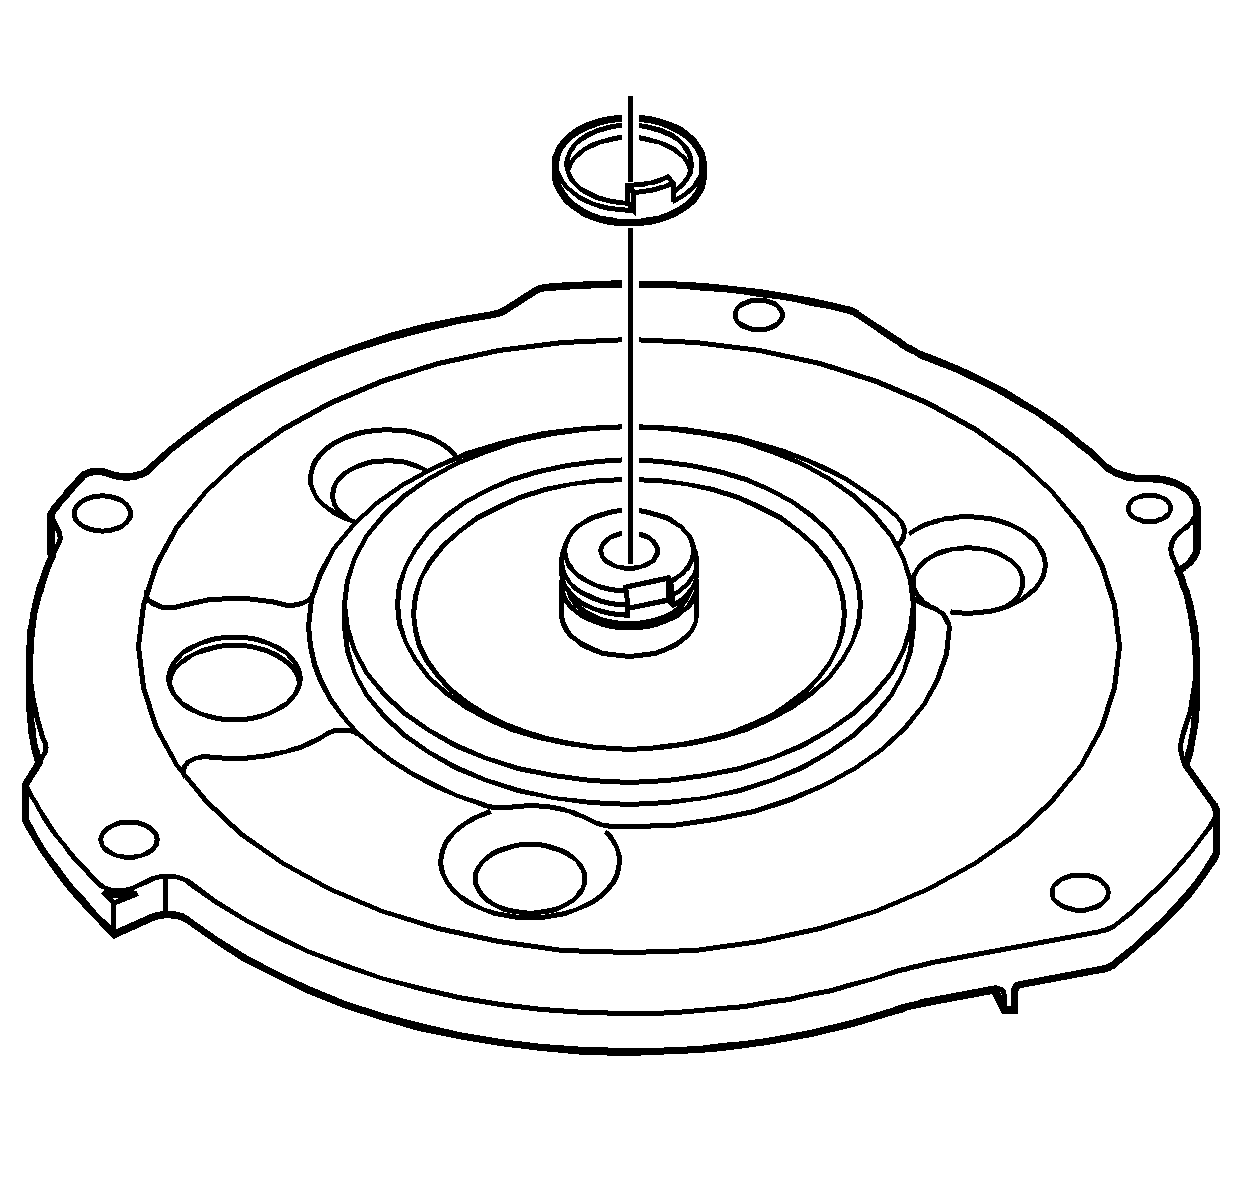
- Install the retaining ring for the drive pulley bearing.
- Install the driven pulley bearing retainer and 6 bolts.
- Install the drive pulley bearing retainer and 3 nuts.
- Using the J 44337 , slowly pull up on the two clamp handles in order to release the spring force on the driven pulley assembly.
- Remove the U-shaped ring from the driven pulley.
- Inspect the case cover seal on the driven pulley cover for damage. Replace if necessary.
- Install the 2 NEW driven pulley cover seals and the NEW case cover O-ring seal on the case cover assembly.
- Install the driven pulley cover and the 2 bolts on the case cover assembly.
- Inspect the case cover seal on the drive pulley cover for damage. Replace if necessary.
- Install the 2 NEW drive pulley cover seals on the case cover assembly.
- Install the drive pulley cover and the 2 bolts on the case cover assembly.
- Remove the 2 tie straps from the belt assembly.
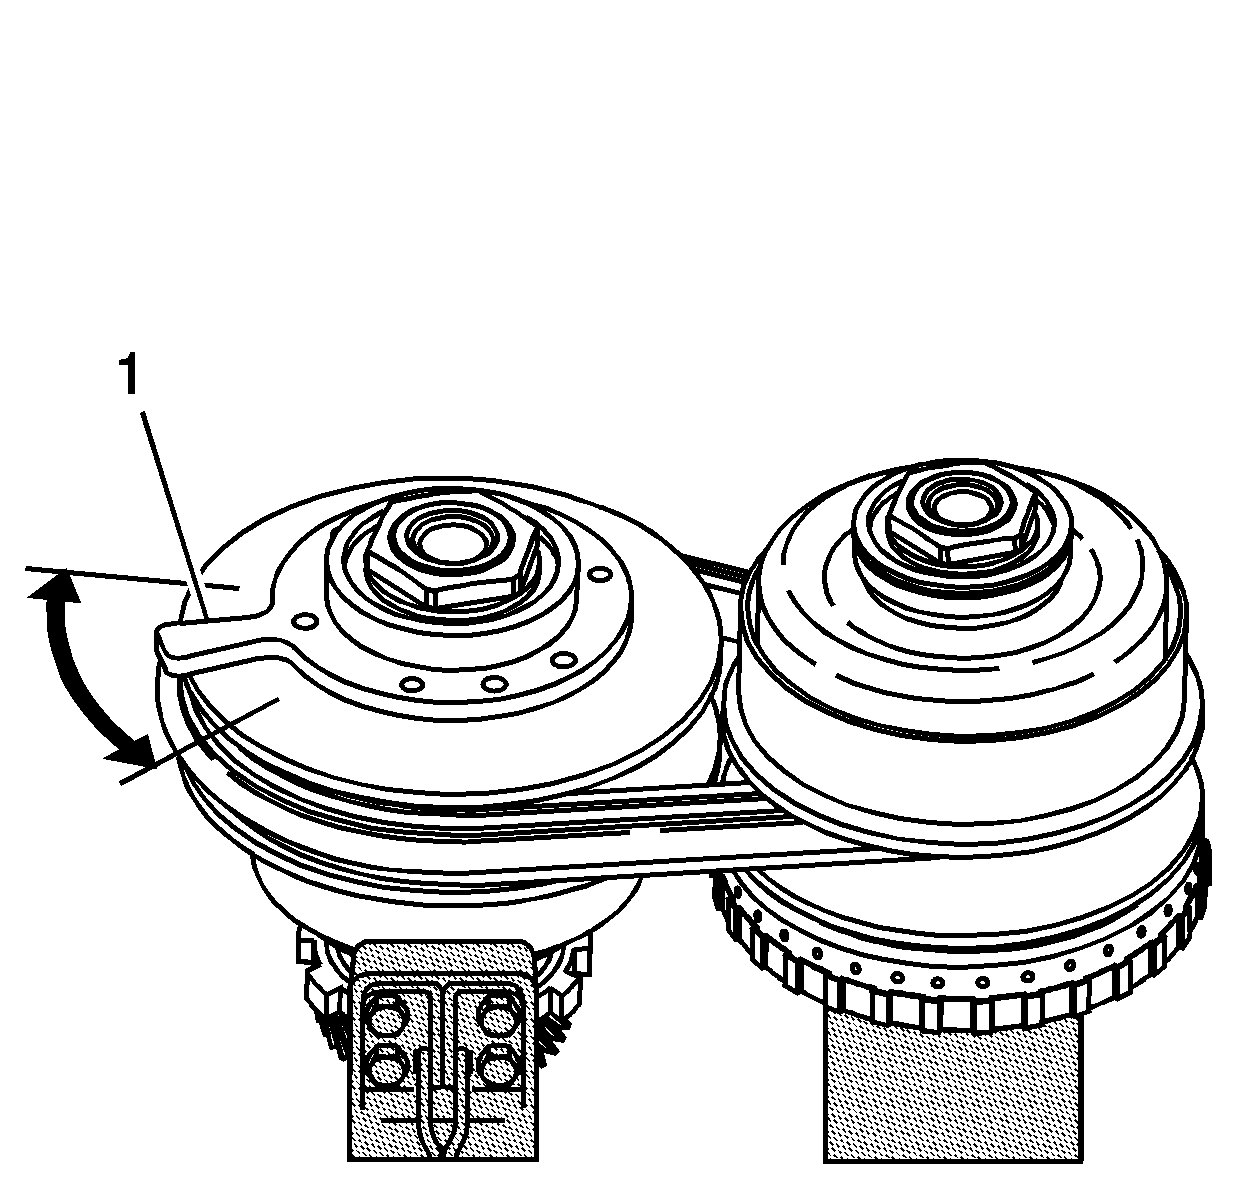
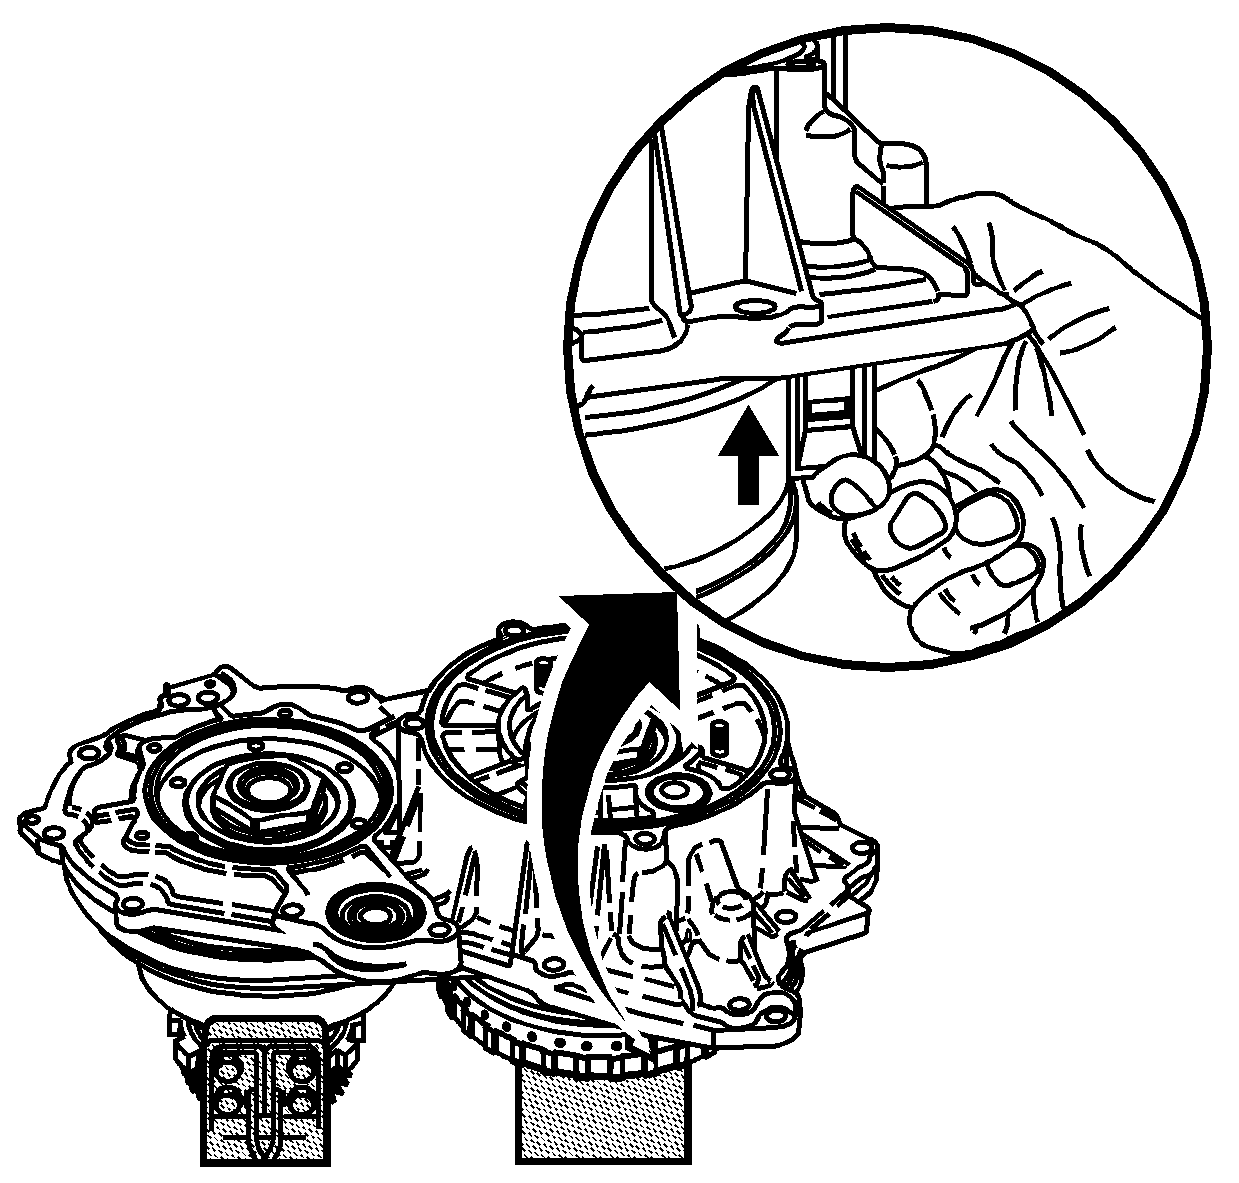
Important: When installing the case cover assembly onto the drive and driven pulley assemblies, ensure that the follower is positioned properly on the drive pulley.
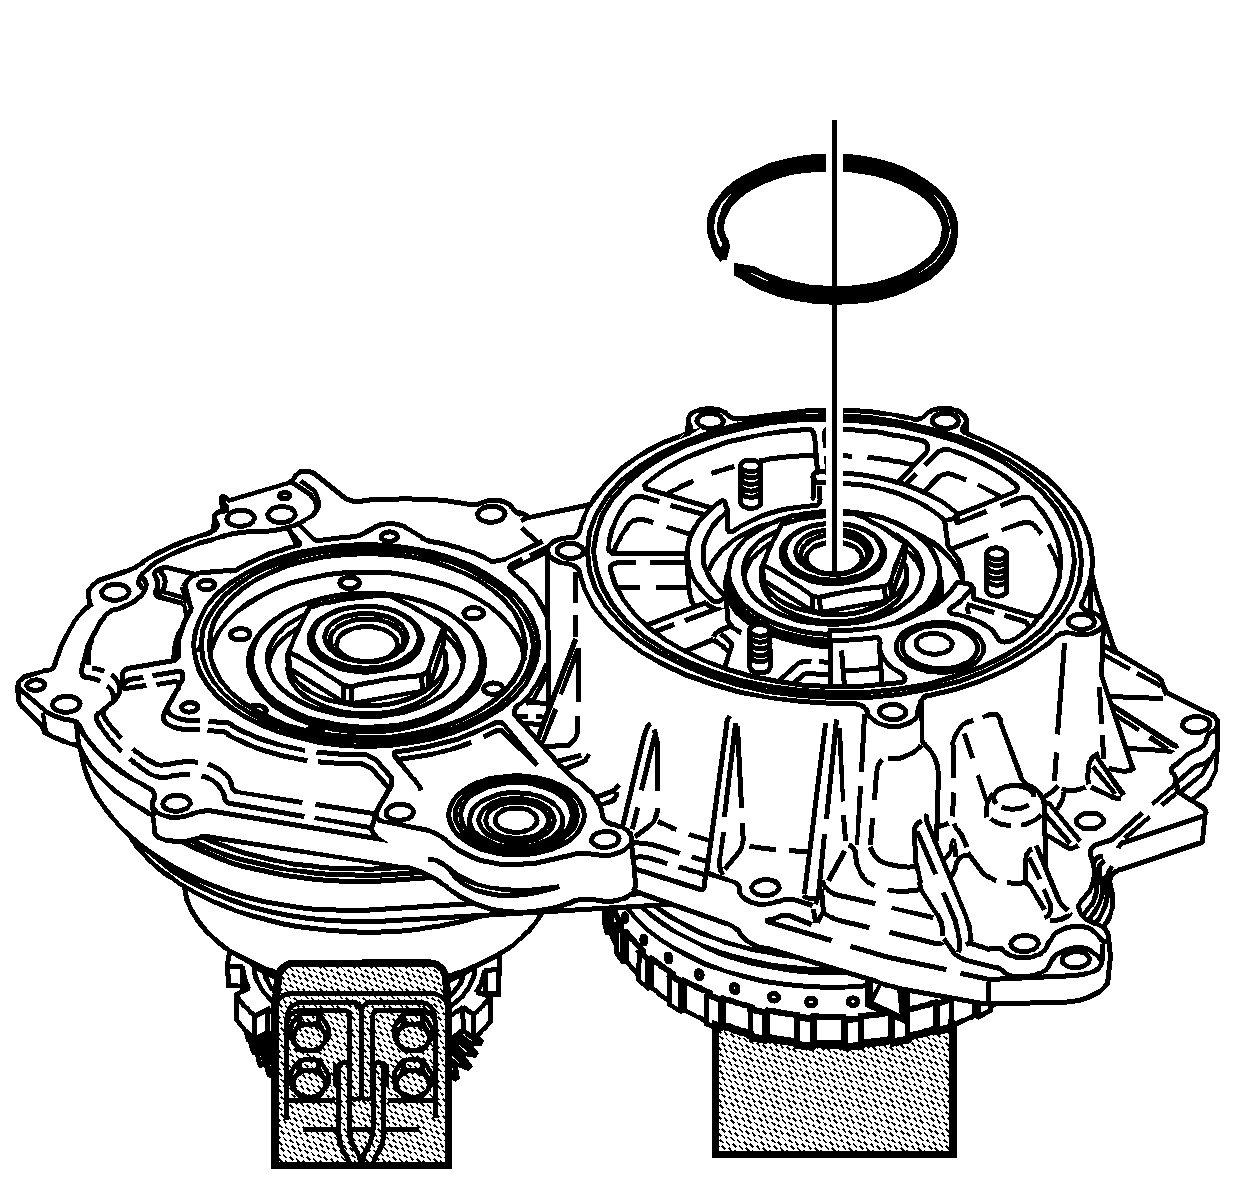
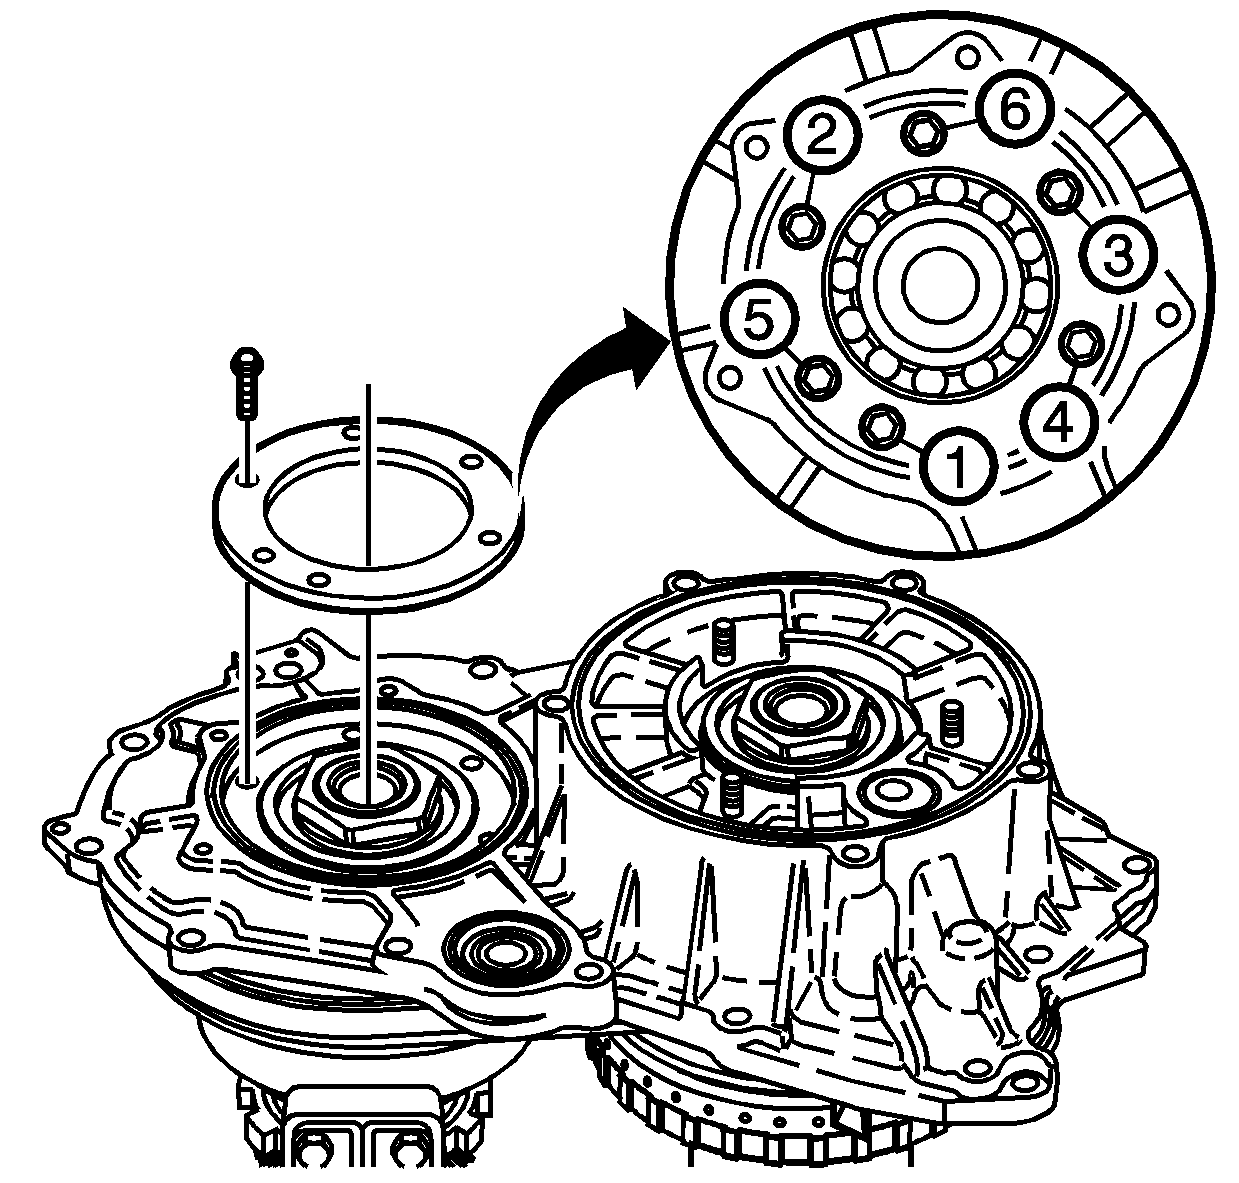
Notice: Use the correct fastener in the correct location. Replacement fasteners must be the correct part number for that application. Fasteners requiring replacement or fasteners requiring the use of thread locking compound or sealant are identified in the service procedure. Do not use paints, lubricants, or corrosion inhibitors on fasteners or fastener joint surfaces unless specified. These coatings affect fastener torque and joint clamping force and may damage the fastener. Use the correct tightening sequence and specifications when installing fasteners in order to avoid damage to parts and systems.
Important: Ensure that the bolt holes in the driven pulley retainer extension are properly aligned with the bolt holes in the driven pulley bearing retainer.
Tighten
| • | Tighten the bearing retainer bolts - 8 mm hex head to 5 N·m (44 lb in) in the sequence shown. |
| • | Tighten the bearing retainer bolts - 10 mm hex head to 9 N·m (80 lb in) in the sequence shown. |
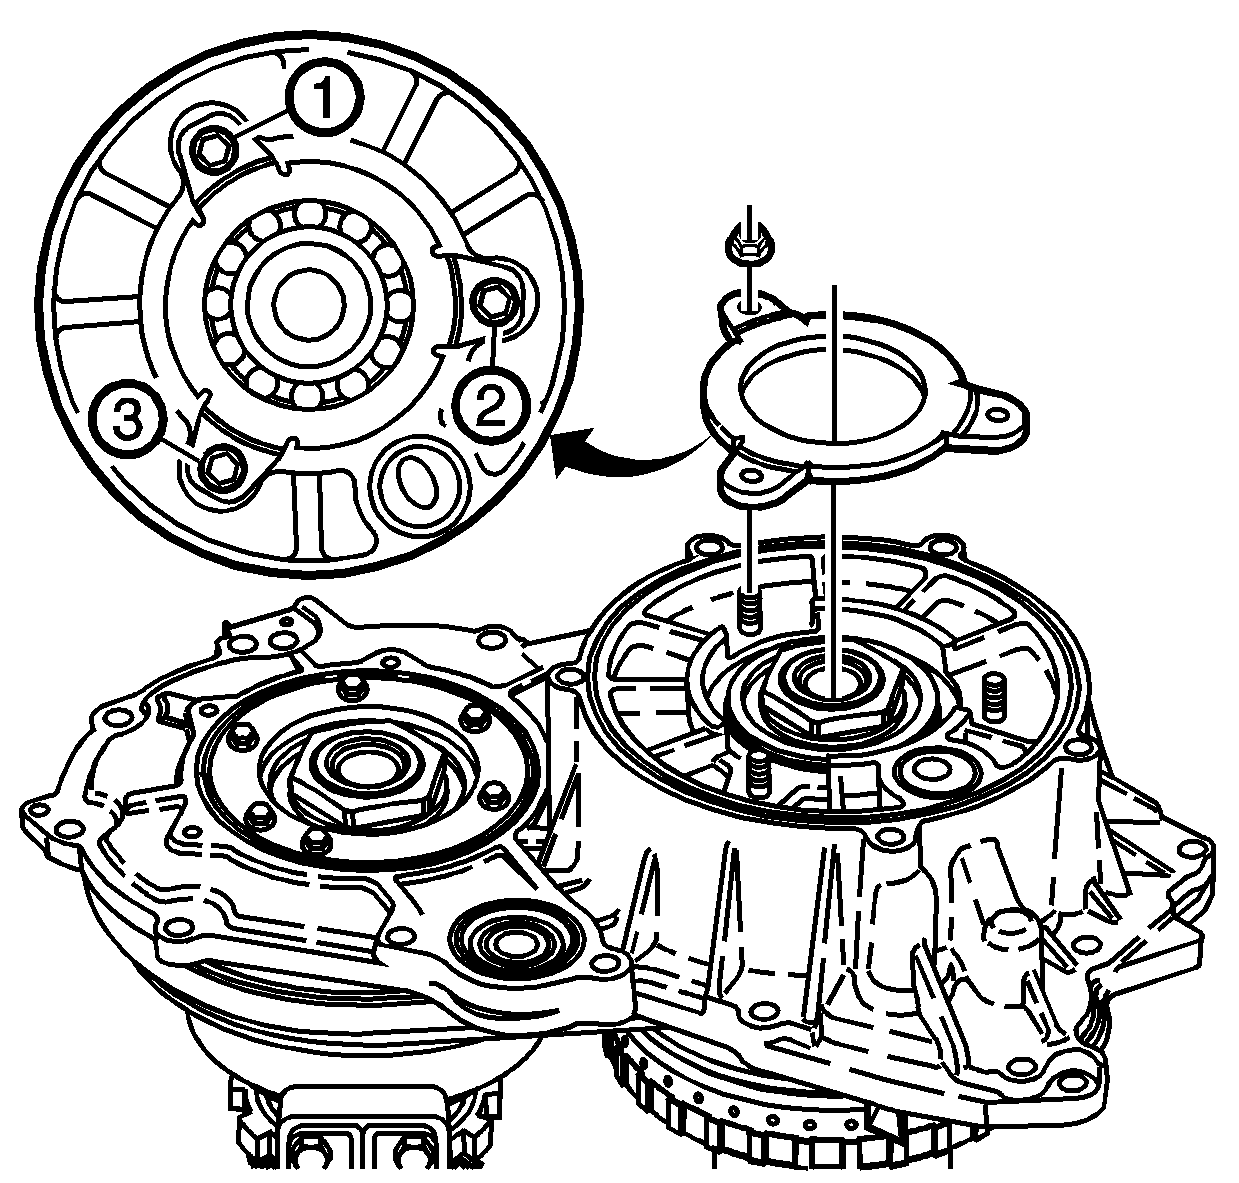
Tighten
Tighten the bearing retainer nuts to 11 N·m (8 lb ft)
in the sequence shown.
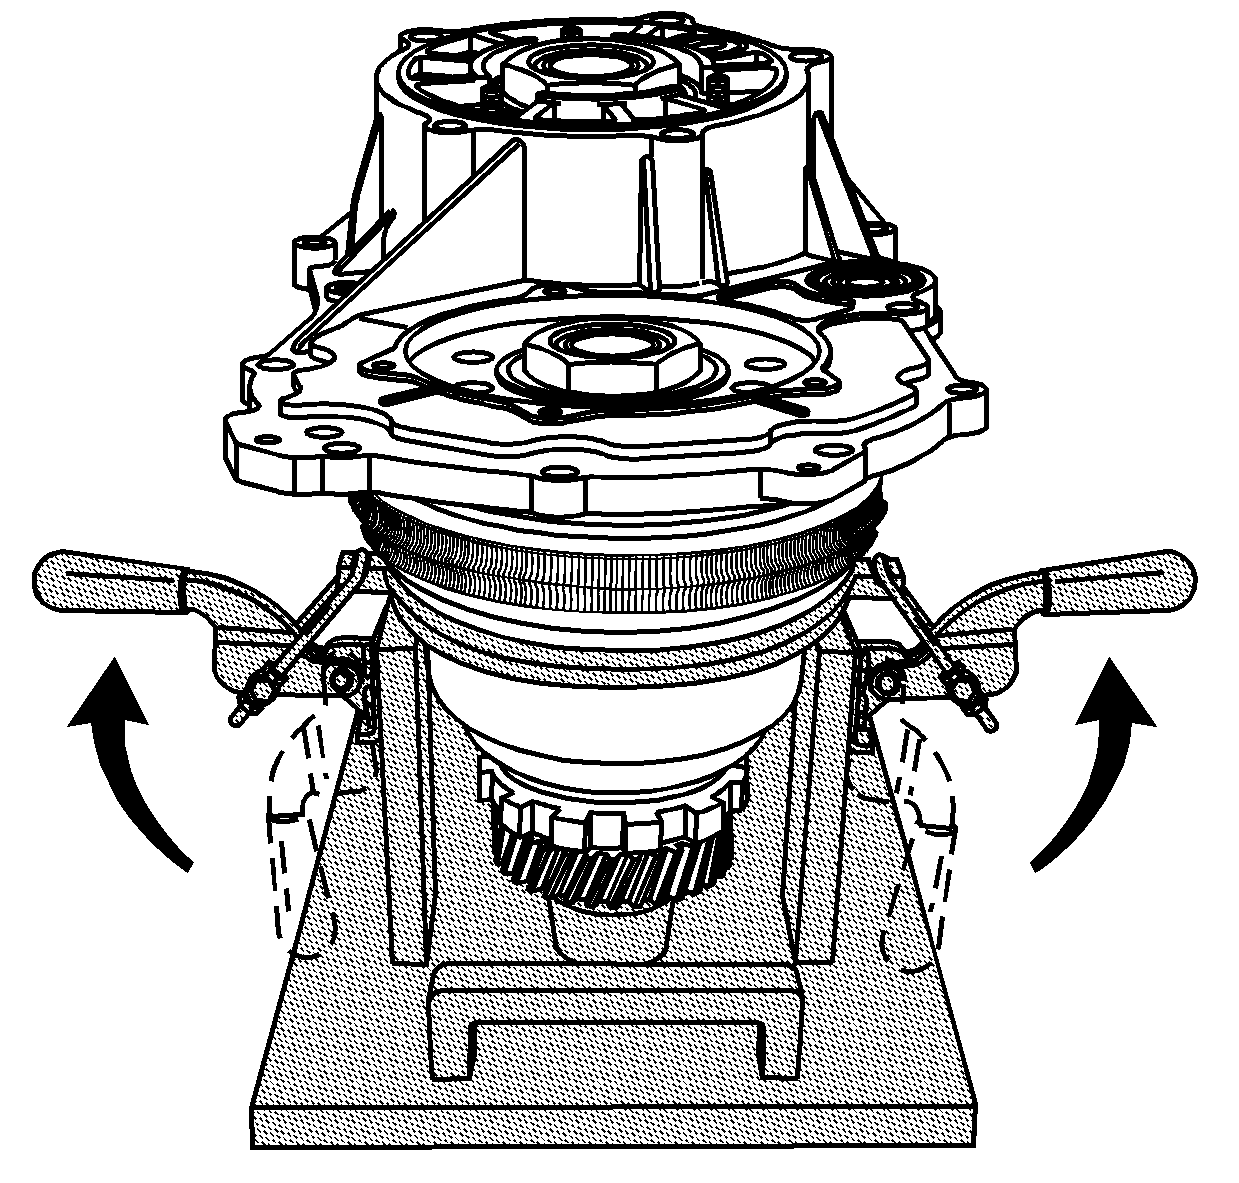
Notice: When releasing the spring force on the driven pulley assembly, slowly pull up on the two clamp handles. A rapid release of the spring force may cause damage to the belt assembly.
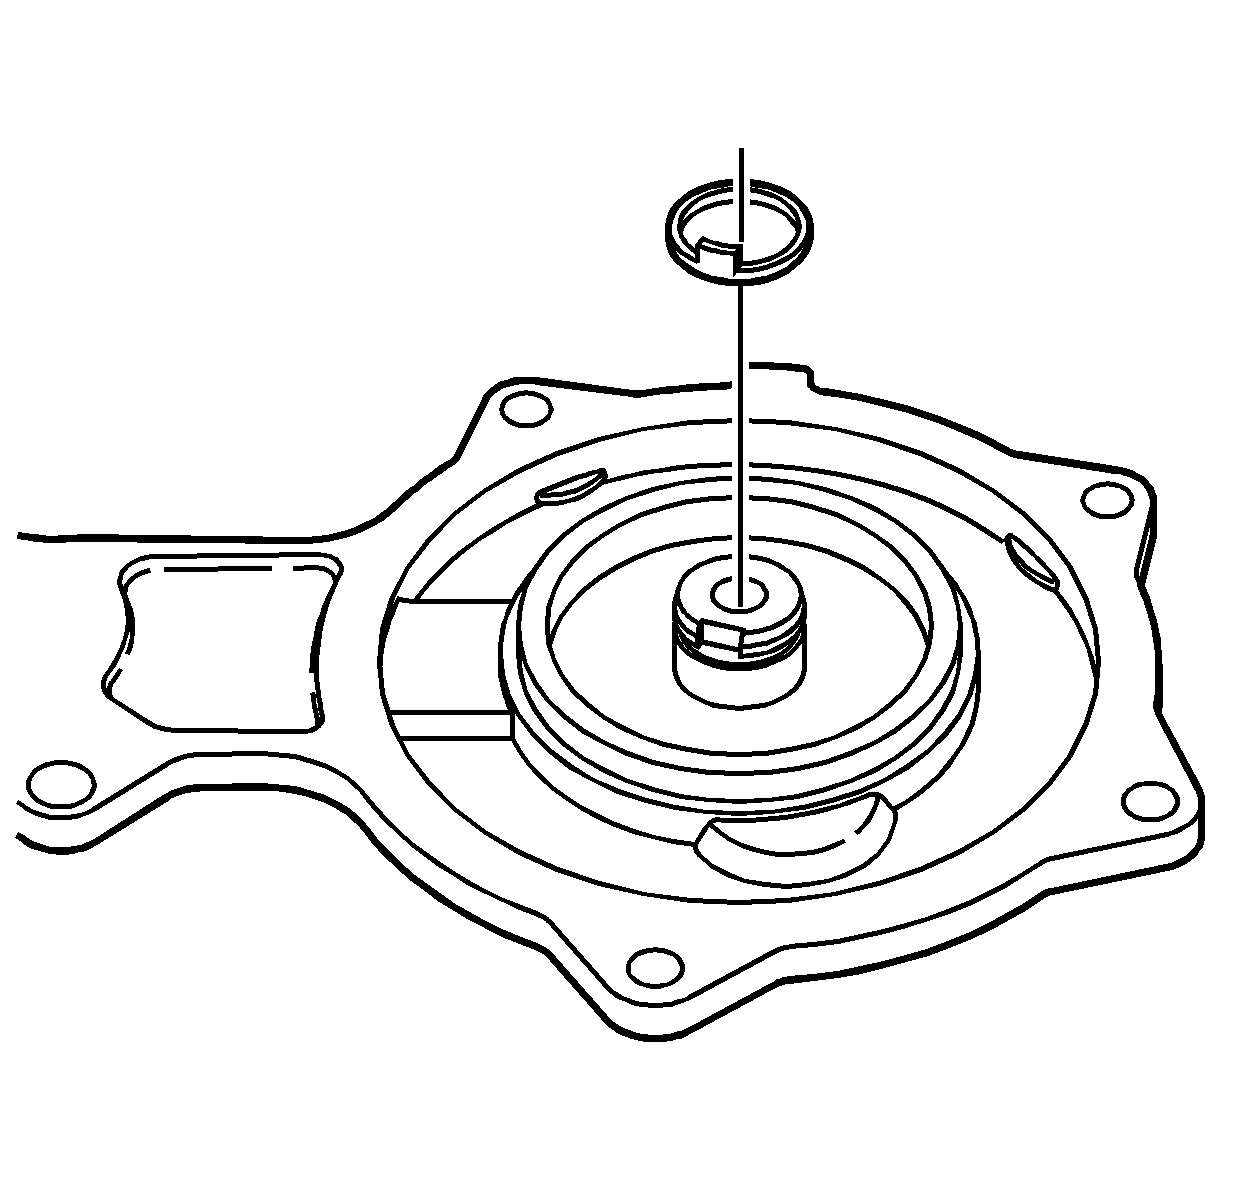
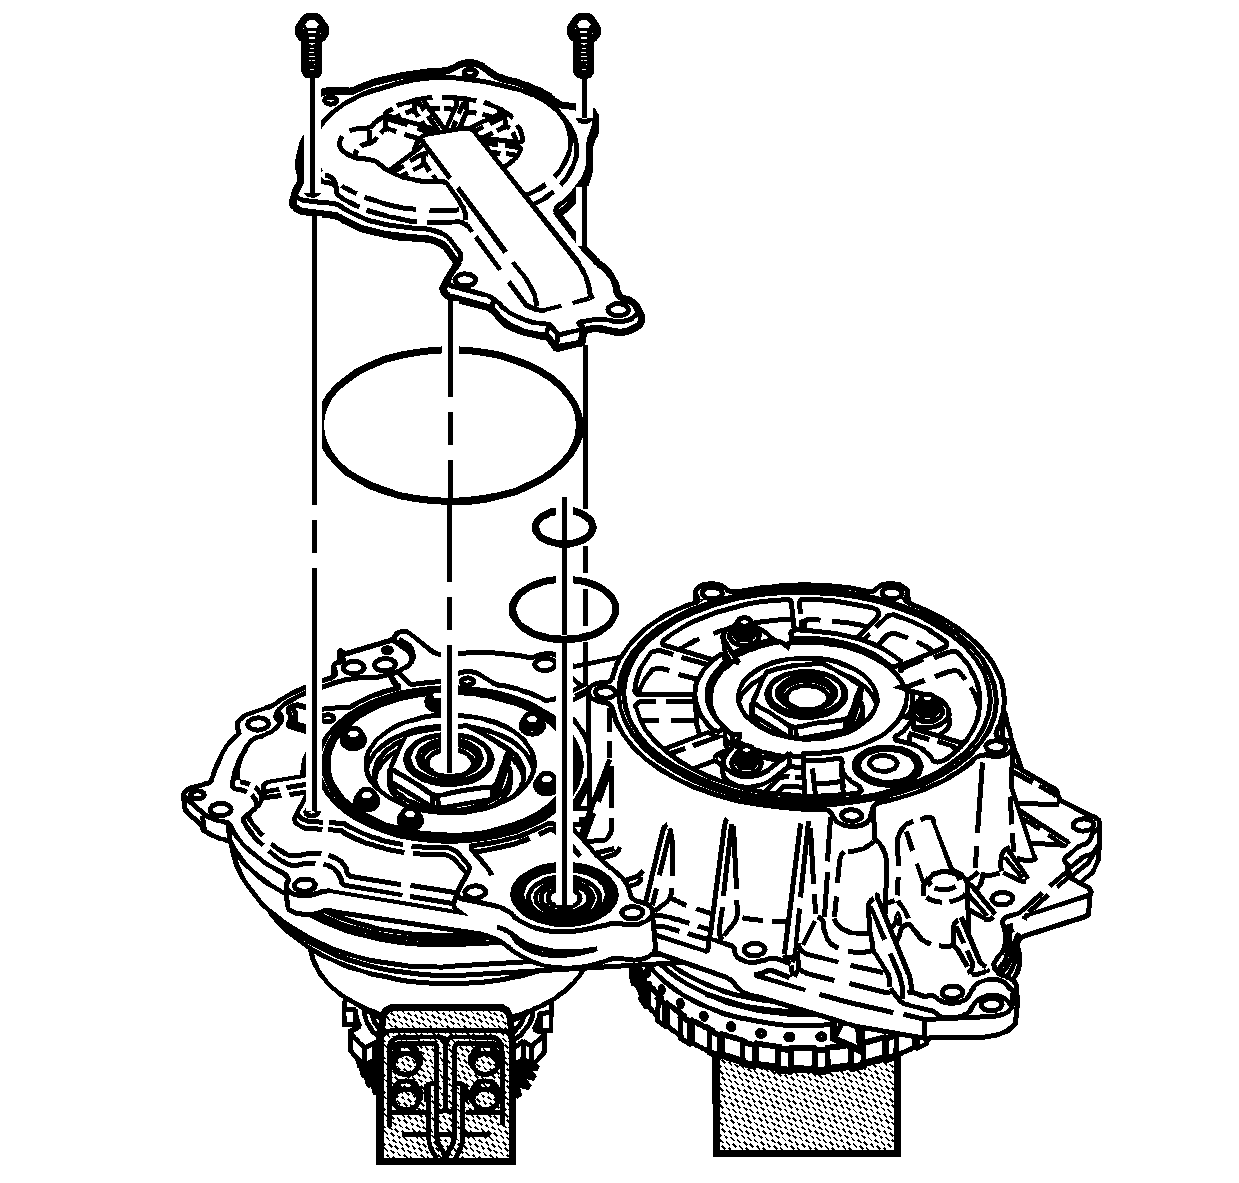
Important: Do not install all 4 of the bolts used to secure the driven pulley cover to the case cover assembly. Two of the bolt holes are used for attaching the case cover lifting bracket.
Tighten
Tighten the bolts to 11 N·m (8 lb ft).
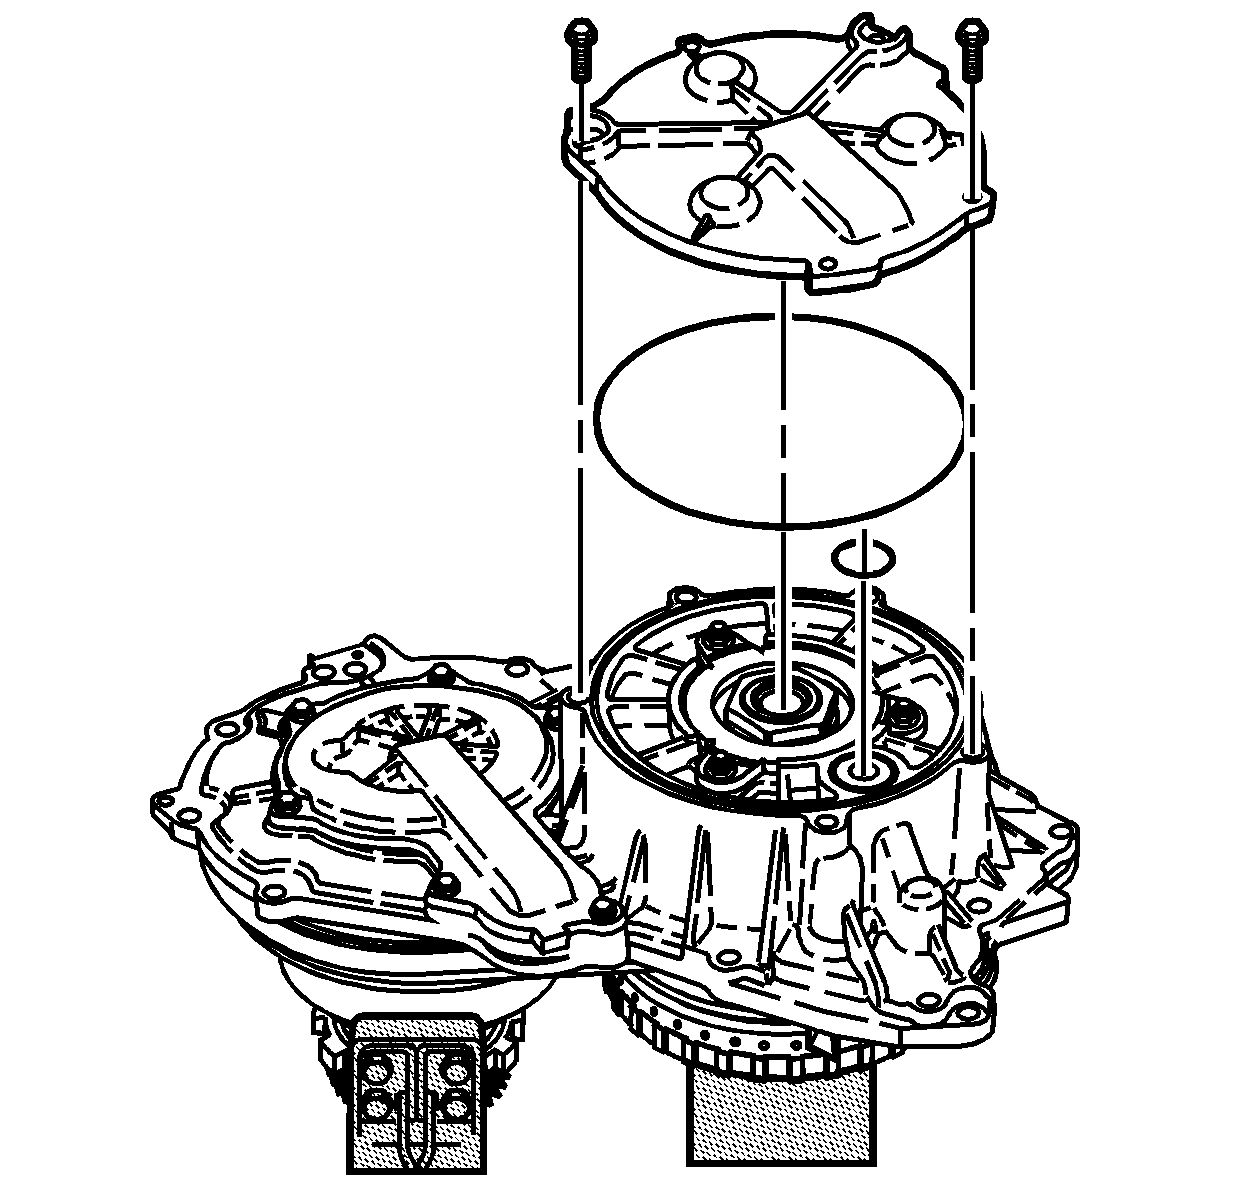
Important: Do not install all 4 of the bolts used to secure the drive pulley cover to the case cover assembly. Two of the bolt holes are used for attaching the case cover lifting bracket.
Tighten
Tighten the bolts to 11 N·m (8 lb ft).
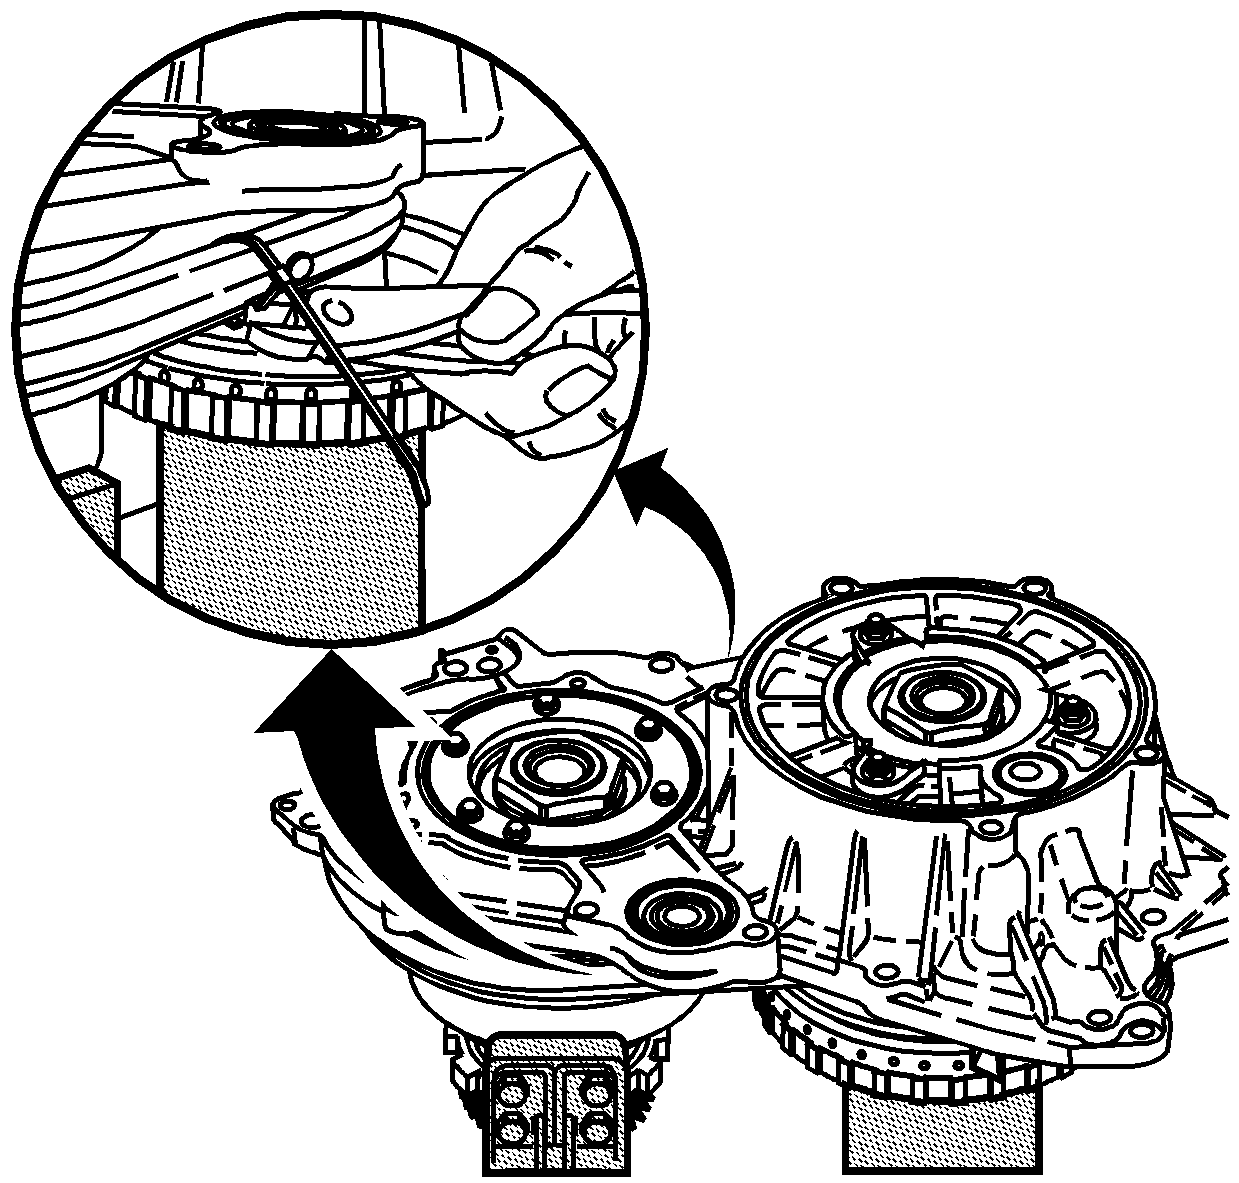
Notice: Avoid damage to the belt ringsets. Damage to the ringsets may cause the belt to become inoperative.
