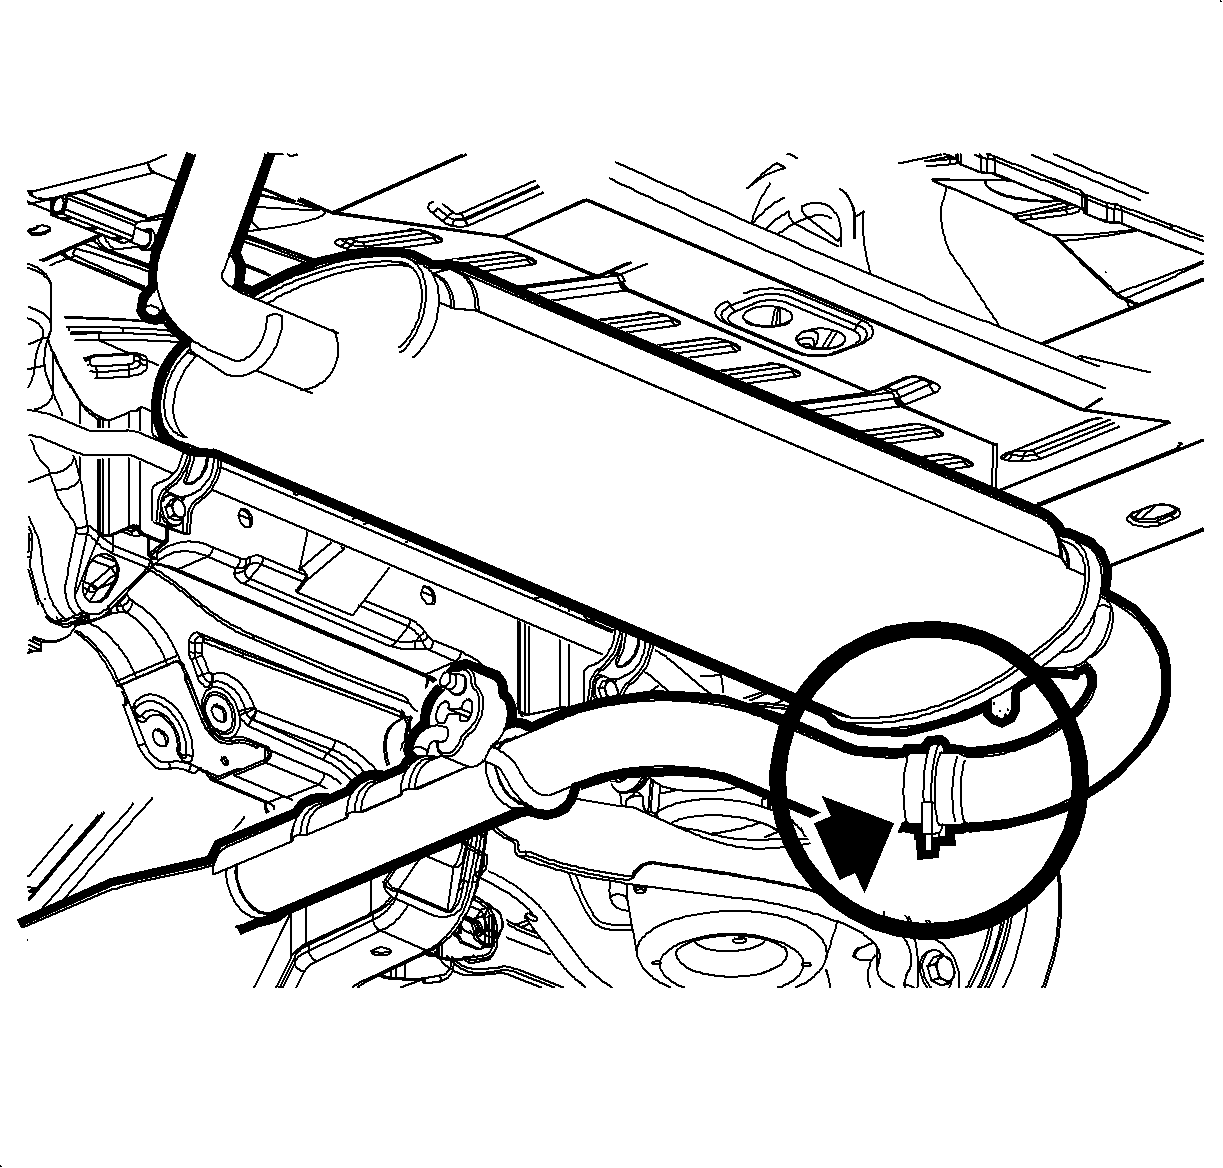
Exhaust Muffler Replacement Production Assembly
Removal Procedure
- Hoist the vehicle.
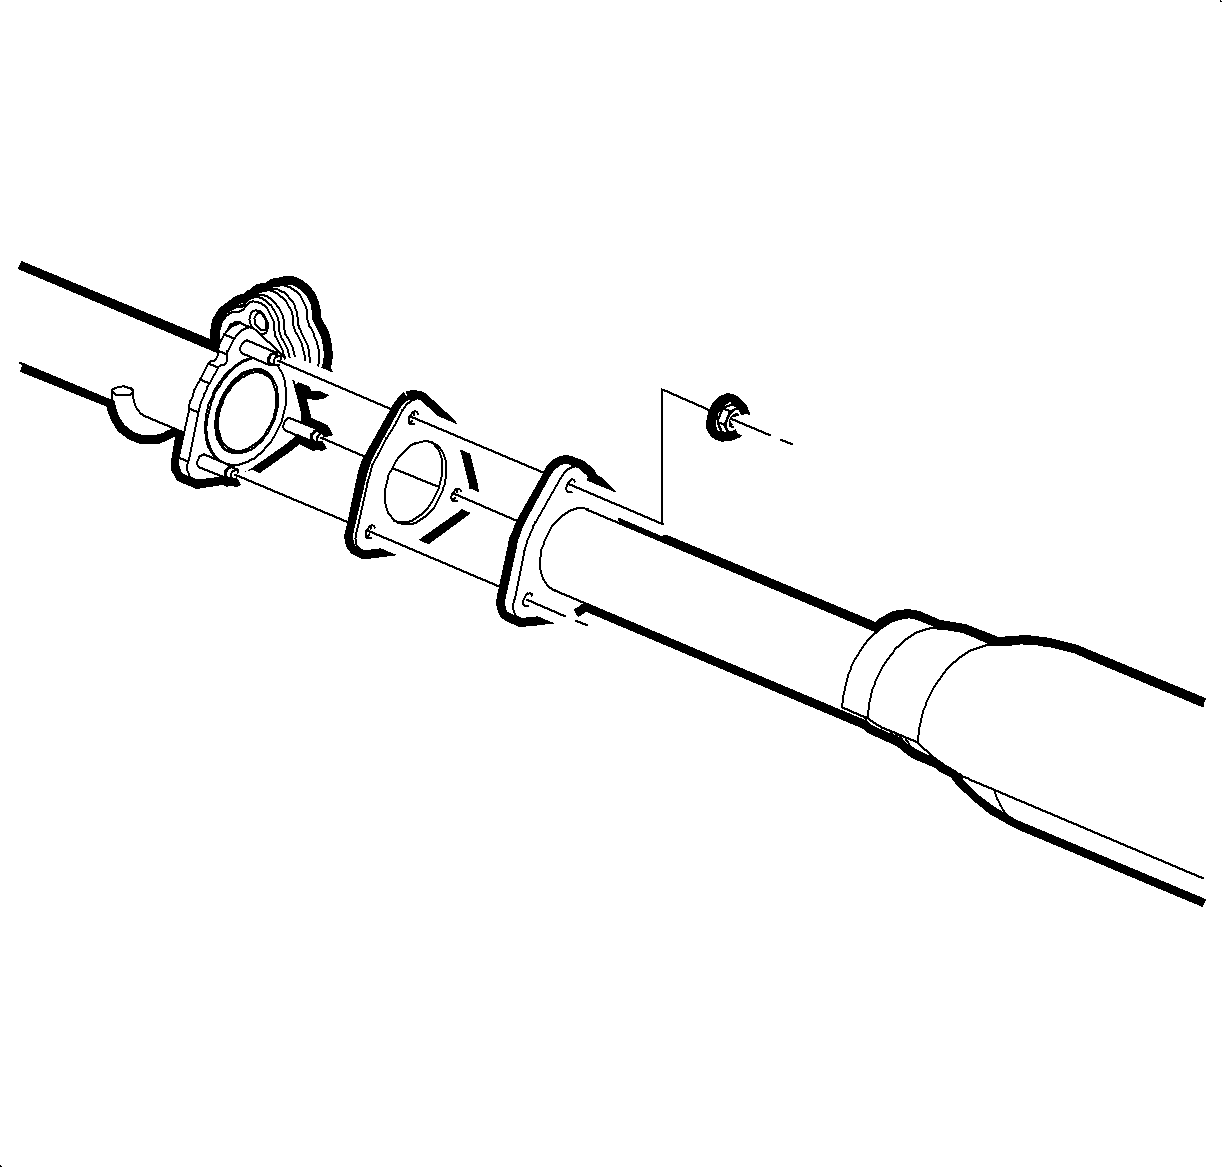
- Remove the rear exhaust pipe flange to intermediate pipe nuts.
- Separate the hangers from rubber isolators.
- Remove the muffler and pipe assembly.
Caution: Ensure that the vehicle is properly supported and squarely positioned. To help avoid personal injury when a vehicle is on a hoist, provide additional support for the vehicle on the opposite end from which the components are being removed.
Important: The muffler and resonator is not available as a complete assembly. Separate resonator and muffler assemblies are available as service parts.

Installation Procedure
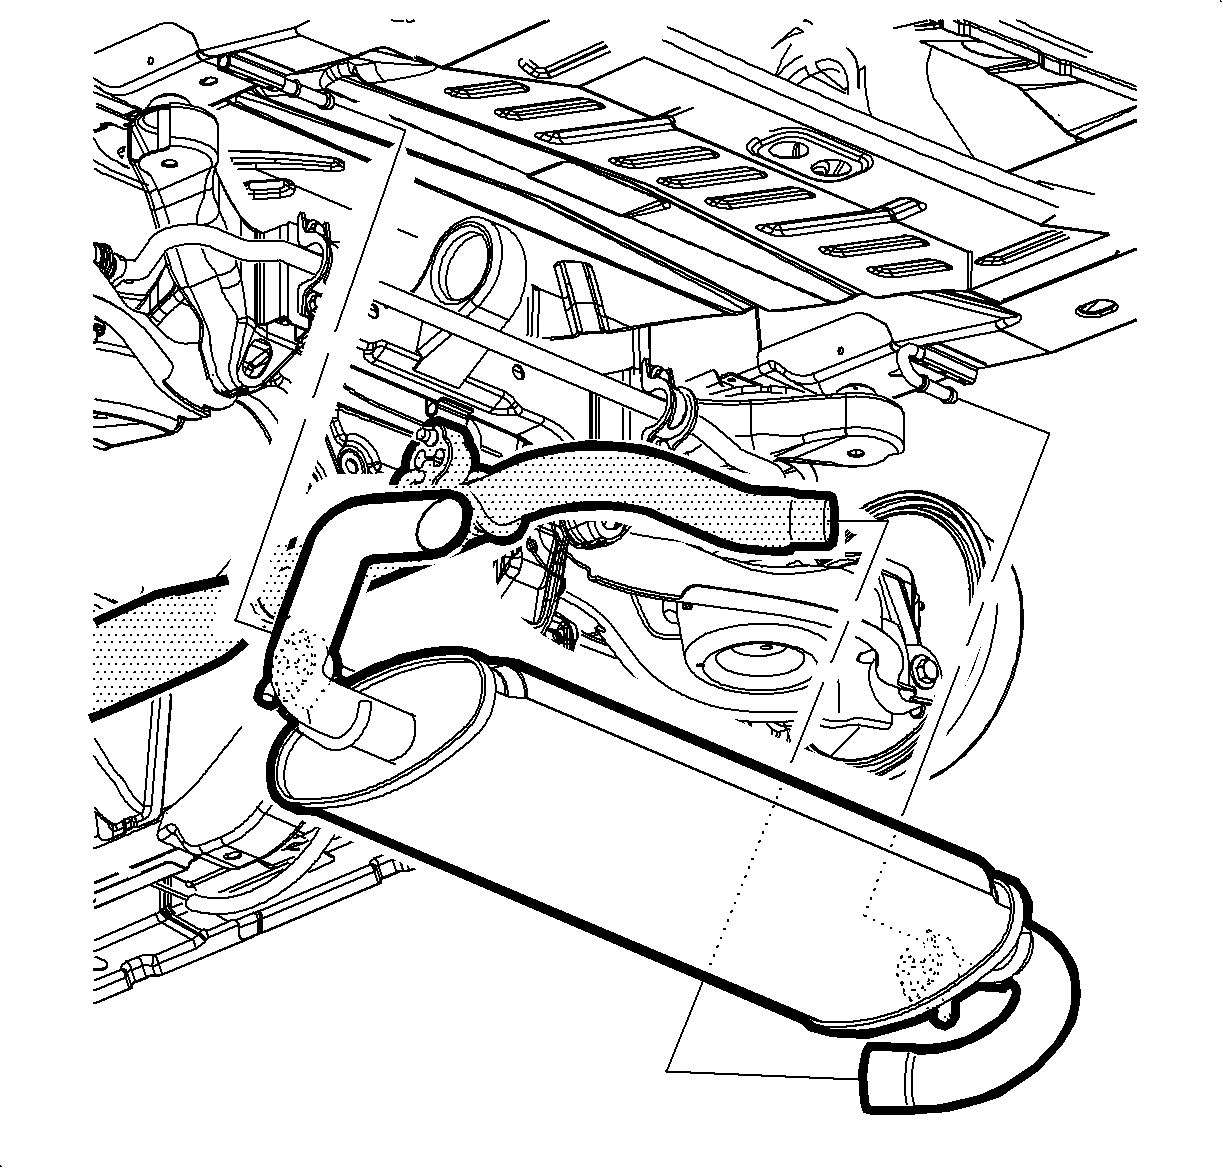
- Position the muffler and resonator assembly to the vehicle and install into the rubber mounts.
- Install the new gasket onto the exhaust pipe rear flange.
- Assemble the intermediate pipe to exhaust pipe, install new nuts and tighten.
- Check the entire exhaust system for leaks.
Notice: Refer to Fastener Notice in the Preface section.
Tighten
Tighten the exhaust pipe-to-intermediate pipe nuts to 30 N·m (22 lb ft).
Exhaust Muffler Replacement Service Part
Tools Required
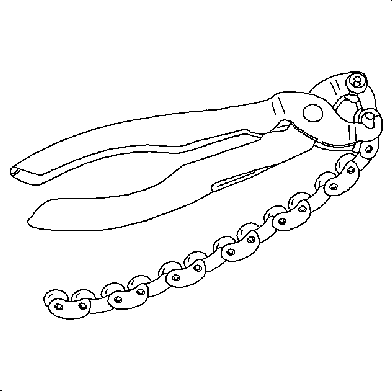
SA9168NE Exhaust and Tailpipe Cutter
Removal Procedure
- Raise and support the vehicle. Refer to Lifting and Jacking the Vehicle .
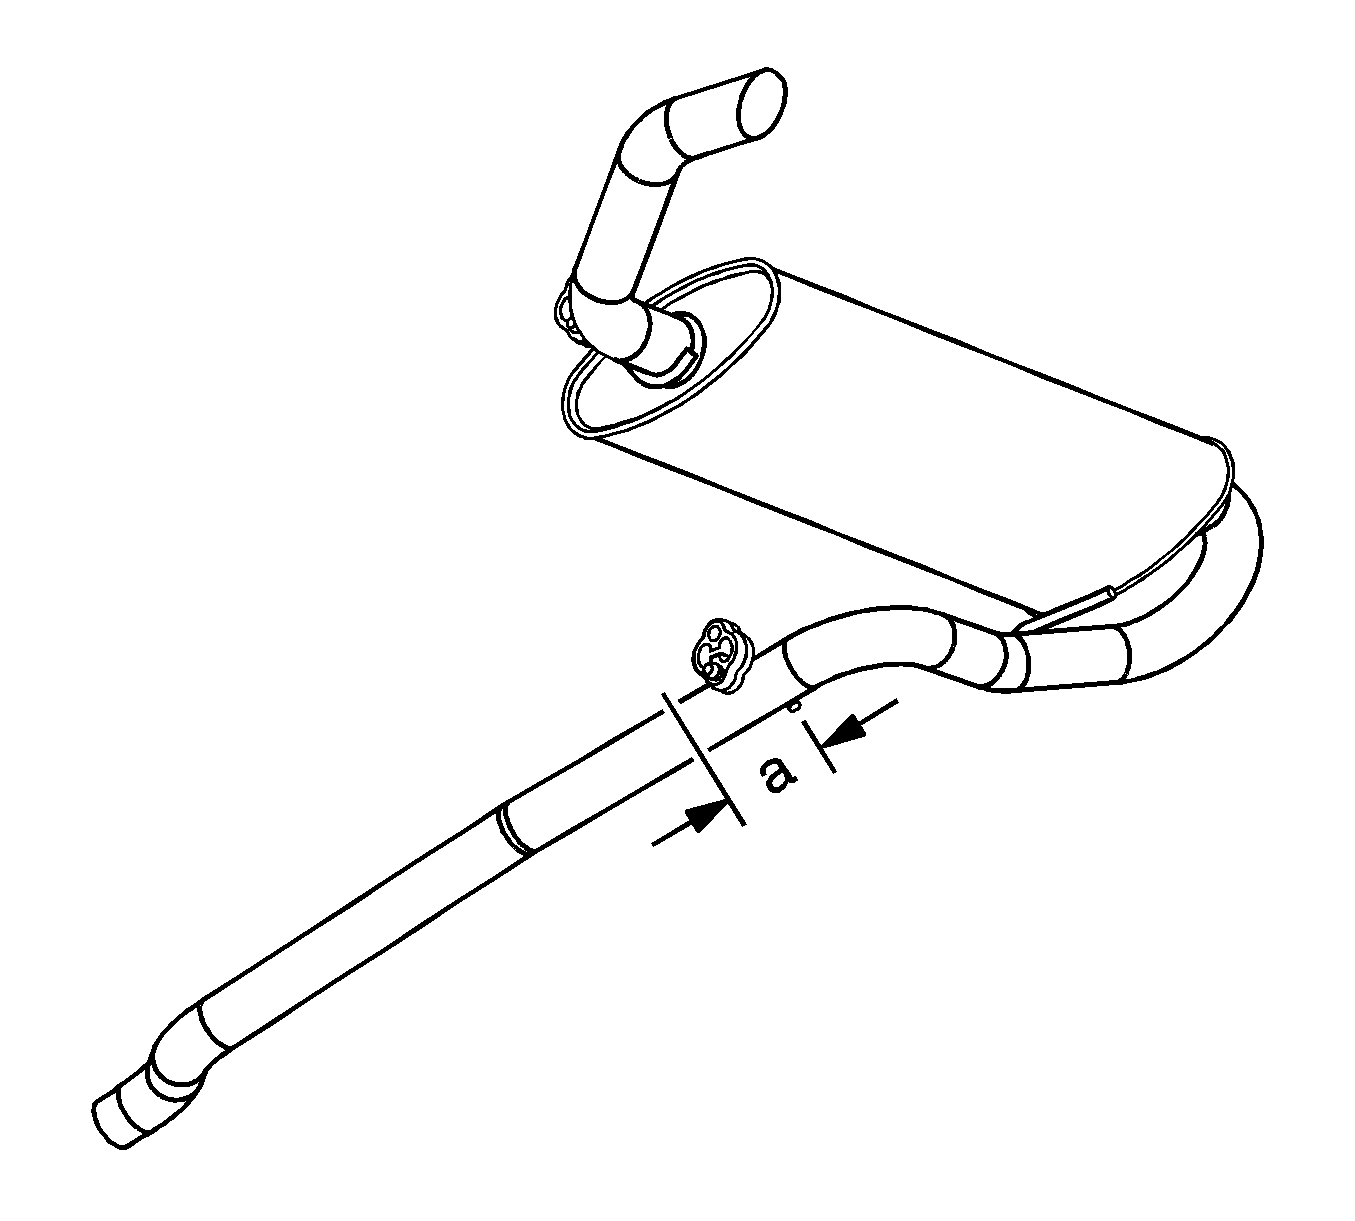
- Obtain a piece of (non-stretchable) string 135 mm (5.3 in) long. Starting from the muffler, place the string along the pipe. Mark the end of the string on the pipe.
- Using a SA9168NE (or equivalent) cut the pipe on the mark.
- Separate the muffler and tailpipe.
- Remove the muffler and tailpipe.
Caution: Ensure that the vehicle is properly supported and squarely positioned. To help avoid personal injury when a vehicle is on a hoist, provide additional support for the vehicle on the opposite end from which the components are being removed.
Notice: Always use a chain cutter to cut the stainless steel pipe. A torch leaves a rough edge and may warp the pipe.
Installation Procedure
Important: The service resonator pipe is designed to attach to either the production or service muffler assembly.
- Deburr the pipe ends as necessary.
- Position the service muffler and tailpipe assembly onto the intermediate pipe.
- Install the rubber isolator to mount hanger.
- Install the service clamp and tighten
Notice: Refer to Fastener Notice in the Preface section.
Tighten
Tighten the rear muffler pipe service clamp to 45 N·m (33 lb ft).
