For 1990-2009 cars only
Removal Procedure
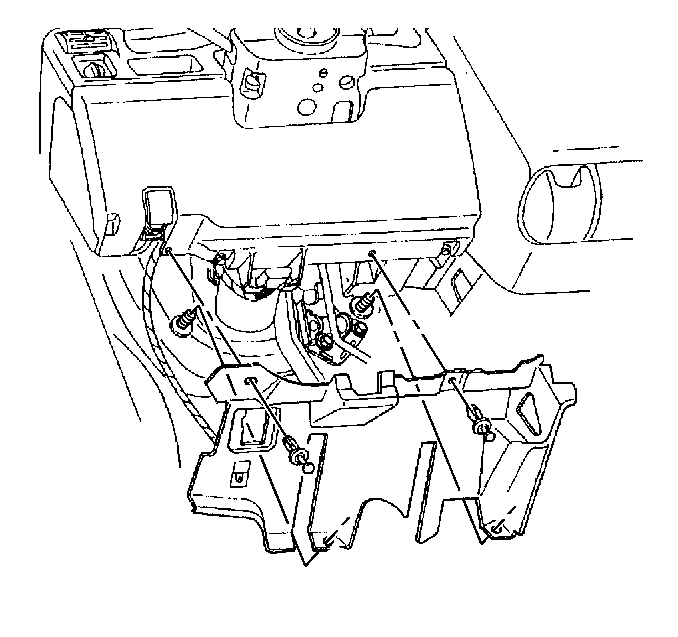
- Remove the screws from the instrument panel (I/P) lower closeout panel.
- Remove the I/P lower left closeout panel.
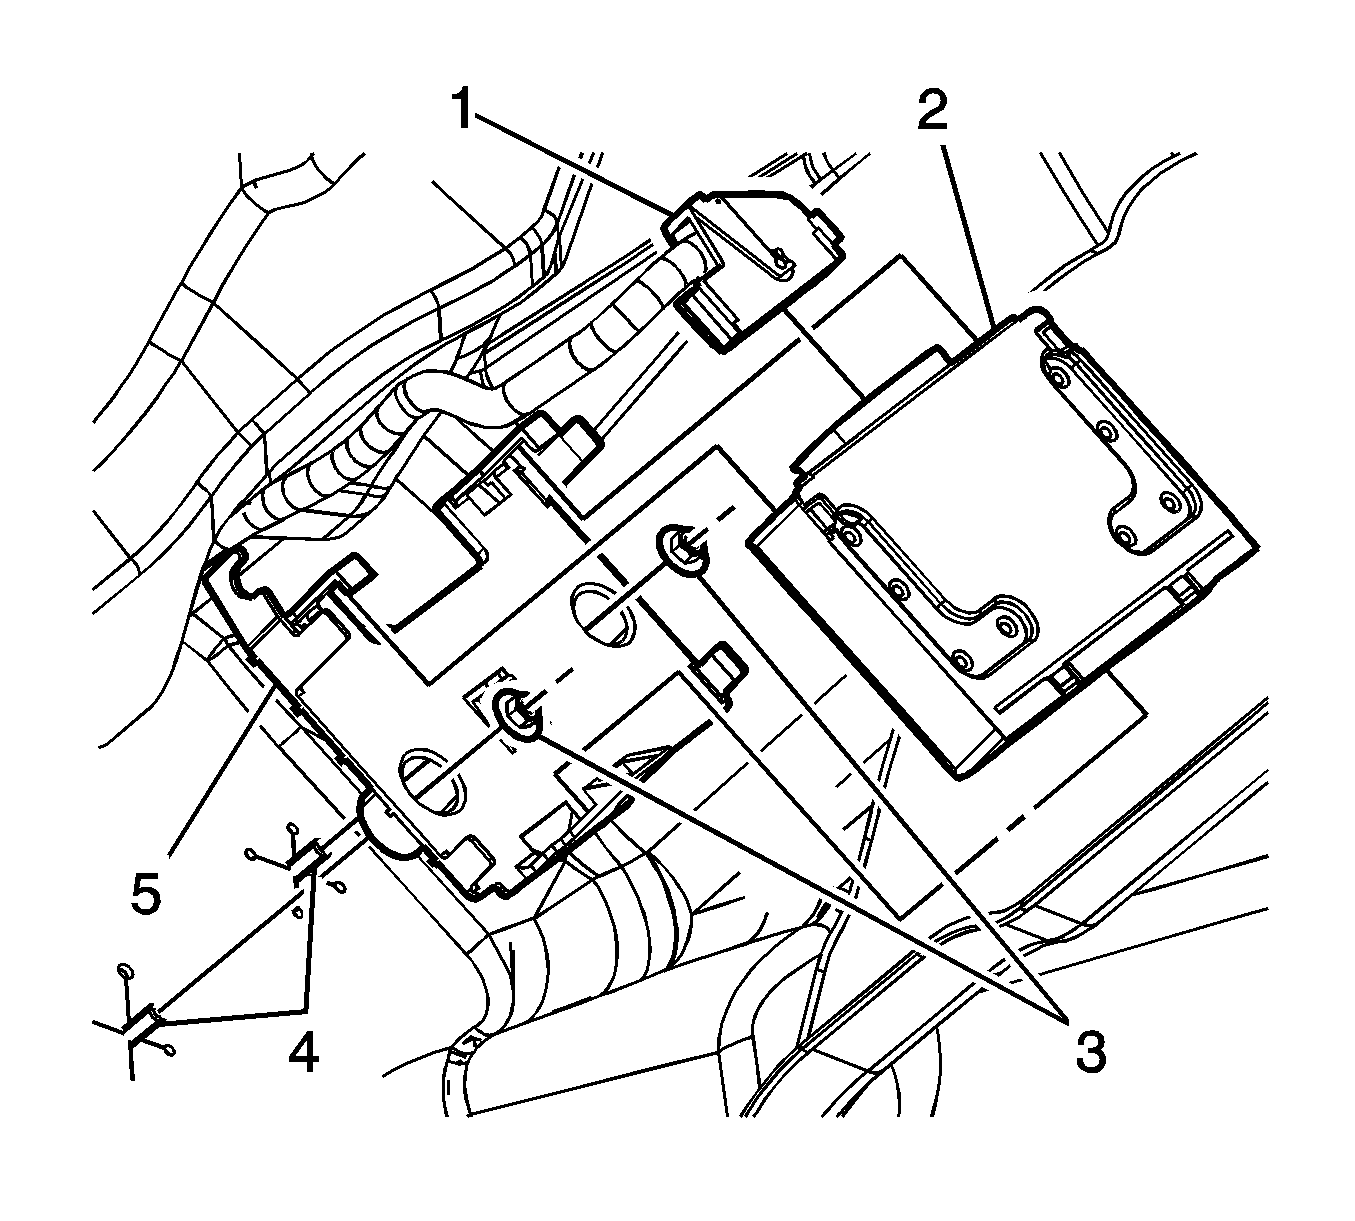
- Release the transmission control module (TCM) (2) from the TCM bracket (5).
- Un-wrap the tape from the extra length of wires in wiring harness.
- Pull the TCM down to access the electrical connector.
- Release the TCM electrical connector (1) from the TCM.
- If TCM bracket replacement is necessary, remove the TCM bracket nuts (3).
- Remove the TCM bracket (5) from the vehicle.
Important: Wires to the TCM connector have 350-400 mm of extra length to aid in the diagnosis and repair of the TCM. Re-tape wires after repairs.


Installation Procedure
- Install the TCM bracket (5) if previously removed.
- Install the TCM bracket nuts (3).
- Install the TCM electrical connector (1) to the TCM.
- Install the TCM (2) to the TCM bracket (5).
- Re-tape the extra length of wires in harness.
- Install the I/P lower left closeout panel.
- Install the I/P lower closeout panel screws.
- Reset the TAP values. Refer to Transmission Adaptive Functions .
- Refer to Control Module References for programming and setup information.

Notice: Refer to Fastener Notice in the Preface section.
Tighten
Tighten the nuts to 10 N·m (89 lb in).

Tighten
Tighten the screws to 2 N·m (18 lb in).
Important: It is recommended that transmission adaptive pressure (TAP) information be reset.
Resetting the TAP values using a scan tool will erase all learned values in all cells. As a result, The ECM, PCM or TCM will need to relearn TAP values. Transmission performance may be affected as new TAP values are learned.