Service Manual Update Regarding Air Conditioning (A/C) Compressor Replacement

| Subject: | Service Manual Update Regarding Air Conditioning (A/C) Compressor Replacement |
| Models: | 2004 and 2005 Saturn VUE Vehicles |
| with 3.5L Engine (VIN 4 -- RPO L66) |
| Attention: | Technician |
Purpose
The purpose of this bulletin is to inform technicians that the A/C Compressor Replacement L66 procedure for the 2004 and 2005 Saturn VUE has been updated in SI.
Please obtain all 2004 VUE HVAC Service Manuals and replace the A/C Compressor Replacement L66 procedure with the procedure in this bulletin.
Procedure
Compressor Replacement (L66 Engine Only)
Removal
Important: Performing this procedure will require replacement of the forward engine frame bolts.
- Recover the refrigerant. Refer to Refrigerant Recovery and Recharging (SI Document ID #884007) in the appropriate Saturn VUE Service Manual.
- Remove the air cleaner assembly. Refer to Air Cleaner Assembly Replacement (SI Document ID #1276960) in the Engine Controls -- 3.5L (L66) section located in the appropriate Saturn VUE Service Manual.
- Remove the accessory drive belt. Refer to Drive Belt Replacement (SI Document ID #1234681) in the Engine Mechanical -- 3.5L (L66) section of the appropriate Saturn VUE Service Manual.
- Raise and support the vehicle. Refer to Lifting and Jacking the Vehicle (SI Document ID #995301) in General Information section location in the appropriate Saturn VUE Service Manual.
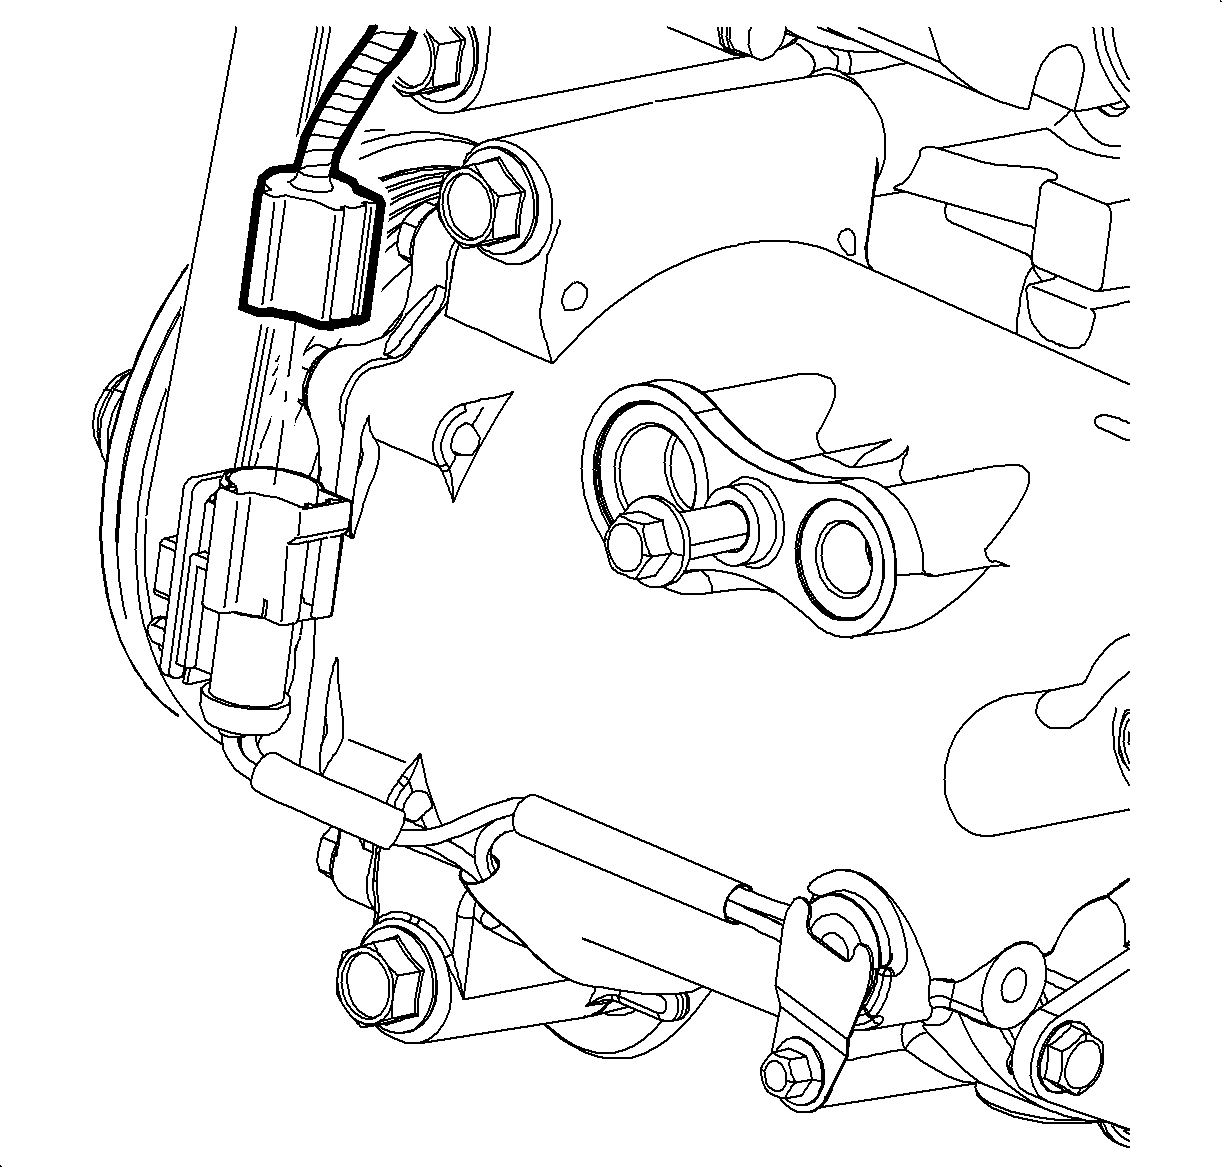
- Disconnect the electrical connector from the compressor.
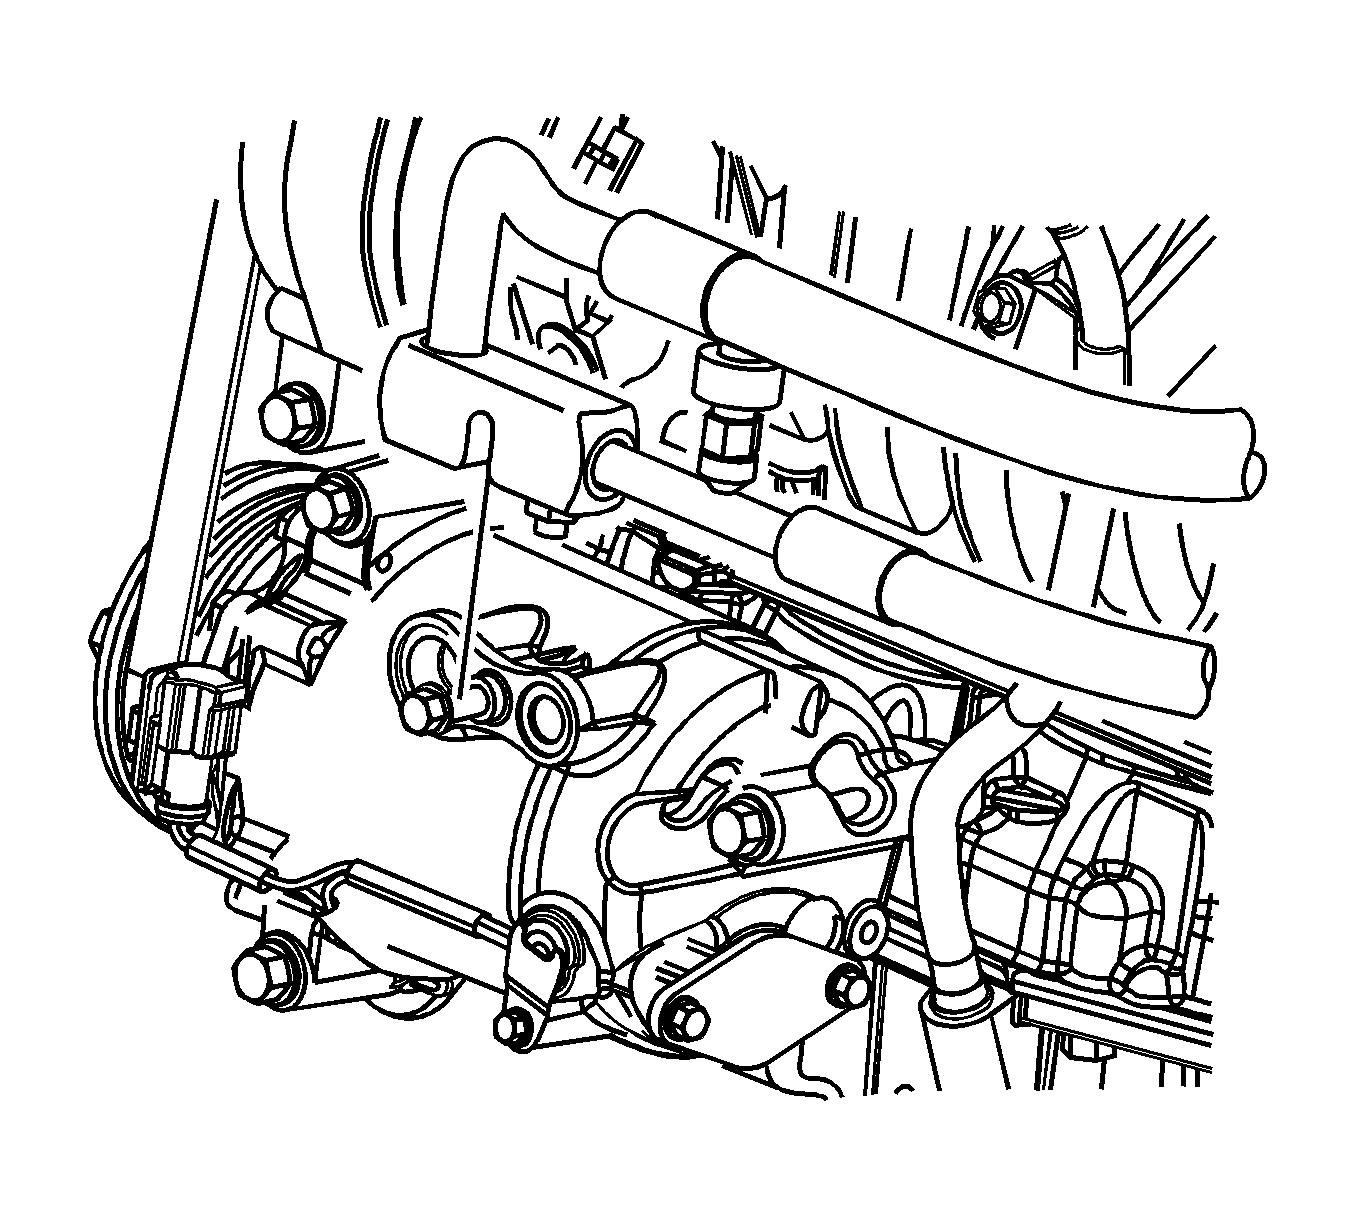
- Remove the compressor hose bolt from the compressor.
- Remove the compressor hose from the compressor.
- Remove and discard the O-rings from the compressor. Refer to O-Ring Replacement (SI Document ID #956443) in the appropriate Saturn VUE Service Manual.
- Install a cap to the compressor hose to prevent moisture or contamination from entering the A/C system.
- Place an adjustable jack stand or a lifting device under the front edge of the engine frame.
- Loosen, but do not remove, the front engine frame mounting bolts.
- Lower the forward edge of the engine frame approximately 12.7 mm (0.5 in).
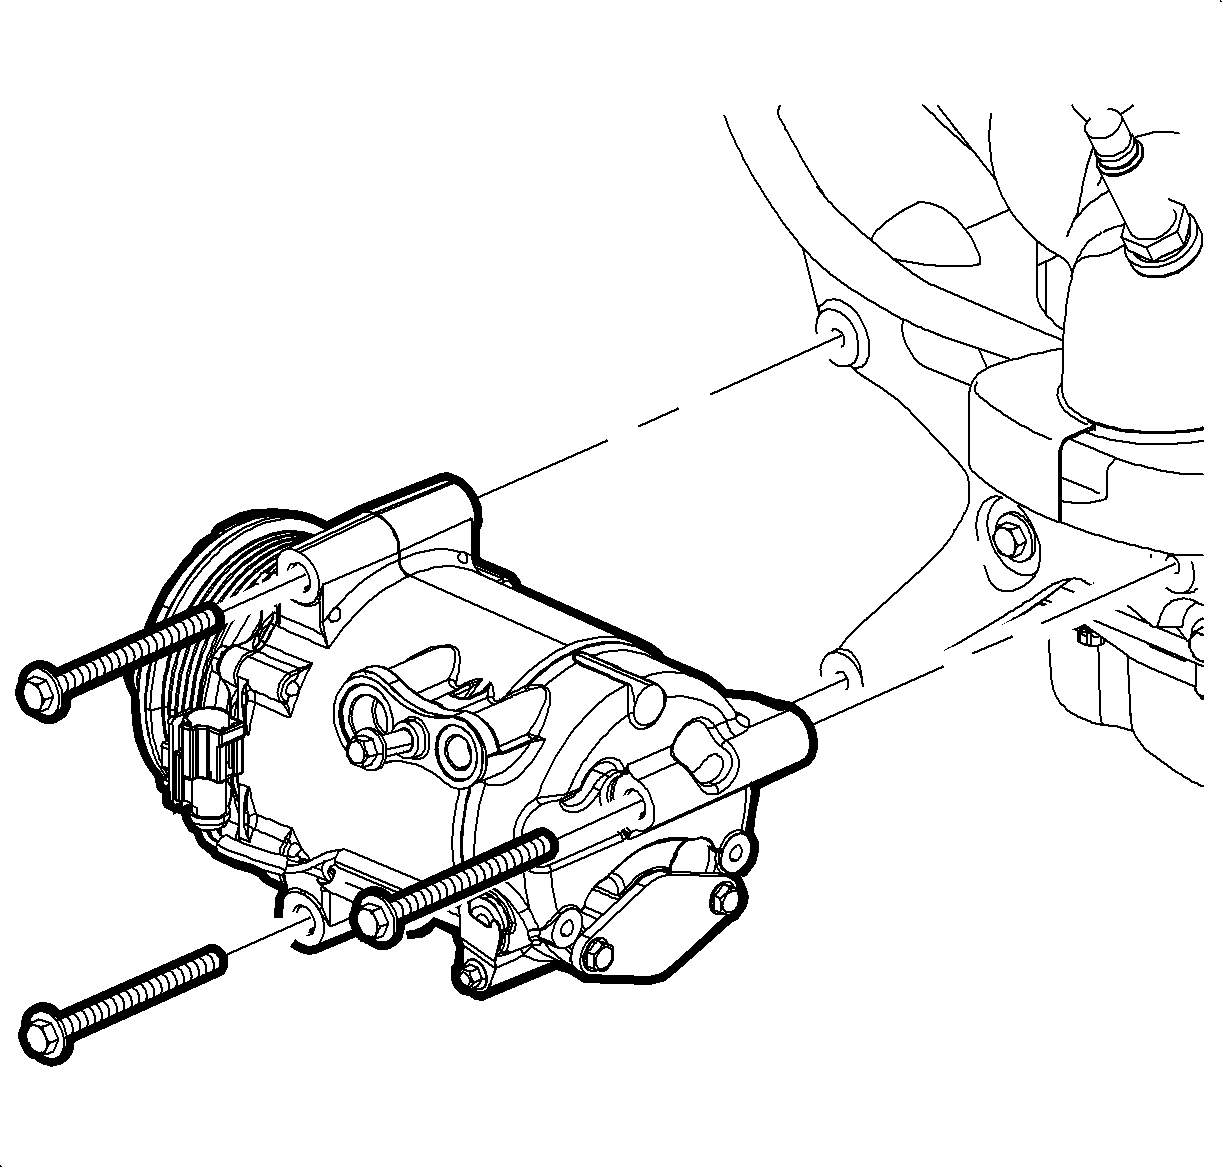
- Remove the compressor bolts from the engine.
- Remove the compressor from the vehicle.

Caution: To avoid any vehicle damage, serious personal injury or death when major components are removed from the vehicle and the vehicle is supported by a hoist, support the vehicle with jack stands at the opposite end from which the components are being removed.
Caution: To avoid any vehicle damage, serious personal injury or death, always use the jackstands to support the vehicle when lifting the vehicle with a jack.


Installation
Notice: Do NOT mix refrigerant oils. Use of incorrect refrigerant oil will cause compressor failure. This compressor uses a low viscosity refrigerant oil, Saturn P/N 22695048.
Notice: New compressor assemblies are shipped with a partial poly-alkylene glycol (PAG) refrigerant oil charge. Use of the incorrect PAG oil can result in compressor failure.
- If replacing the compressor, refer to Compressor Oil Balancing (SI Document ID #1222182) in the appropriate Saturn VUE Service Manual.
- Install the compressor to the vehicle.
- Install the compressor bolts to the engine.
- Raise the forward edge of the engine frame.
- Remove and discard the right hand front engine frame bolt.
- Install a new right hand front engine frame bolt.
- Remove and discard the left hand front engine frame bolt.
- Install a new left hand front engine frame bolt.
- Tighten the engine frame bolts to the body.
- Remove the adjustable jack stand or lifting device from the front edge of the engine frame.
- Remove the caps from the compressor and the compressor hose.
- Install new O-rings to the compressor. Refer to O-Ring Replacement (SI Document ID #956443) in the appropriate Saturn VUE Service Manual.
- Install the compressor hose to the compressor.
- Install the compressor hose bolt to the compressor.
- Connect the electrical connector to the compressor.
- Lower the vehicle. Refer to Lifting and Jacking the Vehicle (SI Document ID #995301) in General Information section location in the appropriate Saturn VUE Service Manual.
- Install accessory drive belt. Refer to Drive Belt Replacement (SI Document ID #1234681) in the Engine Mechanical -- 3.5L (L66) section of the appropriate Saturn VUE Service Manual.
- Install the air cleaner assembly. Refer to Air Cleaner Assembly Replacement (SI Document ID #1276960) in the Engine Controls -- 3.5L (L66) section located in the appropriate Saturn VUE Service Manual.
- Evacuate and charge the A/C system. Refer to Refrigerant Recovery and Recharging (SI Document ID #884007) in the appropriate Saturn VUE Service Manual.
- Test the affected A/C joints for leaks using Halogen Leak Detector J 39400-A (SQ9214NE) or equivalent.
Notice: Use the correct fastener in the correct location. Replacement fasteners must be the correct part number for that application. Fasteners requiring replacement or fasteners requiring the use of thread locking compound or sealant are identified in the service procedure. Do not use paints, lubricants, or corrosion inhibitors on fasteners or fastener joint surfaces unless specified. These coatings affect fastener torque and joint clamping force and may damage the fastener. Use the correct tightening sequence and specifications when installing fasteners in order to avoid damage to parts and systems.
Tighten
Tighten the bolts to 22N·m(16 ft-lbs).
Tighten
Tighten the bolts to 155N·m(114 ft-lbs).

Tighten
Tighten the bolt to 27N·m(20 ft-lbs).
