Tools Required
SA9179NE
Dial Indicator

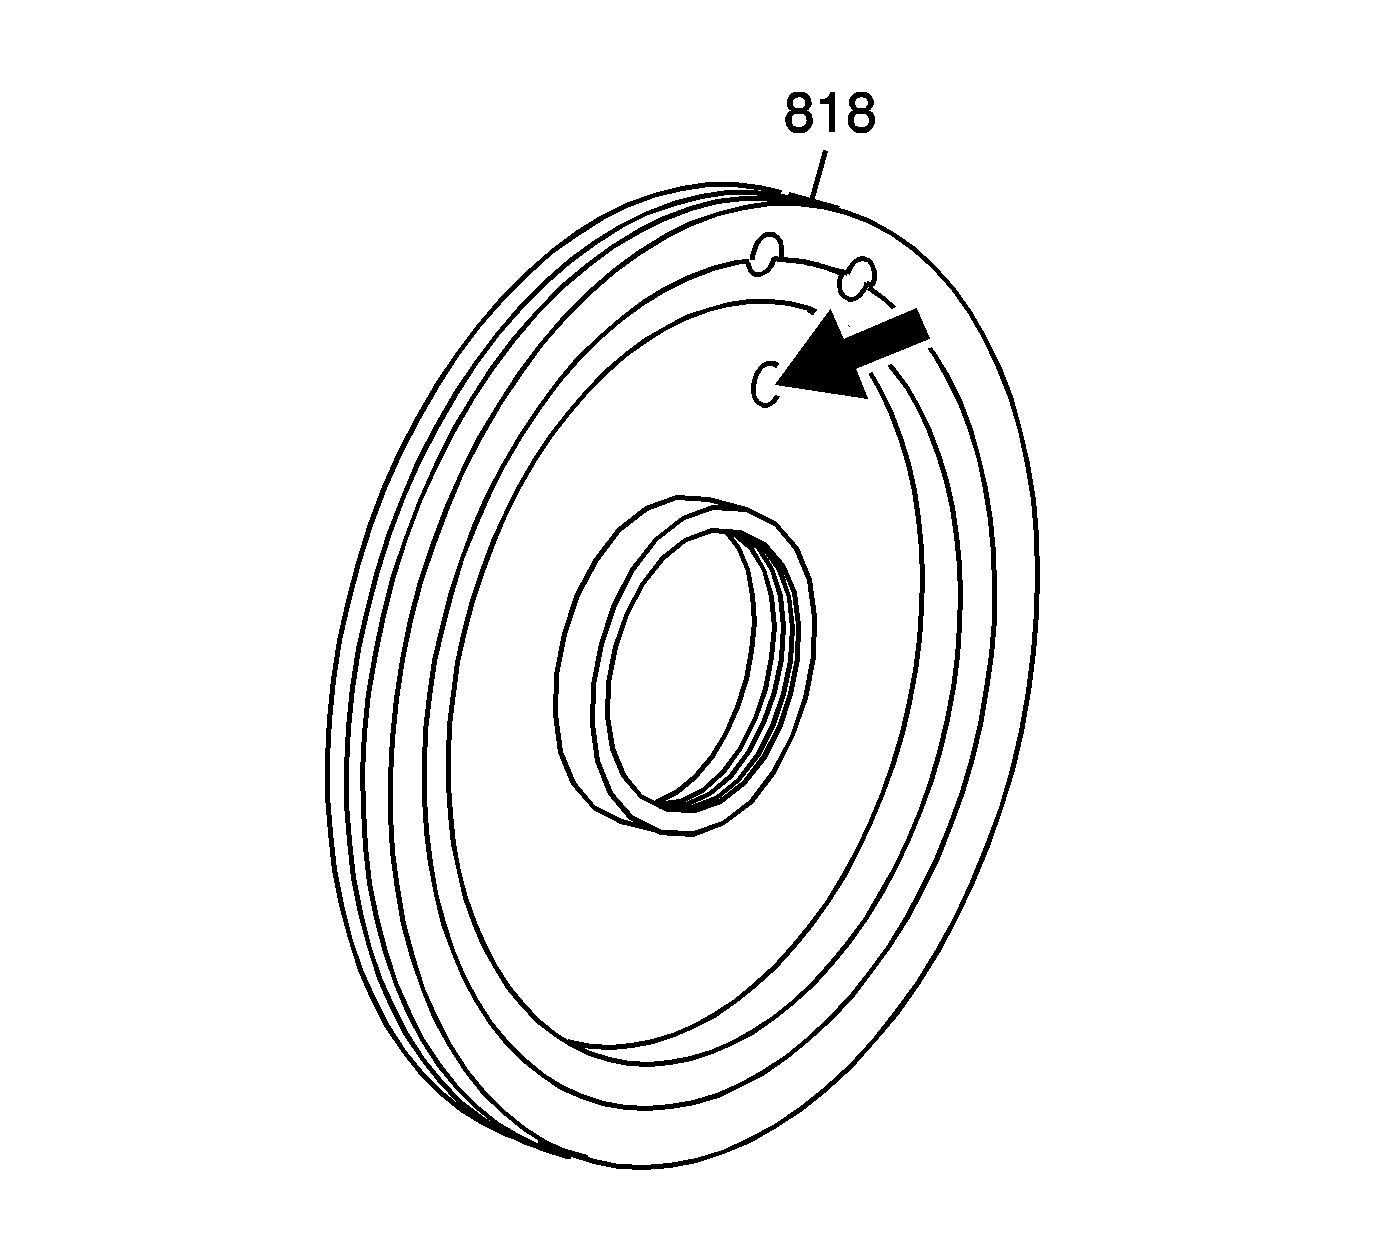
- Inspect the 3rd clutch piston (818) and the clutch piston check valve.
- Replace the 3rd clutch piston if the check valve is missing, stuck, or damaged.

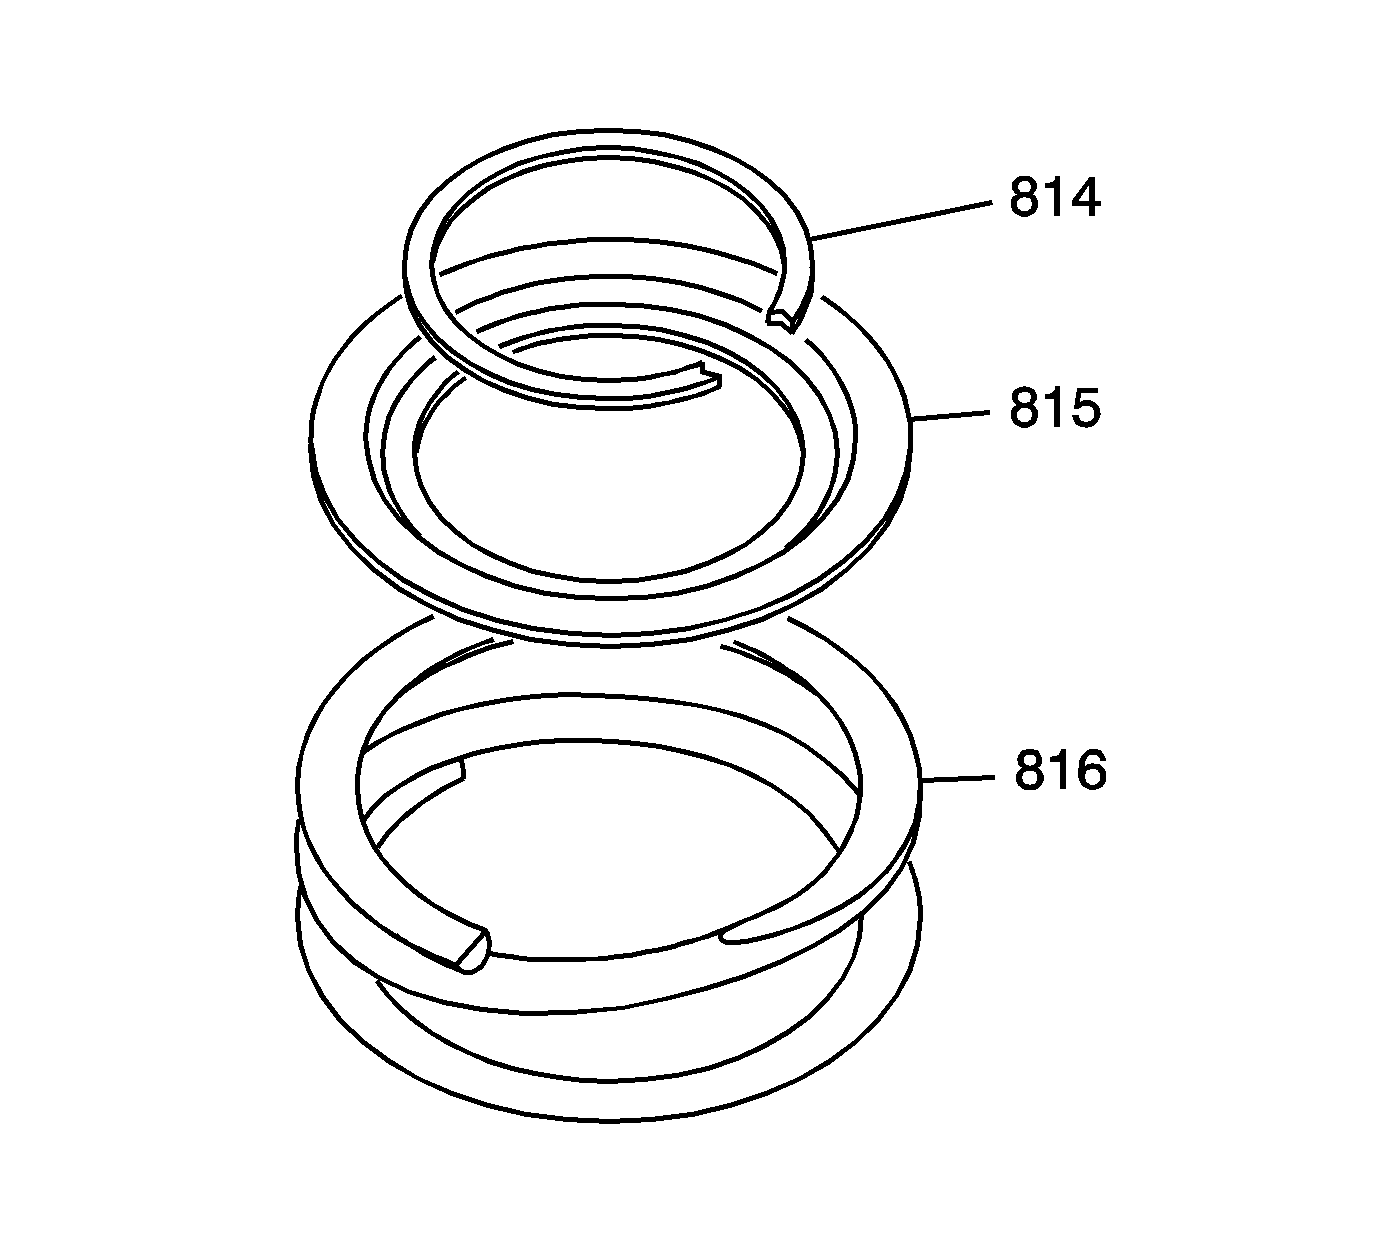
- Inspect the following components for wear or damage:
| • | 3rd clutch piston spring cap (815) |
| • | 3rd clutch piston retaining ring (814) |
| • | 3rd clutch piston return spring (816) |
- Replace the components if faulty.

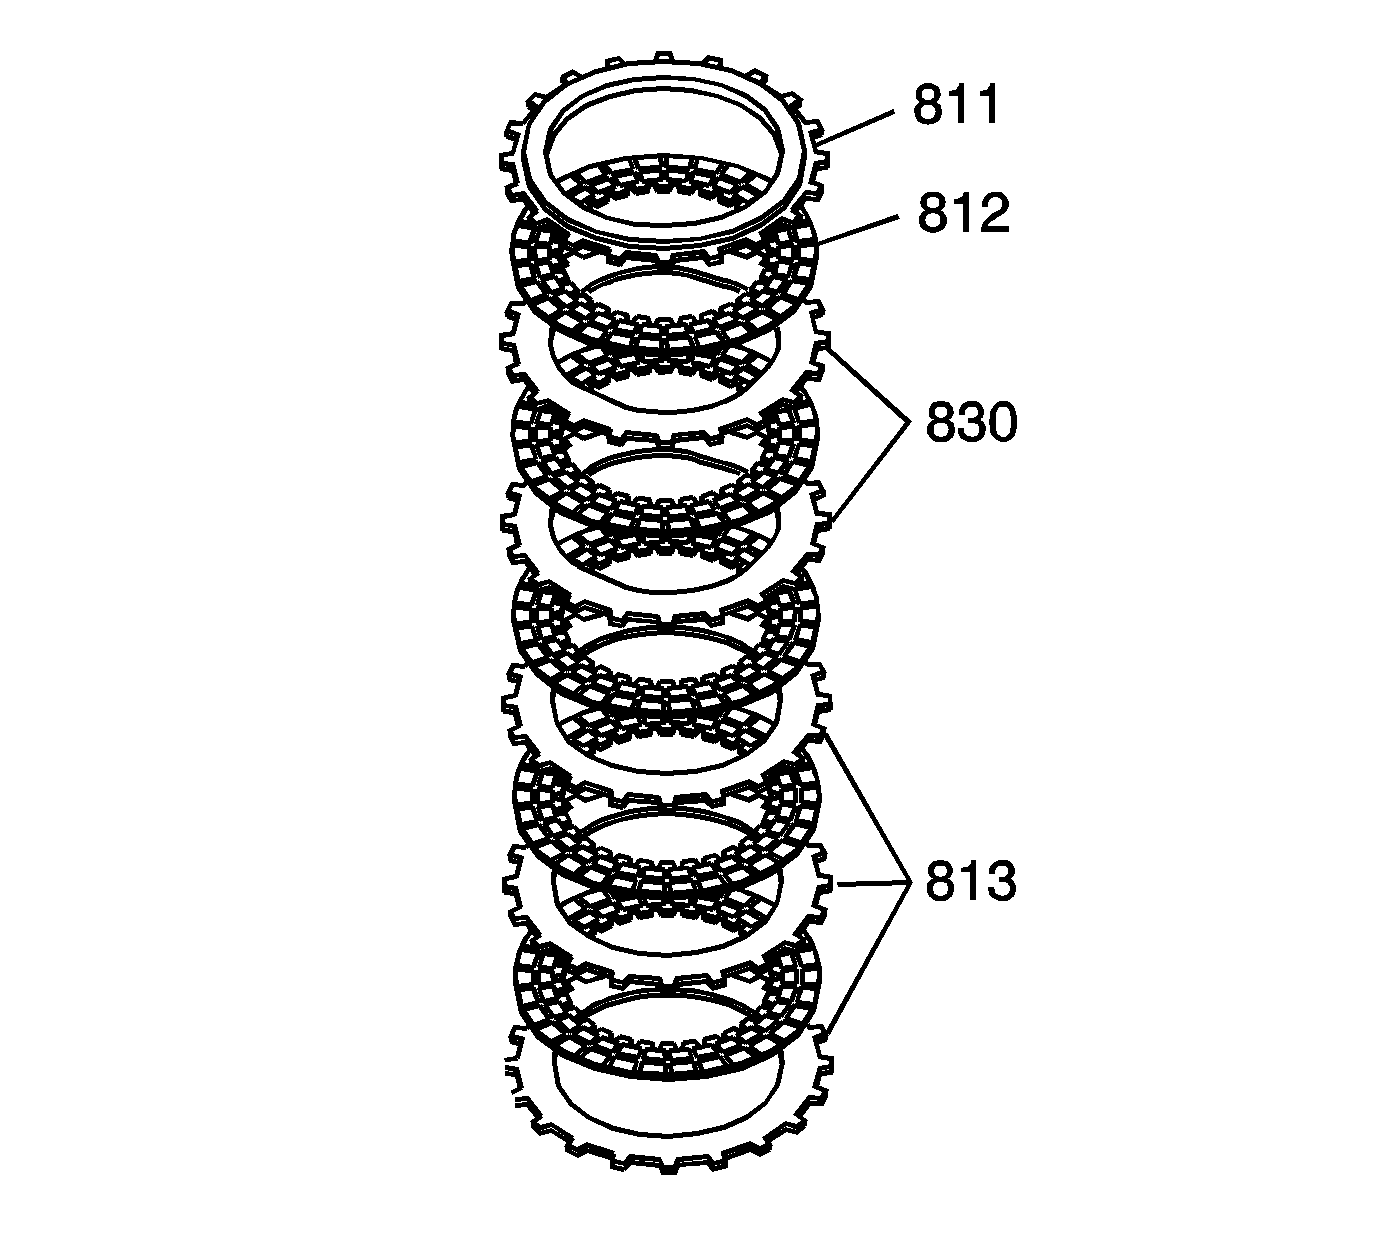
- Inspect the following 3rd clutch components for wear, damage, or severe discoloration:
| • | 3rd clutch steel flat plates (813) |
| • | 3rd clutch steel wave plates (830) |
| • | 3rd clutch fiber plates (812) |
| • | 3rd clutch selective backing plate (811) |
- If the clutch steel plates are worn or damaged or severely discolored, replace the plates as a complete set.
- If the clutch fiber plates are worn, damaged, or discolored, replace the plates as a complete set.
- If the 3rd clutch selective backing plate (811) is worn, damaged, or severely discolored, inspect the clutch backing plate-to-top disc clearance, then replace the clutch backing plate making sure to use the correct selective
size backing plate.
Clutch Wave Plate Phase Difference Inspection

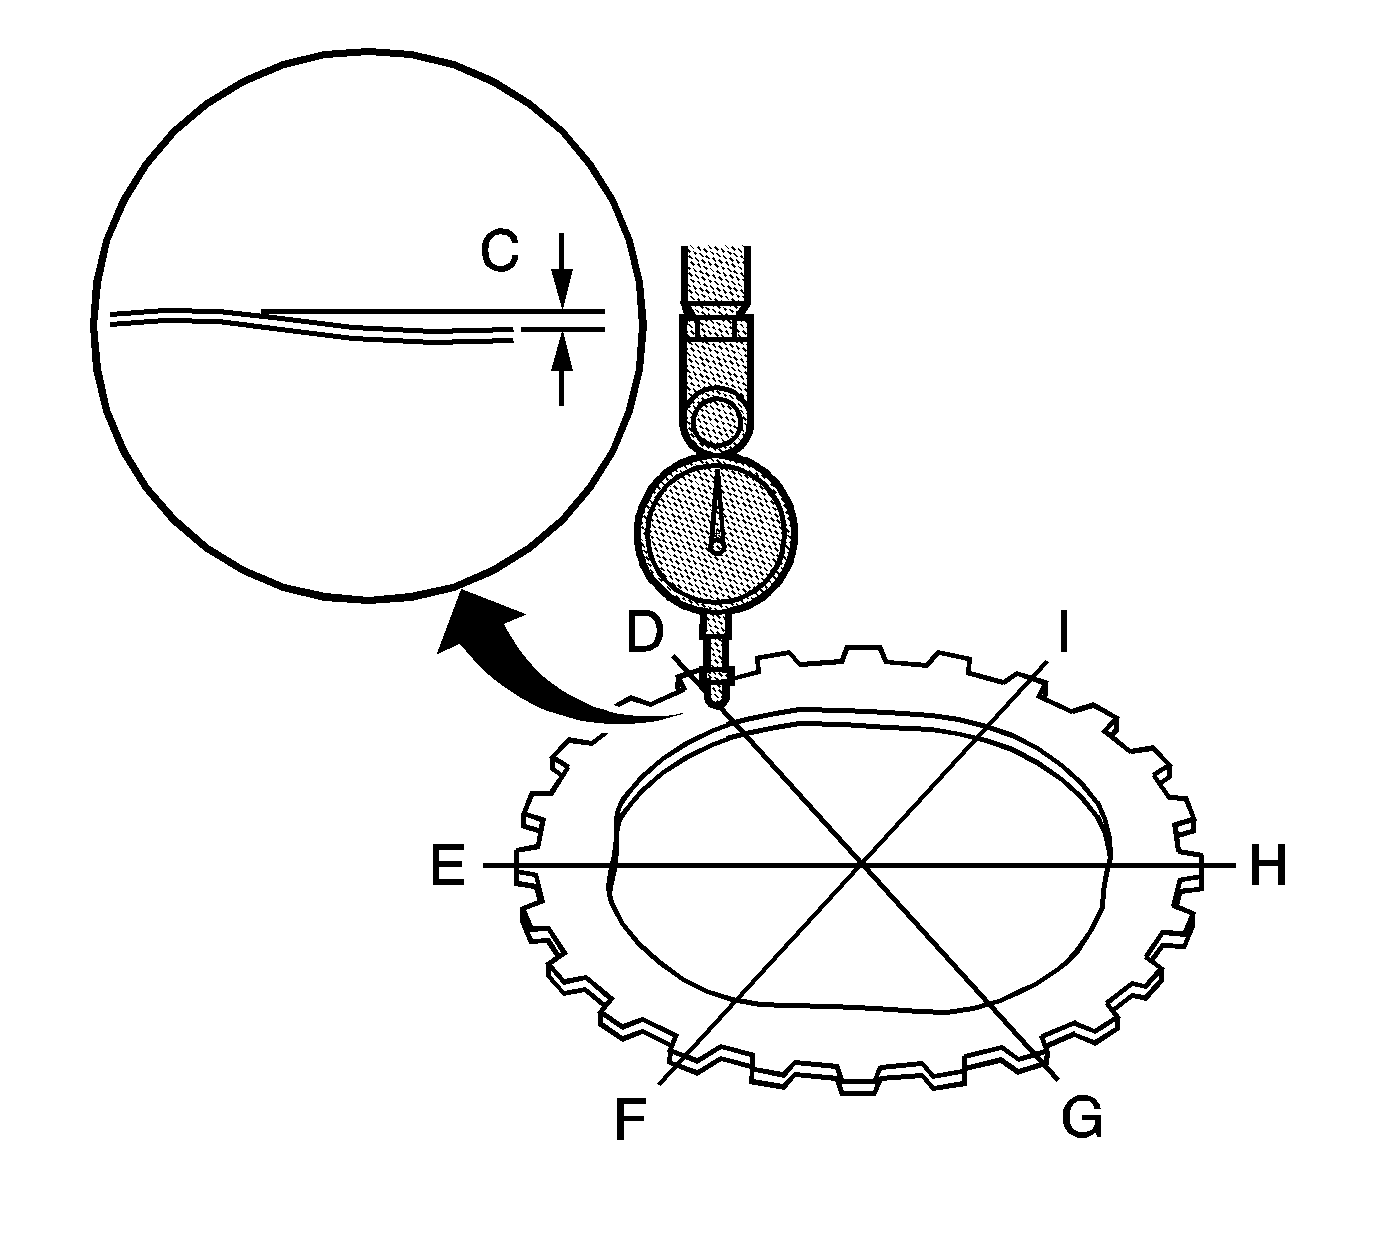
- Place the clutch wave plate on a surface plate, and set
SA9179NE
on the wave plate.
- Find the bottom (D) of a phase difference of the wave plate, zero the
SA9179NE
and make a reference mark on the bottom of the wave plate.
- Rotate the clutch wave plate of the clutch about 60-degrees apart from the bottom while holding the wave plate by the circumference. The
SA9179NE
should be at the top (E) of a phase difference.
Do not rotate the wave plate while holding the surface, always rotate the plate by holding the circumference.
- Read the
SA9179NE
. The
SA9179NE
reads the phase difference (C) of the wave plate between the bottom and top.
Specification
Standard: 0.05 mm (0.002 in) minimum
- Rotate the wave plate of the clutch about 60-degrees. The
SA9179NE
should be at the bottom of a phase difference (F and H), and zero the
SA9179NE
.
- Measure the phase difference at the other 2 tops (G and I) of the wave plate by following steps 3 through 5.
- If the 2 values of the 3 measurements are within the standard, the wave plate is OK. If the 2 values of the 3 measurements are out of the standard, replace the wave plate.


