Removal Procedure
- Set the tires in a straight-ahead position. Center the steering wheel.
- Remove the SIR module. Refer to Inflatable Restraint Steering Wheel Module Replacement.
- Remove the steering wheel. Refer to Steering Wheel Replacement .
- Remove the SIR coil. Refer to Inflatable Restraint Steering Wheel Module Coil Replacement.
- Disconnect the negative battery cable. Refer to Battery Negative Cable Disconnection and Connectionl.
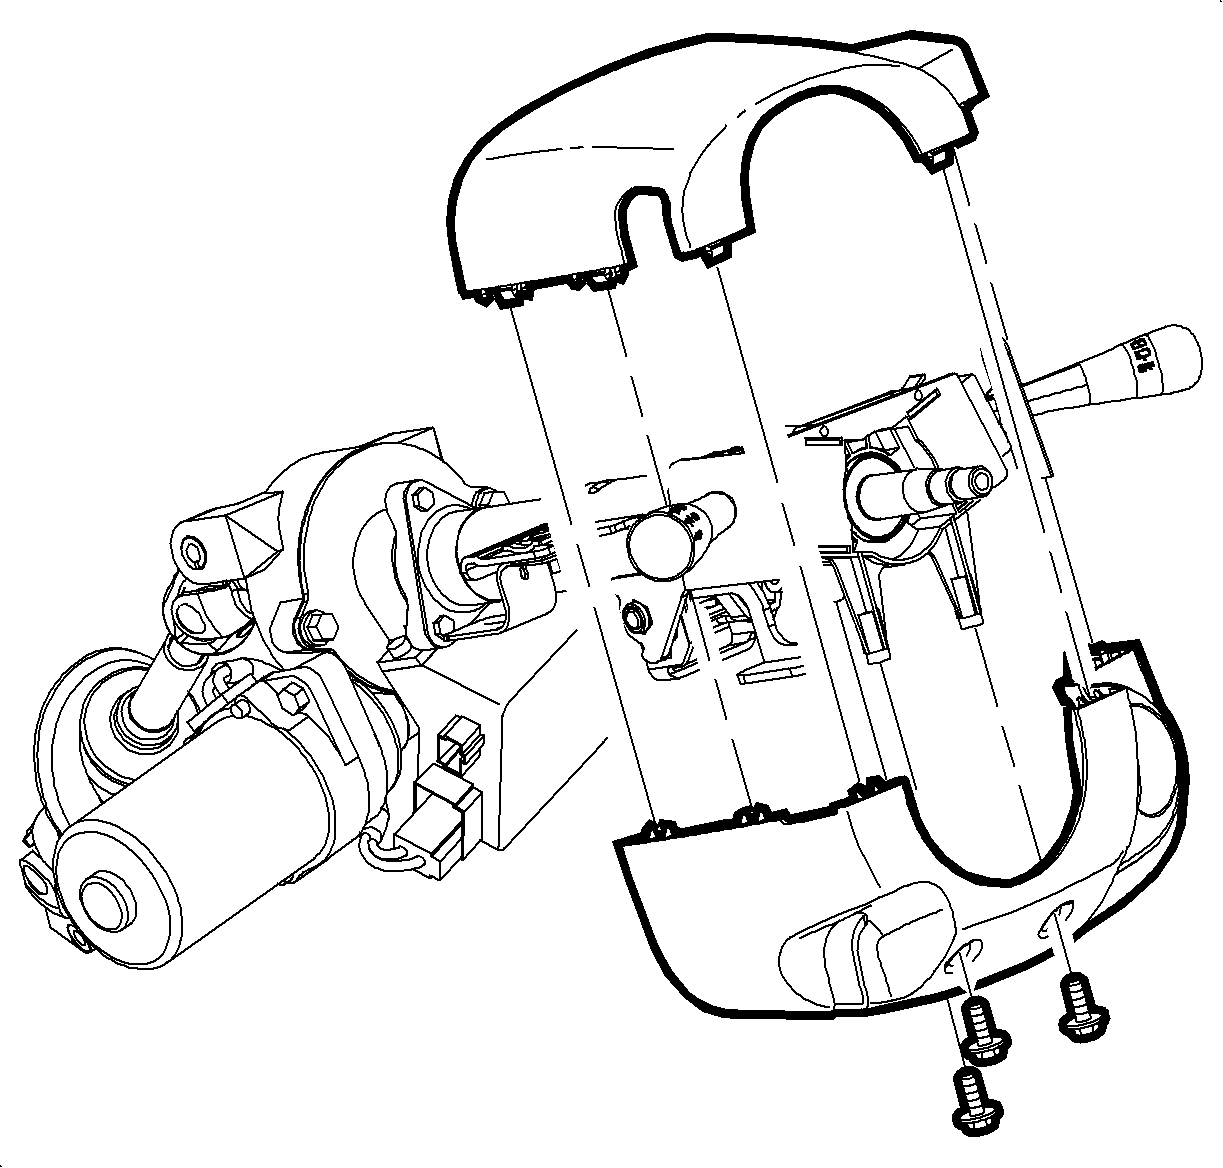
- Using a thin-bladed screwdriver, remove the lock cylinder bezel.
- Remove the shroud fasteners.
- Remove the upper and lower shrouds.
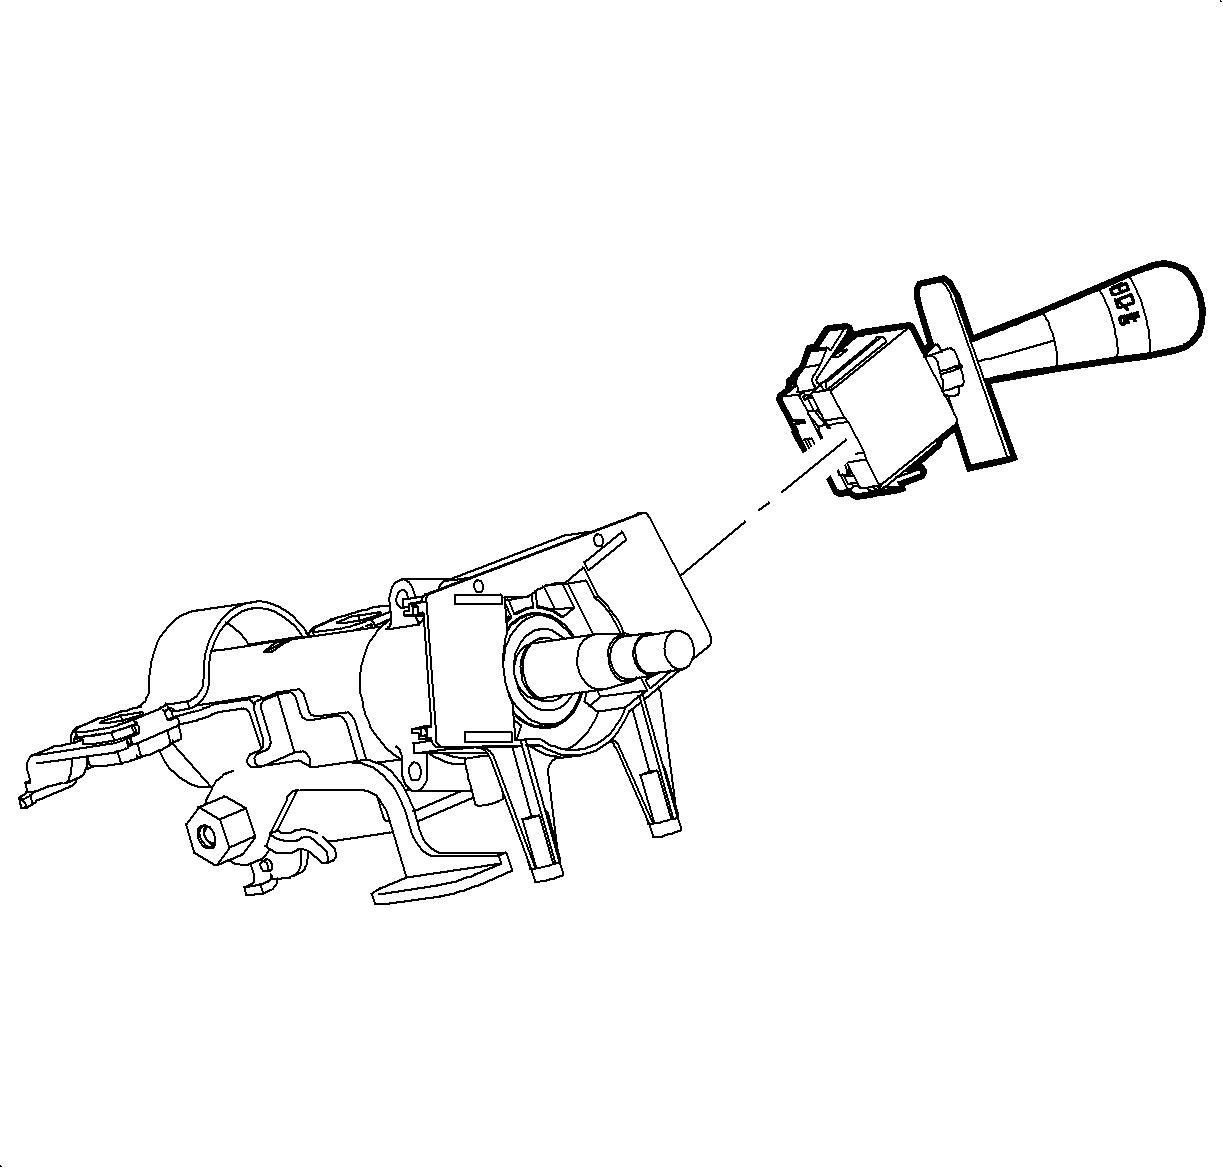
- Depress the lock tabs on the left and right multi-function levers. Remove the multi-function levers.
- Disconnect the electrical housing electrical connectors.
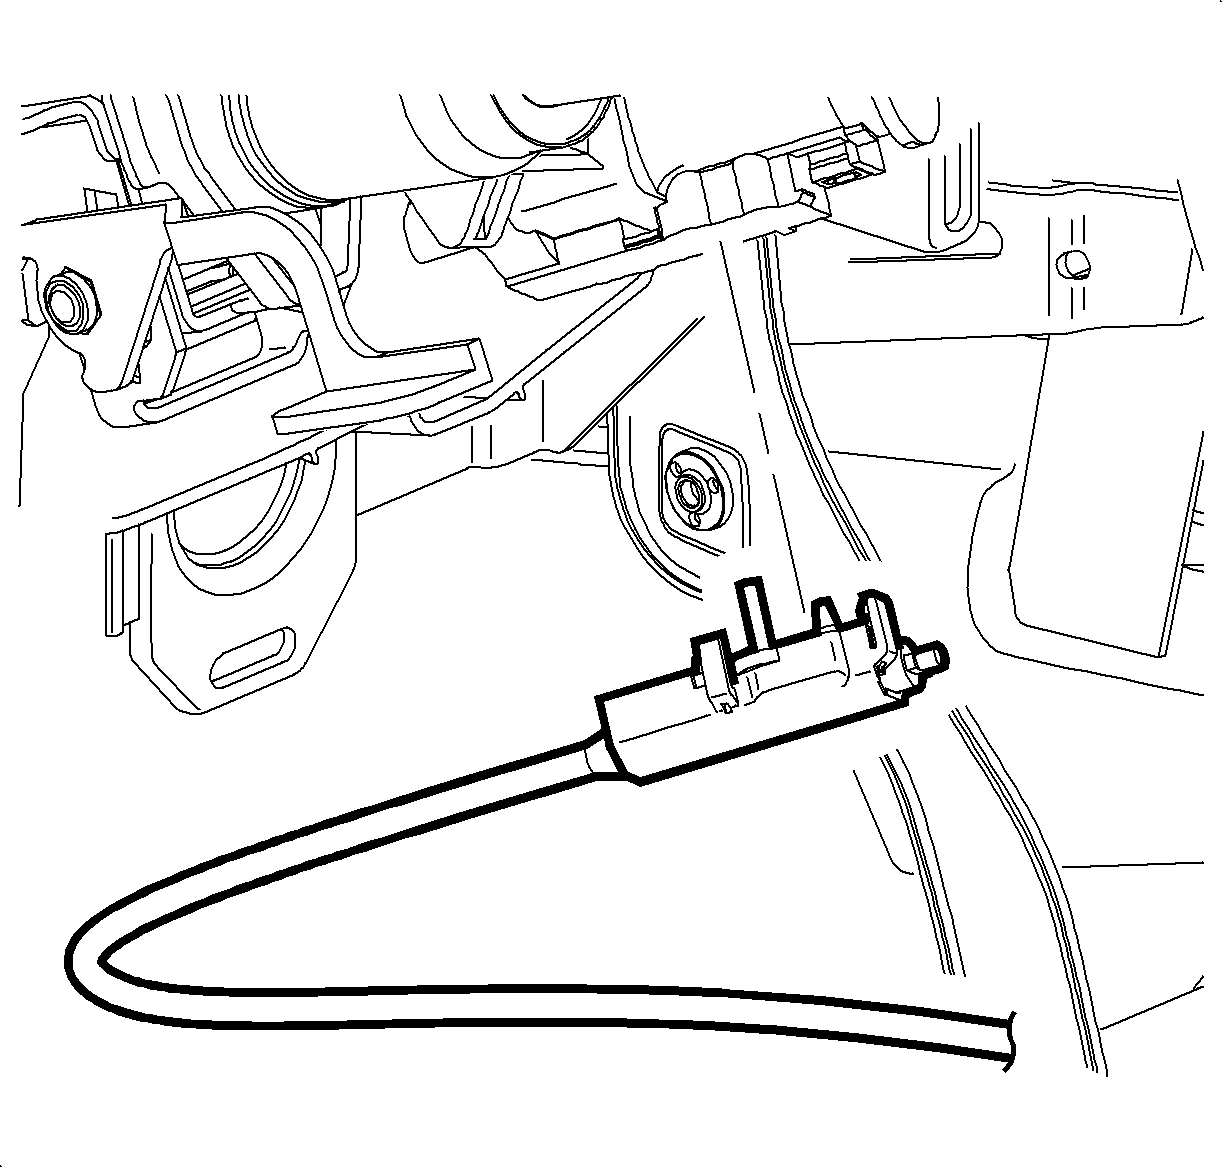
- Disengage the retaining tabs on the park lock cable assembly. Remove the assembly from the ignition module.
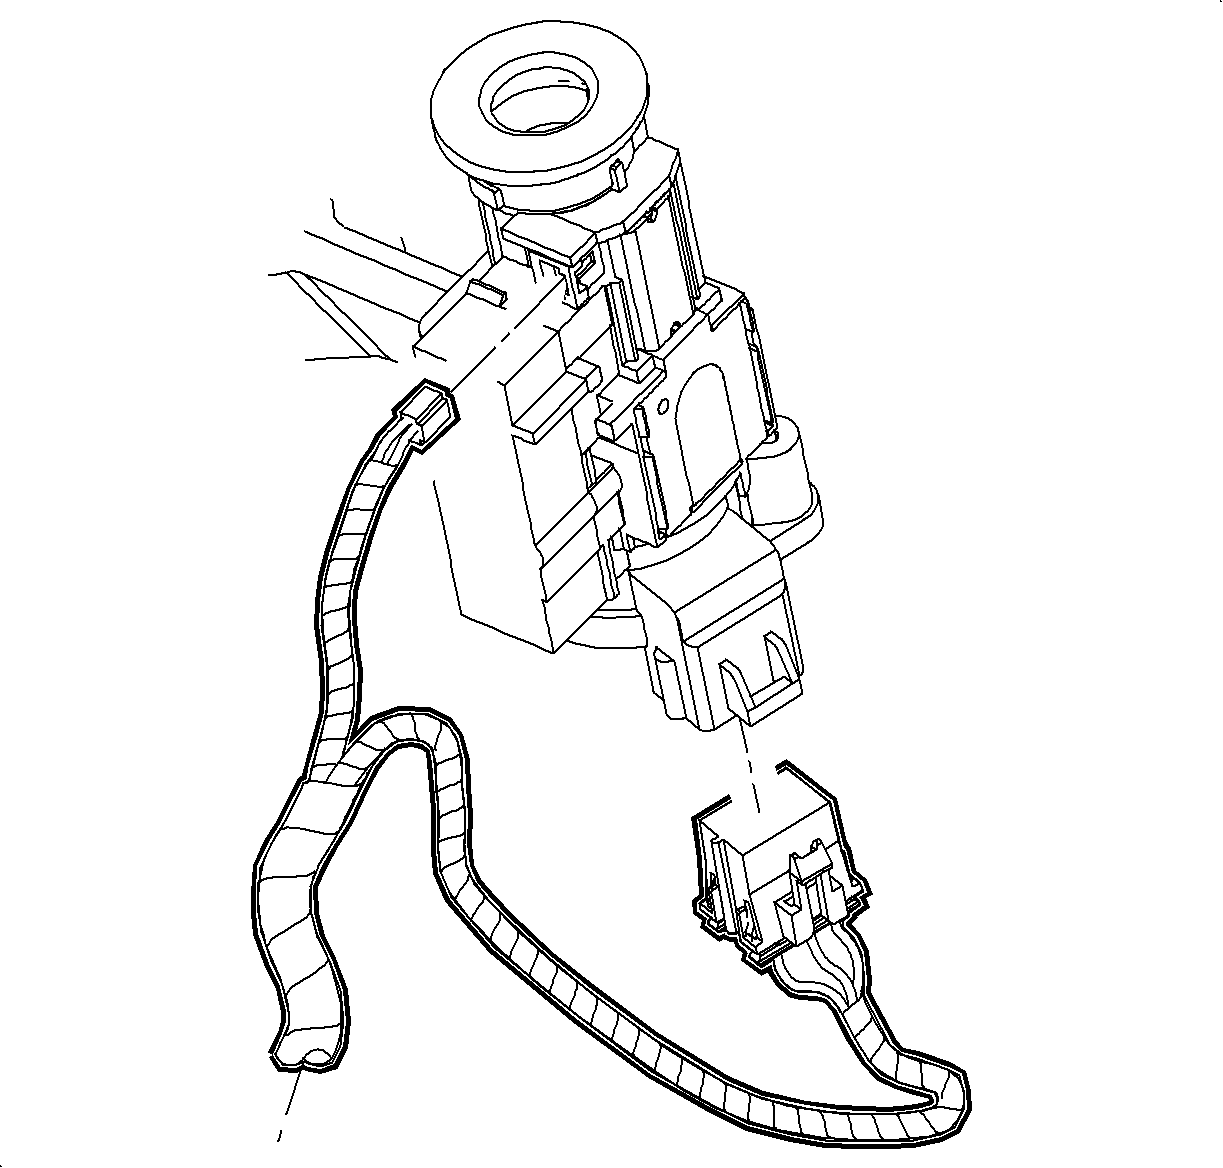
- Disconnect the ignition switch electrical connector.
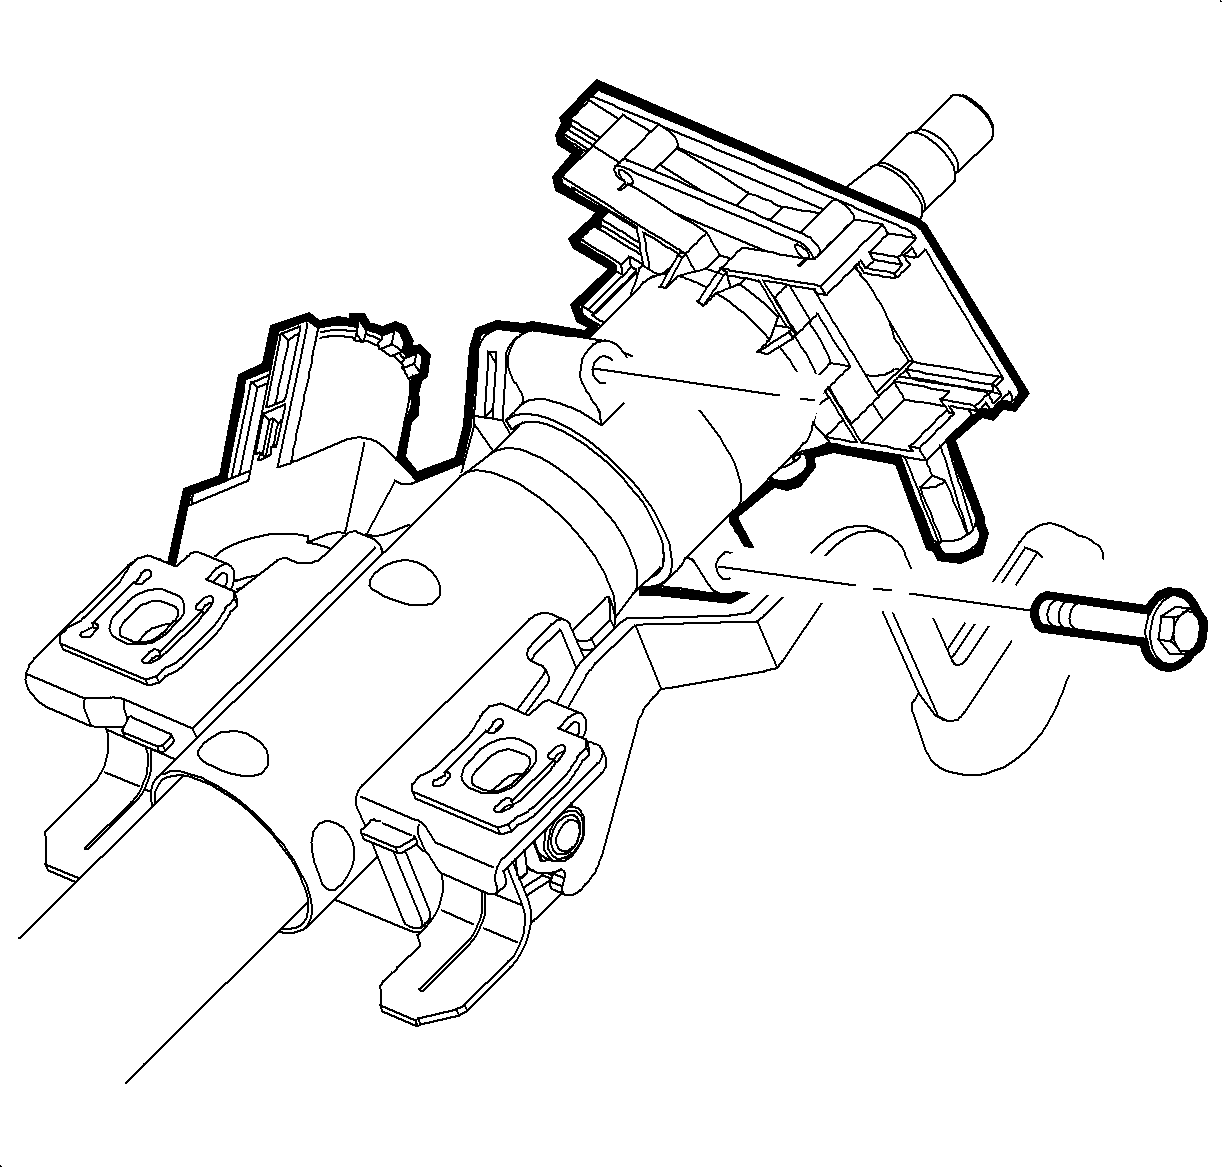
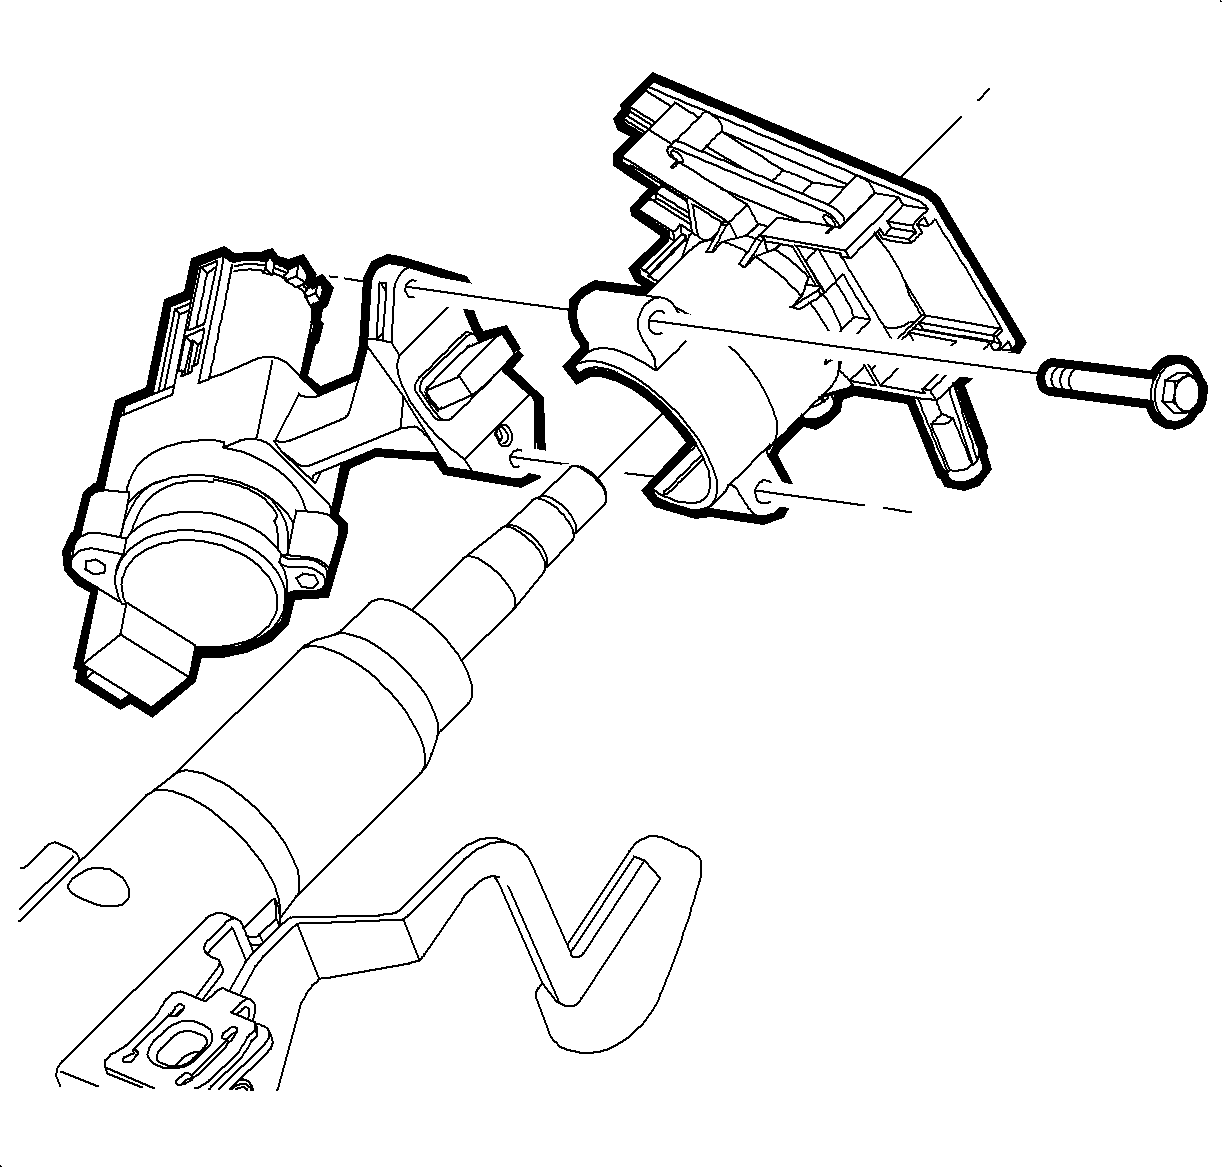
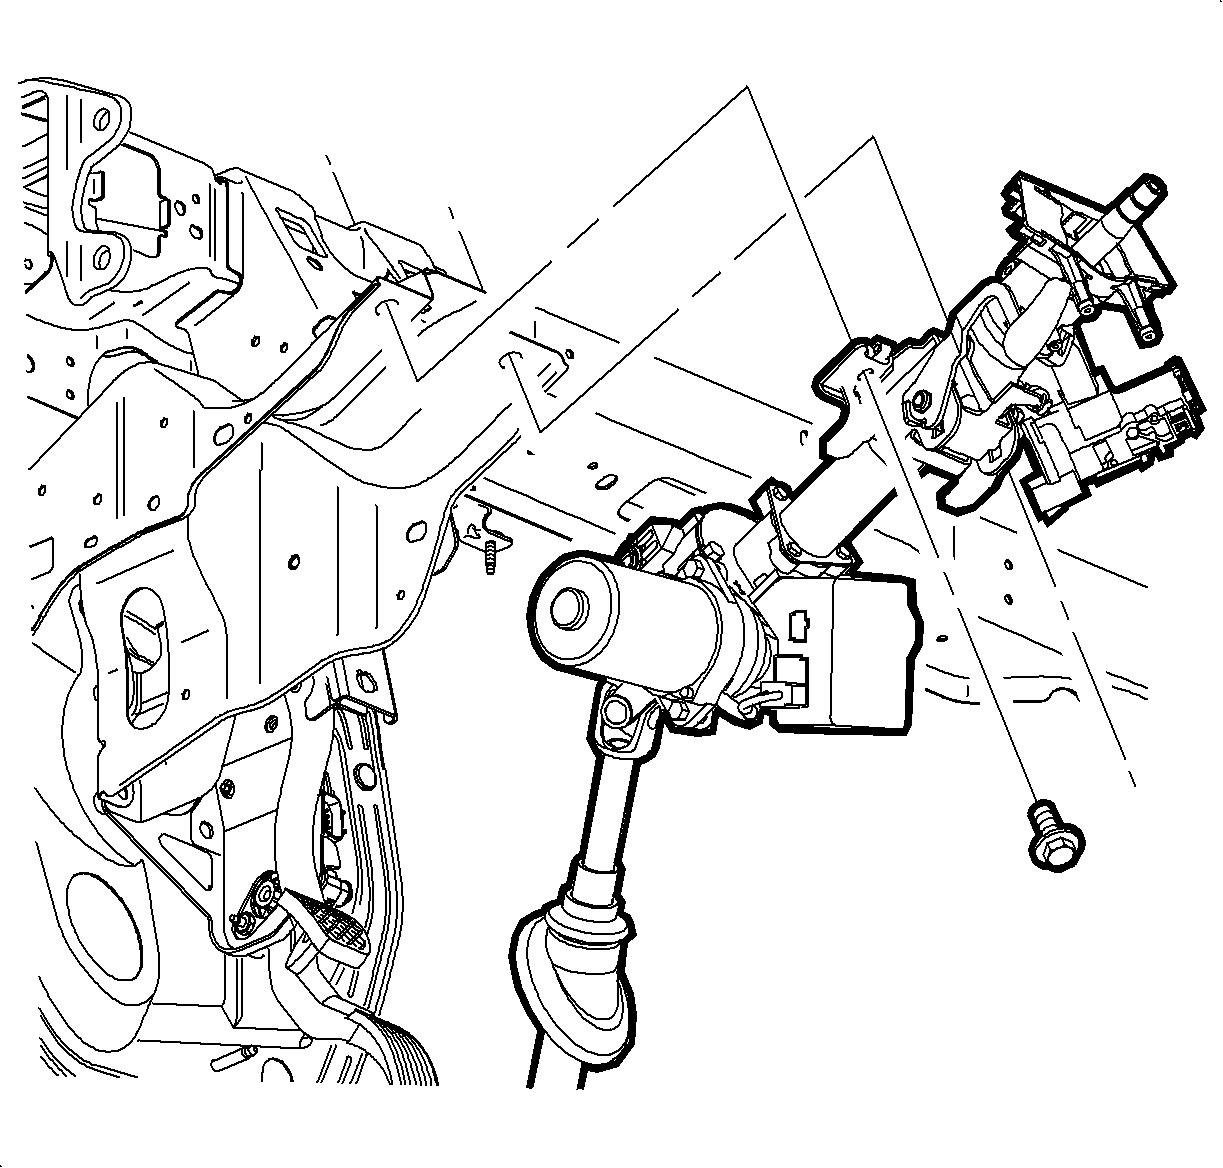
- Remove the lock housing bolts.
- Remove the lock housing. Slide the bracket from the column.
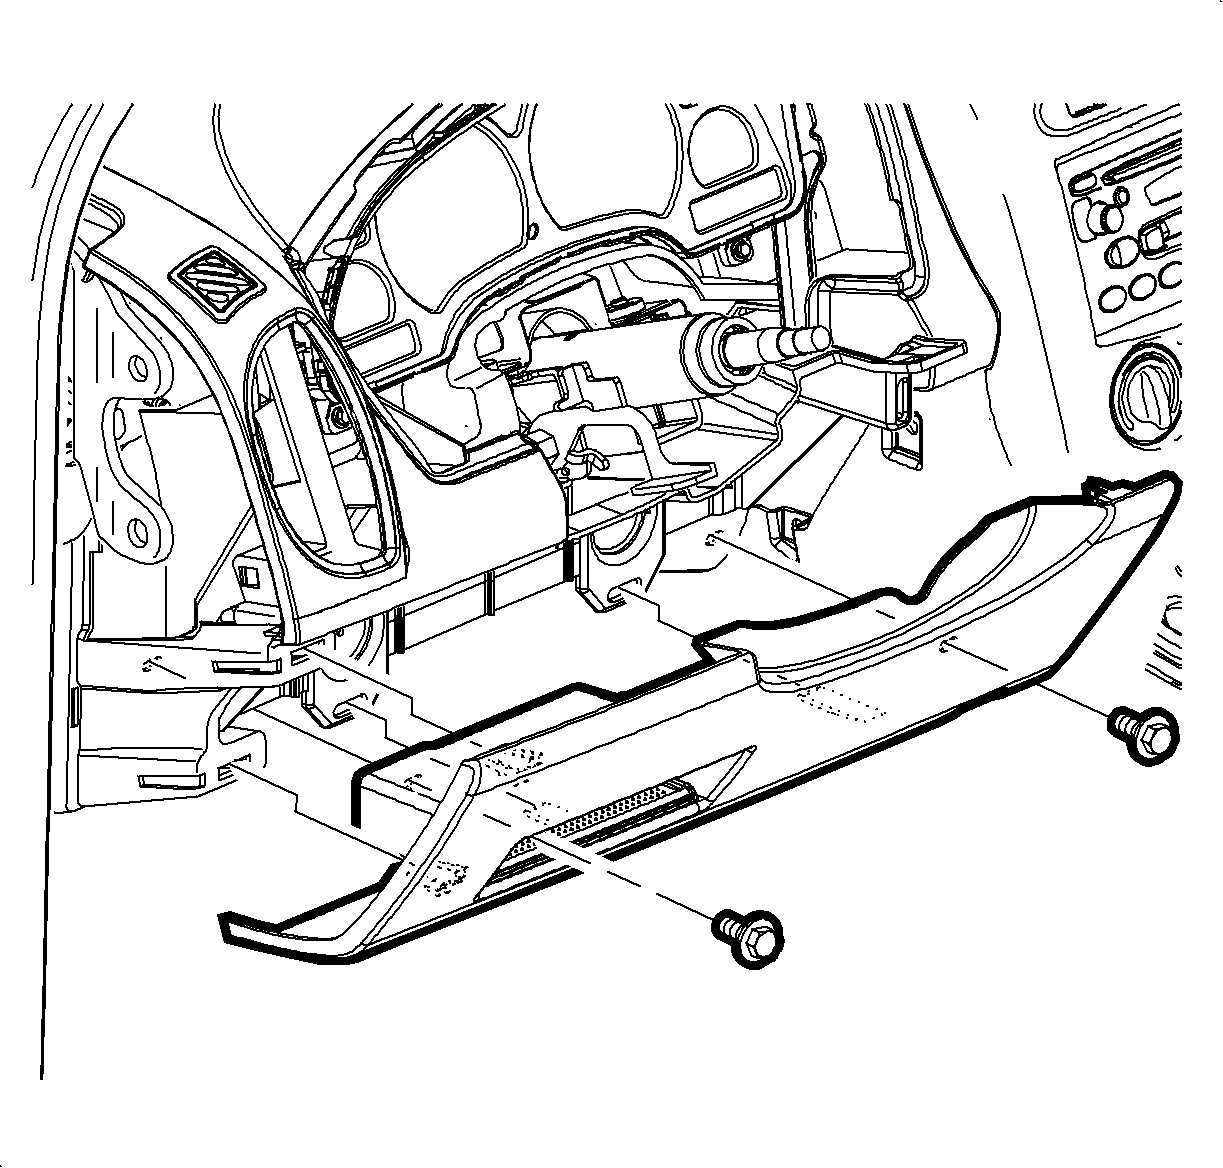
- Remove the knee bolster bolts. Unsnap the knee bolster.
- Disconnect the electric power steering (EPS) electrical connectors from the EPS controller.
- Remove the lower column mounting bolt.
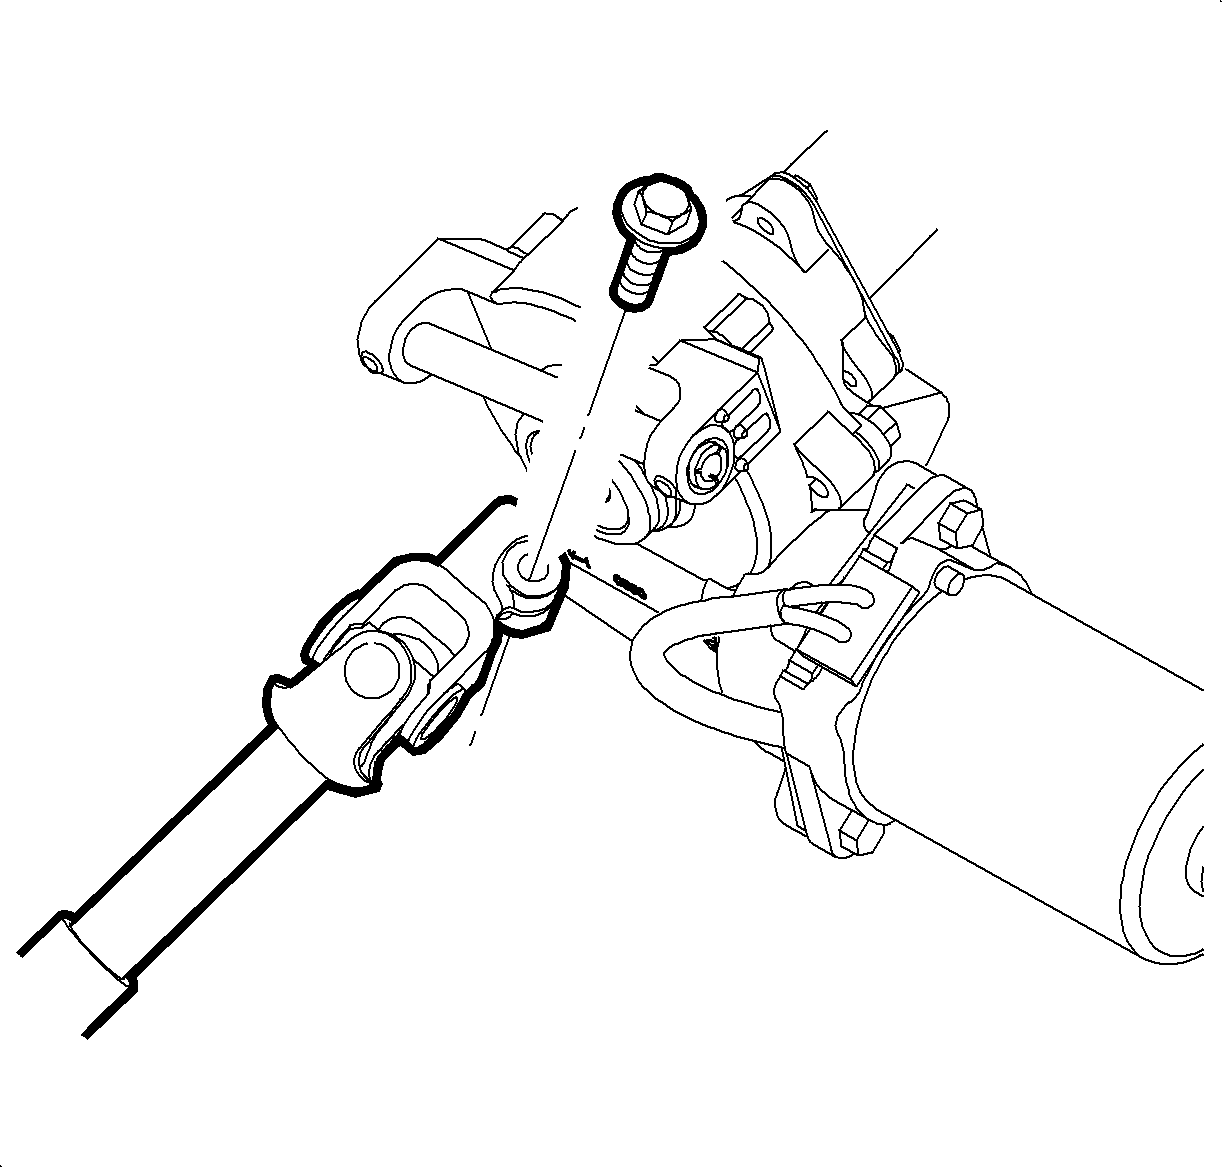
- Remove and discard the column to I-shaft bolt.
- Remove the upper column attachment bolts.
- Remove the steering column.

Notice: Rotating steering wheel while it is disconnected from the steering gear may cause damage to SIR coil.
Important: If you are installing the removed column, index mark the column to the I-shaft connection for reassembly alignment.
Installation Procedure
- Position the column into the vehicle and insert I-shaft onto the lower column. Install a new I-shaft bolt and tighten. Align index marks as re-installing removed column.
- Hand start the upper column mounting bolts.
- Install the lower column through-bolt. Hand tighten until snug.
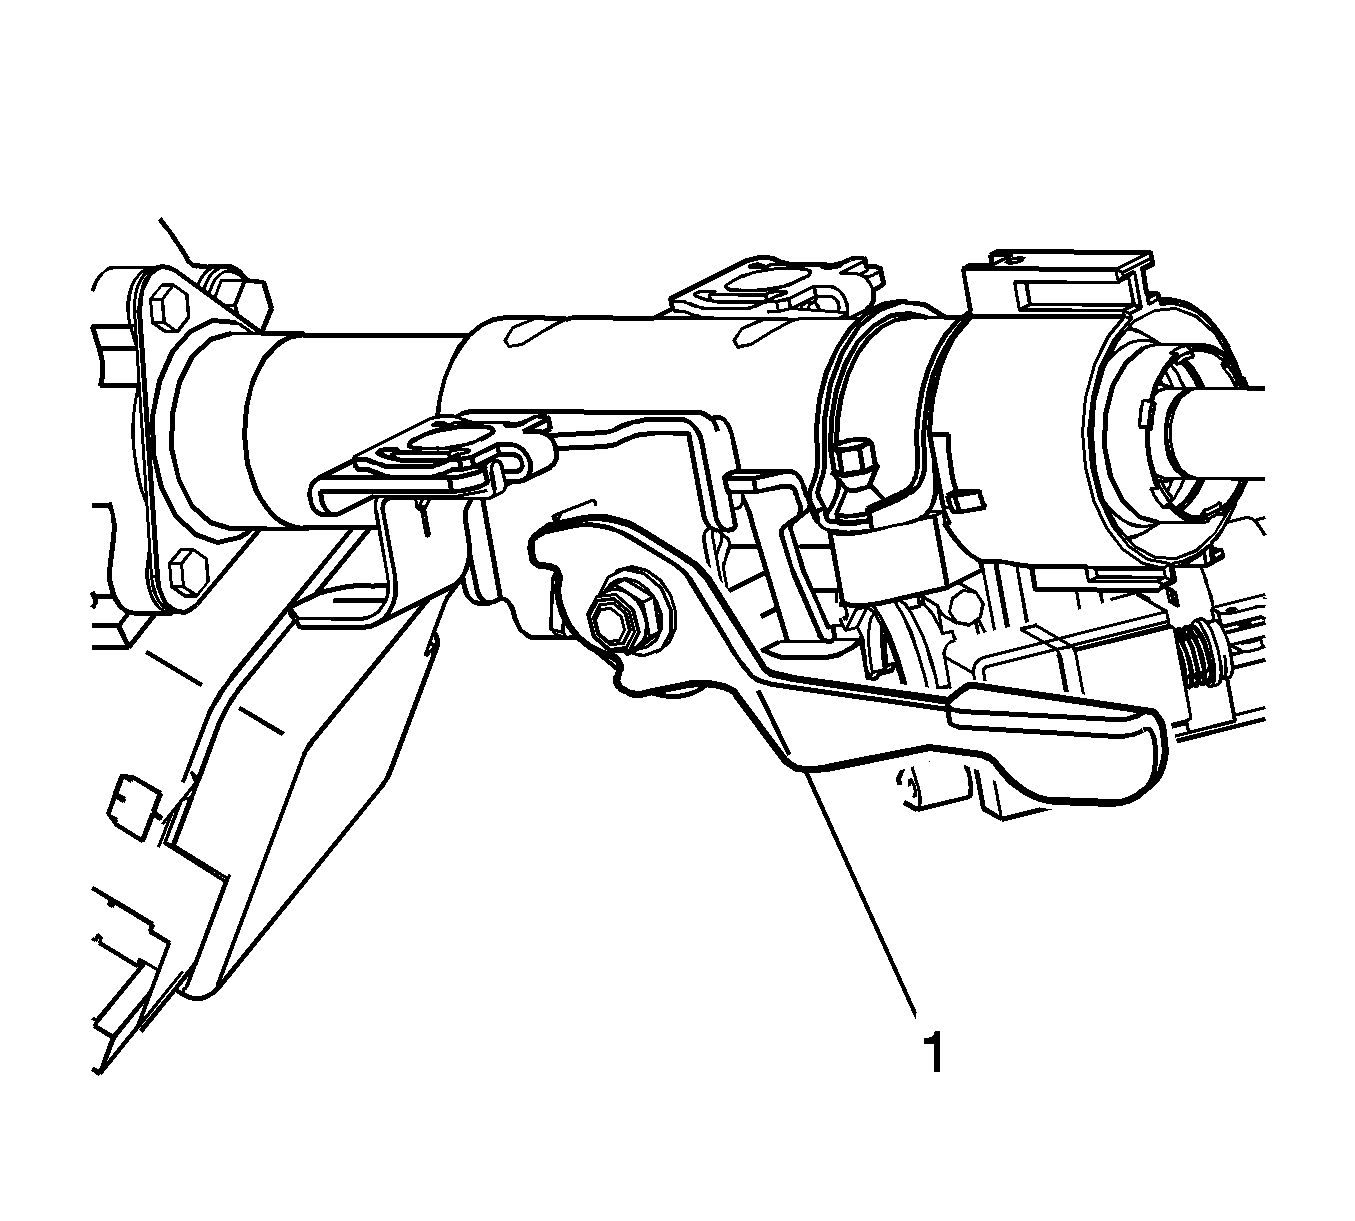
- Pre-assemble the lock housing and multi-function lever bracket. Hand tighten the bolts leaving approximately 3.2 mm (1/8 in) gap at both bolts.
- Slide the bracket onto the column.
- Hand tighten the lower lock housing bolt until snug.
- Hand tighten the upper lock housing bolt until snug.
- Tighten the lower lock housing bolt.
- Tighten the upper lock housing bolt.
- Secure the left side upper column mounting bolt.
- Secure the lower column mounting bolt.
- Operate column through range of motion before securing the final bolt.
- Secure the right side upper column mounting bolt.
- Install the ignition housing electrical connectors.
- Align and install the park lock cables onto ignition module by snapping into place.
- Install the multi-function levers.
- Install EPS electrical connectors to EPS controller.
- Install the electrical housing electrical connectors.
- Install the upper and lower shrouds, install screws, and tighten.
- Install the lock cylinder bezel (snap fit).
- Press in knee bolster and install the bolts.
- Install the SIR coil. Refer to Inflatable Restraint Steering Wheel Module Coil Replacement.
- Install the steering wheel. Refer to Steering Wheel Replacement .
- Install the SIR module. Refer to Inflatable Restraint Steering Wheel Module Replacement.
- Test drive the vehicle. Inspect for proper steering operation.
- Connect the negative battery cable. Refer to Battery Negative Cable Disconnection and Connection.
- Refer to Control Module References for programming and setup information.
Notice: Refer to Fastener Notice in the Preface section.
Important:
• When installing a NEW service replacement EPS column, the Saturn Service Stall (SSS) must be utilized to properly program the EPS controller contained with the column. • Ensure the steering wheel alignment is in the 12 o'clock position.
Tighten
Tighten the I-shaft bolt to 34 N·m (25 lb ft).
Important: Ensure the lock tab fully engages into slot in column.
Tighten
Tighten the lower bolt to 8 N·m (71 lb in).
Tighten
Tighten the upper bolt to 8 N·m (71 lb in).
Tighten
Tighten the left side upper column mounting bolt to 25 N·m (18 lb ft).
Tighten
Tighten the lower column mounting bolt to 25 N·m (18 lb ft).
| 12.1. | Release rake/tilt lever (1). |
| 12.2. | Move column up and down 3 times. |
| 12.3. | Set column in UP position. |
| 12.4. | Secure rake/tilt lever (1). |
Tighten
Tighten the right side upper column mounting bolt to 25 N·m (18 lb ft).
Important: Ensure both locking tabs are properly seated.
Tighten
Tighten the shroud screws to 2 N·m (18 lb in).
Tighten
Tighten the knee bolster bolts to 4 N·m (35 lb in).
