Compressor Thermal Protection Switch Replacement L61
Tools Required
J 44020 Terminal Repair Kit
Removal Procedure
- Raise and support the vehicle. Refer to Lifting and Jacking the Vehicle .
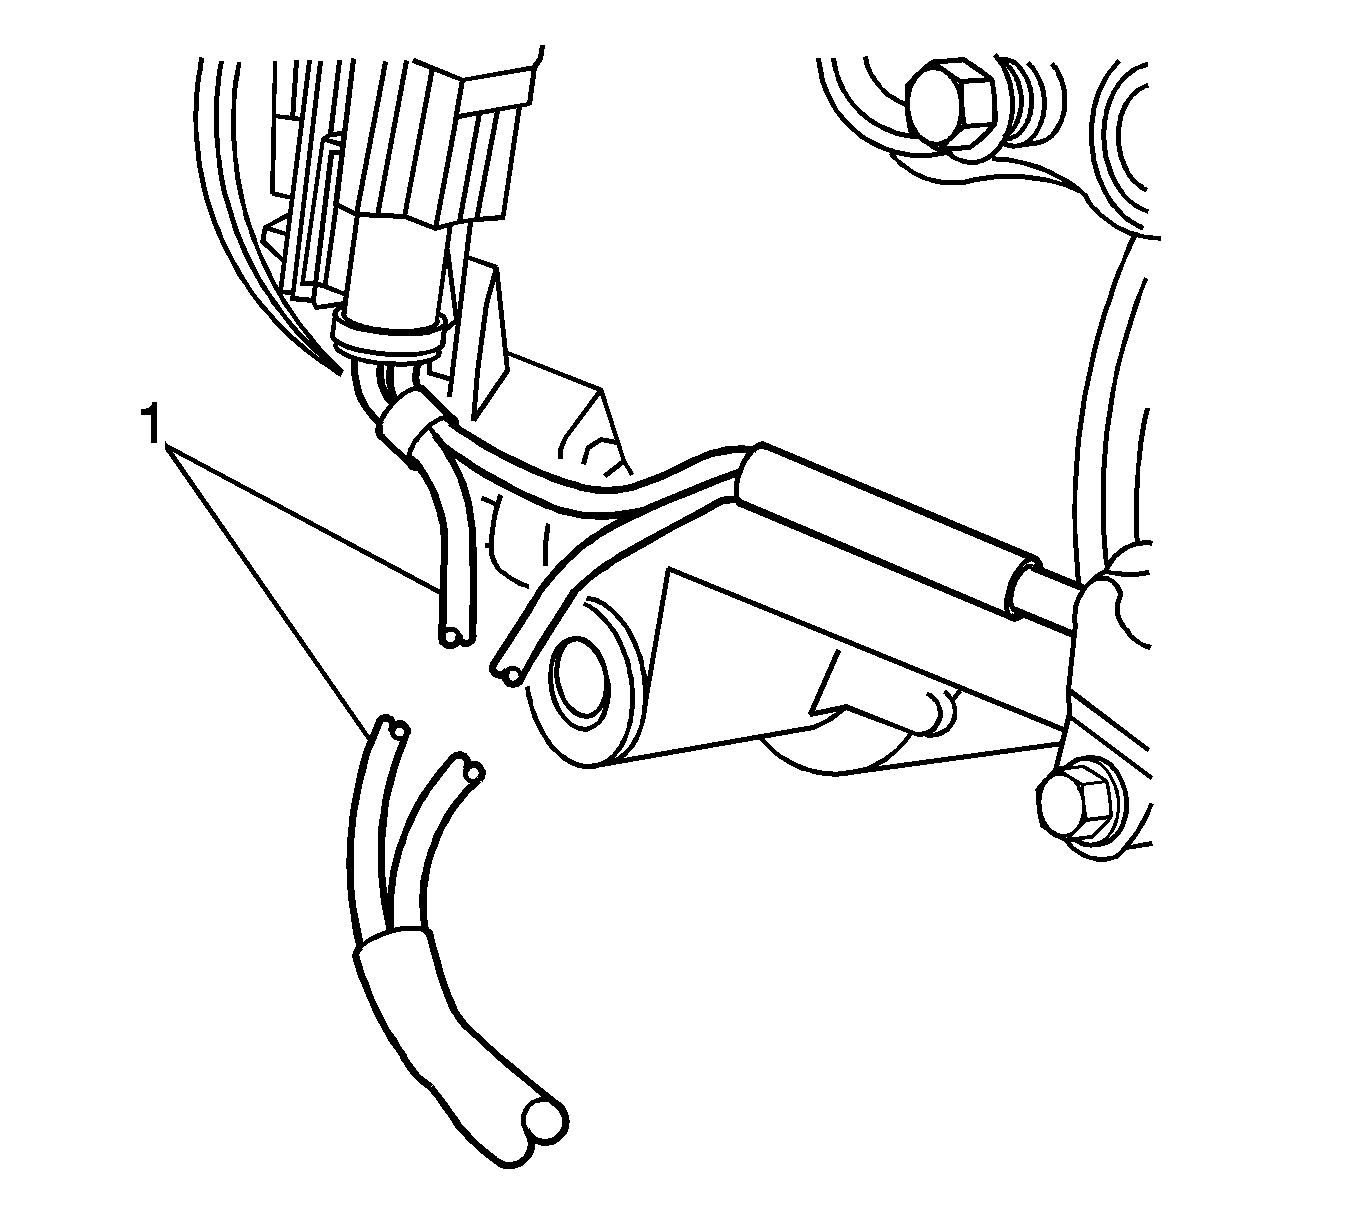
- Cut the wire harness leads (1) to the clutch coil.
- Remove the electrical connector from the clutch coil bracket.
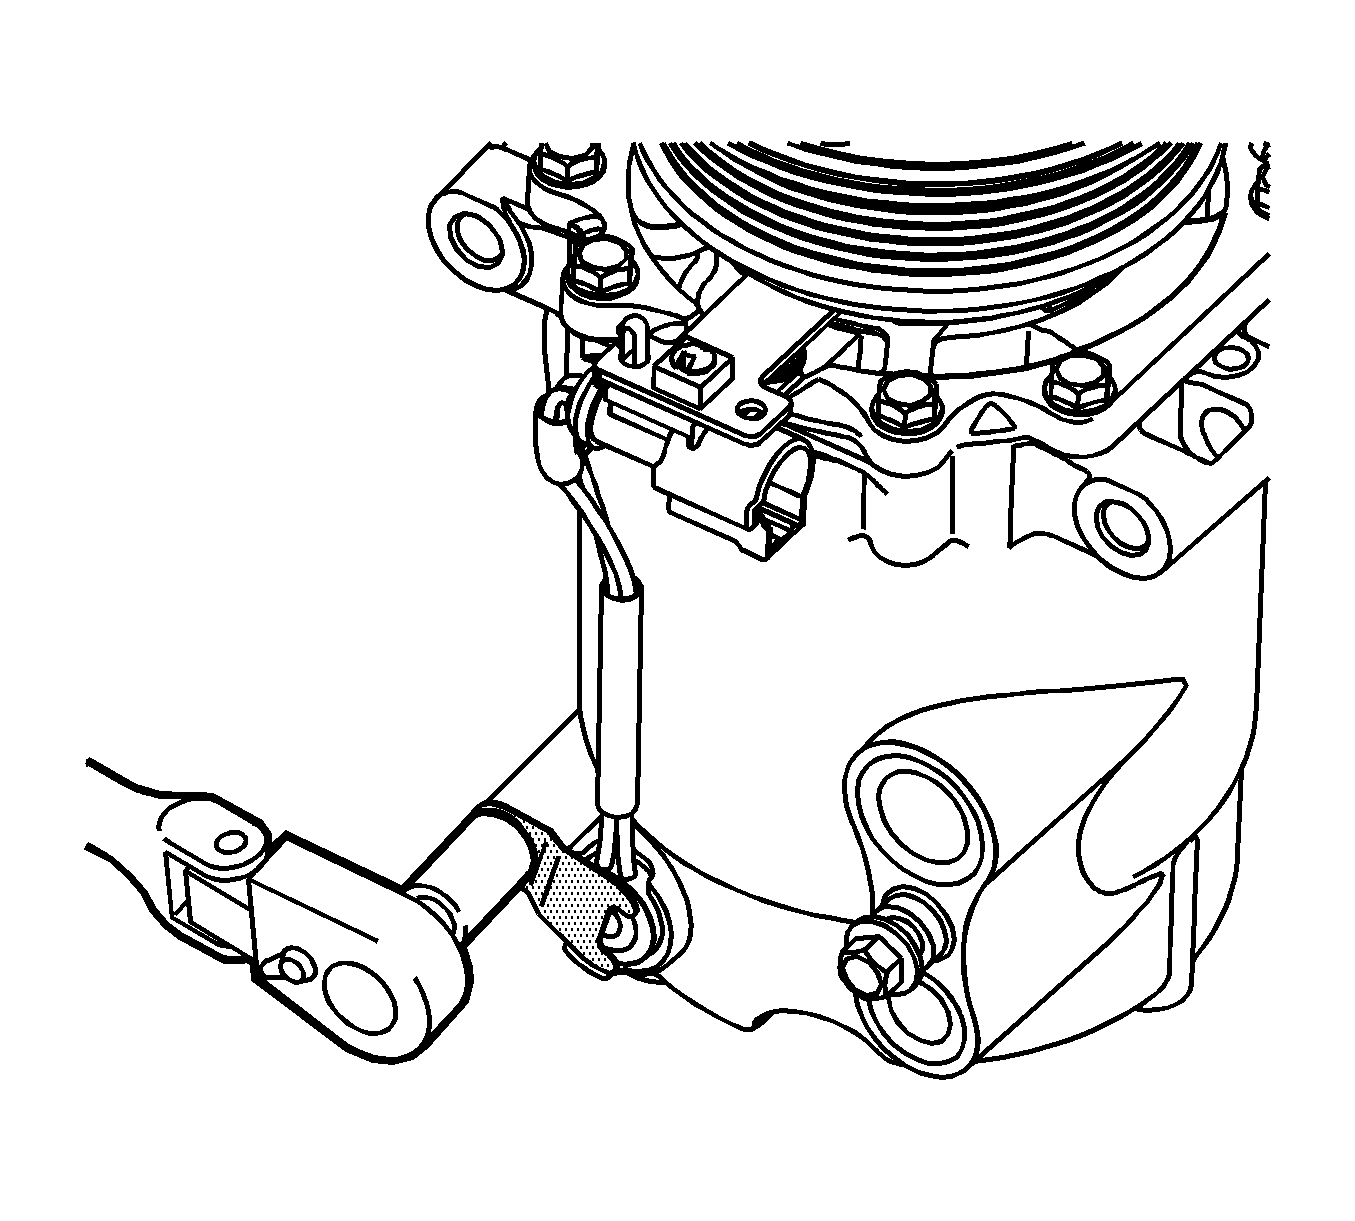
- Remove the thermal protection switch (TPS) retainer bolt from the compressor.
- Remove the TPS retainer from the compressor.
- Remove the TPS assembly from the compressor. It may be necessary to gently pry the TPS with a flat bladed tool.


Installation Procedure
- Measure and cut the new TPS assembly to the proper length.
- Remove 9.5 mm (3/8 in) of insulation from the ends of the TPS assembly and the wire harness.
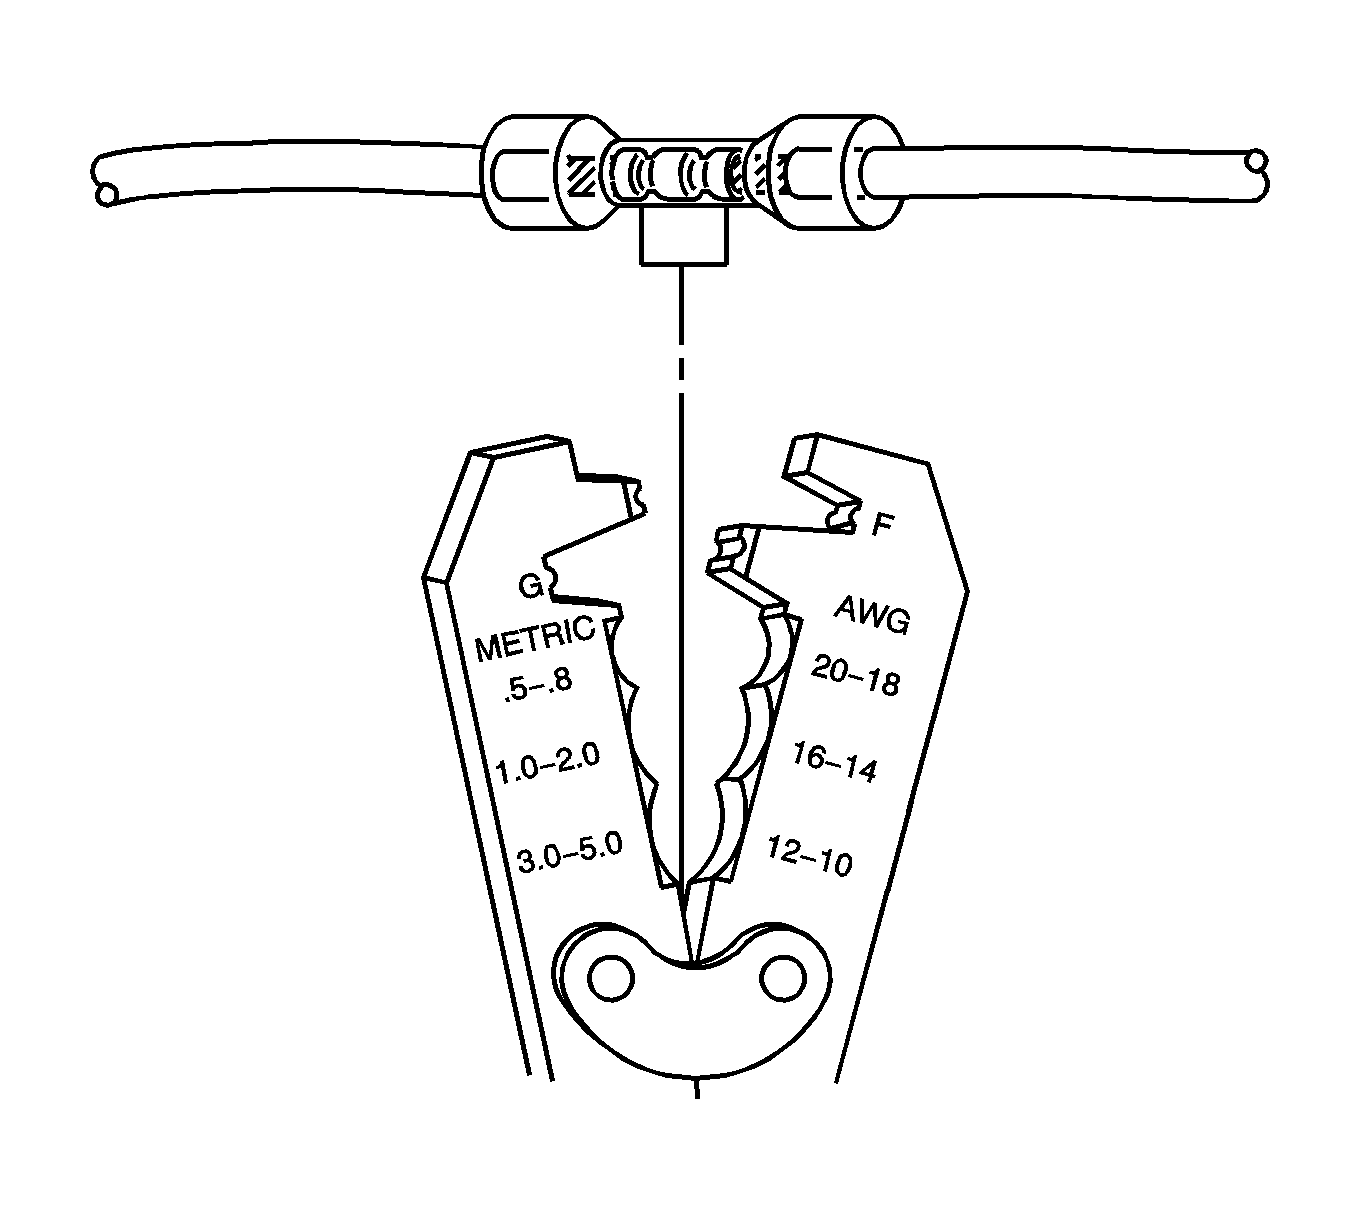
- Position the stripped ends of wire in the appropriate splice sleeve found in J 44020 .
- Crimp the splices using an approved crimping tool.
- Gently tug on the wires to ensure proper crimping.
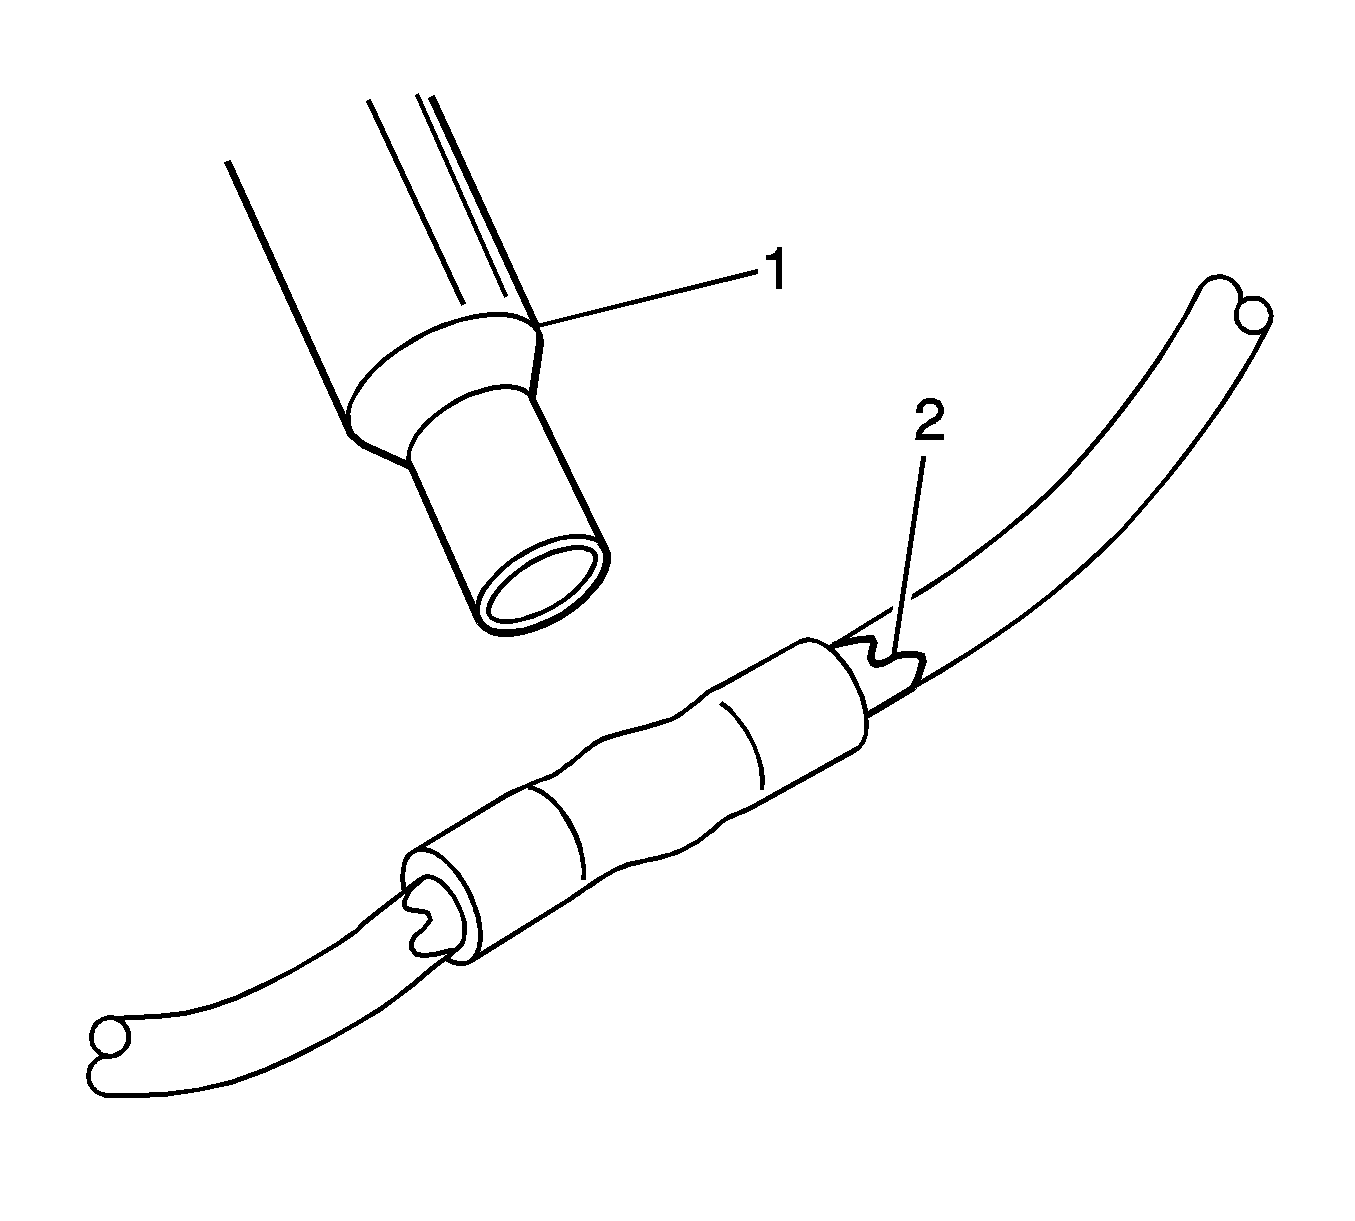
- Apply heat (1) to the splice joints until glue (2) flows from the splice sleeves.
- Clean the TPS pocket of any foreign material.
- Apply Saturn thermal conductive sealant P/N 22681632 to the TPS pocket.
- Install the TPS to the TPS pocket on the compressor.
- Remove any excess sealant from around the switch.
- Install the TPS retainer to the compressor.
- Install the TPS retainer bolt to the compressor.
- Install the electrical connector to the clutch coil bracket.
- Lower the vehicle.

Important: To ensure proper routing and retention, be sure the new TPS assembly is cut to the same length as the original TPS assembly.


Important: Use Saturn thermal conductive sealant P/N 22681632 to ensure the TPS functions properly.
Notice: Use the correct fastener in the correct location. Replacement fasteners must be the correct part number for that application. Fasteners requiring replacement or fasteners requiring the use of thread locking compound or sealant are identified in the service procedure. Do not use paints, lubricants, or corrosion inhibitors on fasteners or fastener joint surfaces unless specified. These coatings affect fastener torque and joint clamping force and may damage the fastener. Use the correct tightening sequence and specifications when installing fasteners in order to avoid damage to parts and systems.
Tighten
Tighten the bolt to 6 N·m (53 lb in).
