For 1990-2009 cars only
Removal Procedure
- Raise and support the vehicle. Refer to Lifting and Jacking the Vehicle .
- Remove both front tires and wheels. Refer to Tire and Wheel Removal and Installation .
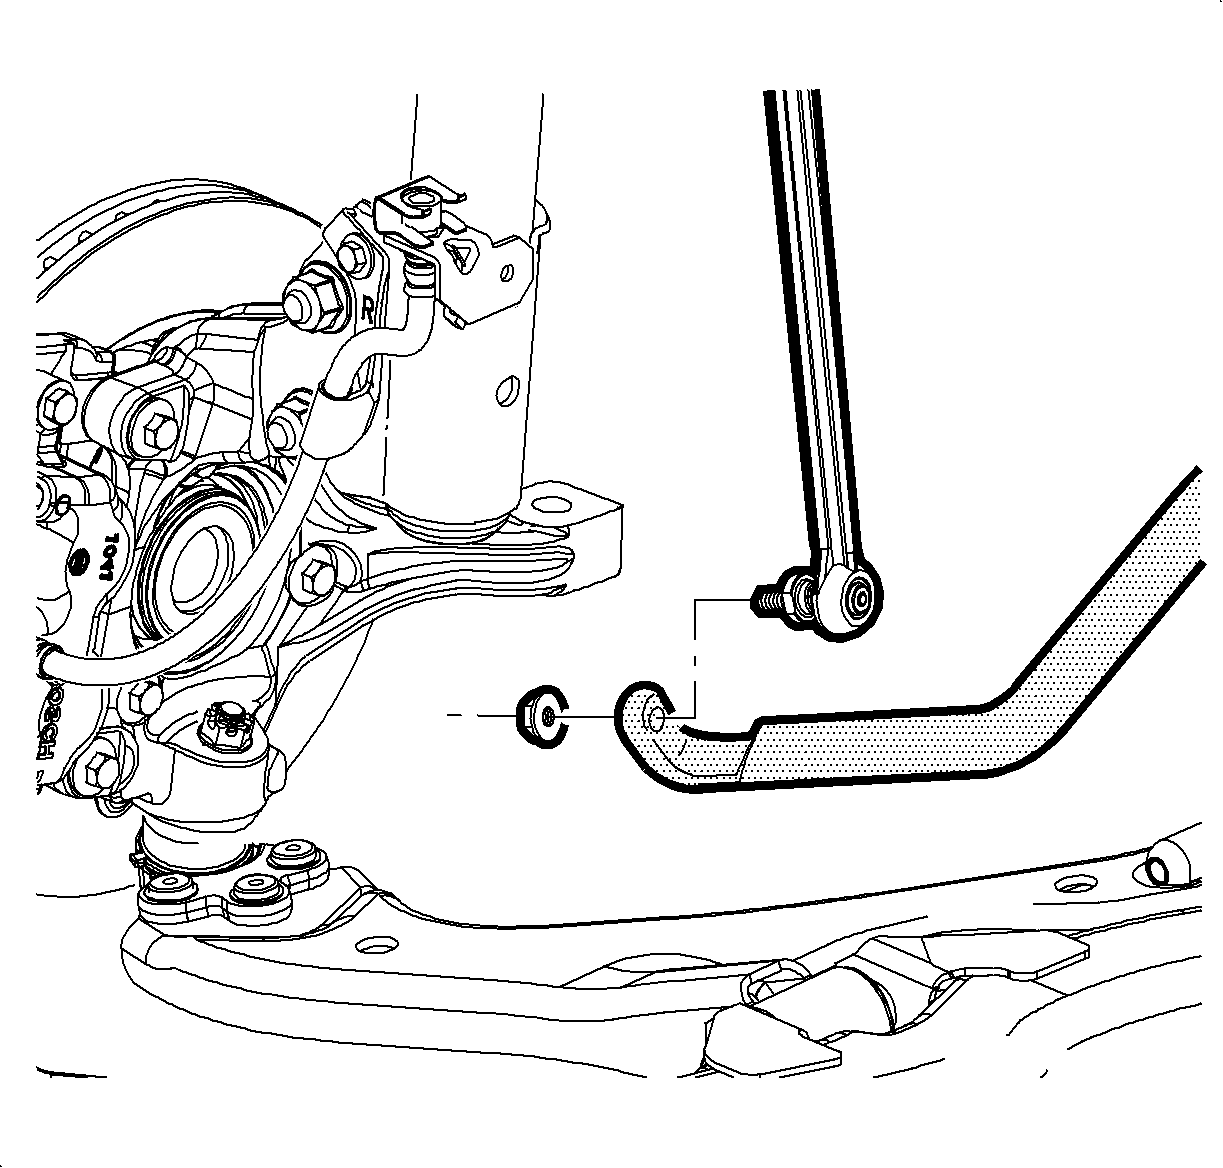
- If equipped with AWD, disconnect the stabilizer links from the stabilizer shaft.
- If equipped with AWD, swing the stabilizer shaft upwards in order to gain additional clearance.
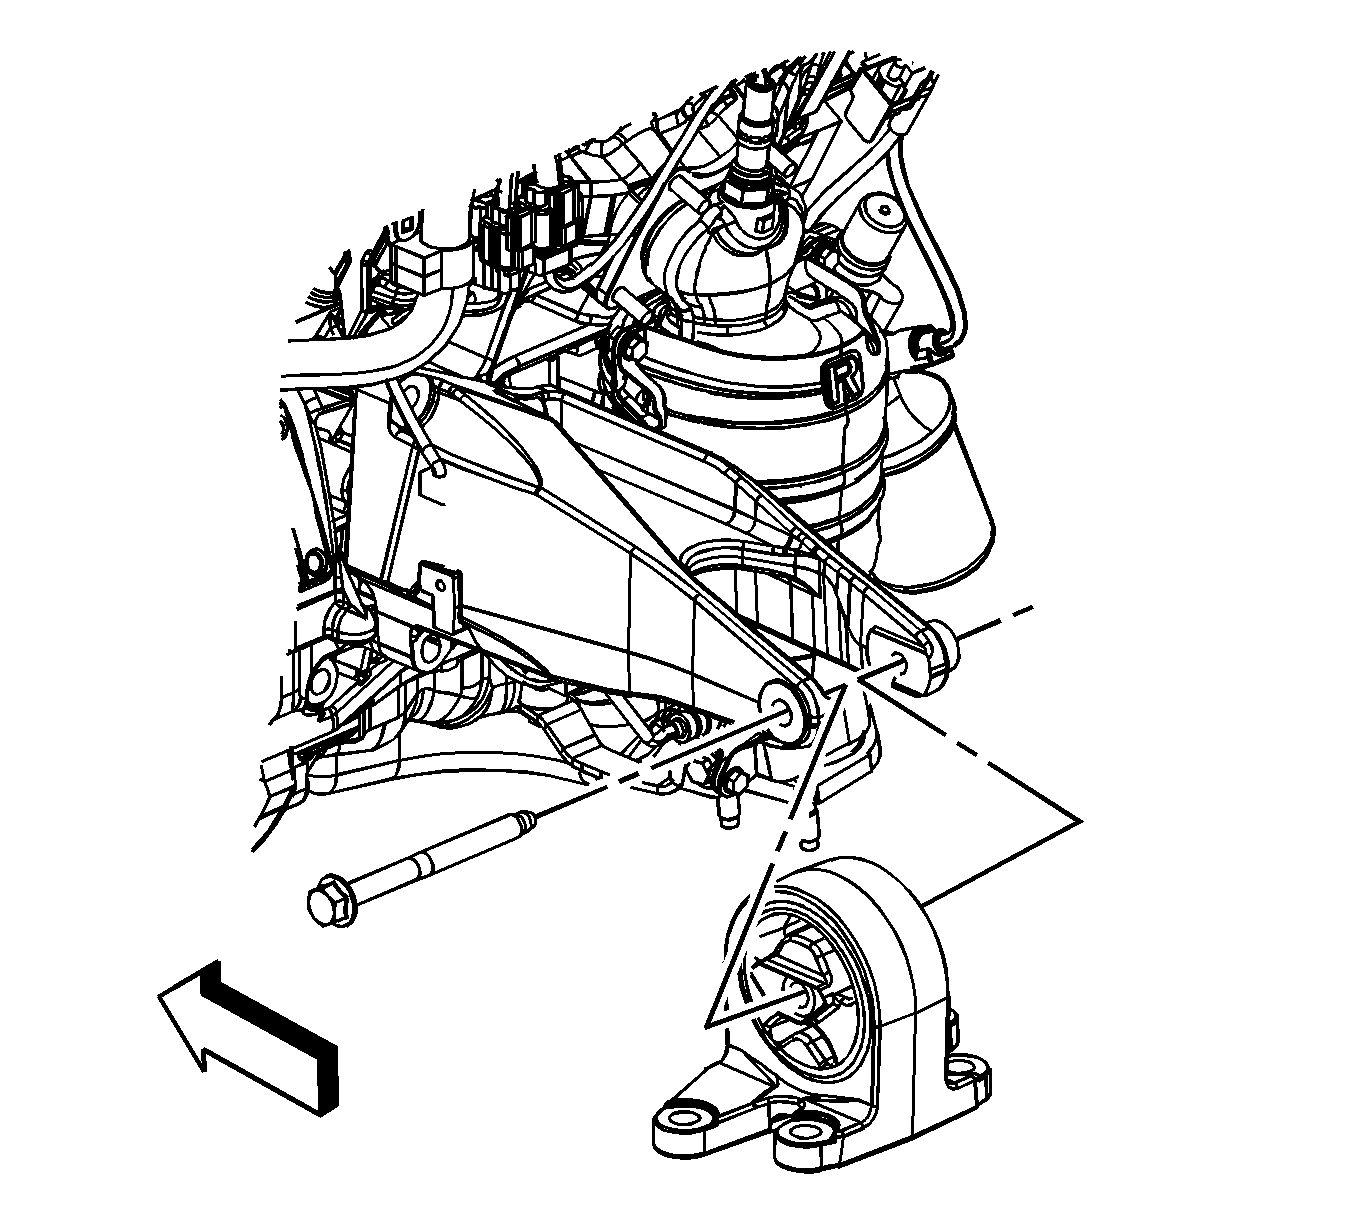
- Remove the transmission mount-to-bracket through bolt.
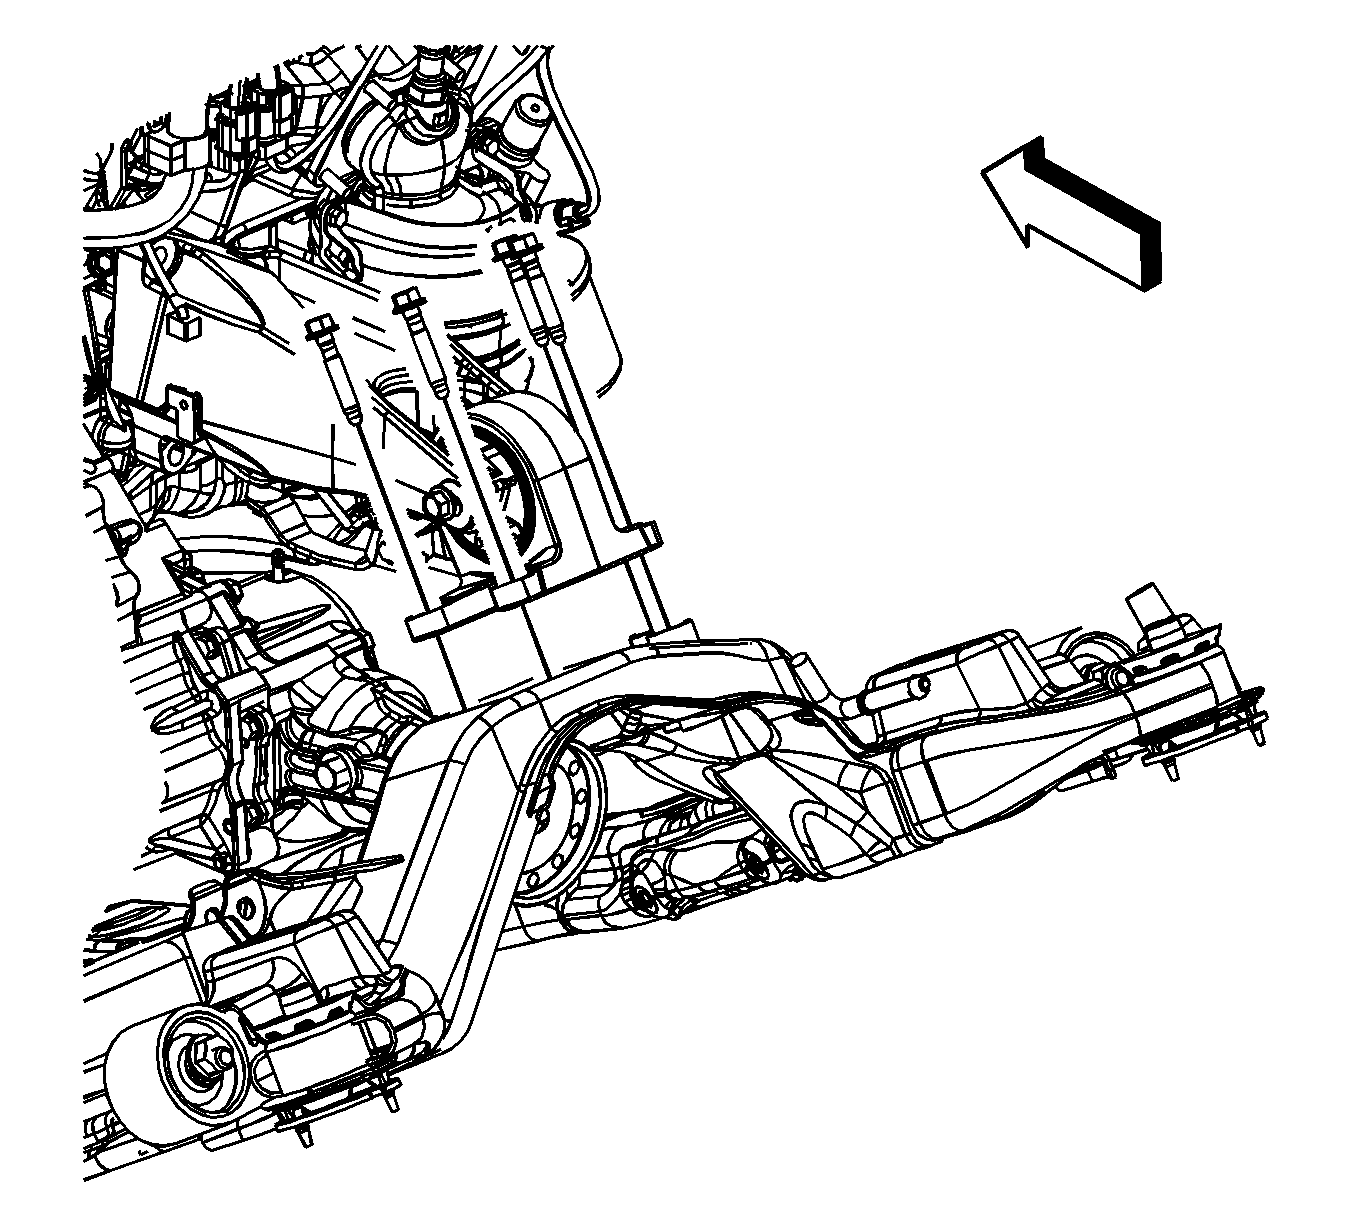
- Remove the transmission mount-to-frame bolts.
- Remove the transmission mount from the vehicle.


Installation Procedure
- Position the transmission mount to the frame.
- Install the transmission mount-to-frame bolts.
- Install the transmission mount-to-bracket through bolt, while aligning the transmission mount to the bracket.
- If equipped with AWD, lower the stabilizer shaft and connect the stabilizer links .
- Install both front tires and wheels. Refer to Tire and Wheel Removal and Installation .
- Lower the vehicle.
Notice: Refer to Fastener Notice in the Preface section.

Tighten
Tighten the bolt to 50 N·m (37 lb ft).

Tighten
Tighten the bolt to 110 N·m (81 lb ft).

Tighten
Tighten the stabilizer link nuts to 65 N·m (48 lb ft).
