GM Service Manual Online
For 1990-2009 cars only

Liquid Line Replacement L61

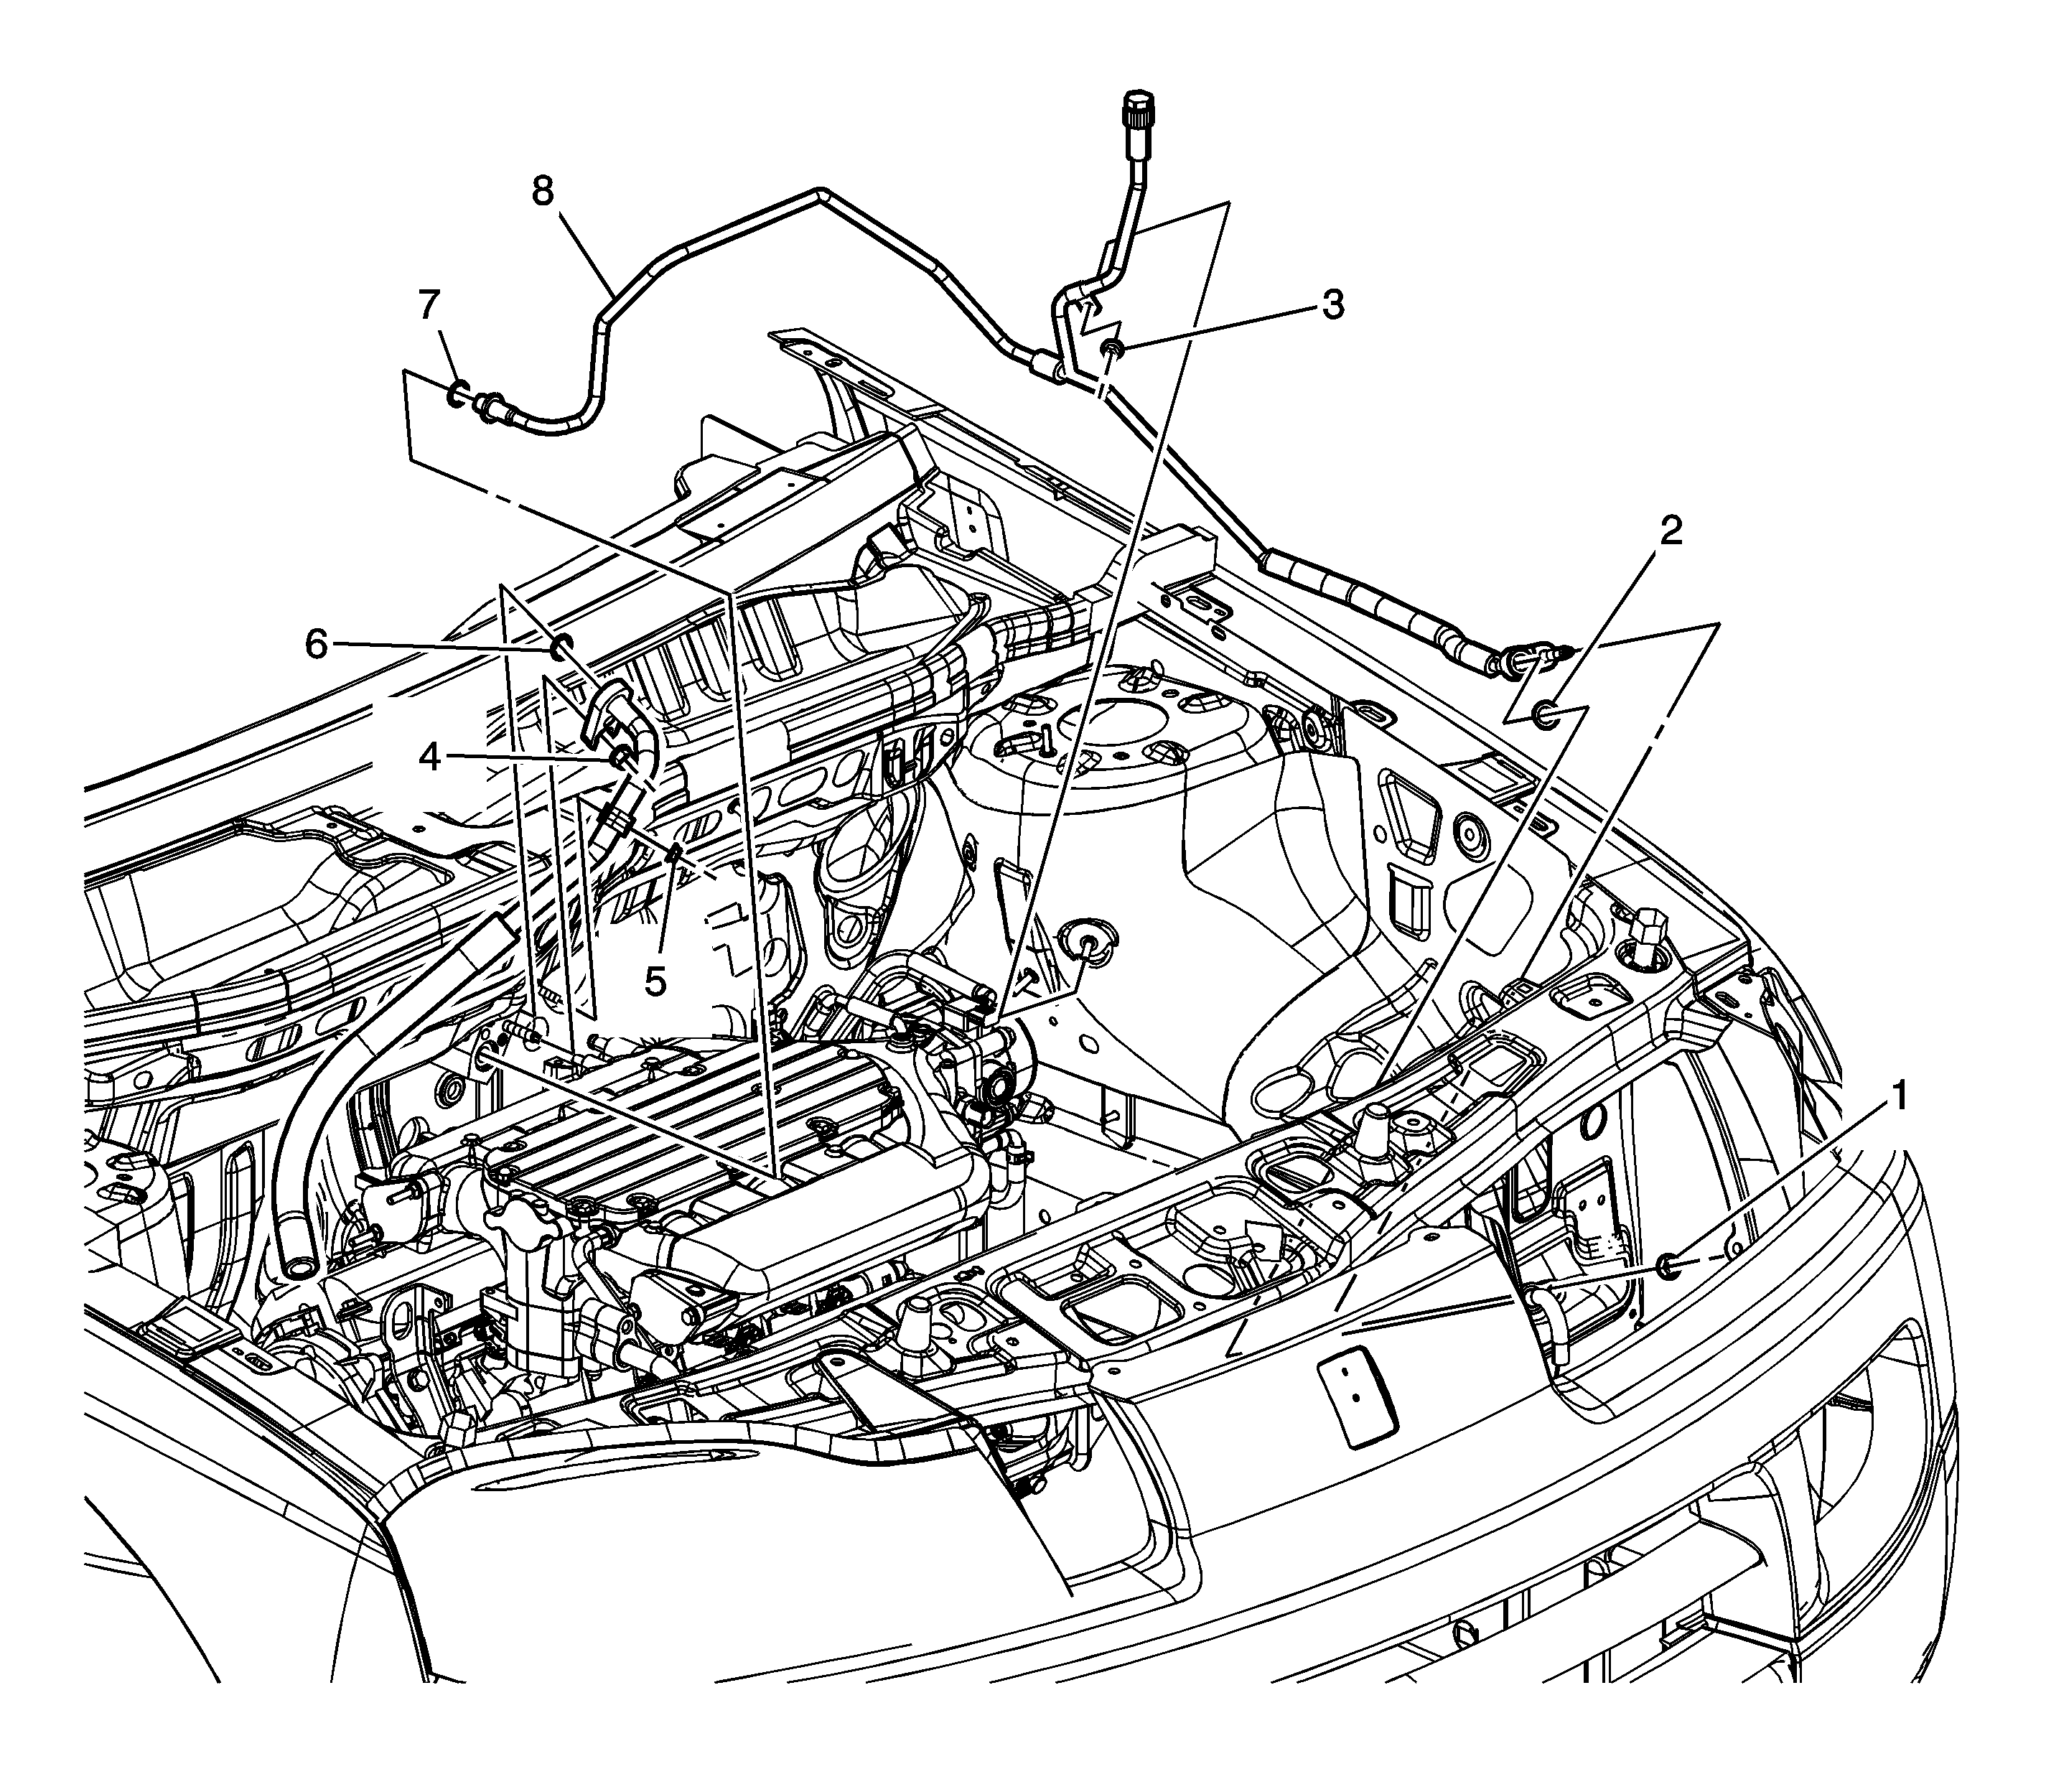
Object Number: 1541341  Size: LF

Callout

Component Name

Notice: Refer to Fastener Notice in the Preface section.

Fastener Tightening Specifications: Refer to Fastener Tightening Specifications .

Preliminary Procedure

  1. Recover the refrigerant. Refer to Refrigerant Recovery and Recharging .
  2. Remove the left headlamp. Refer to Headlamp Assembly or Headlamp Bulb and/or Cornering, Sidemarker, Park, Turn Signal Bulb Replacement .
  3. Remove the surge tank. Refer to Radiator Surge Tank Replacement .
  4. Remove the washer bottle. Refer to Windshield Washer Solvent Container and Pump Replacement .
  5. Remove the battery tray. Refer to Battery Tray Replacement .
  6. Remove negative battery cable from the wheelhouse liner. Refer to Battery Negative Cable Replacement .

1

Nut, Tube Assembly - A/C Receiver Dehydrator

Tighten
10 N·m (89 lb in)

2

Nut, Tube Assembly - A/C Receiver Dehydrator

Tighten
16 N·m (12 lb ft)

3

Washer, Sealing

Tip
Remove and discard the seal. Refer to Sealing Washer Replacement .

4

Nut, Tube Assembly - A/C Receiver Dehydrator

Tip
Position the A/C evaporator outlet hose to the side.

Tighten
20 N·m (15 lb ft)

5

Washer, Sealing

Tip
Remove and discard the seal. Refer to Sealing Washer Replacement .

6

Washer, Sealing

Tip
Remove and discard the seal. Refer to Sealing Washer Replacement .

7

Tube Assembly - A/C Receiver Dehydrator

Liquid Line Replacement L66


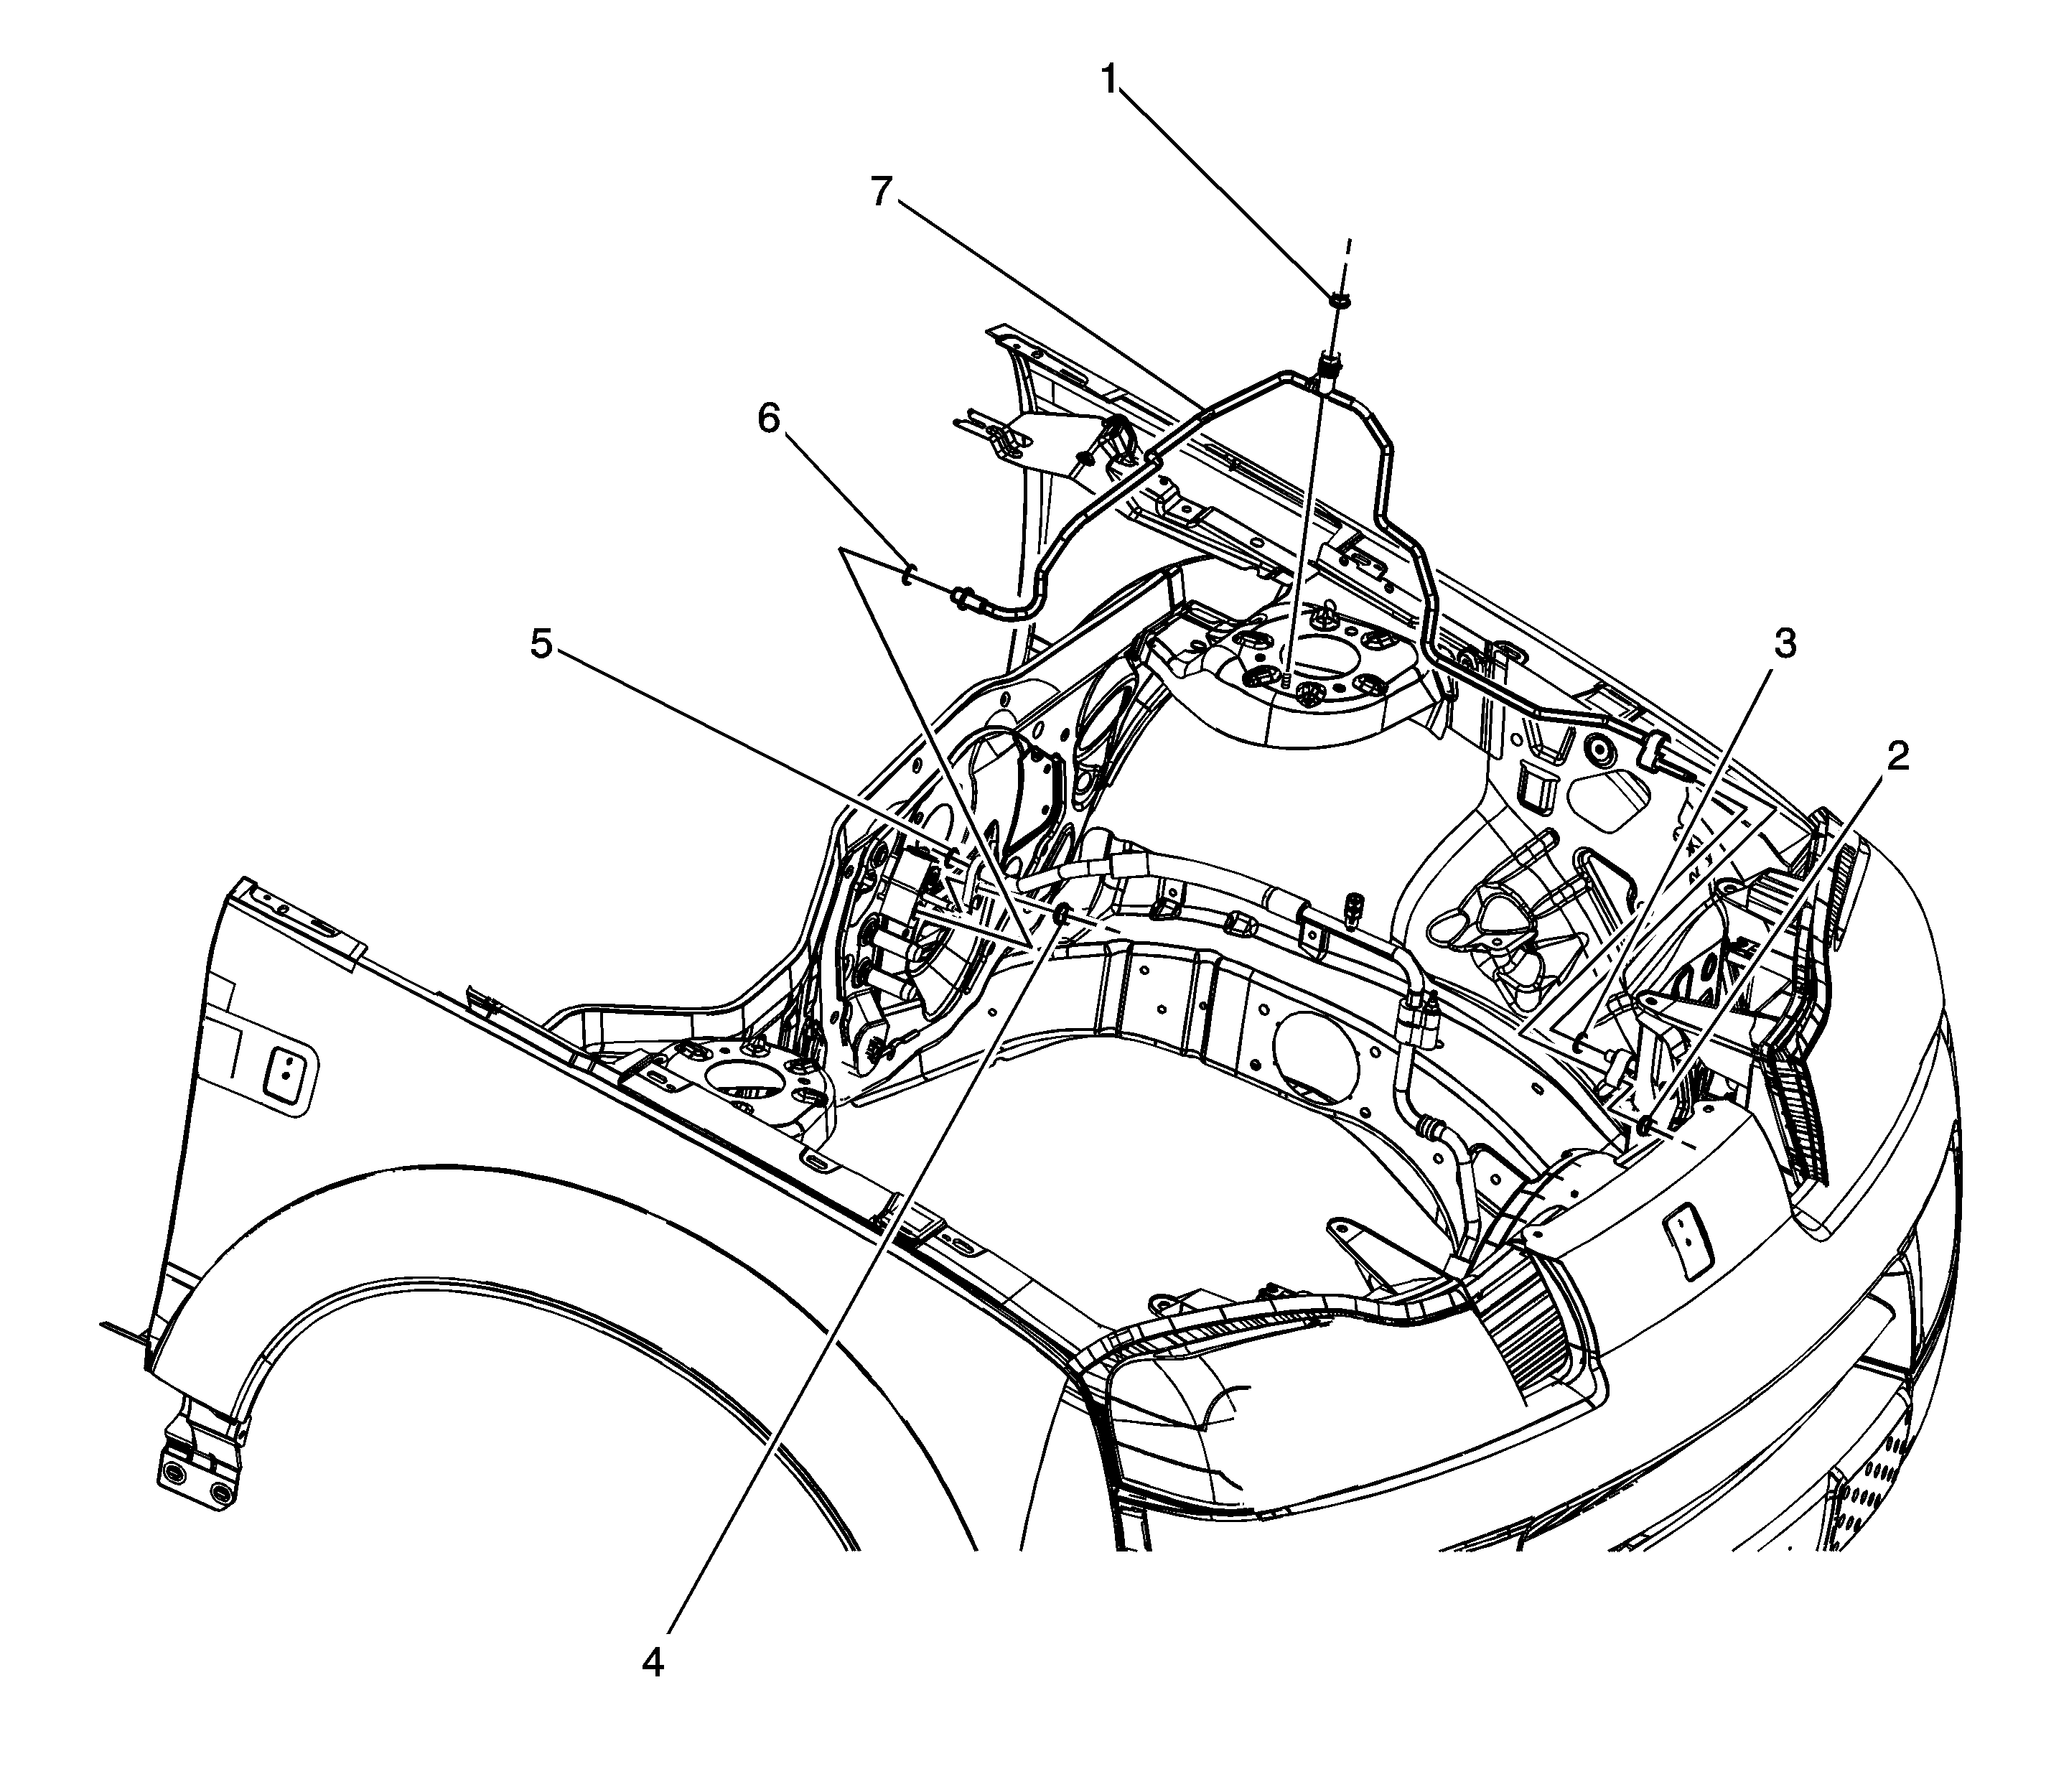
Object Number: 1542222  Size: LF

Callout

Component Name

Notice: Refer to Fastener Notice in the Preface section.

Fastener Tightening Specifications: Refer to Fastener Tightening Specifications .

Preliminary Procedure

  1. Recover the refrigerant. Refer to Refrigerant Recovery and Recharging .
  2. Remove the left headlamp. Refer to Headlamp Assembly or Headlamp Bulb and/or Cornering, Sidemarker, Park, Turn Signal Bulb Replacement .
  3. Remove the air cleaner duct. Refer to Air Cleaner Resonator Outlet Duct Replacement .
  4. Remove the surge tank. Refer to Radiator Surge Tank Replacement .
  5. Remove the battery tray. Refer to Battery Tray Replacement .

1

Nut, Tube Assembly - A/C Receiver Dehydrator

Tighten
16 N·m (12 lb ft)

2

Washer, Sealing

Tip
Remove and discard the seal. Refer to Sealing Washer Replacement .

3

Nut, Tube Assembly - A/C Receiver Dehydrator

Tighten
10 N·m (89 lb in)

4

Nut, Tube Assembly - A/C Receiver Dehydrator

Tighten
20 N·m (15 lb ft)

5

Nut, A/C Compressor Hose

Tip
Position the A/C compressor hose to the side.

Tighten
10 N·m (89 lb in)

6

Washer, Sealing

Tip
Remove and discard the seal. Refer to Sealing Washer Replacement .

7

Washer, Sealing

Tip
Remove and discard the seal. Refer to Sealing Washer Replacement .

8

Tube Assembly - A/C Receiver Dehydrator