Important: Inspect the piston, pin and connecting rod with the components at room
temperature. Do not use a wire brush to clean the piston ring grooves. Do
not cut the ring grooves deeper with a groove cleaning tool.
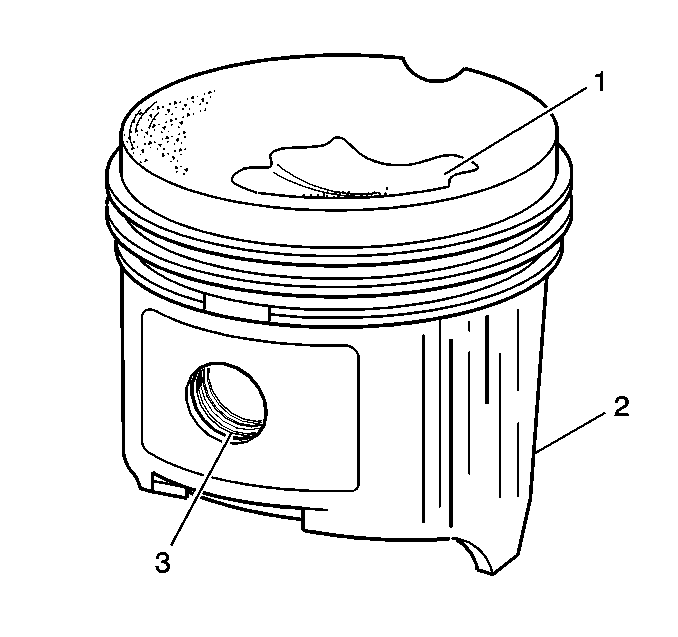
- Inspect the piston for the following conditions:
| • | Eroded areas (1) at the top of the piston |
| • | Scuffed or damaged skirt (2) |
| • | Scoring to the piston pin bore (3) |

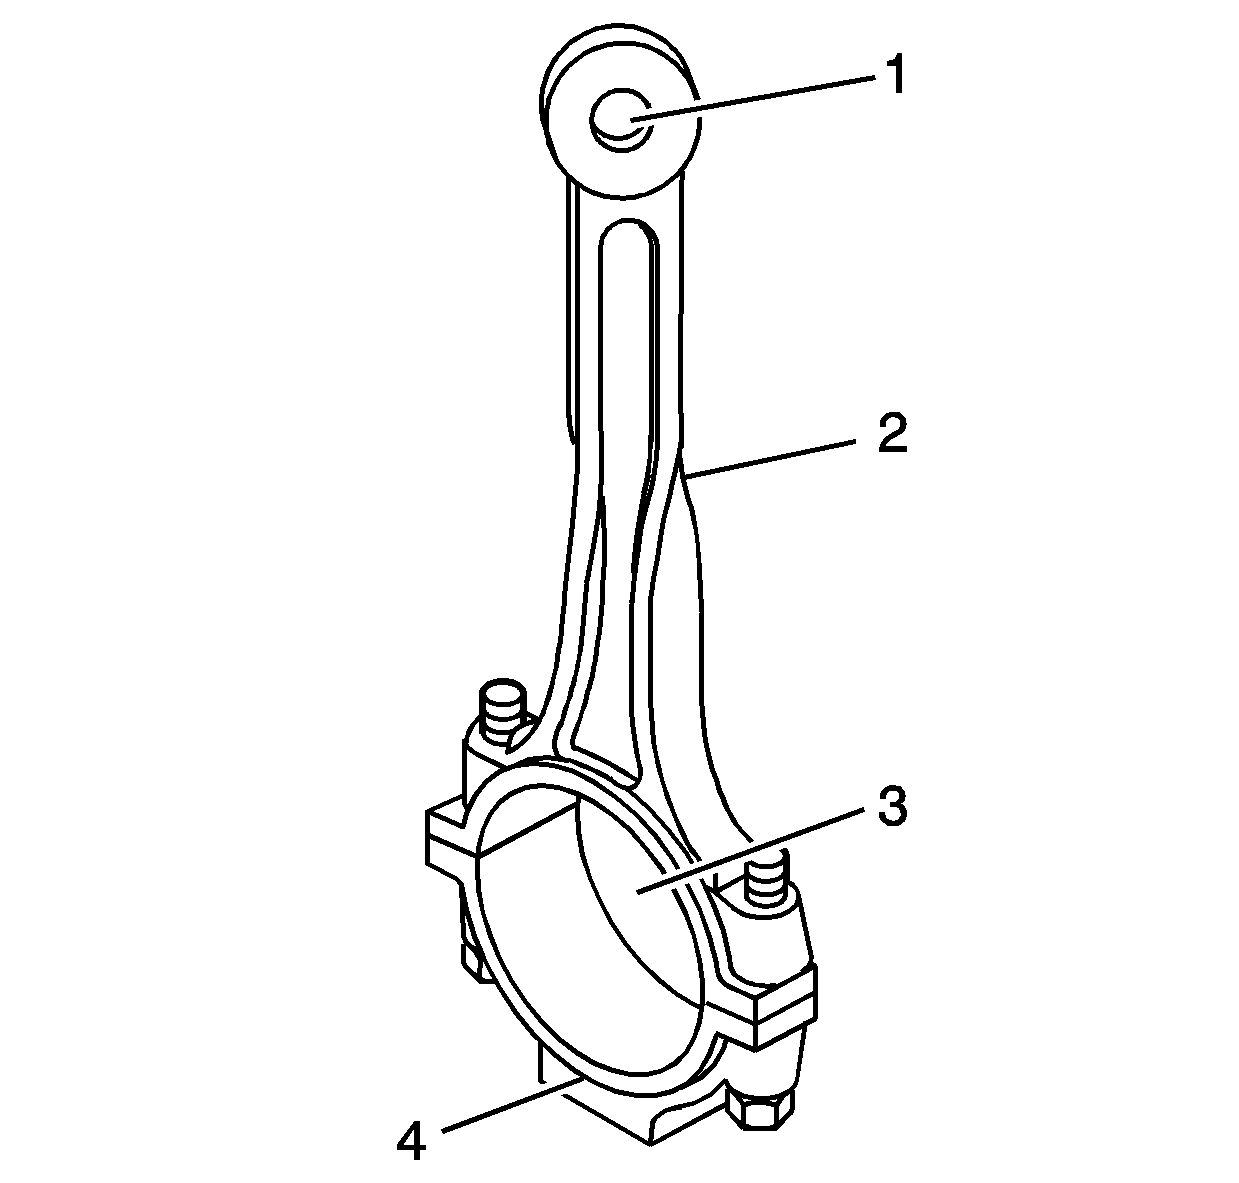
- Inspect the connecting rod for the following conditions:
| • | Nicks or gouging in the pin or bearing bores (1 and 3) |
| • | Proper fit of the connecting rod and cap (4) |

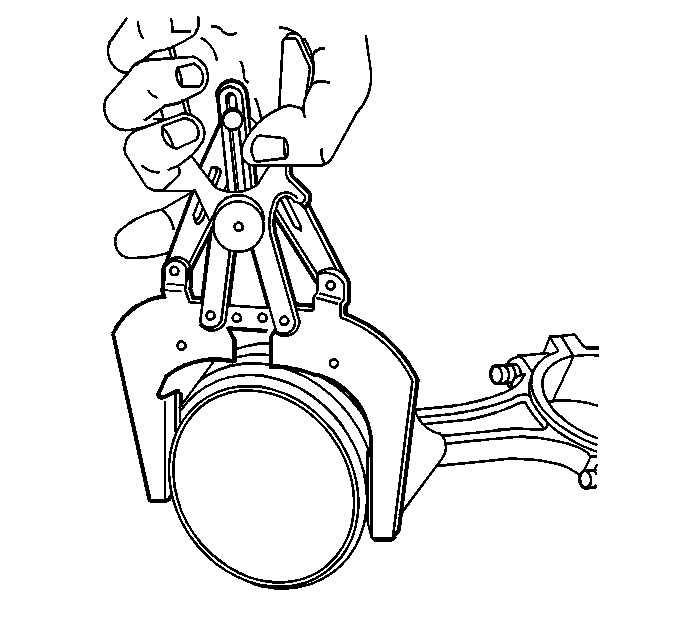
- Clean all the piston ring
grooves thoroughly with a ring groove cleaning tool.

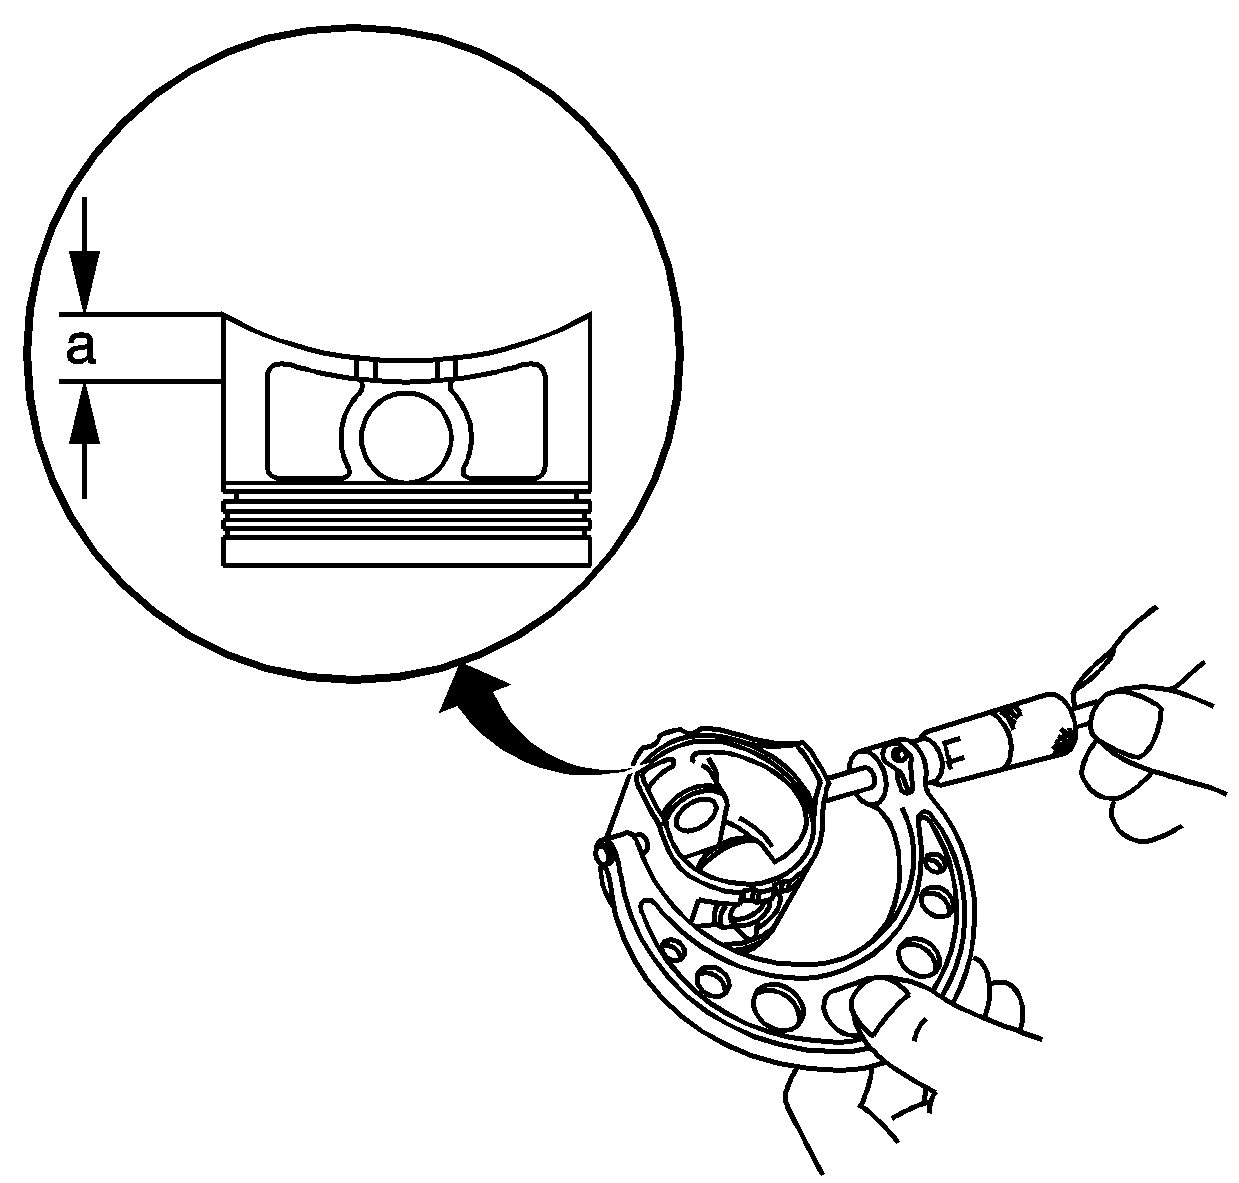
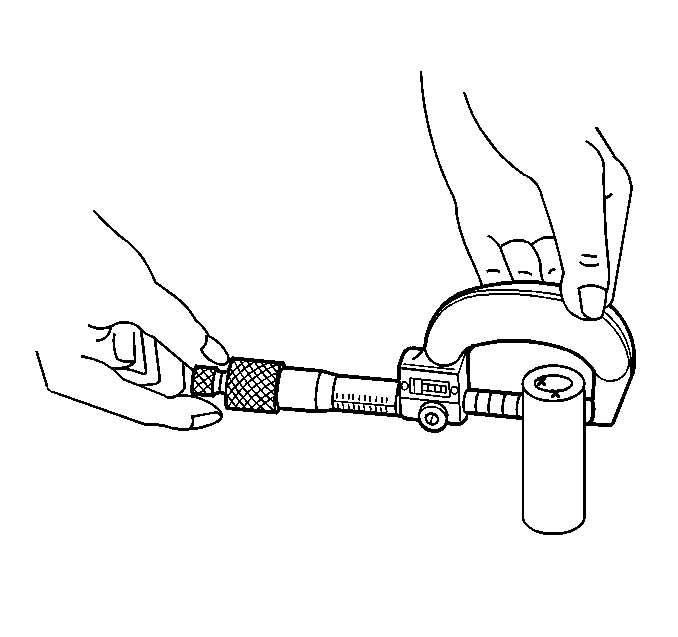
- Measure the piston diameter
at a point 16 mm (0.63 in) from the bottom of the skirt (a).
Specification
| • | Piston diameter - new: 88.975-88.985 mm (3.5029-3.5033 in) |
| • | Piston diameter - service limit: 88.965 mm (3.5026 in) |
| • | 0.25 mm (0.0098 in) oversize piston diameter: 89.225-89.235 mm
(3.5128-3.5132 in) |

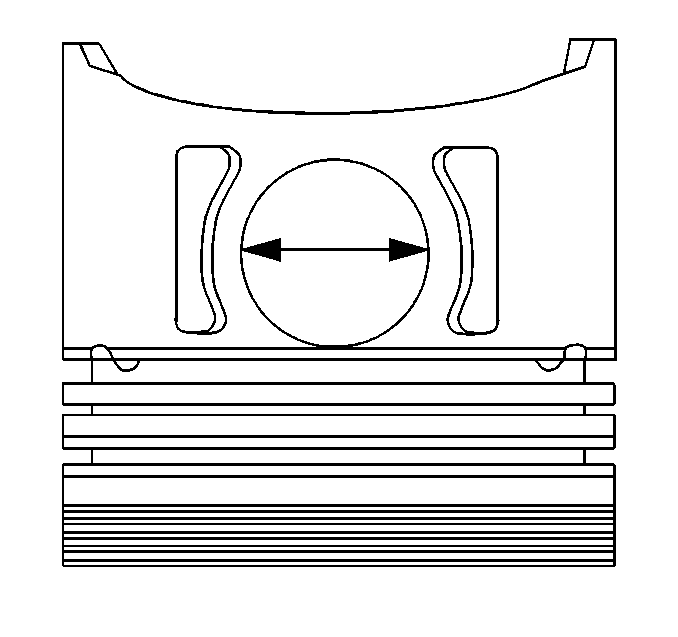
- Measure the piston pin
diameter.
Specification
| • | Piston pin diameter - new: 21.962-21.965 mm
(0.8646-0.8648 in) |
| • | Piston pin diameter - service: 21.954 mm (0.8643 in) |

- Measure the piston pin
bore.
- Calculate the pin-to-bore clearance.
Specification
| • | Piston pin-to-bore clearance - new: -0.005
to +0.001 mm (-0.0002 to +0.00004 in) |
| • | Piston pin-to-bore clearance - service limit:
0.004 mm (0.0002 in) |

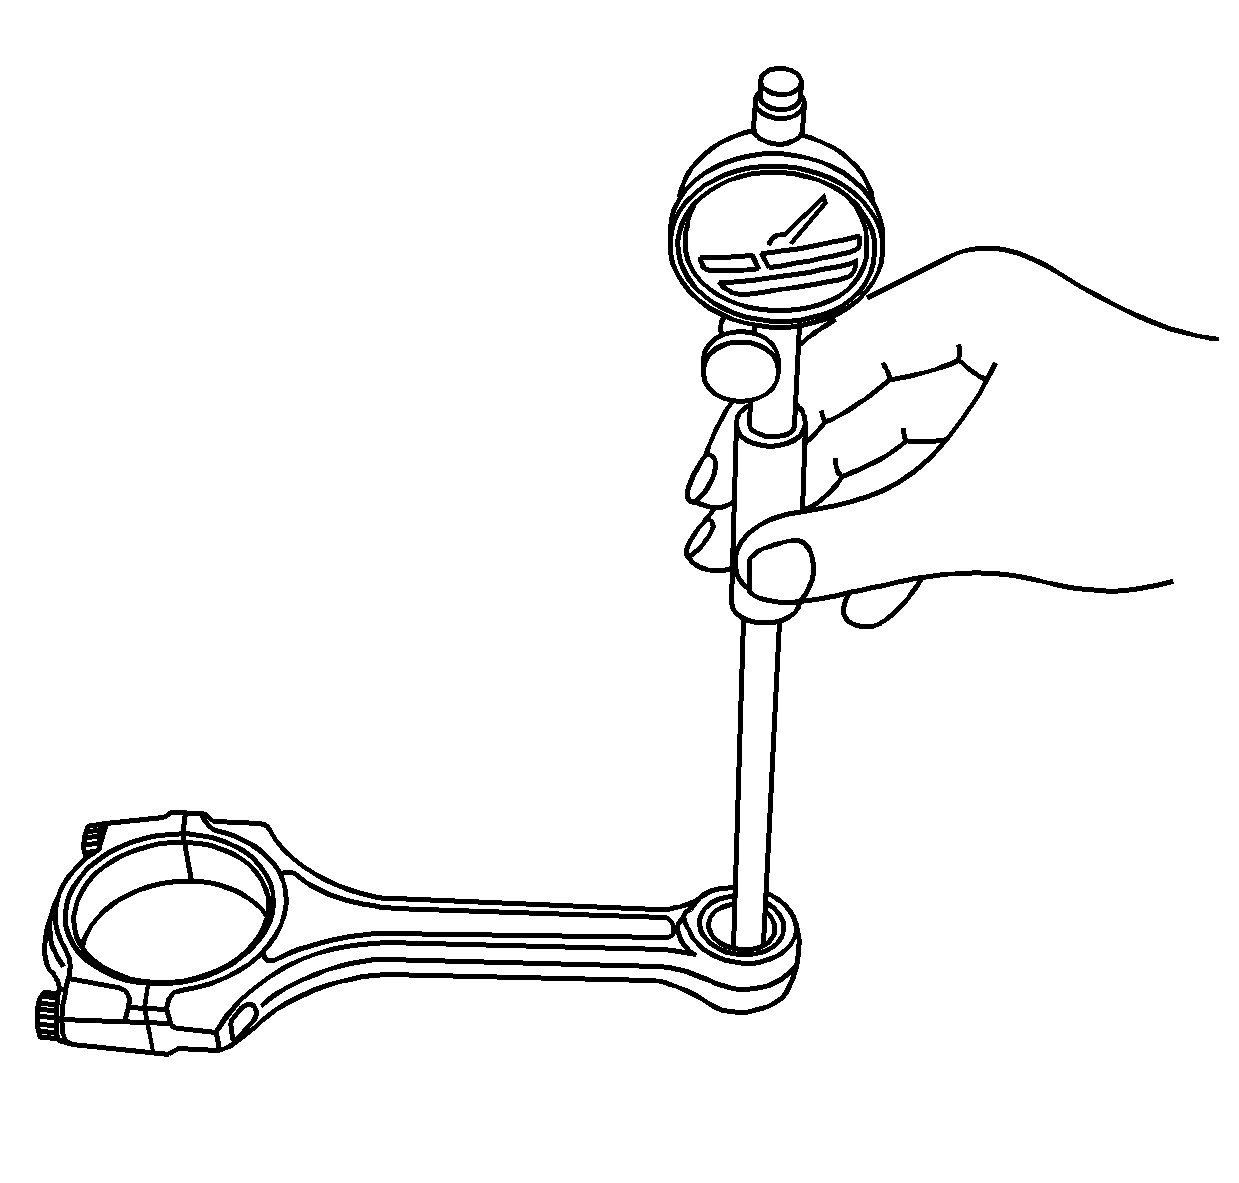
- Measure the connecting
rod pin bore.
- Calculate the piston pin-to-connecting rod clearance.
Specification
| • | Piston pin-to-connecting rod clearance - new:
0.005-0.014 mm (0.0002-0.0006 in) |
| • | Piston pin-to-connecting rod clearance - service
limit: 0.019 mm (0.0007 in) |
Connecting Rod Bolt Inspection

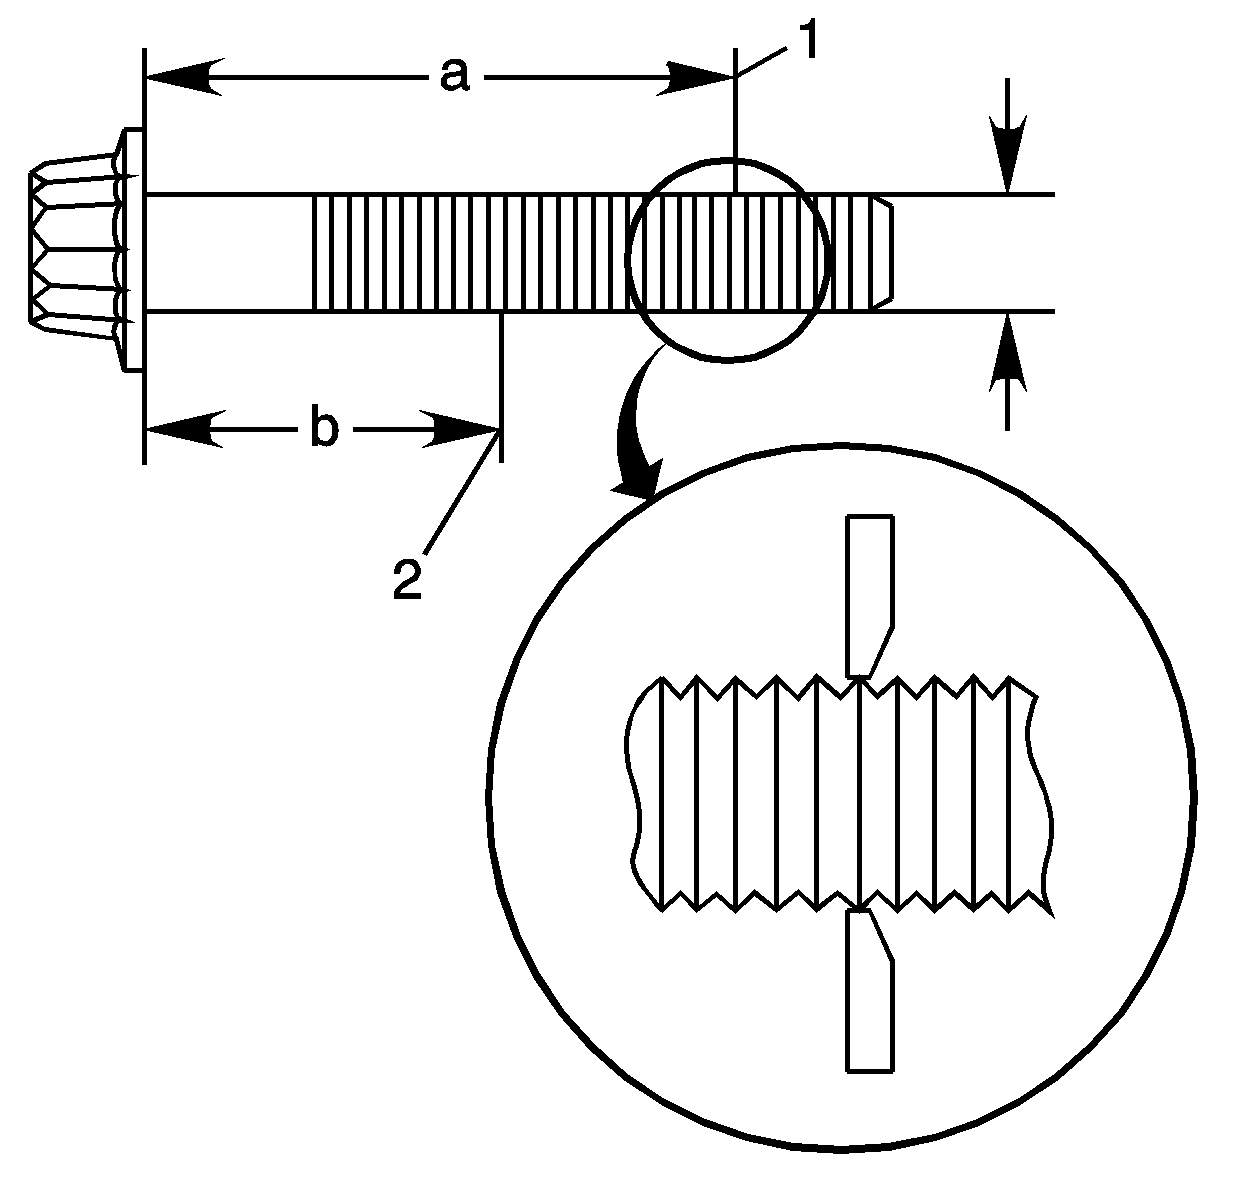
- Measure the diameter of
each connecting rod bolt at the 2 measurement points (1 and
2) - 35 mm (1.38 in) (a) and 20 mm (0.79 in) (b).
- Calculate the difference between the 2 measurements.
If the difference between the 2 measurements exceeds the specification,
replace the bolt.
Specification
Connecting rod bolt - difference in diameter: 0.0-0.1 mm
(0.0-0.004 in)
Piston Selection

- Measure the piston diameter.
- Measure the cylinder bore diameter. Refer to
Engine Block Cleaning and Inspection
.
- Calculate the clearance between the piston and the cylinder bore.
Specification
| • | Piston-to-bore clearance - new: 0.015-0.04 mm
(0.0006-0.0016 in) |
| • | Piston-to-bore clearance - service limit:
0.08 mm (0.003 in) |
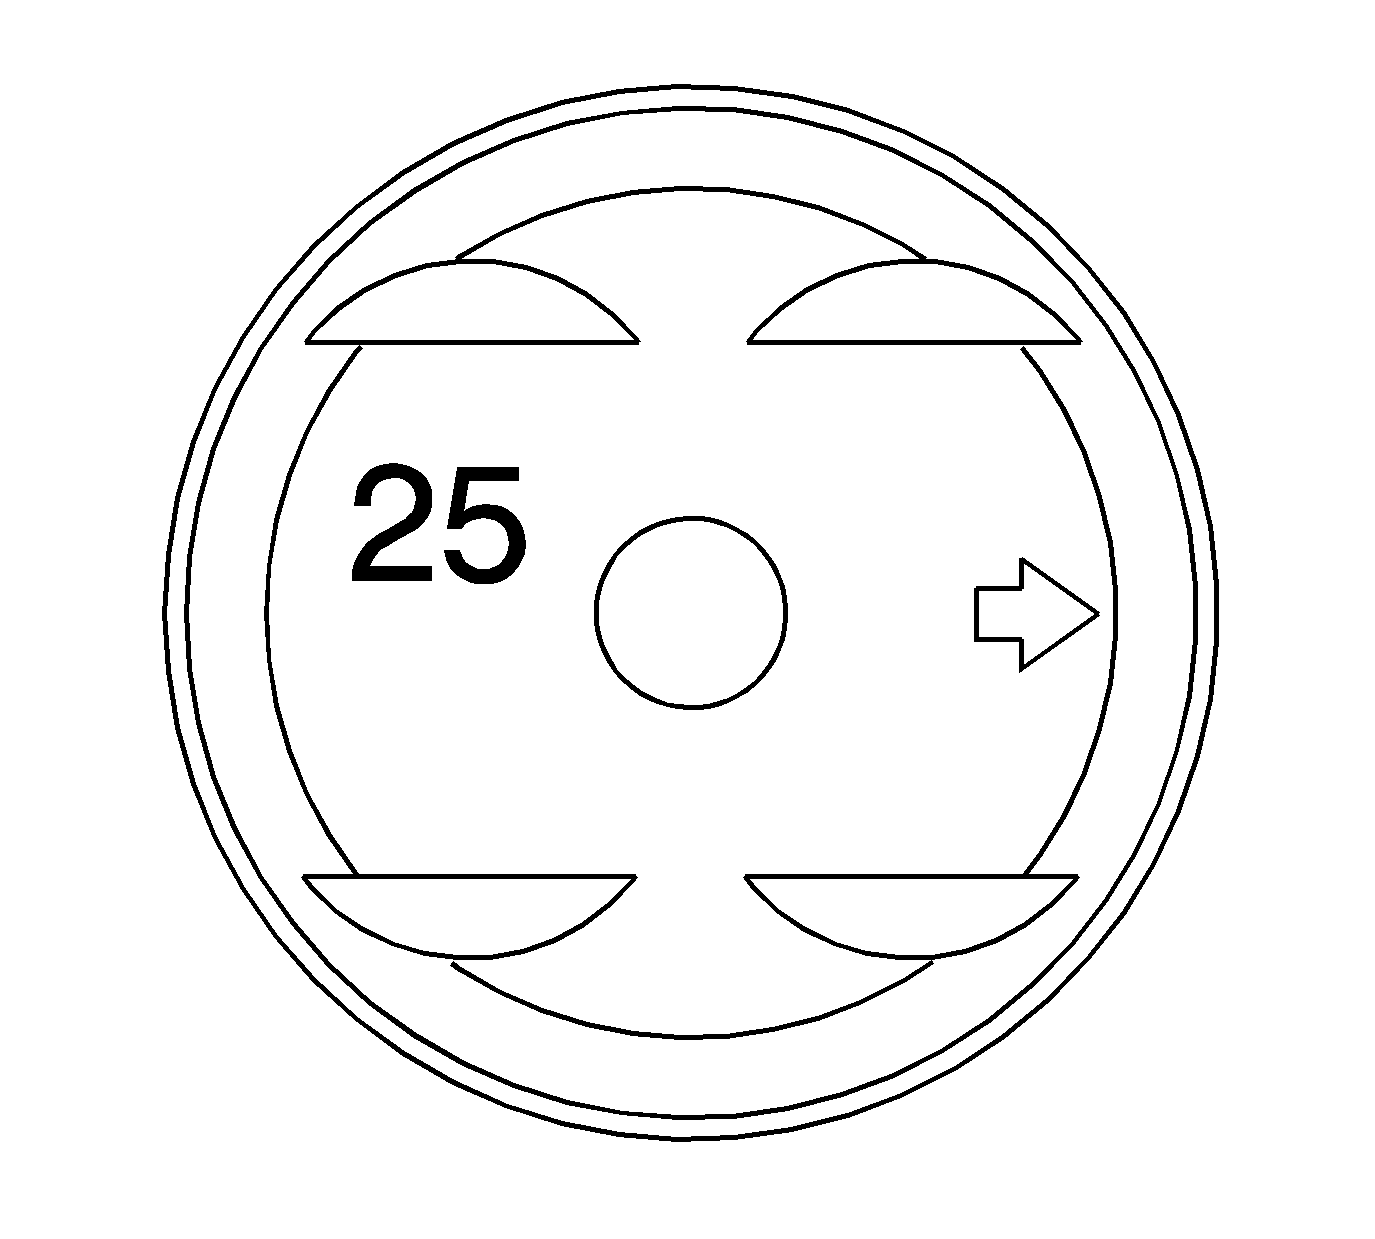
- A 0.25 mm (0.010 in) oversize piston can be identified
by the numbers 25 on the top of the piston.
Piston Ring Selection

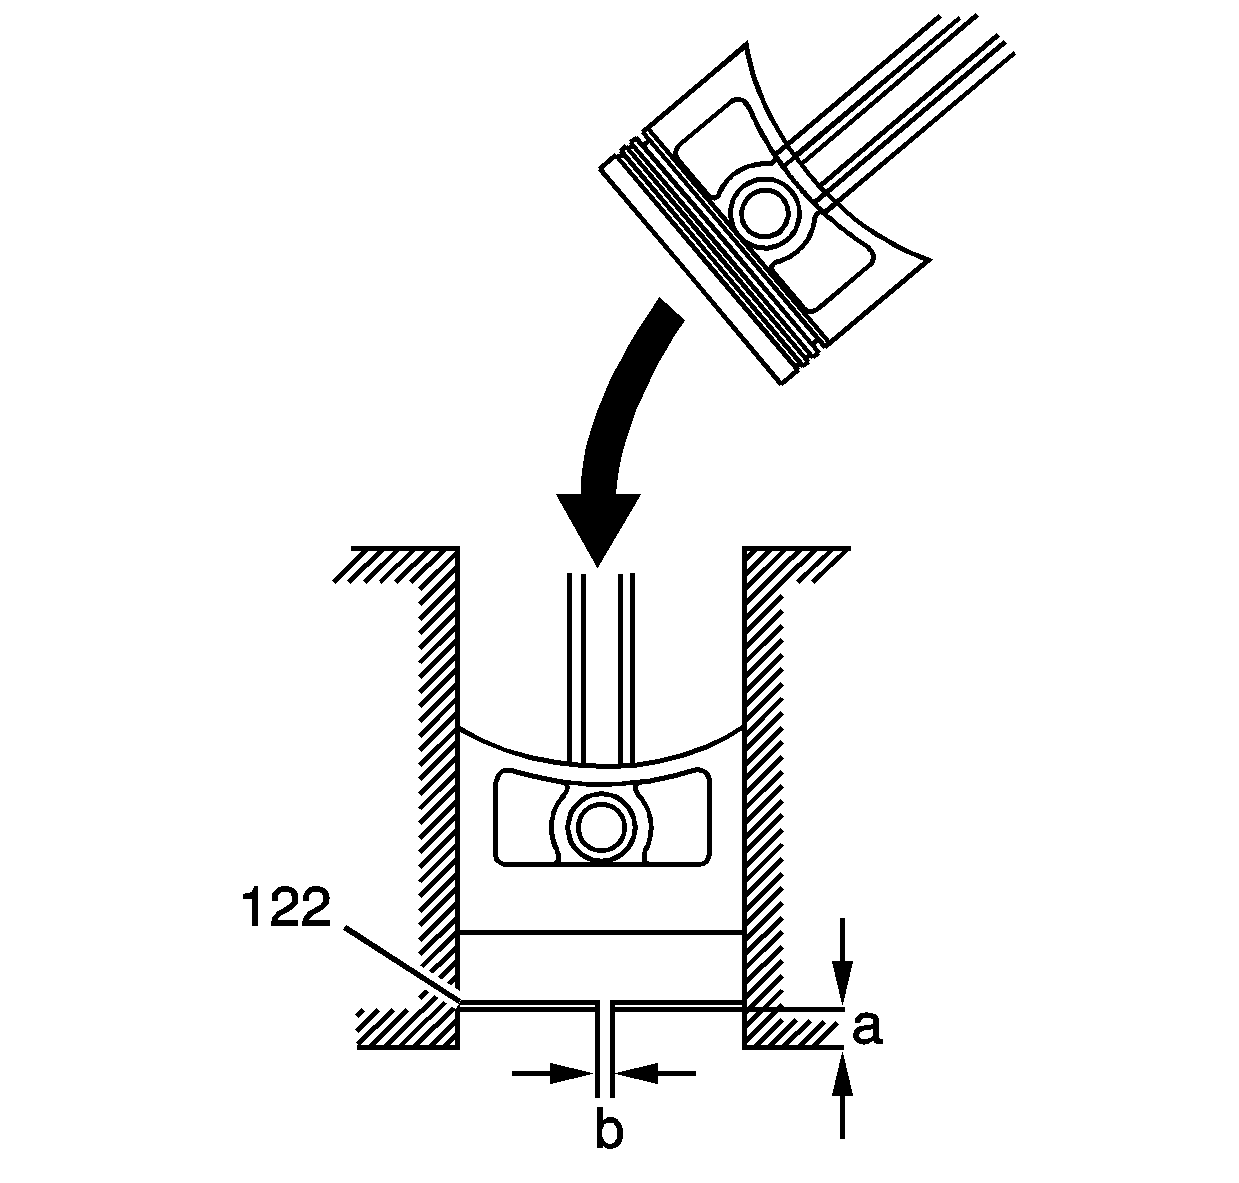
- Insert the piston ring (122)
into the cylinder 15-20 mm (0.6-0.8 in) (a)
from the bottom of the bore.
- Measure the piston ring end gap (b) with a feeler gage.
| 2.1. | If the gap is too small, check to see if you have the proper rings
for the application. |
| 2.3. | If the bore diameter exceeds the service limit, the cylinder
block must be bored and fitted with oversize pistons and piston rings. |
Specification
| • | Piston ring end gap - top ring - production: 0.2-0.35 mm
(0.008-0.014 in) |
| • | Piston ring end gap - second ring - production: 0.4-0.55 mm
(0.016-0.022 in) |
| • | Piston ring end gap - oil ring - production: 0.2-0.7 mm
(0.008-0.028 in) |
| • | Piston ring end gap - top ring - service limit: 0.6 mm
(0.024 in) |
| • | Piston ring end gap - second ring - service limit:
0.7 mm (0.028 in) |
| • | Piston ring end gap - oil ring - service limit: 0.8 mm
(0.031 in) |
