Removal Procedure
Caution: Ensure that the vehicle is properly supported and squarely positioned. To help avoid personal injury when a vehicle is on a hoist, provide additional support for the vehicle on the opposite end from which the components are being removed.
Caution: Do not allow smoking or the use of open flames in the area where work on the fuel or EVAP system is taking place. Anytime work is being done on the fuel system, disconnect the negative battery cable, except for those tests where battery voltage is required.
Caution: Whenever fuel lines are removed, catch fuel in an approved container. Container opening must be a minimum of 300 mm (12 in) diameter to adequately catch the fluid.
Notice: Fuel/Vapor lines cannot be spliced or repaired. The line must be replaced (if damaged) with the same type of line.
- Relieve the fuel system pressure. Refer to Fuel Pressure Relief .
- Disconnect the negative battery terminal. Refer to Battery Negative Cable Disconnection and Connection .
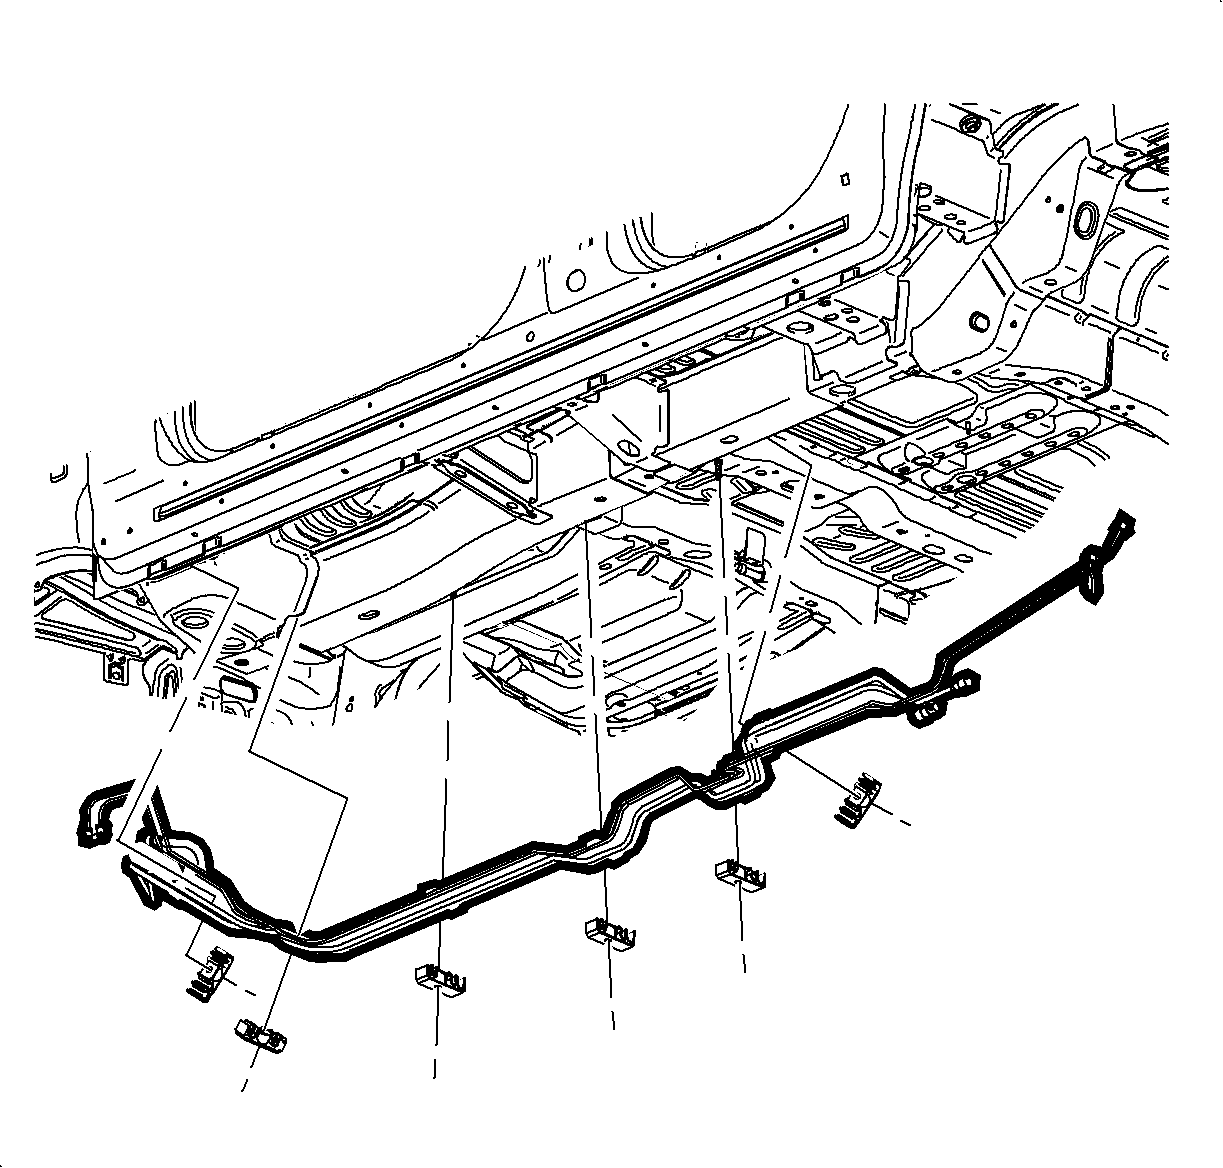
- From underhood, remove the fuel line clip and using the Snap-On™ tool YA 9457 or equivalent, disconnect the fuel feed line from the fuel rail.
- Disconnect the evaporative emission (EVAP) purge line from the EVAP purge solenoid.
- Raise and support the vehicle . Refer to Lifting and Jacking the Vehicle .
- Disconnect the chassis fuel feed line from the fuel tank .
- Disconnect the EVAP purge line from the EVAP canister.
- Release the fuel and EVAP purge lines from underbody retainers.
Important: To facilitate removal, it may be necessary to spray quick connect fittings with penetrating oil to remove debris.
Installation Procedure
- Make sure the lines are not kinked, bent, or damaged.
- Install the fuel and EVAP lines into underbody retainers. Make sure the lines are properly routed and attach retainers to the vehicle.
- Connect the EVAP purge line onto the EVAP canister.
- Connect the chassis fuel feed line from the fuel tank .
- Lower the vehicle from the hoist.
- Connect the fuel feed line to fuel rail and install the safety clip.
- Connect the negative battery terminal. Refer to Battery Negative Cable Disconnection and Connection .
- Prime the fuel system.
- Run the engine and check the system for leaks.
Notice: Fuel/Vapor lines cannot be spliced or repaired. The line must be replaced (if damaged) with the same type of line.
| 8.1. | Cycle the ignition ON for 5 seconds and then OFF for 10 seconds. |
| 8.2. | Repeat step 7.1 twice. |
| 8.3. | Crank the engine until it starts. The maximum starter motor cranking time is 20 seconds. |
| 8.4. | If the engine does not start, repeat steps 7.1-7.4. |
