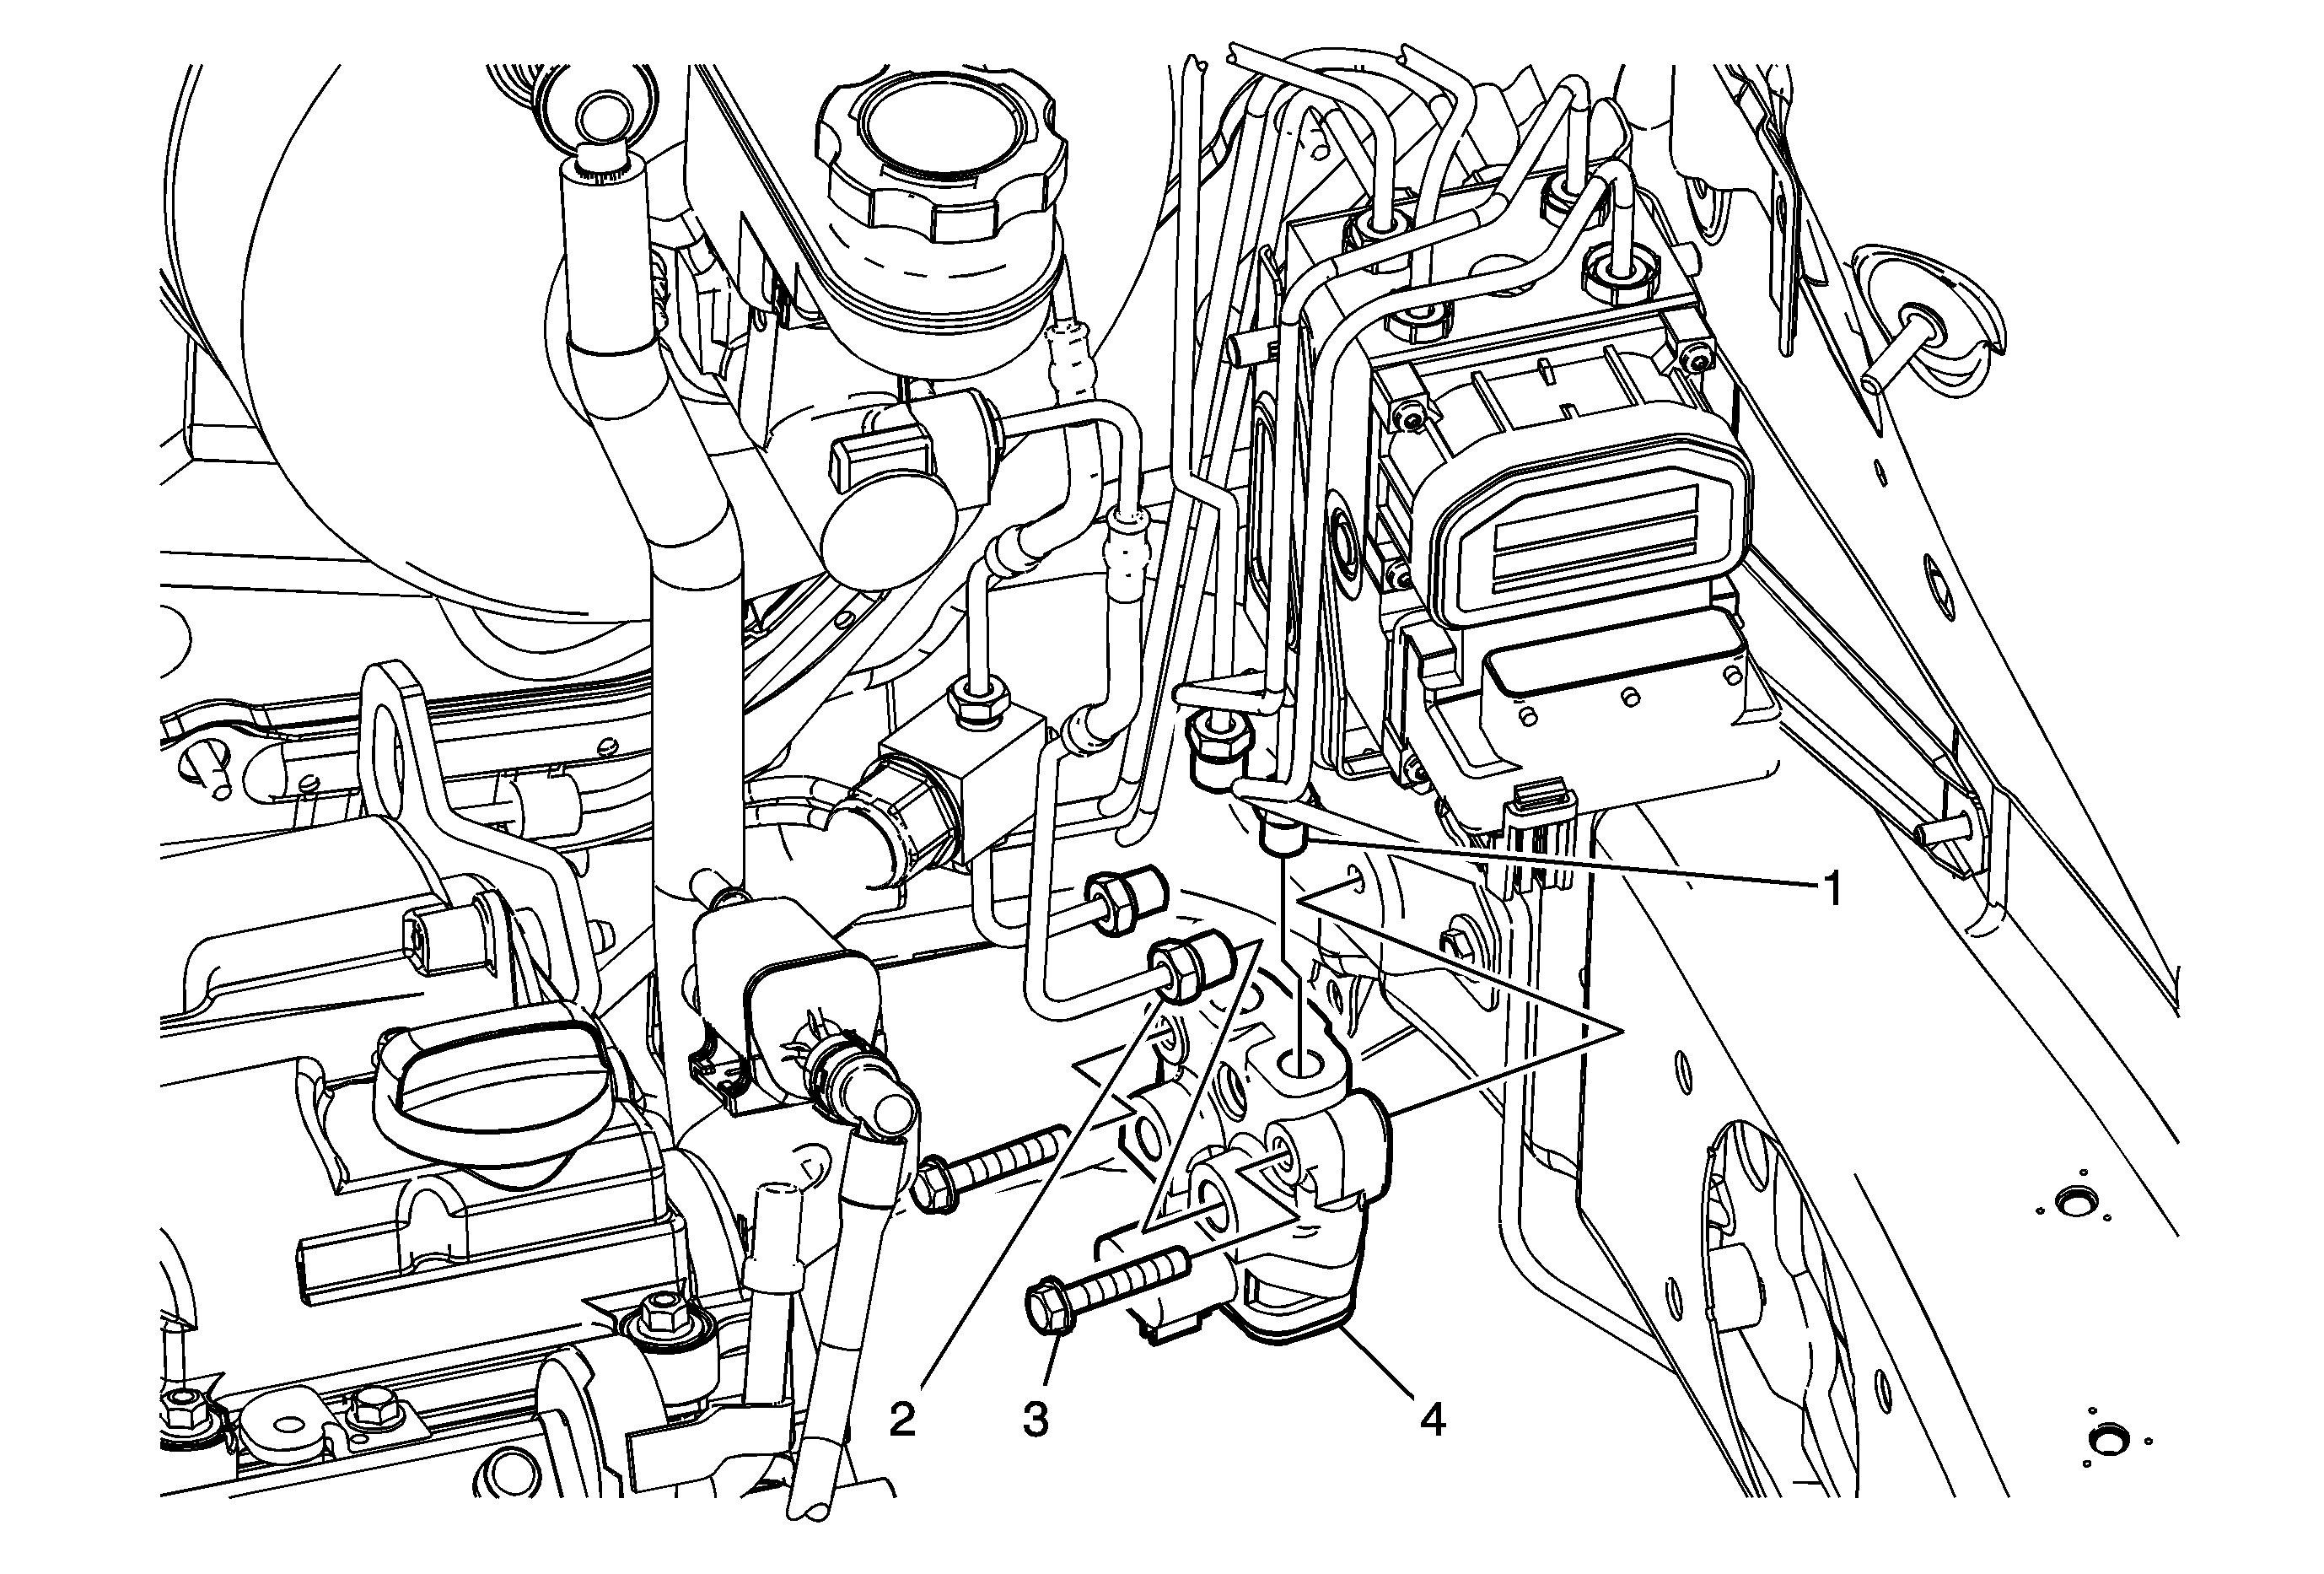
Callout
| Component Name
|
|
Caution: Refer to Brake Fluid Irritant Caution in the Preface section.
Notice: Refer to Brake Fluid Effects on Paint and Electrical Components Notice in the Preface section.
Preliminary Procedures
- Turn the ignition switch to the OFF position.
- Raise and support the vehicle. Refer to
Lifting and Jacking the Vehicle
.
- Remove the left front tire and wheel assembly. Refer to
Tire and Wheel Removal and Installation
.
- Remove the engine splash shield. Refer to
Engine Splash Shield Replacement
.
- Clean the area around the brake pipe fittings on the brake delay valve of any foreign material or debris.
- Disconnect the brake delay valve electrical connector.
- Place a clean shop towel around the brake delay valve below the brake pipe fittings.
|
1
| Delay Valve Outlet Brake Pipe Fitting (Qty: 2)
Notice: Refer to Fastener Notice in the Preface section.
Tip
| • | Cap the brake pipe fitting to prevent brake fluid loss and contamination. |
| • | Plug the inlet port of the brake delay valve to prevent brake fluid loss and contamination. |
Tighten
18 N·m (13 lb ft) |
2
| Brake Delay Valve Inlet Brake Pipe Fitting (Qty: 2)
Tip
| • | Cap the brake pipe fitting to prevent brake fluid loss and contamination. |
| • | Plug the inlet port of the brake delay valve to prevent brake fluid loss and contamination. |
Tighten
18 N·m (13 lb ft) |
3
| Brake Delay Valve Bracket Bolt (Qty: 2)
Tighten
10 N·m (89 lb in) |
4
| Brake Delay Valve and Bracket Assembly
Tip
- Bleed the hydraulic brake system. Refer to
Hydraulic Brake System Bleeding
.
- Turn the ignition switch to the ON position. DO NOT start the engine.
- Perform the
Diagnostic System Check - Vehicle
.
- Observe the feel of the brake pedal after performing the diagnostic system check. If the brake pedal feels spongy, perform the
Antilock Brake System Automated Bleed Procedure
.
|

