Information on Replacement of 2.4L LAT Piston Oil Nozzles with 45 Degree Design

| Subject: | Information on Replacement of 2.4L LAT Piston Oil Nozzles with 45° Design |
| Models: | 2007 Saturn VUE Green Line Hybrid |
| Built Prior to VIN Breakpoint 7S834256 |
| with 2.4L 4-Cylinder Engine (VIN Z - RPO LAT) |
The purpose of this bulletin is to inform Saturn Retailers of the procedure to replace 90° piston oil nozzles on 2.4L LAT engines in early-build 2007 Saturn VUE vehicles with a 45° piston oil nozzle, P/N 12591858, that is in current production vehicles built on or after October 1, 2006.
If it is necessary to replace a piston oil nozzle, follow the service procedure in this bulletin to replace the 4 piston oil nozzles with the 45° piston oil nozzle, P/N 12591858, while the engine is still in the vehicle.
Service Procedure
- Disconnect the 12V negative battery cable (in the engine compartment). Refer to Battery Negative Cable Disconnection and Connection (2.4L [LAT]) in SI.
- Disconnect the 36V hybrid generator battery system. Refer to Hybrid Battery Service Disconnect/Connect in SI.
- Remove the air cleaner assembly. Refer to Air Cleaner Assembly Replacement in SI.
- Remove the oil level indicator tube. Refer to Oil Level Indicator and Tube Replacement in SI.
- Remove the serpentine drive belt. Refer to Drive Belt Replacement in SI.
- Remove the bolts from the serpentine belt tensioner and leave loose. It is necessary to pry the engine towards the driver side of vehicle with a pry bar to remove one of the bolts.
- Raise and support the vehicle. Refer to Lifting and Jacking the vehicle in SI.
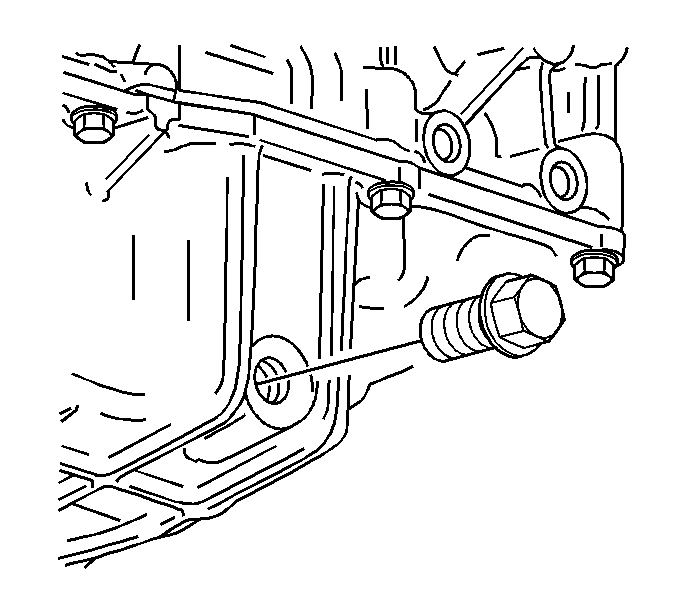
- Place a suitable drain pan under the oil pan drain plug.
- Remove the oil pan drain plug.
- Drain the engine oil.
- Remove the right inner fender liner. Refer to Front Wheelhouse Liner Replacement in SI.
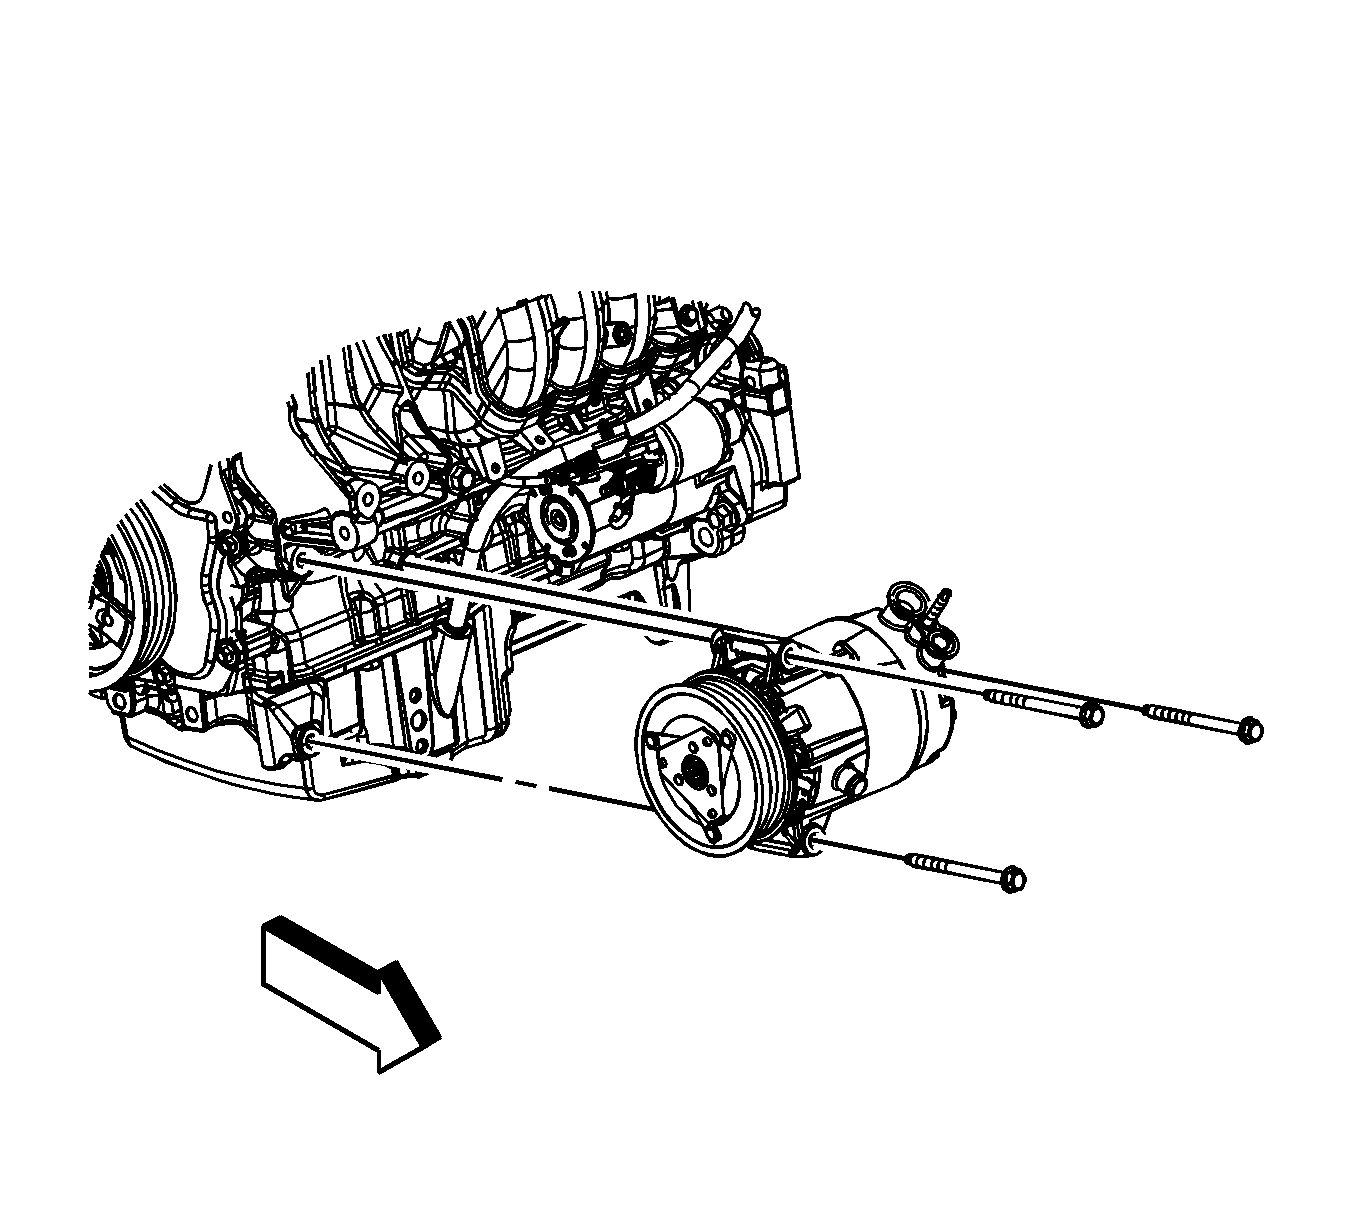
- Remove the three upper air conditioning (A/C) compressor bolts.
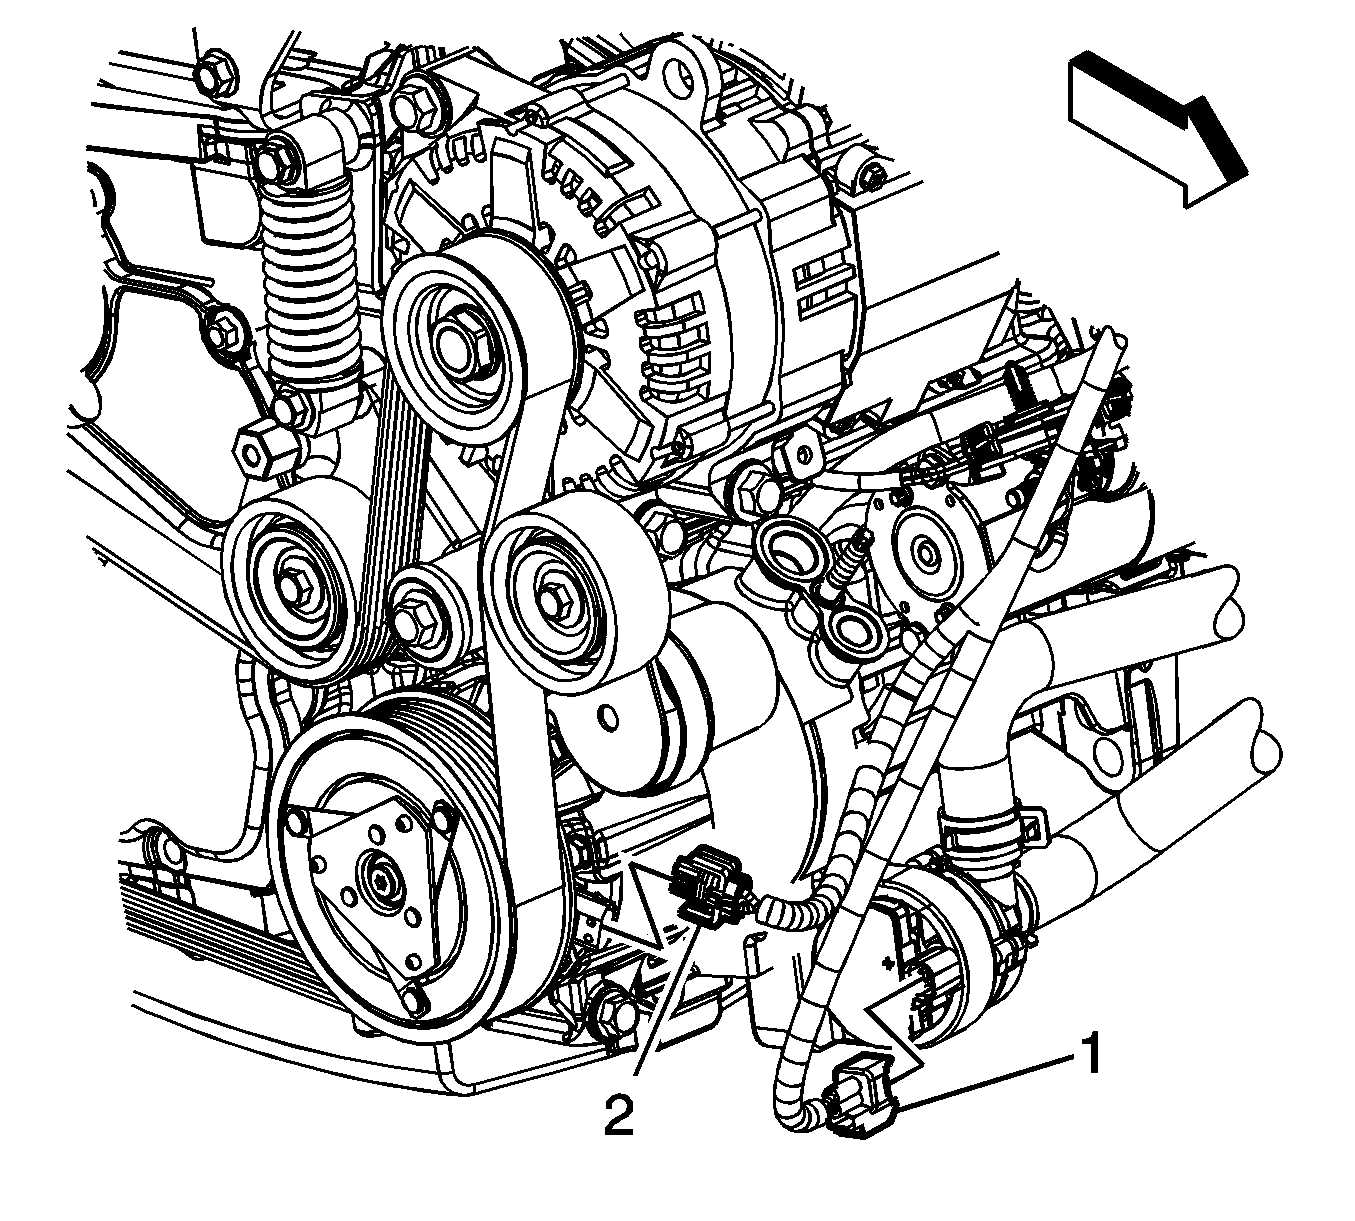
- Disconnect the engine wiring harness electrical connector (1) from the generator control module coolant pump.
- Remove the generator control module coolant pump bolt and position the generator control module coolant pump away from the oil pan.
- Remove the four oil pan to transaxle bolts.
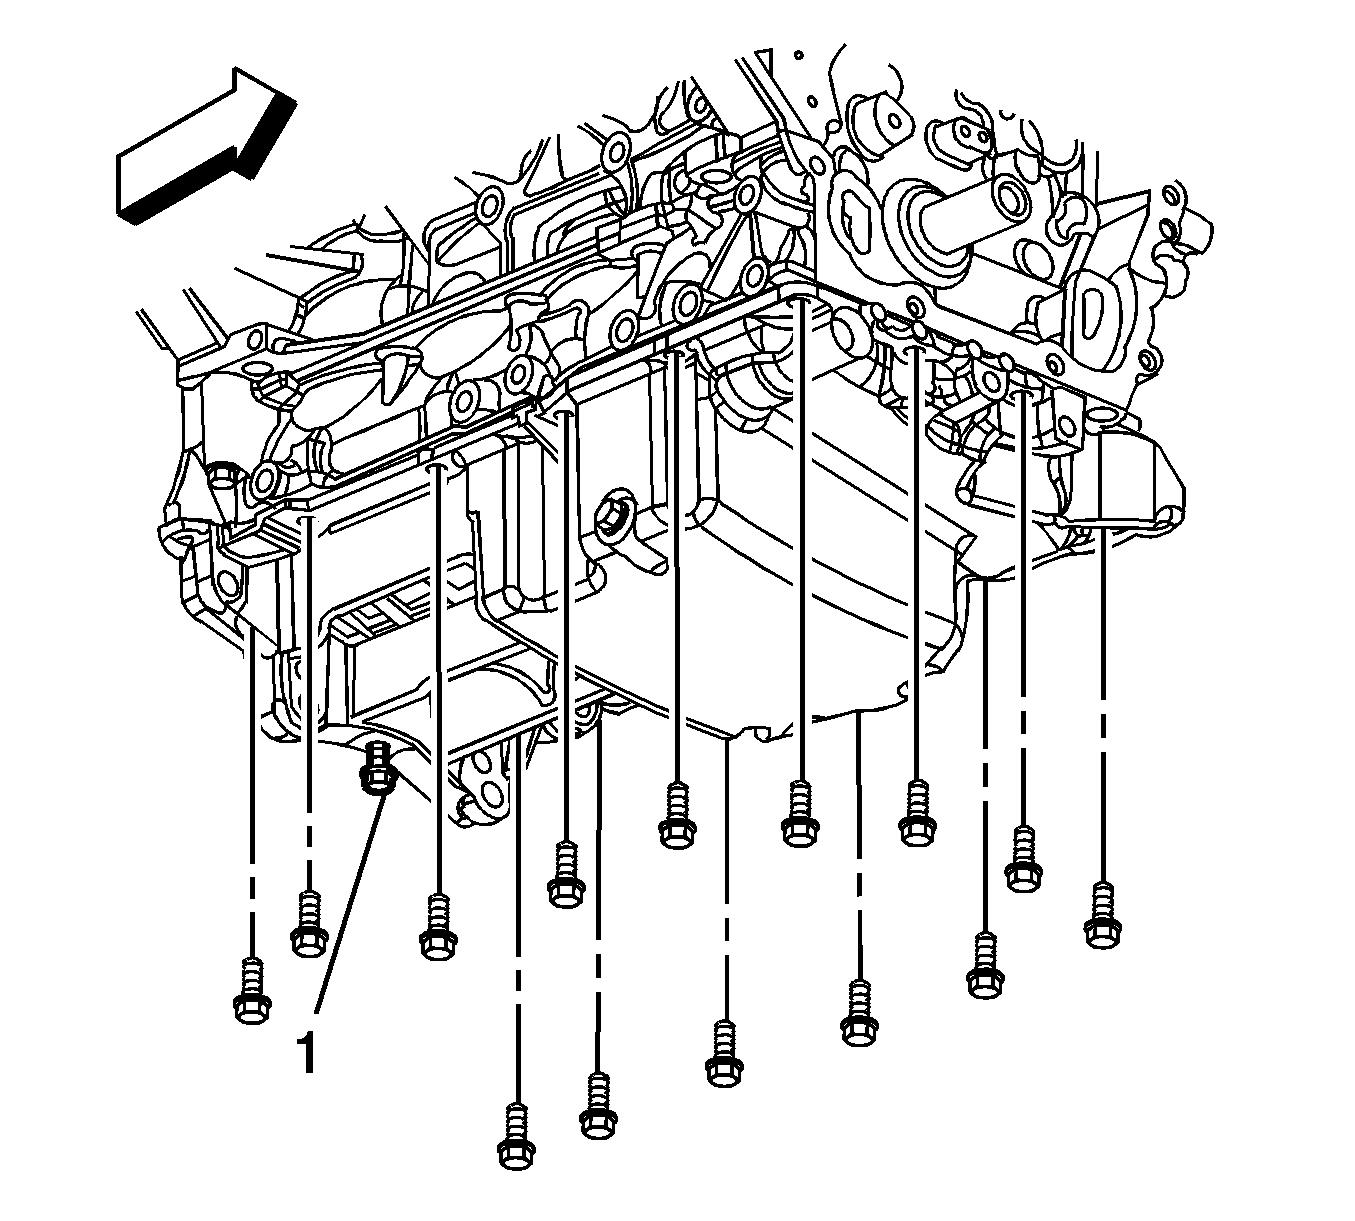
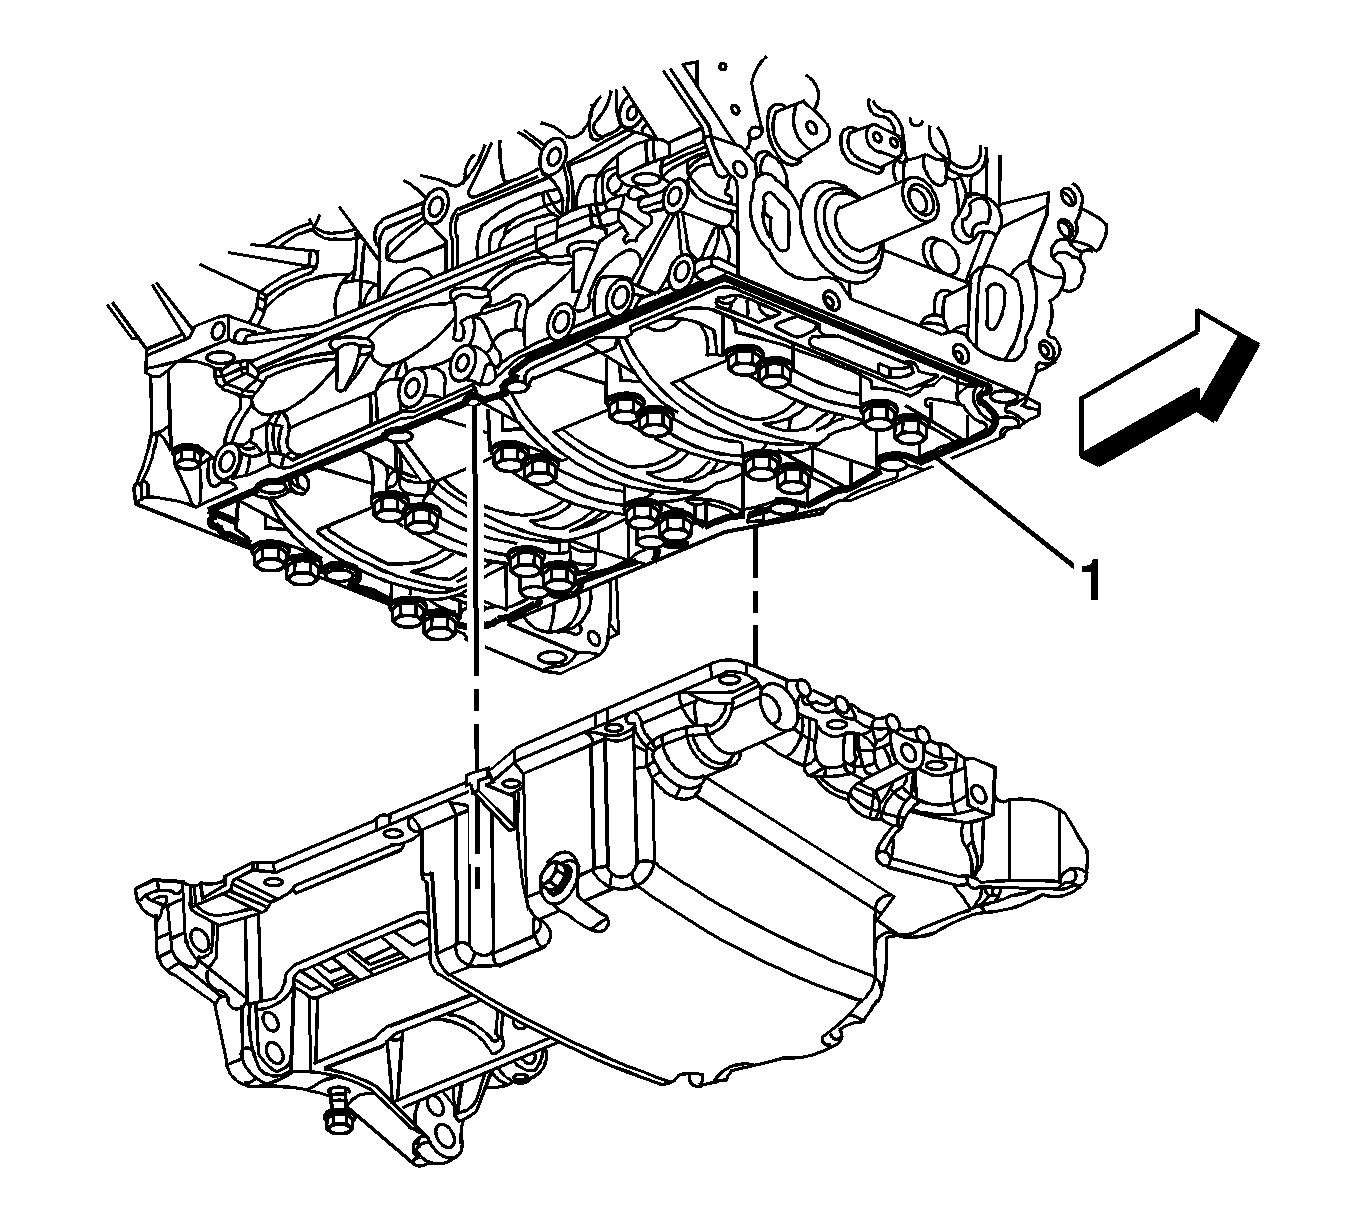
- Remove the oil pan bolts.
- Remove the oil pan.
- Rotate the crankshaft so that Cylinders 1 and 4 are at TDC.
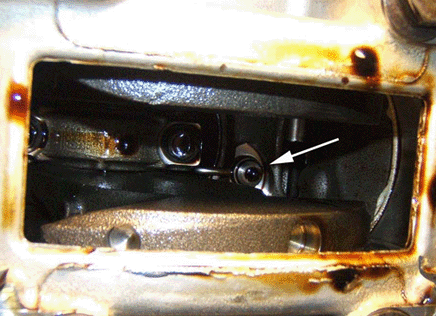
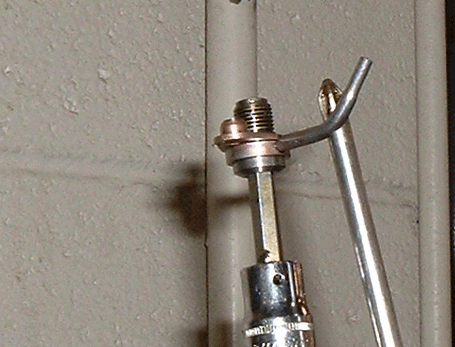
- Remove the piston oil nozzles from Cylinders 1 and 4 using a 3/8" wobble extension drive with a 6 mm hex drive bit. Discard the old piston oil nozzles.
- Install new piston oil nozzles. Turn the extension by hand to ensure that the threads are aligned. Use a long screwdriver to ensure that the nozzle does not rotate and make sure that the locating pin is properly indexed in its hole.
- Rotate the crankshaft so that Cylinders 2 and 3 are at TDC. Repeat Steps 18 and 19 to replace the piston oil nozzles.
- Reinstall the oil pan drain plug until snug.
- Remove and clean any old oil pan sealant.
- Clean the engine block oil pan mating surface.
- Apply a 2 mm (0.08 in) bead of sealant, P/N 12378521 (P/N 88901148 in Canada), around the perimeter of the oil pan and the oil suction port opening. DO NOT over apply the sealant. More than a 2 mm (0.08 in) bead is not required.
- Install the oil pan.
- Install the oil pan bolts.
- Install the four oil pan to transaxle bolts.
- Tighten the oil pan bolts in the sequence shown.
- Install the generator control module coolant pump to the oil pan. Ensure that the anti-rotation tab is inserted into the hole in the oil pan.
- Install the generator control module coolant pump bolt.
- Connect the engine wiring harness electrical connector (1) to the generator control module coolant pump.
- Install the A/C compressor and three A/C compressor bolts.
- Install the two drive belt tensioner bolts and tighten.
- Install the right inner fender liner. Refer to Front Wheelhouse Liner Replacement in SI.
- Lower the vehicle. Refer to Lifting and Jacking the vehicle in SI.
- Install the serpentine drive belt. Refer to Drive Belt Replacement in SI.
- Install the oil level indicator tube. Refer to Oil Level Indicator and Tube Replacement in SI.
- Install the air cleaner assembly. Refer to Air Cleaner Assembly Replacement in SI.
- Connect the 36V hybrid generator battery system. Refer to Hybrid Battery Service Disconnect/Connect in SI.
- Connect the 12V negative battery cable. Refer to Battery Negative Cable Disconnection and Connection (2.4L [LAT]) in SI.
- Replace the oil filter and fill the engine with new 5W-30 motor oil. Refer to Approximate Fluid Capacities in SI for fill specifications.
- Reset the engine oil life monitor. Refer to GM Oil Life System Resetting in SI.
Notice: Use the correct fastener in the correct location. Replacement fasteners must be the correct part number for that application. Fasteners requiring replacement or fasteners requiring the use of thread locking compound or sealant are identified in the service procedure. Do not use paints, lubricants, or corrosion inhibitors on fasteners or fastener joint surfaces unless specified. These coatings affect fastener torque and joint clamping force and may damage the fastener. Use the correct tightening sequence and specifications when installing fasteners in order to avoid damage to parts and systems.
Tighten
Tighten the piston oil nozzle bolts to 15 N·m (11 lb ft).
Tighten
Tighten the bolts to 75 N·m (55 lb ft).
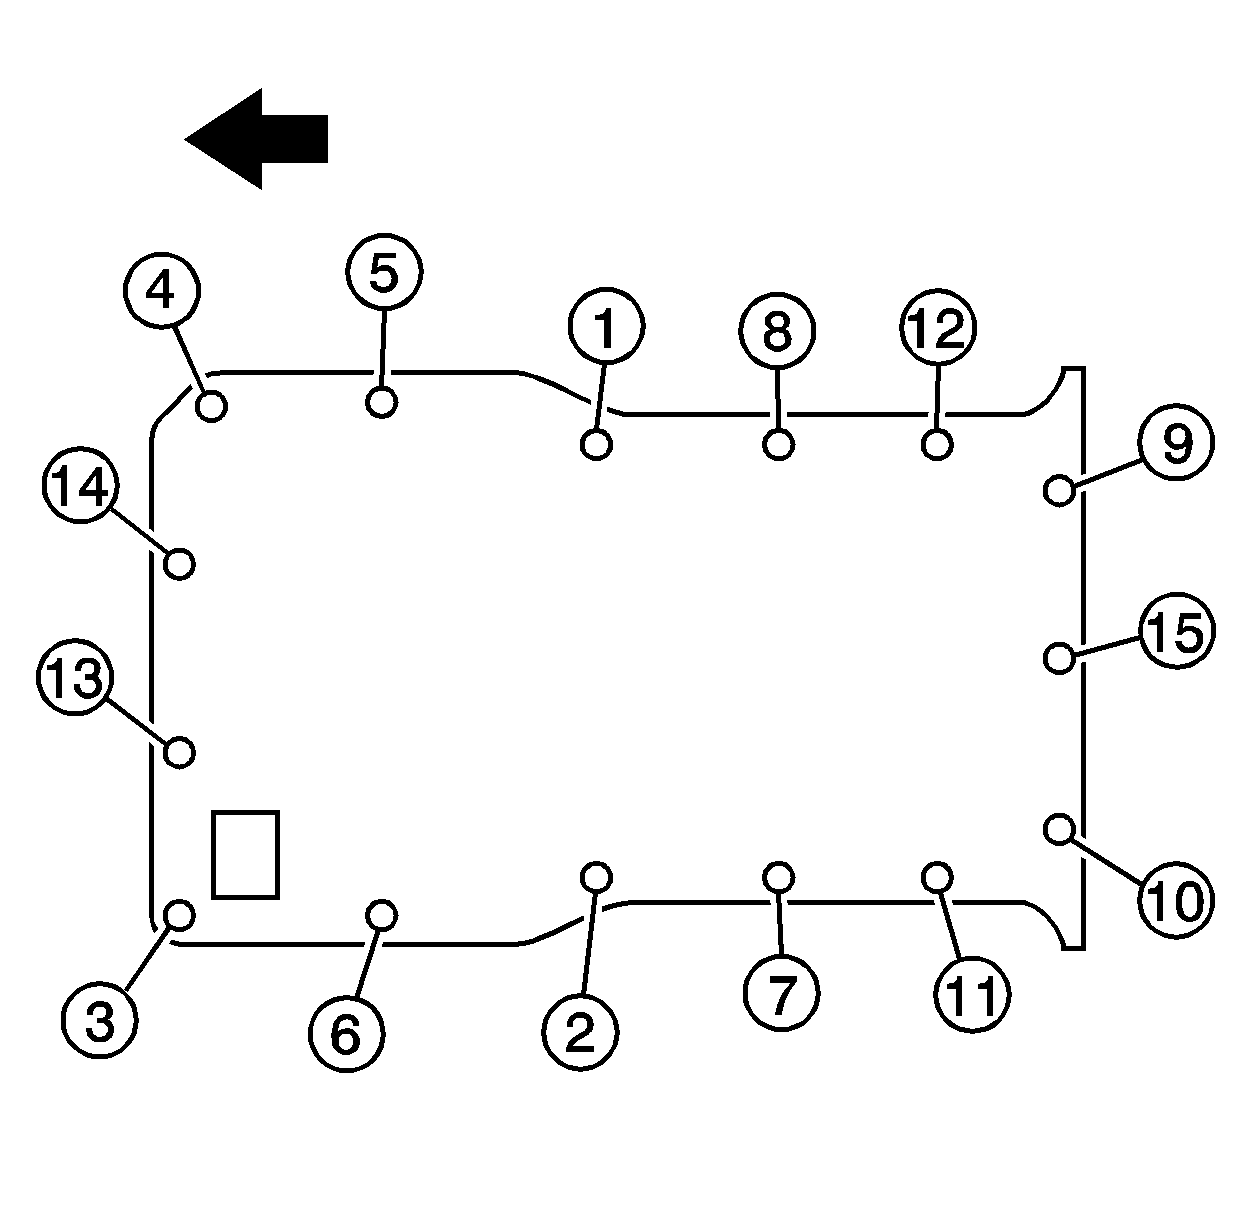
Tighten
Tighten the bolts to 25 N·m (18 lb ft).
Tighten
Tighten the bolt to 25 N·m (18 lb ft).
Tighten
Tighten the bolts to 50 N·m (37 lb ft).
Tighten
Tighten the bolts to 22 N·m (16 lb ft).
Parts Information
Part Number | Description | Qty |
|---|---|---|
12591858 | Piston Oil Nozzle | 4 |
12378521 | Sealant (U.S.) | 1 |
88901148 | Sealant (Canada) | 1 |
12579143 | Oil Filter | 1 |
Warranty Information
For vehicles repaired under warranty, use:
Labor Operation | Description | Labor Time |
|---|---|---|
J7516* | Replace Piston Oil Nozzles | 2.3 hrs |
*This labor operation number is for bulletin use only. It will not be published in the Labor Time Guide. | ||
