For 1990-2009 cars only
Tools Required
J 39505 Torque Wrench Adapter
Removal Procedure
- Disconnect the negative battery cable. Refer to Battery Negative Cable Disconnection and Connection.
- Install the engine support fixture. Refer to Engine Support Fixture .
- Drain the engine oil. Refer to Engine Oil and Oil Filter Replacement.
- Remove the oil filter adapter and bypass valve assembly. Refer to Oil Filter Adapter and Bypass Valve Assembly Replacement .
- Remove the starter motor. Refer to Starter Motor Replacement .
- Remove the left side catalytic converter. Refer to Catalytic Converter Replacement - Left Side.
- Remove the transfer case. Refer to Transfer Case Assembly Replacement.
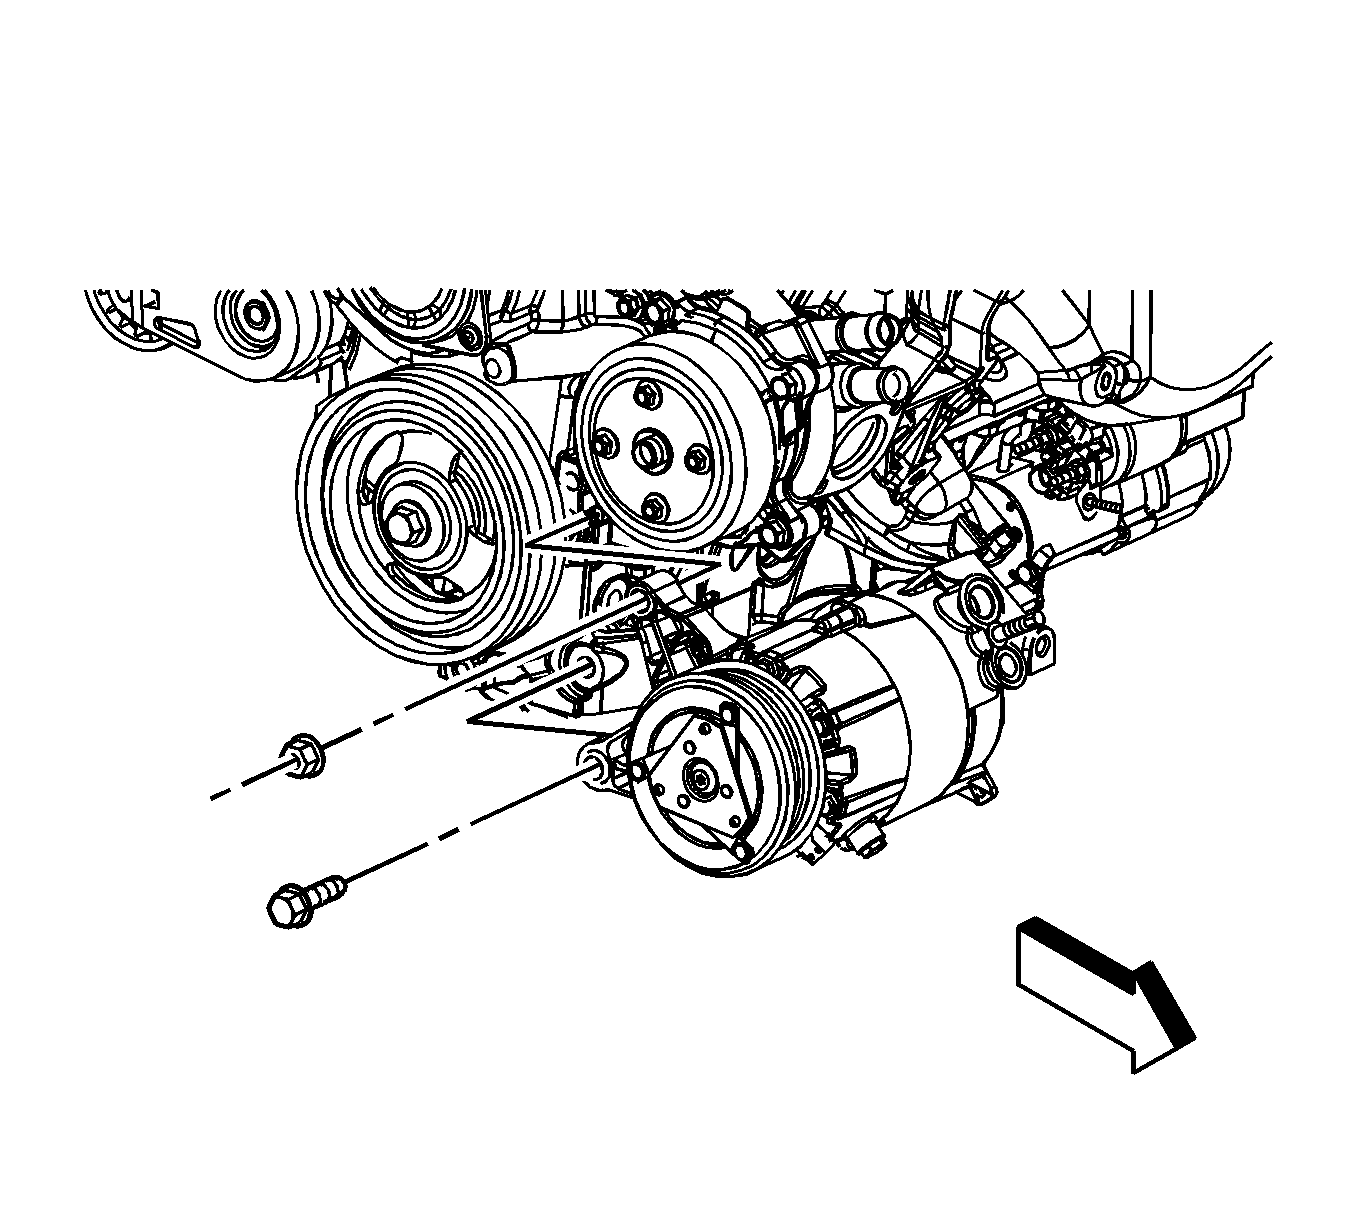
- Remove the air conditioning (A/C) compressor nut and bolt.
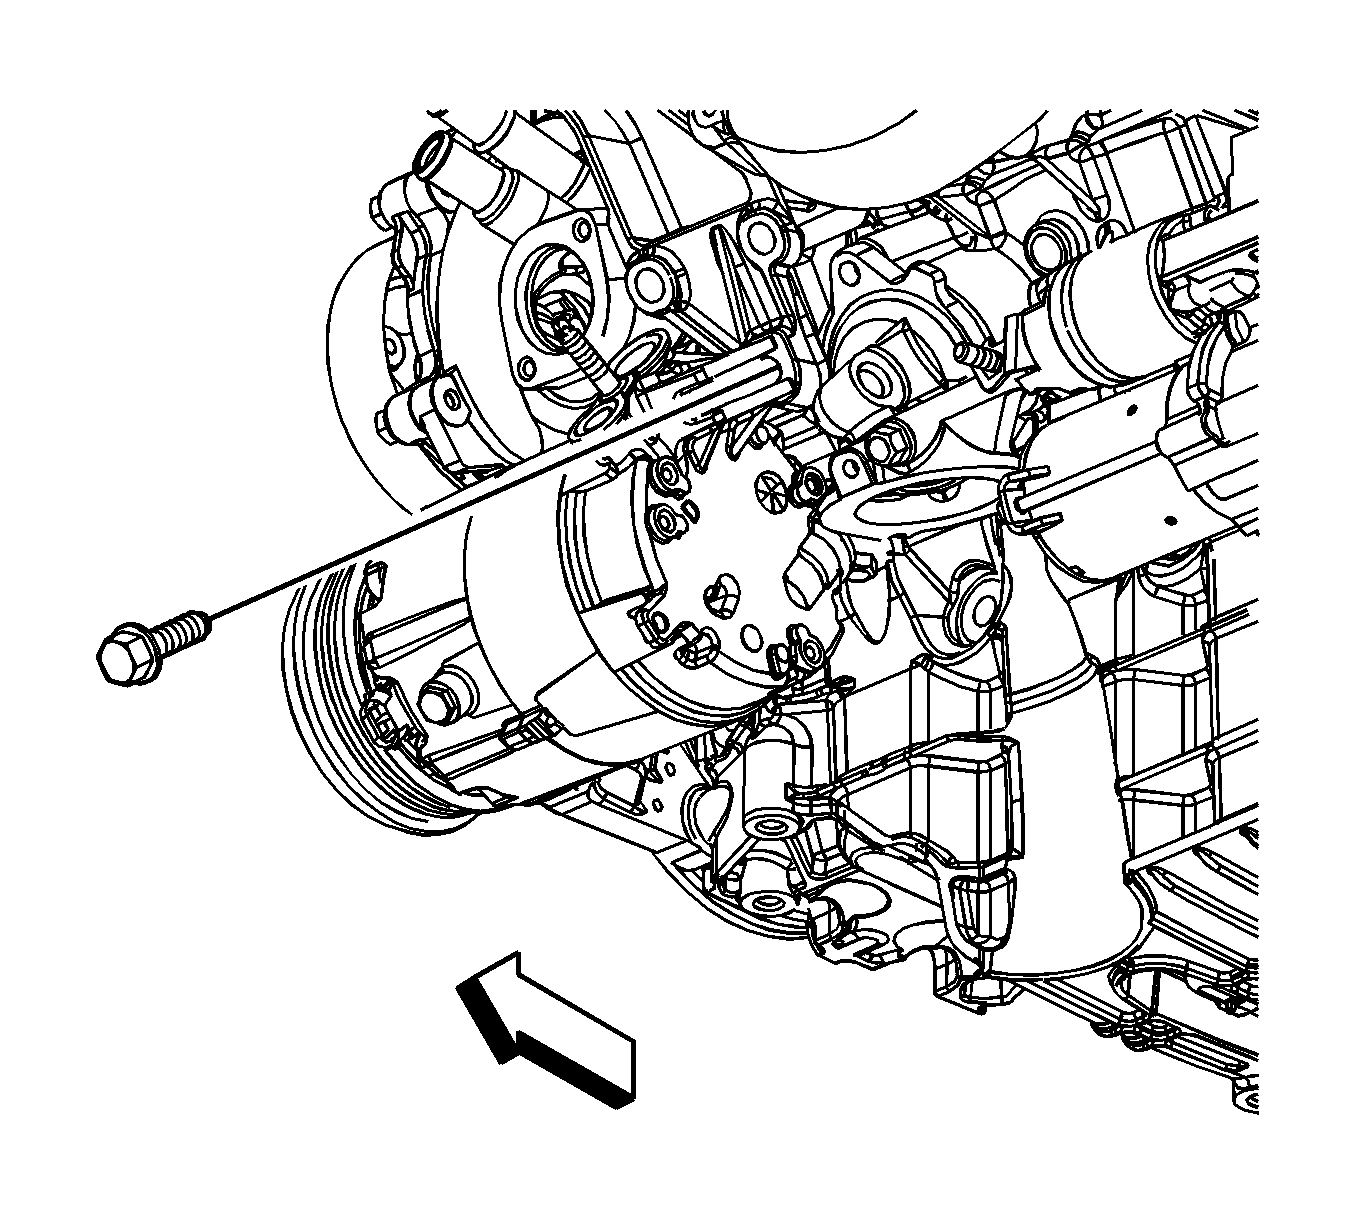
- Remove the A/C compressor rear bolt and position the A/C compressor aside.
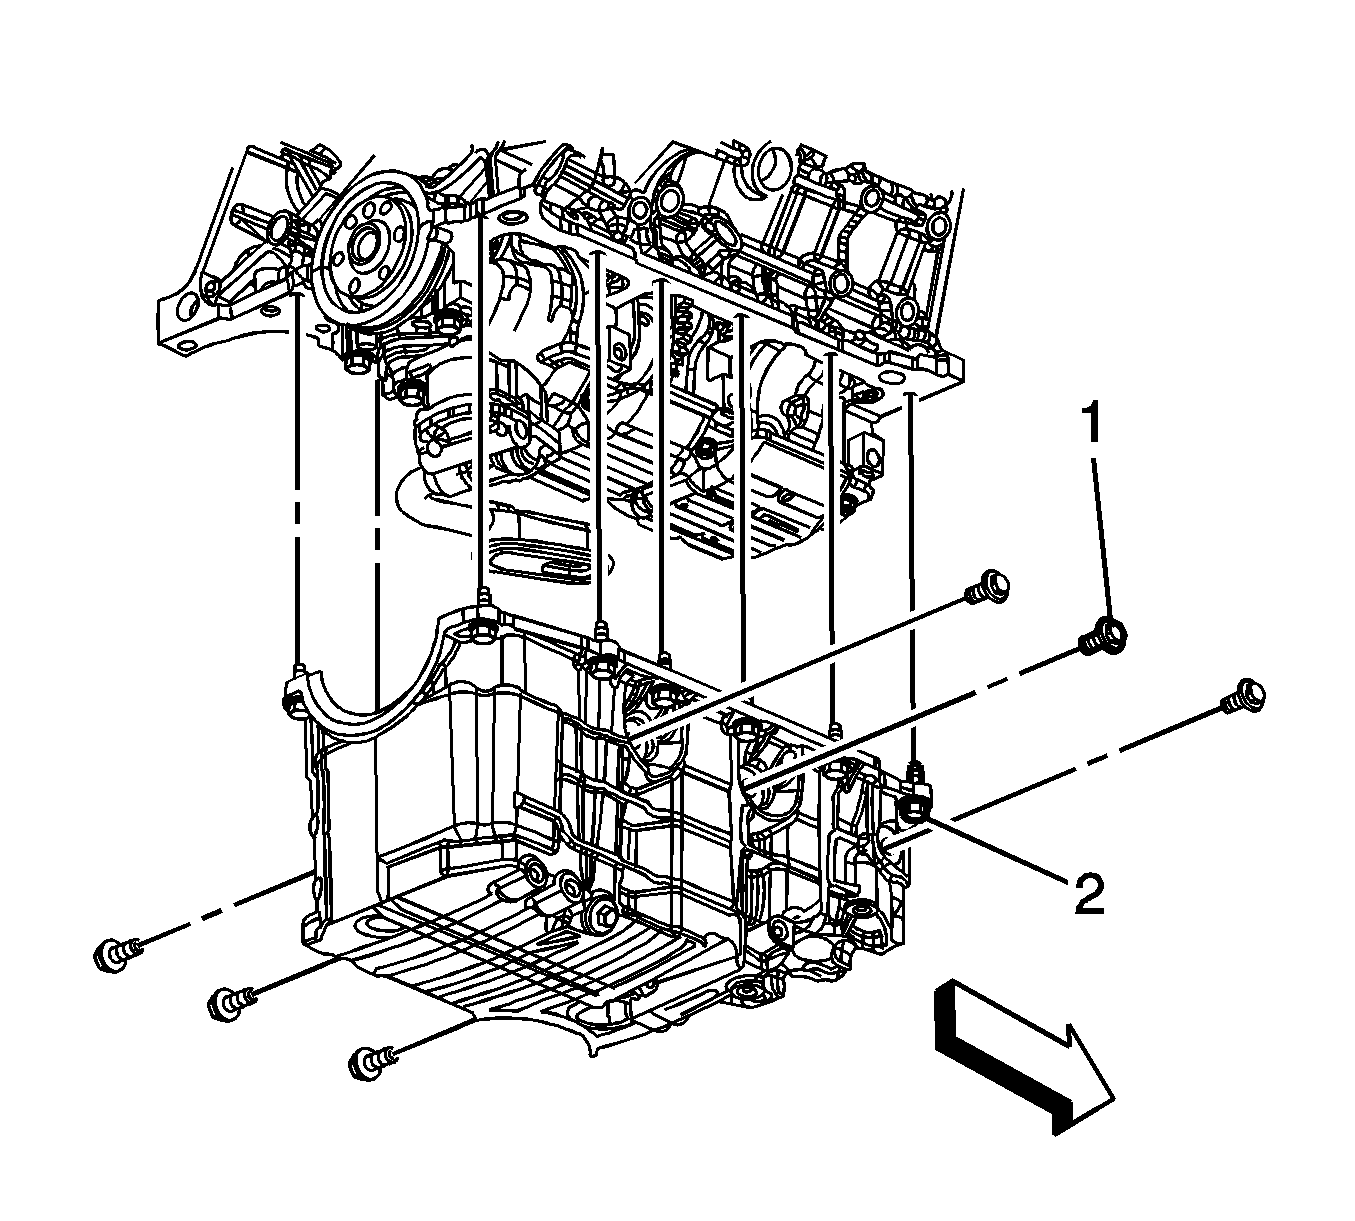
- Remove the horizontal oil pan bolts (1).
- Remove the vertical oil pan bolts (2).
- Remove the oil pan.
- Remove the oil pan gasket.
- Clean the following items:


| • | The oil pan flanges |
| • | The oil pan rail |
| • | The engine front cover |
| • | All threaded holes |
Installation Procedure
- Install a NEW oil pan gasket.
- Position the oil pan to the engine and hand start all the oil pan bolts.
- Torque the vertical oil pan bolts (2).
- Torque the horizontal oil pan bolts (1).
- Tighten the A/C compressor, and hand start the A/C compressor nut and bolt.
- Tighten the A/C compressor rear bolt.
- Install the transfer case. Refer to Transfer Case Assembly Replacement.
- Install the left side catalytic converter. Refer to Catalytic Converter Replacement - Left Side.
- Install the starter motor. Refer to Starter Motor Replacement .
- Install the oil filter adapter and bypass valve assembly. Refer to Oil Filter Adapter and Bypass Valve Assembly Replacement .
- Fill the engine oil. Refer to Engine Oil and Oil Filter Replacement.
- Remove the engine support fixture. Refer to Engine Support Fixture .
- Connect the negative battery cable. Refer to Battery Negative Cable Disconnection and Connection.

Notice: Refer to Fastener Notice in the Preface section.
Tighten
Tighten the bolts to 25 N·m (18 lb ft).
Tighten
Tighten the bolts to 50 N·m (37 lb ft).

Important: Hand start all the A/C compressor bolts before finalizing any torques.
Tighten
Tighten the bolt/nut to 50 N·m (37 lb ft).

Tighten
Tighten the bolt to 50 N·m (37 lb ft).
