For 1990-2009 cars only
Special Tools
CH-48482 Fuel Sender Lock Ring Wrench
Removal Procedure
- Remove the fuel tank. Refer to Fuel Tank Replacement .
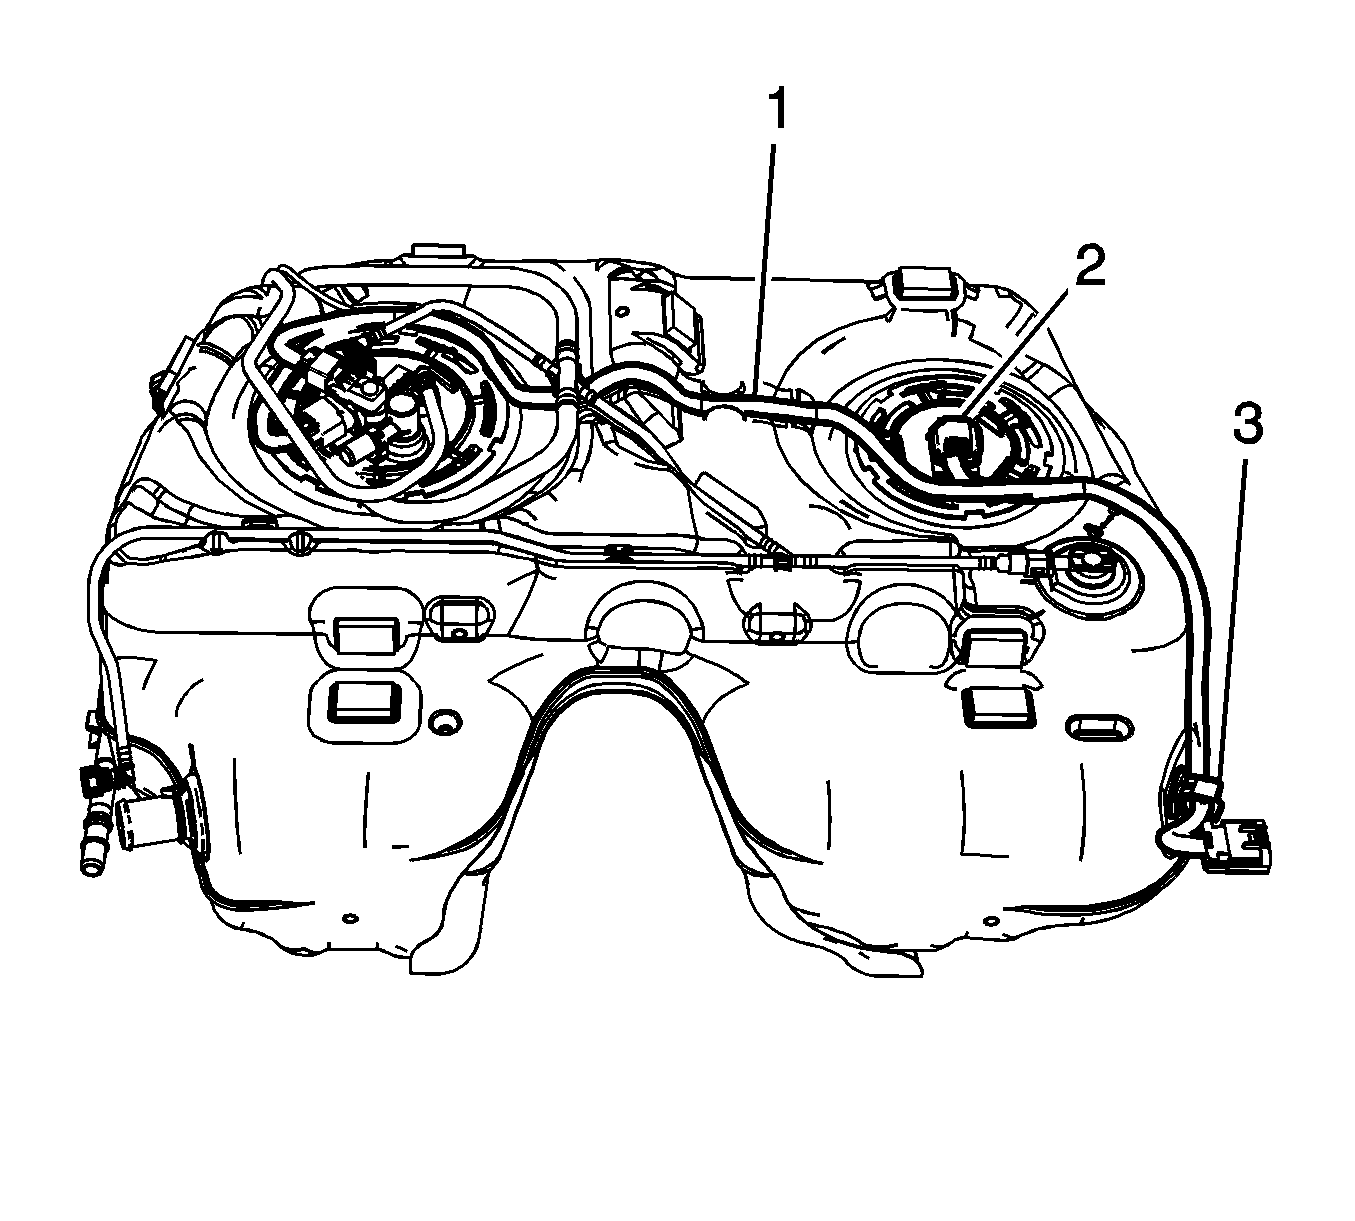
- Disconnect the fuel tank wiring harness electrical connector (2) from the secondary fuel tank fuel pump module.
- Remove the fuel tank wiring harness from the retaining clip (3).
- Reposition the fuel tank wiring harness (1) out of the way.
- Install the CH-48482 to the fuel tank fuel pump module lock ring.
- Using the CH-48482 and a long breaker bar, rotate the lock ring counterclockwise unlocking the fuel tank fuel pump module lock ring.
- Remove the CH-48482 .
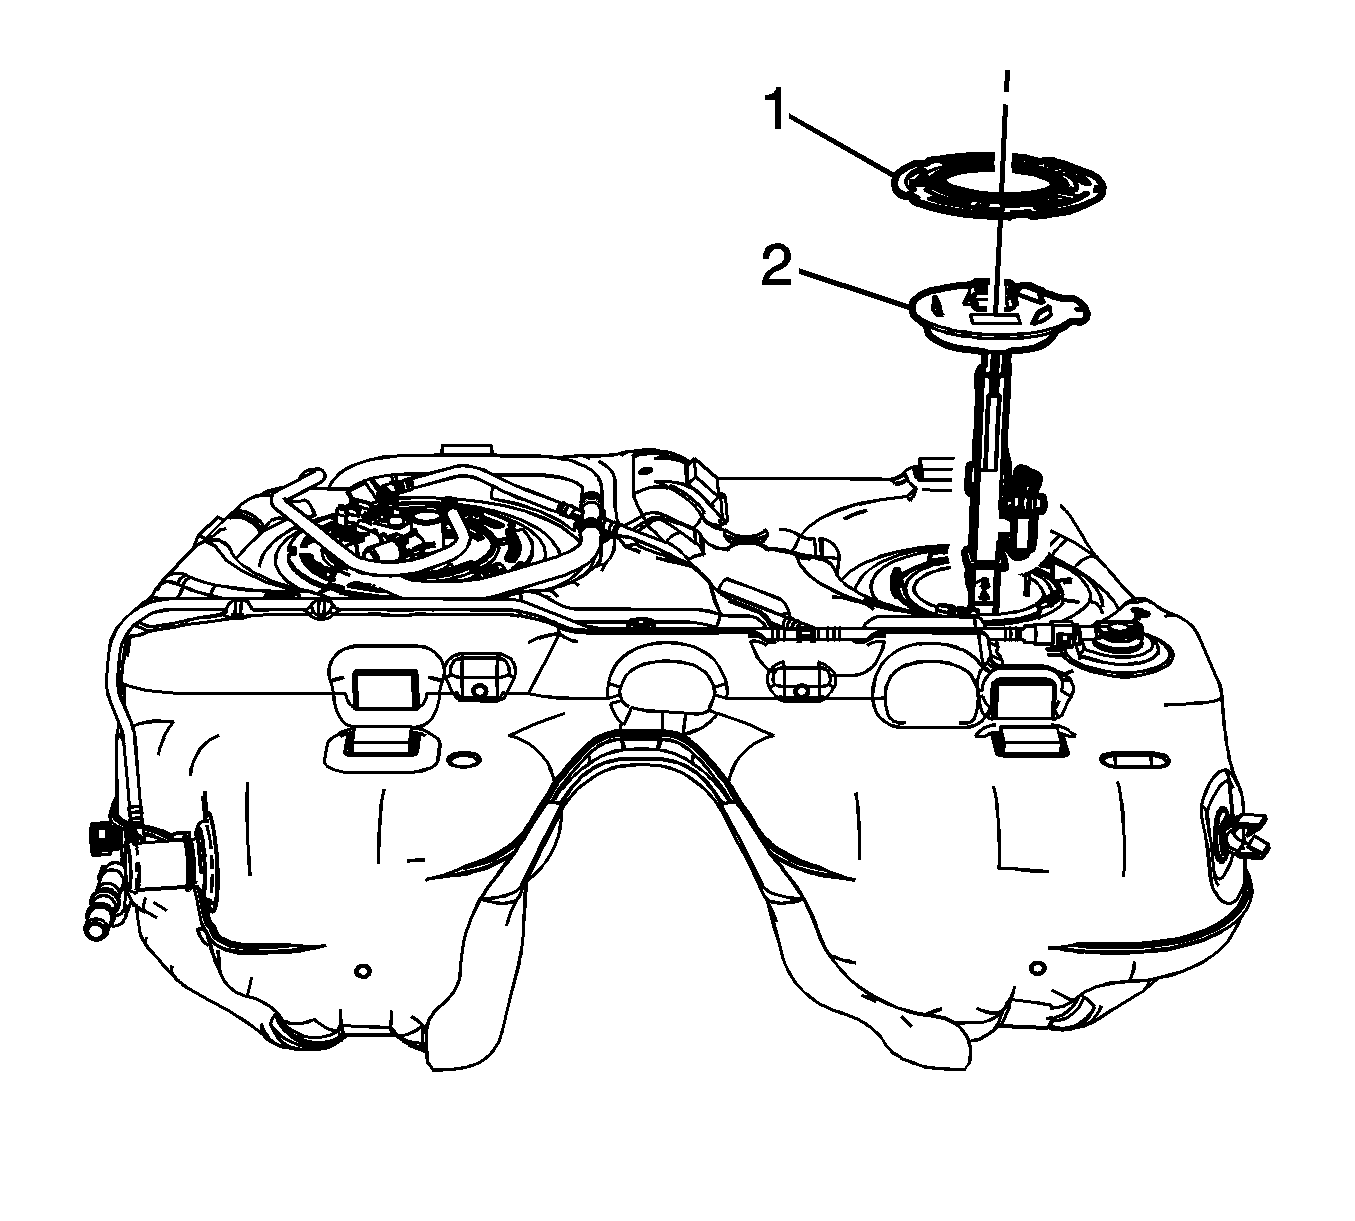
- Remove the fuel tank module lock ring (1).
- Slowly raise the fuel tank fuel pump module (2) until the fuel level sensor float arm and primary fuel tank fuel pump module suction port are just visible.
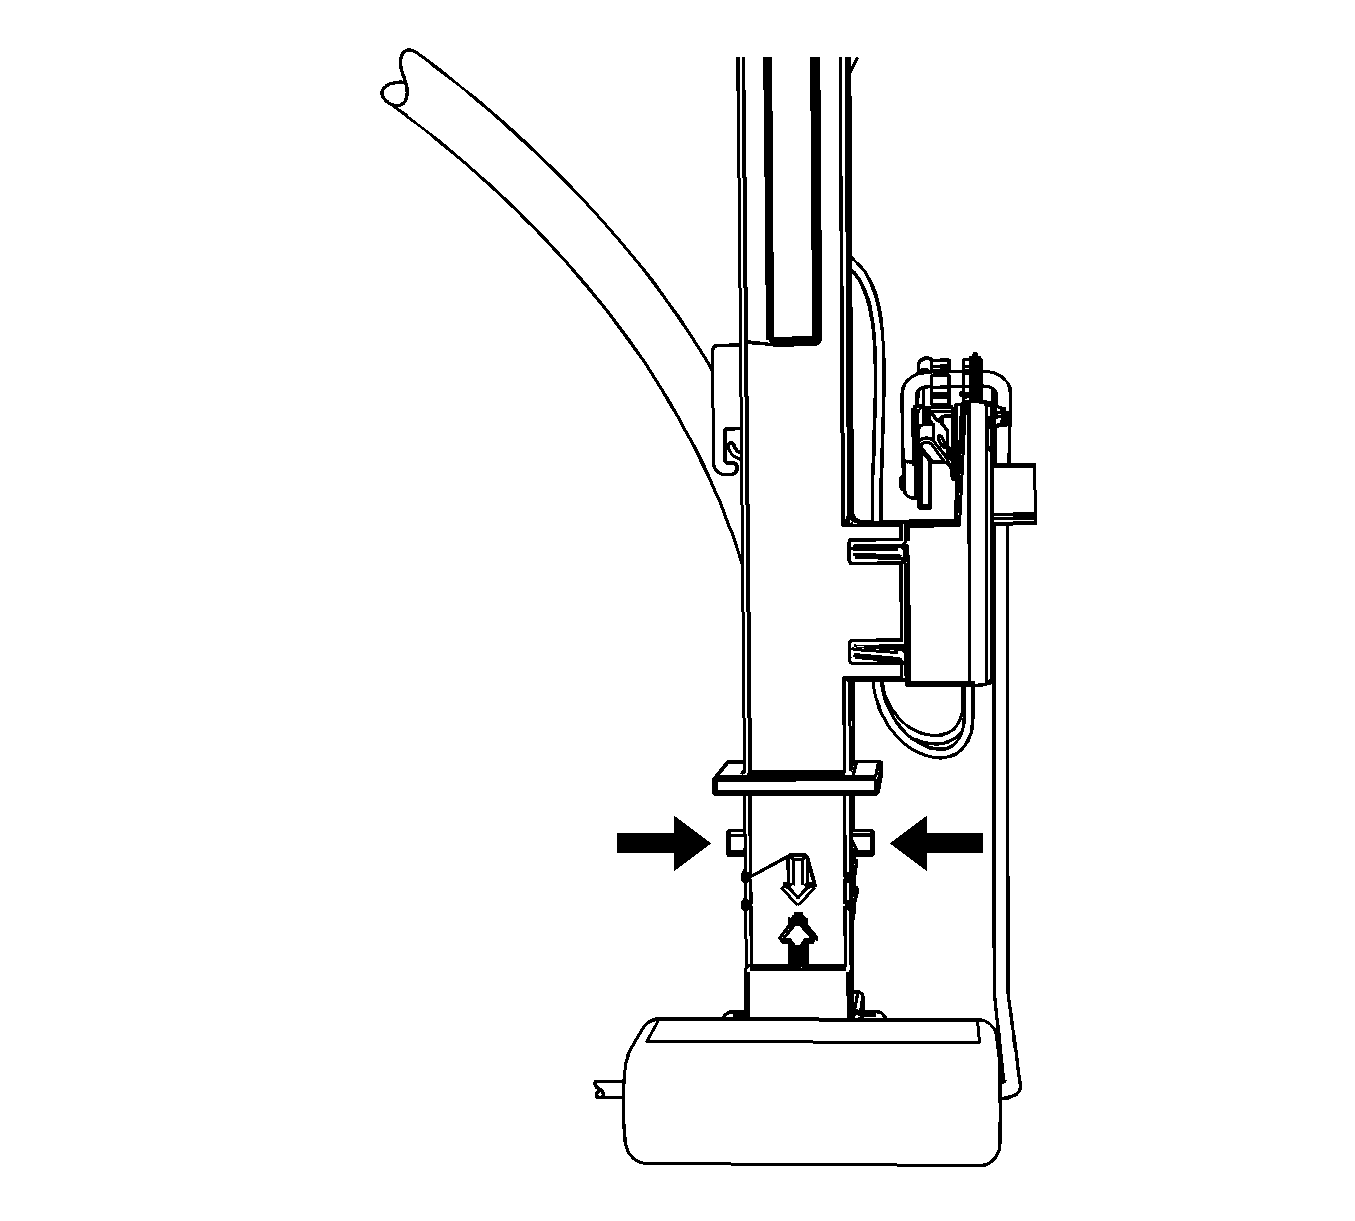
- Squeeze in the primary fuel tank fuel pump module suction port tabs on either side of the port in order to disengage the primary fuel tank fuel pump module suction port from the secondary fuel tank fuel pump module.
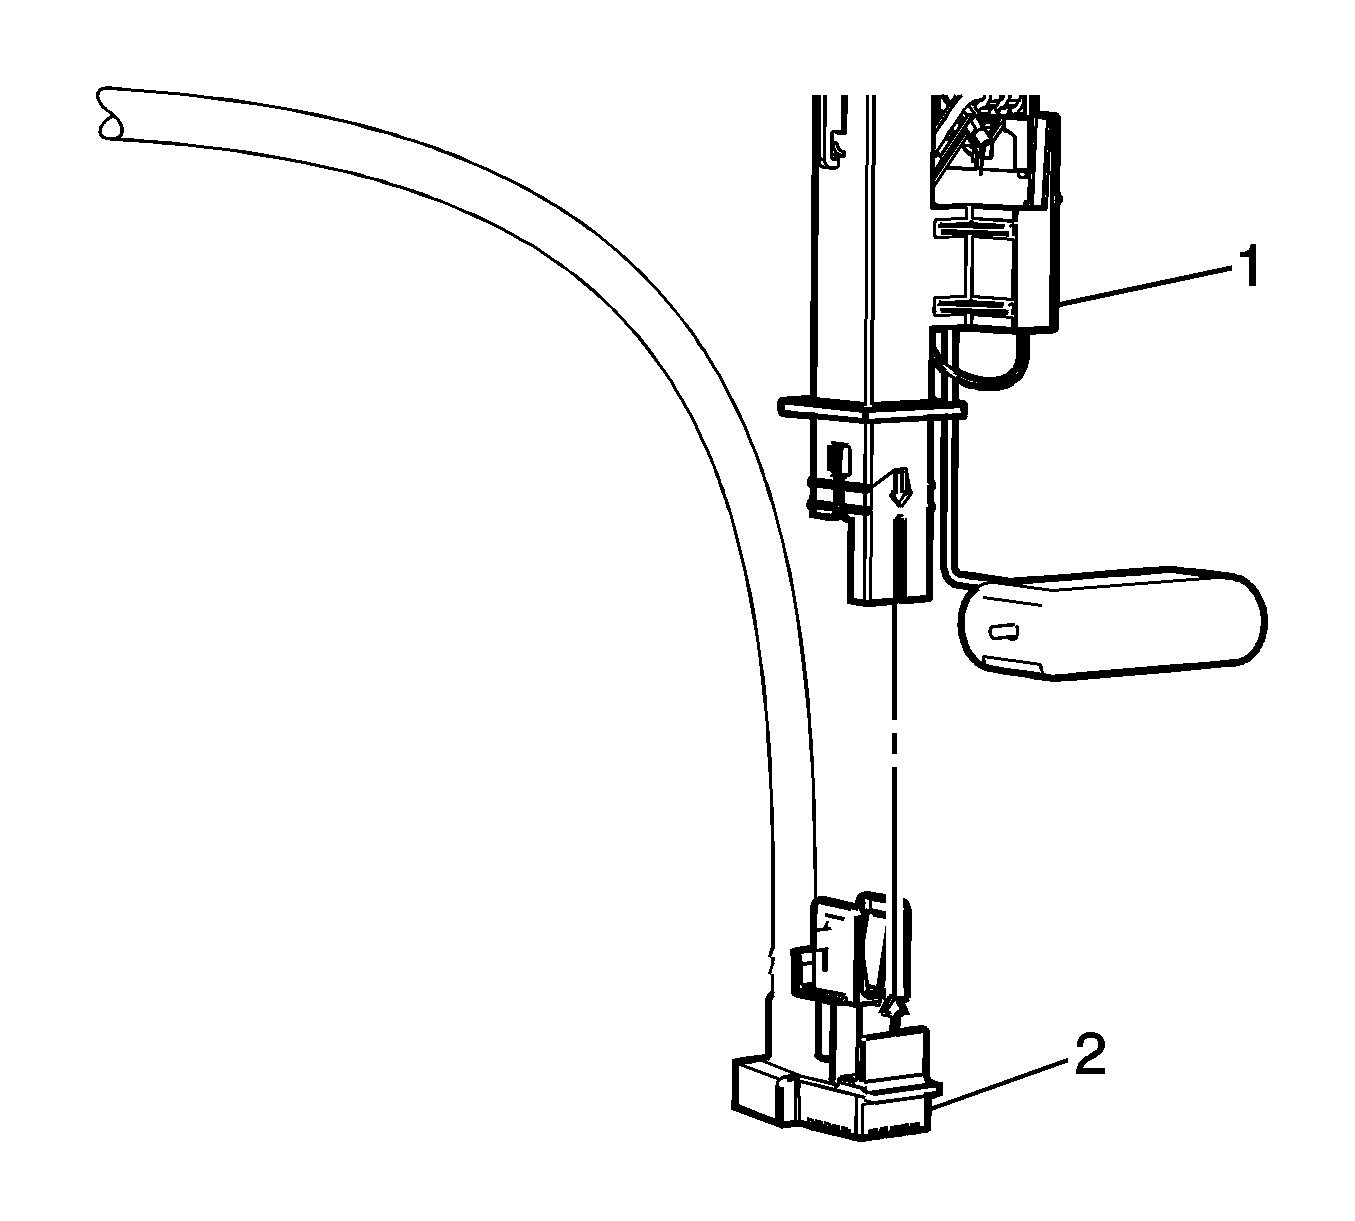
- Remove the primary fuel tank fuel pump module suction port (2) from the secondary fuel tank fuel pump module (1).
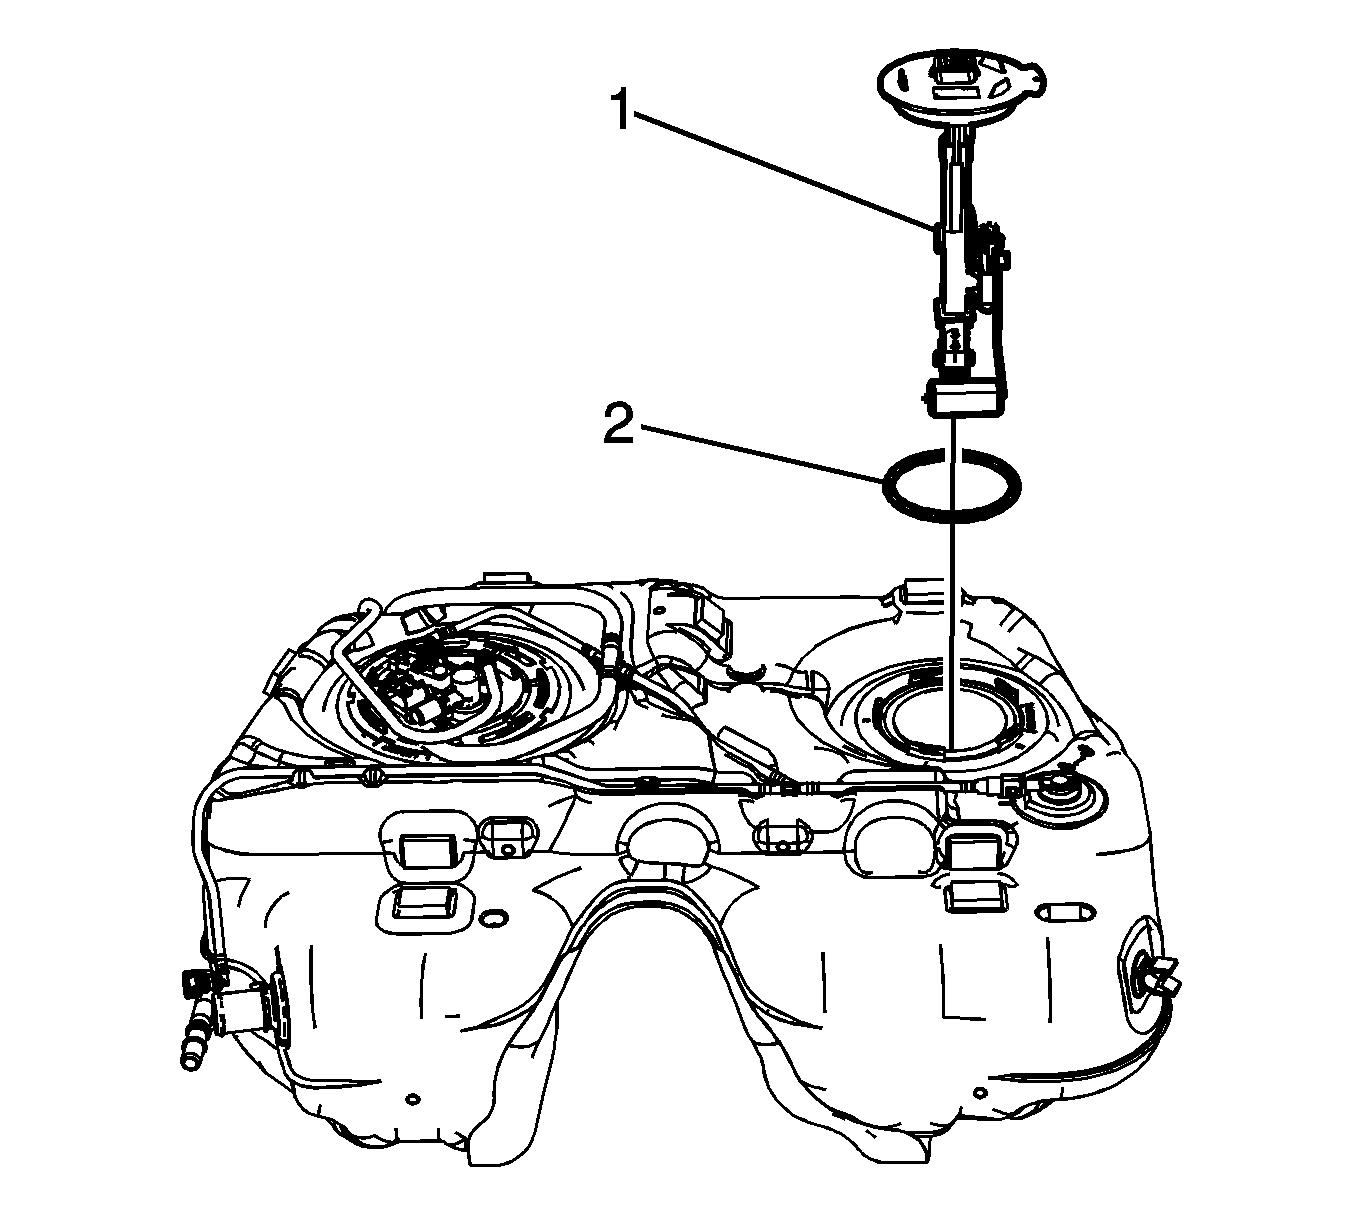
- Tilt the module toward the rear of the fuel tank to allow the level sensor float arm to clear the tank opening. Remove the module (1) from the tank.
- Remove and discard the fuel tank module O-ring seal (2).
- If the secondary fuel tank fuel pump module is being replaced, remove the secondary fuel level sensor, if required. Refer to Secondary Fuel Level Sensor Replacement .
Installation Procedure
- If the secondary fuel tank fuel pump module was replaced, install the secondary fuel level sensor, if required. Refer to Secondary Fuel Level Sensor Replacement .
- Install a NEW fuel tank module O-ring seal (2) onto the fuel tank.
- Tilt the module toward the rear of the fuel tank to allow the fuel level sensor float arm to clear the tank opening. Install the module (1) into the fuel tank.
- Align the arrow (2) on the primary fuel tank fuel pump module suction port to the arrow (1) on the secondary fuel tank fuel pump module. Install the primary fuel tank fuel pump module suction port to the secondary fuel tank fuel pump module.
- Lower the fuel tank fuel pump module (2) into the fuel tank.
- Install the fuel tank module lock ring (1).
- Install the CH-48482 to the fuel tank fuel pump module lock ring.
- Using the CH-48482 and a long breaker bar, rotate the lock ring clockwise locking the fuel tank fuel pump module lock ring.
- Remove the CH-48482 from the fuel tank fuel pump module lock ring.
- Position the fuel tank wiring harness (1) to the module.
- Connect the fuel tank wiring harness electrical connector (2) to the secondary fuel tank fuel pump module.
- Install the fuel tank wiring harness to the retaining clip (3).
- Install the fuel tank. Refer to Fuel Tank Replacement .


