For 1990-2009 cars only
Special Tools
| • | J-2619-A Slide Hammer with Adapter |
| • | J 45341 Axle Shaft Puller |
| • | J 42129 Wheel Hub Puller |
| • | J 45859 Axle Remover |
| • | SA91112T Axle Seal Protector |
Removal Procedure
- Raise and support the vehicle. Refer to Lifting and Jacking the Vehicle.
- Remove the tire and wheel assembly. Refer to Tire and Wheel Removal and Installation.
- Remove the engine splash shield. Refer to Engine Splash Shield Replacement.
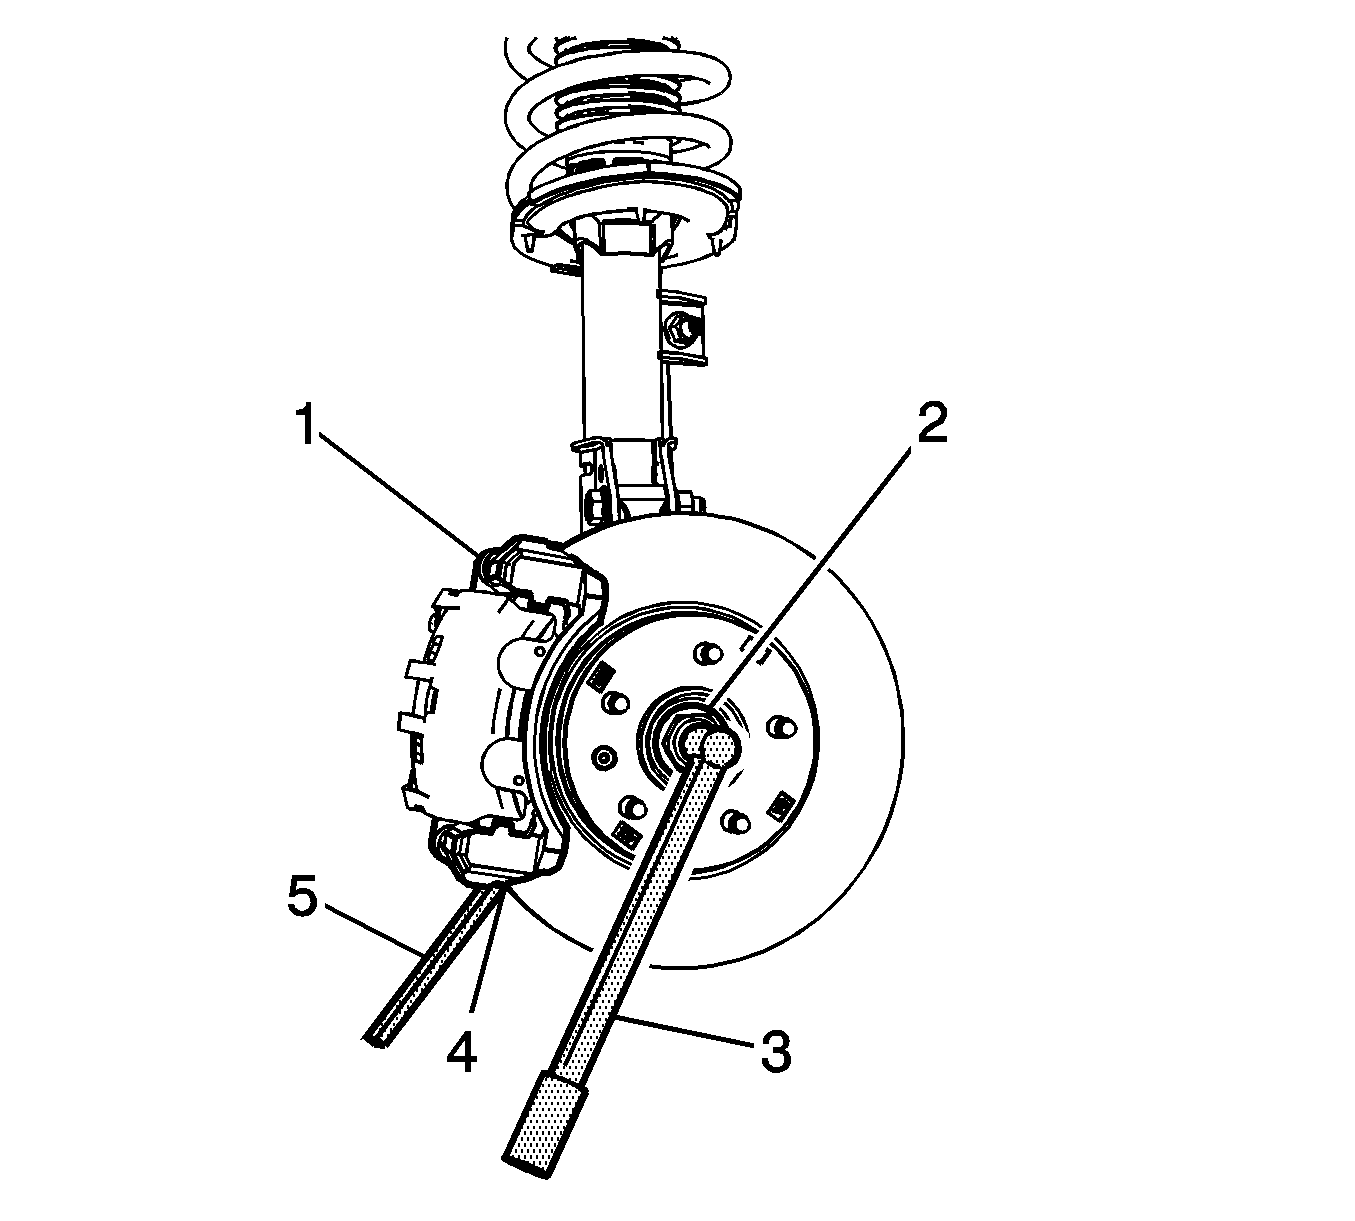
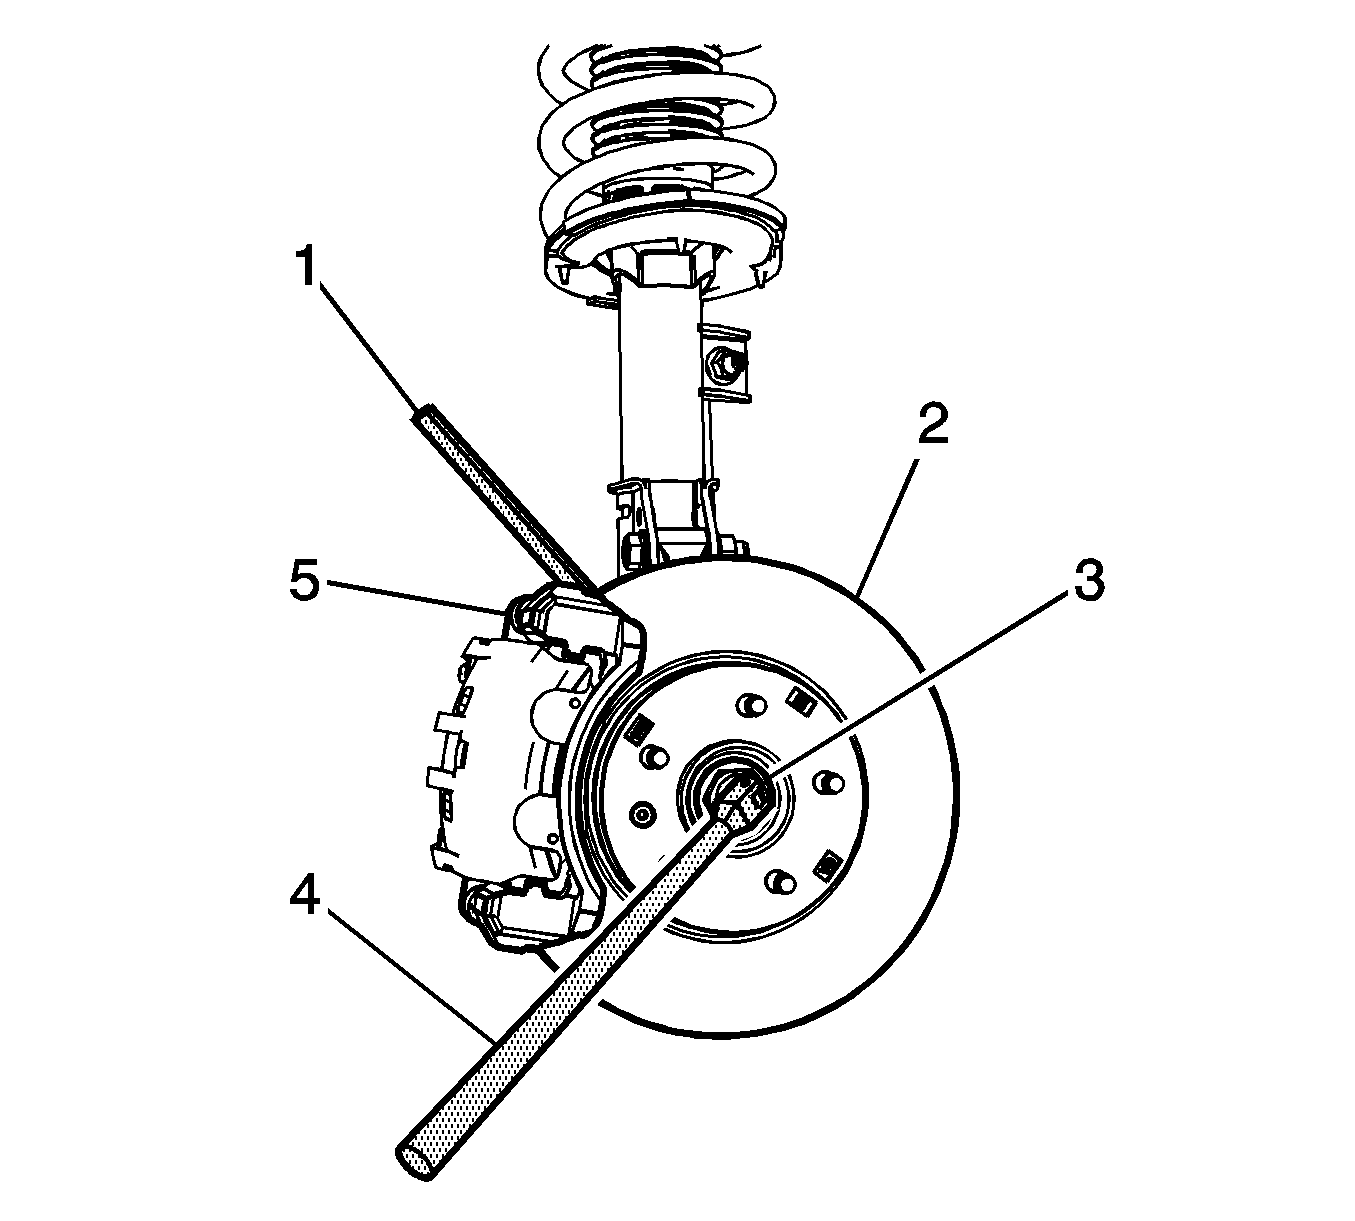
- Insert a brass drift or punch (1) between the brake rotor cooling fins (2) and the brake caliper mounting bracket (4).
- Using the appropriate size socket and a breaker bar (4), remove the wheel drive shaft nut (3).
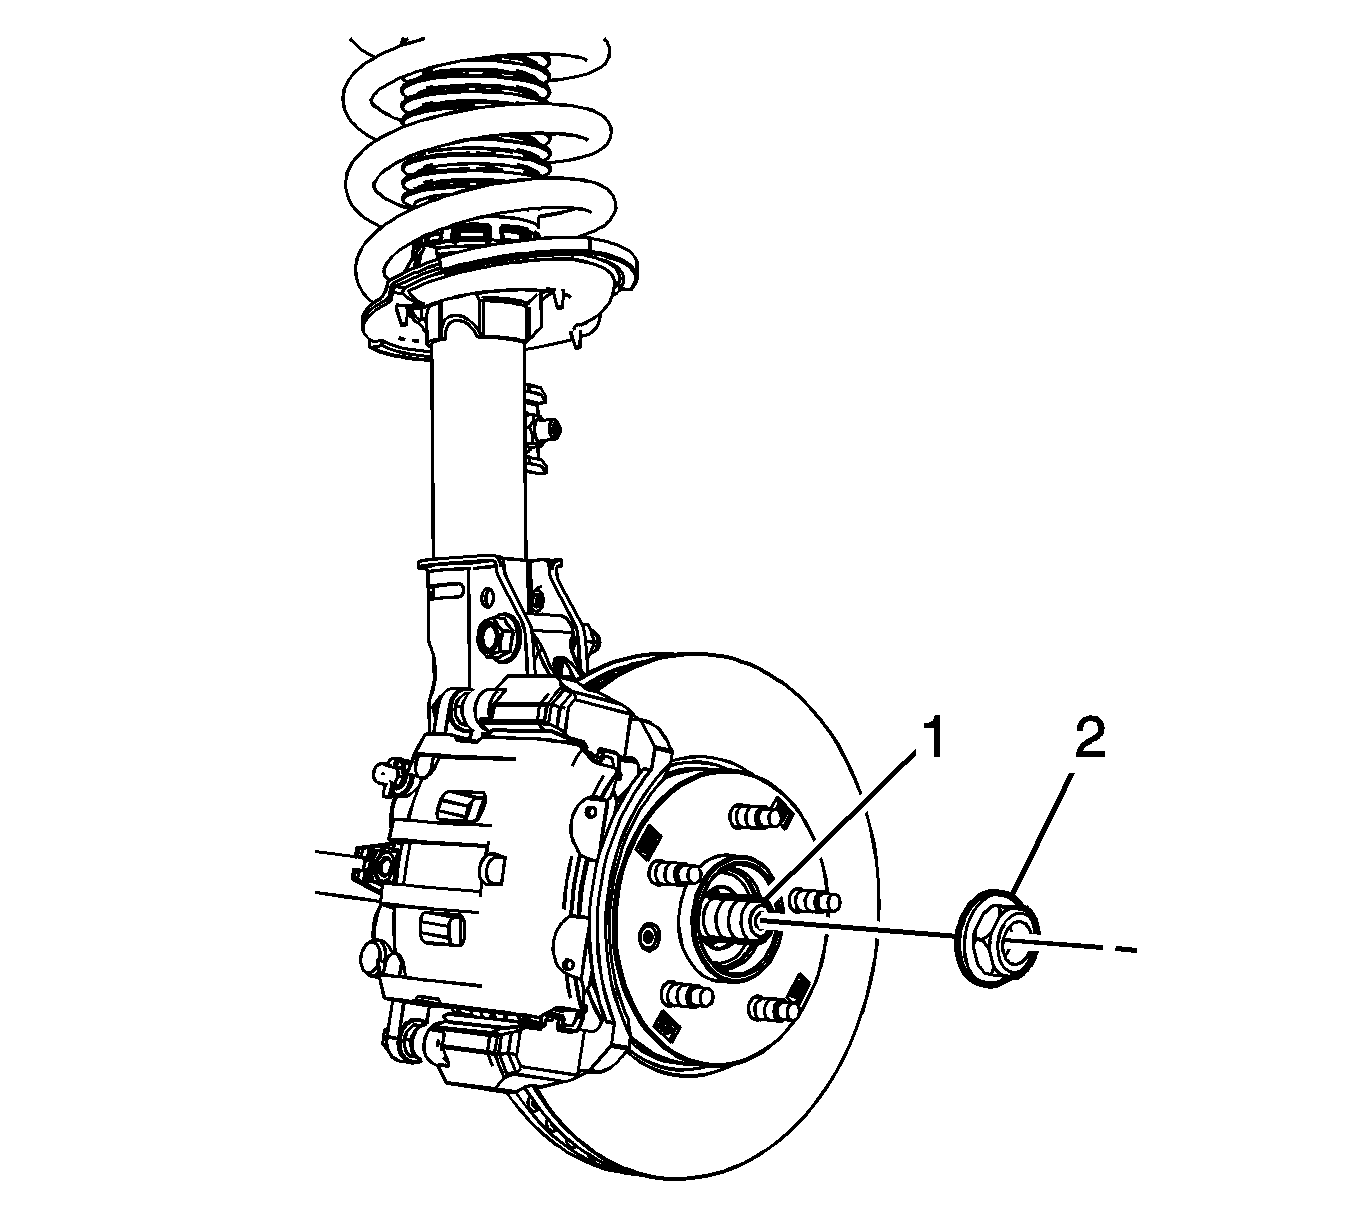
- Remove the wheel drive shaft nut (2) from the wheel drive shaft (1).
- Using the J 42129 (2), separate the wheel drive shaft from the brake rotor and wheel bearing/hub assembly (1).
- Remove the outer tie rod end from the steering knuckle. Refer to Steering Linkage Outer Tie Rod Replacement.
- Remove the stabilizer bar link from the stabilizer shaft. Refer to Stabilizer Shaft Link Replacement.
- Remove the lower control arm from the steering knuckle. Refer to Lower Control Arm Replacement.
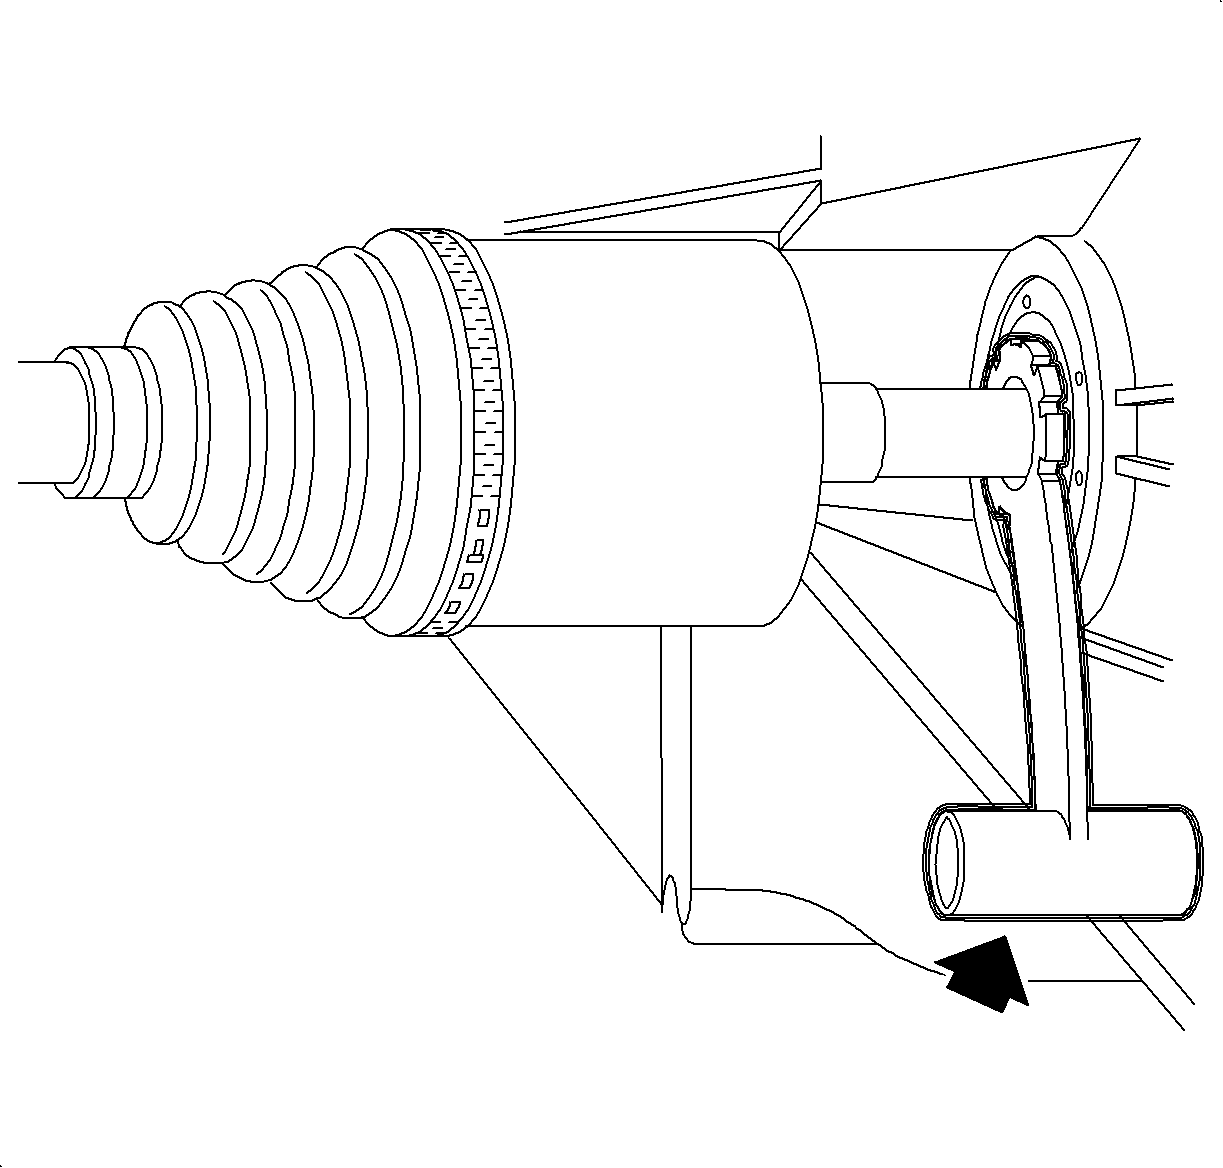
- Install the J 2619-01 , J 29794 , and the J 45341 on the wheel drive shaft inner joint groove.
- Using the J 2619-01 , J 29794 , and the J 45341 , remove the wheel drive shaft.
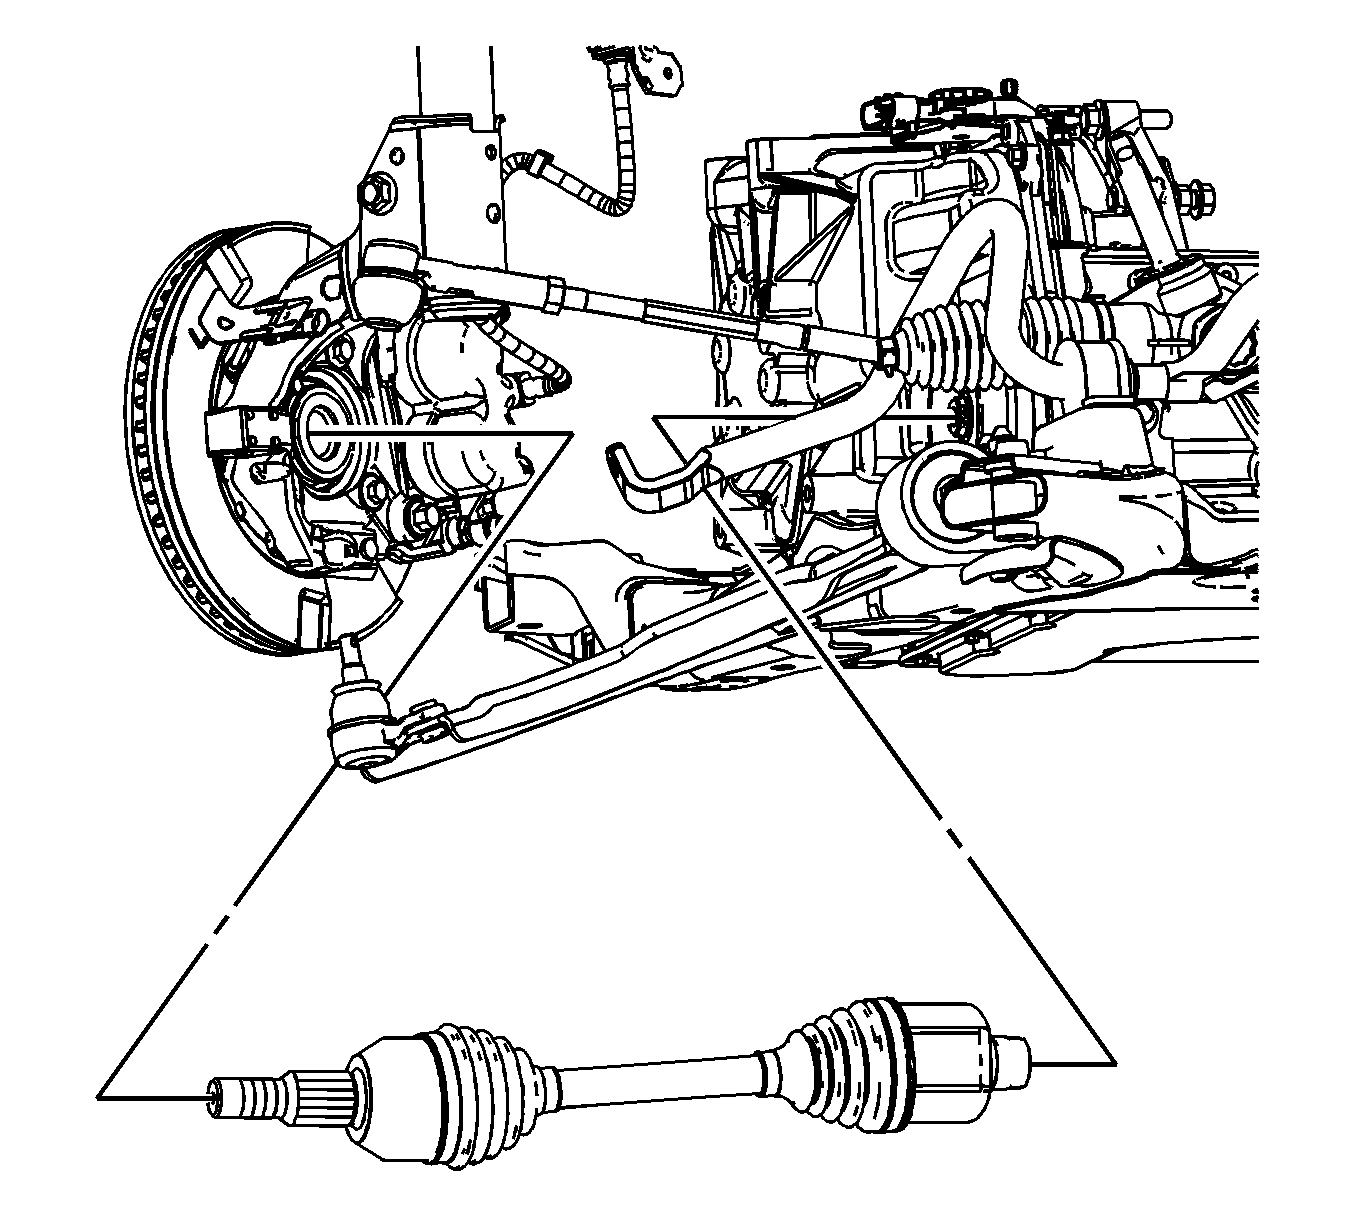
- Remove the wheel drive shaft from the knuckle.
Note: Once the wheel drive shaft nut has been removed, discard and replace with NEW. DO NOT re-use the nut.


Installation Procedure
- Install the SA91112T seal protector.
- Install the wheel drive shaft in the vehicle.
- Remove the SA91112T seal protector.
- Install the lower control arm to the knuckle. Refer to Lower Control Arm Replacement.
- Install the outer tie rod end for the steering gear to the knuckle. Refer to Steering Linkage Outer Tie Rod Replacement.
- Install the stabilizer link to the stabilizer bar. Refer to Stabilizer Shaft Link Replacement.
- Install the NEW wheel drive shaft nut (2) on the wheel drive shaft (1).
- Insert a brass drift or punch (5) between the brake rotor cooling fins (4) and the brake caliper mounting bracket (1).
- Using a torque wrench (2), tighten the wheel drive shaft nut (2). Tighten the wheel drive shaft nut (2) to 205 N·m (151 lb ft).
- Inspect the transmission fluid level and add fluid if necessary. Refer to Transmission Fluid Check.
- Install the engine splash shield. Refer to Engine Splash Shield Replacement.
- Install the tire and wheels. Refer to Lifting and Jacking the Vehicle.
- Lower the vehicle.
Caution: Refer to Fastener Caution in the Preface section.