For 1990-2009 cars only
Removal Procedure
- Raise and support the vehicle. Refer to Lifting and Jacking the Vehicle .
- Lower the rear suspension support. Refer to Support Replacement .
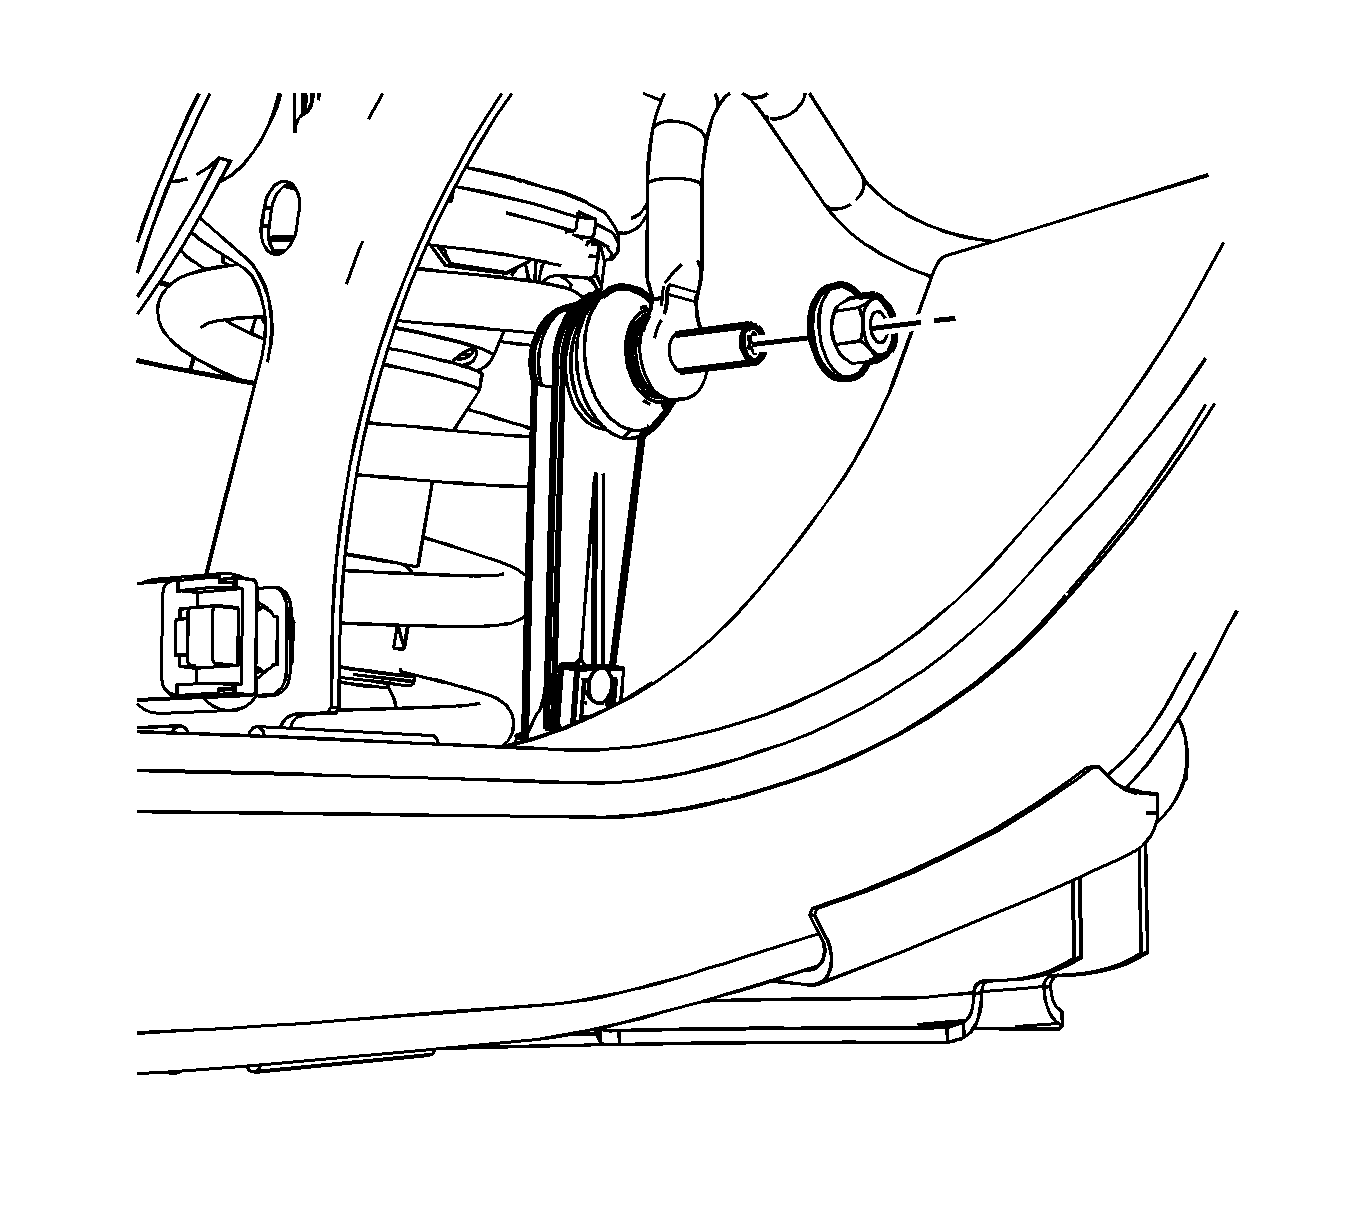
- Remove the stabilizer link to stabilizer shaft nut.
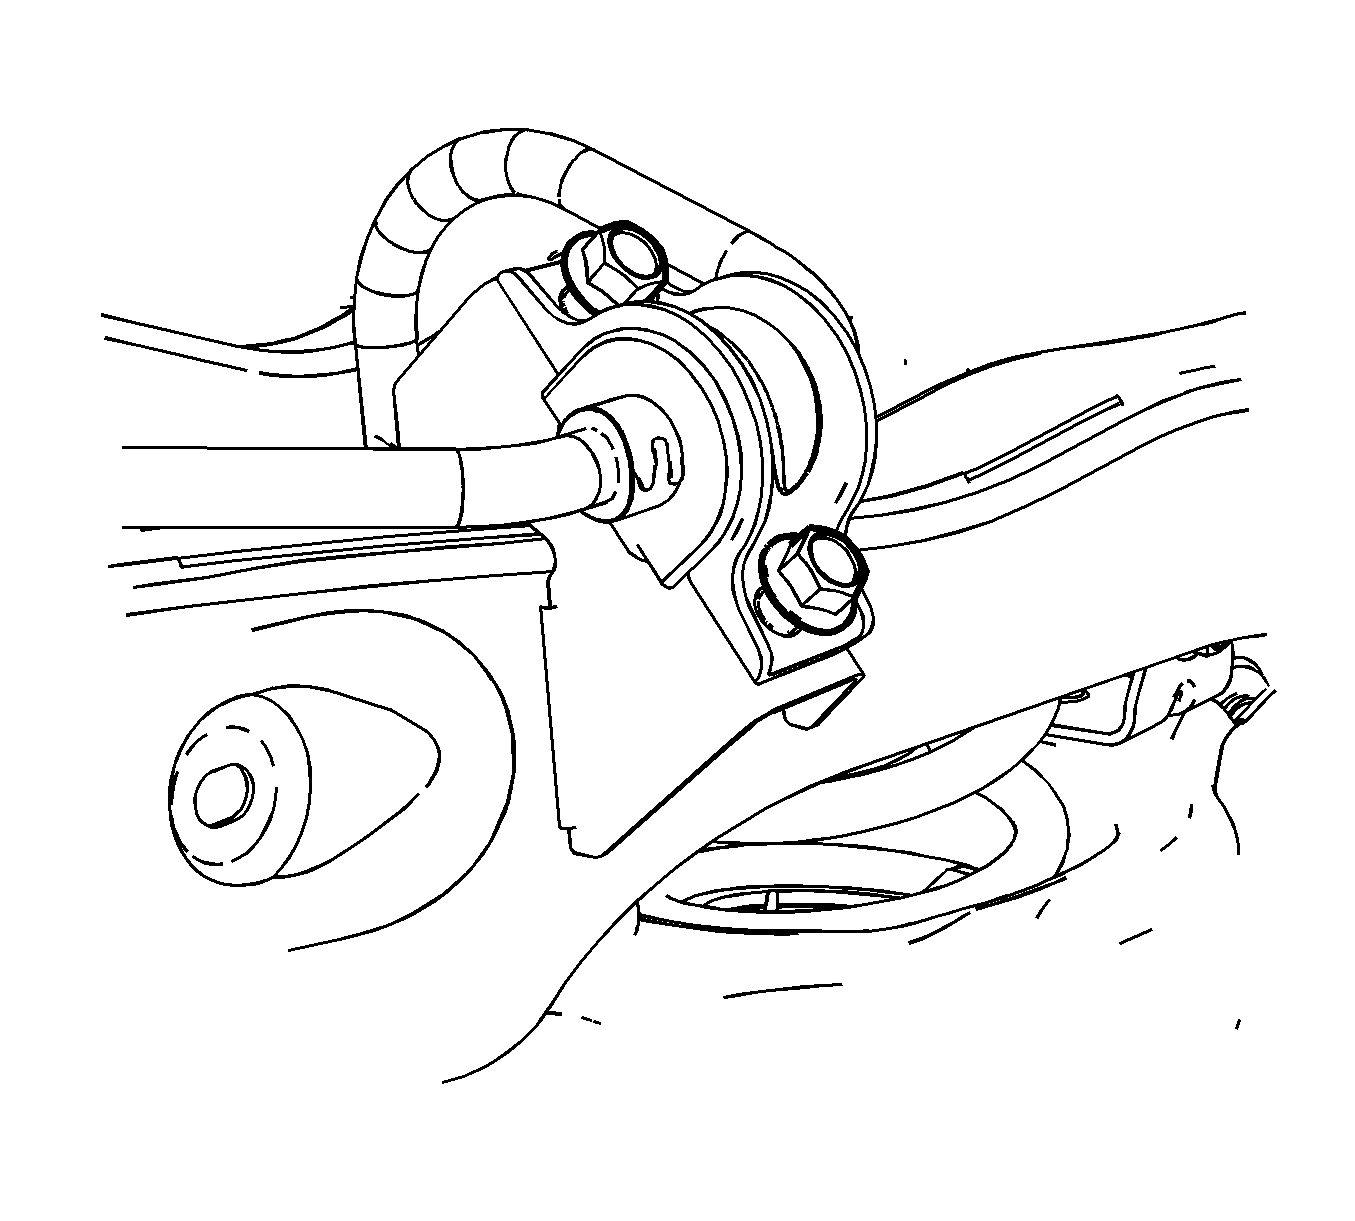
- Remove the stabilizer shaft clamp bolts.
- Remove the stabilizer shaft clamps and bushings from the stabilizer shaft.
- Disengage the stabilizer shaft from the stabilizer link ball studs, while removing the stabilizer shaft from the vehicle.
Important: In the following service procedure, it is not necessary to remove the rear suspension support. Lower the support enough to remove the stabilizer bar.

Important: Hold the ball shaft secure with a 90° bend style TORX® bit, when removing the nut.

Installation Procedure
- Position the stabilizer shaft in the vehicle, while positioning the links to the stabilizer bar.
- Install the stabilizer shaft clamps and bushings to the stabilizer shaft.
- Install the stabilizer shaft clamp bolts.
- Install the stabilizer link to stabilizer shaft nut.
- Install the rear suspension support. Refer to Support Replacement .
- Lower the vehicle.
Notice: Refer to Fastener Notice in the Preface section.

Tighten
Tighten the bolts to 70 N·m (52 lb ft).

Important: Hold the ball shaft secure with a TORX® bit, when installing the nut.
Tighten
Tighten the nut to 50 N·m (37 lb ft).
