Tools Required
| • | J 25031-A Three Jaw Puller |
| • | J 37872 Universal Spanner Wrench |
| • | GE-47849 Clutch Remover |
| • | GE-47850 Center Puller |
| • | GE-47851 Armature Replacer |
Removal Procedure
- Remove the compressor from the vehicle. Refer to Air Conditioning Compressor Replacement .
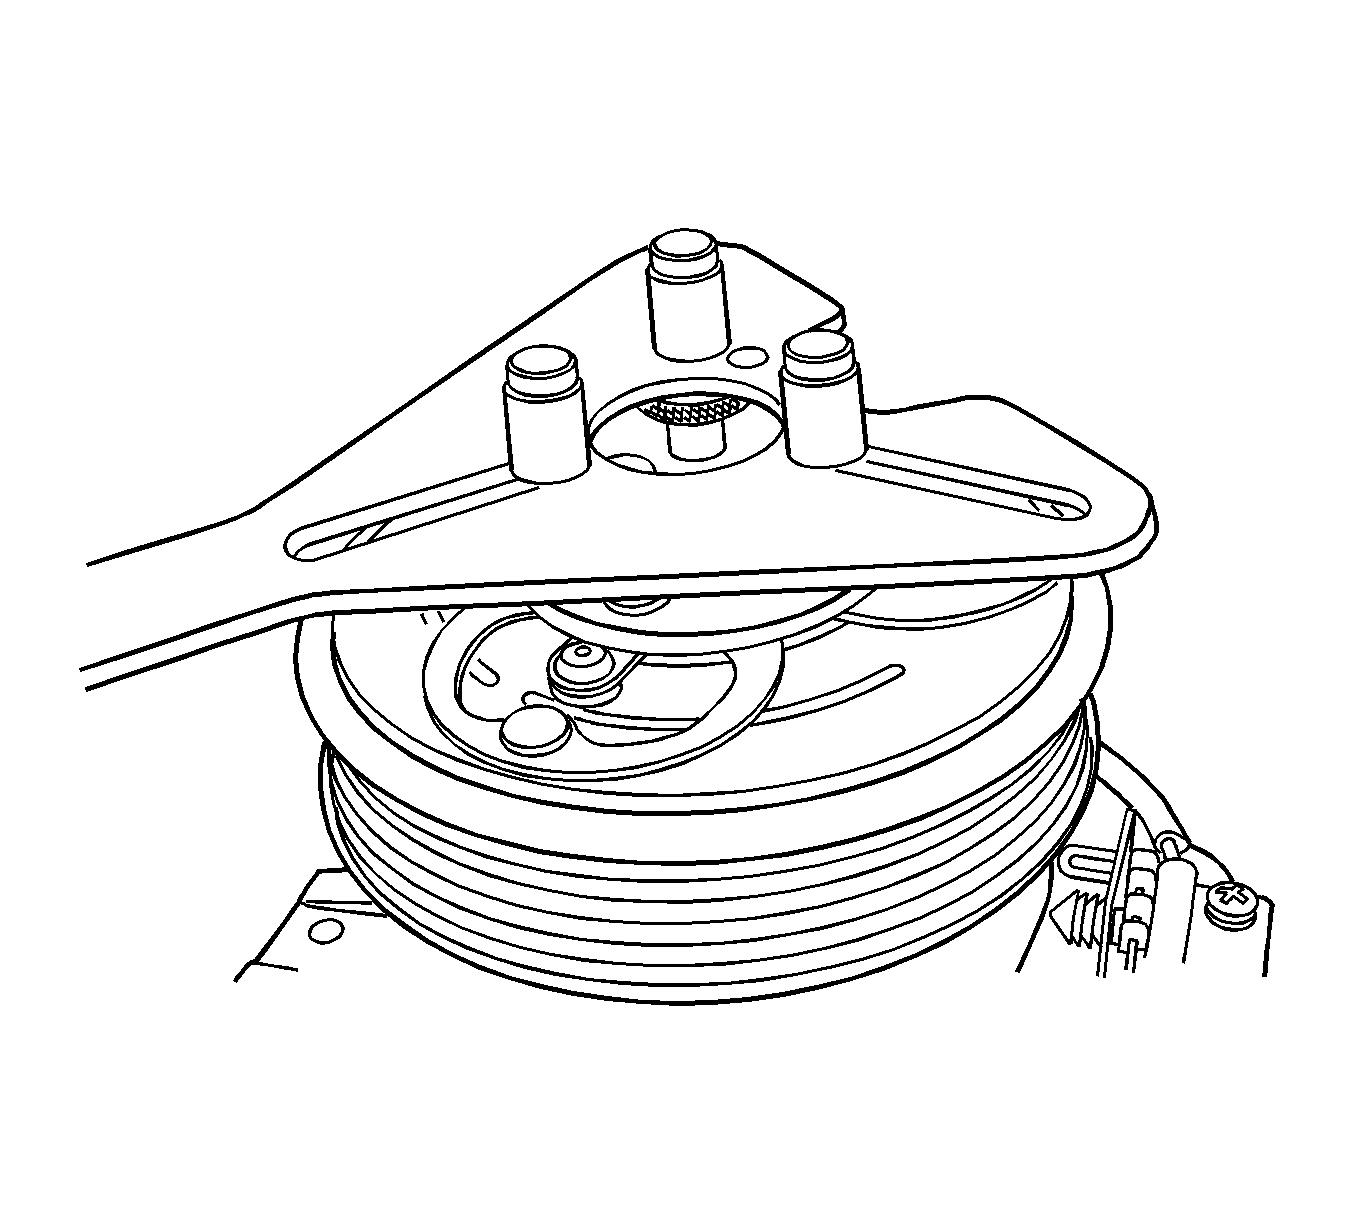
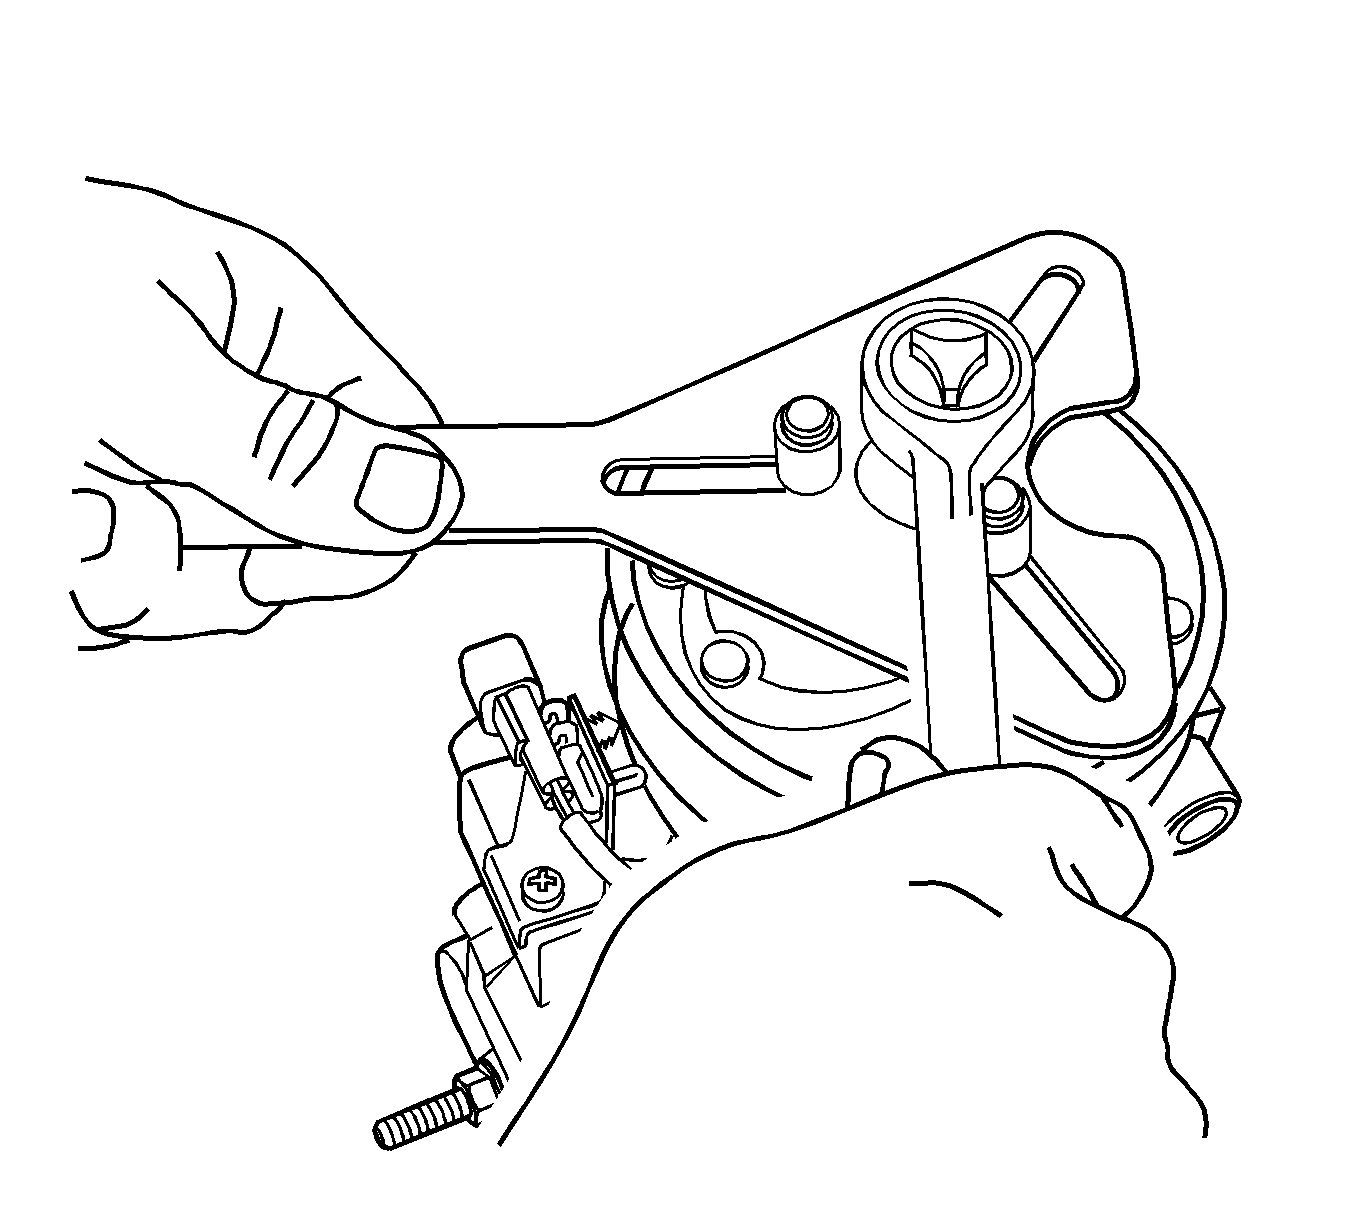
- Use J 37872 to hold the compressor clutch.
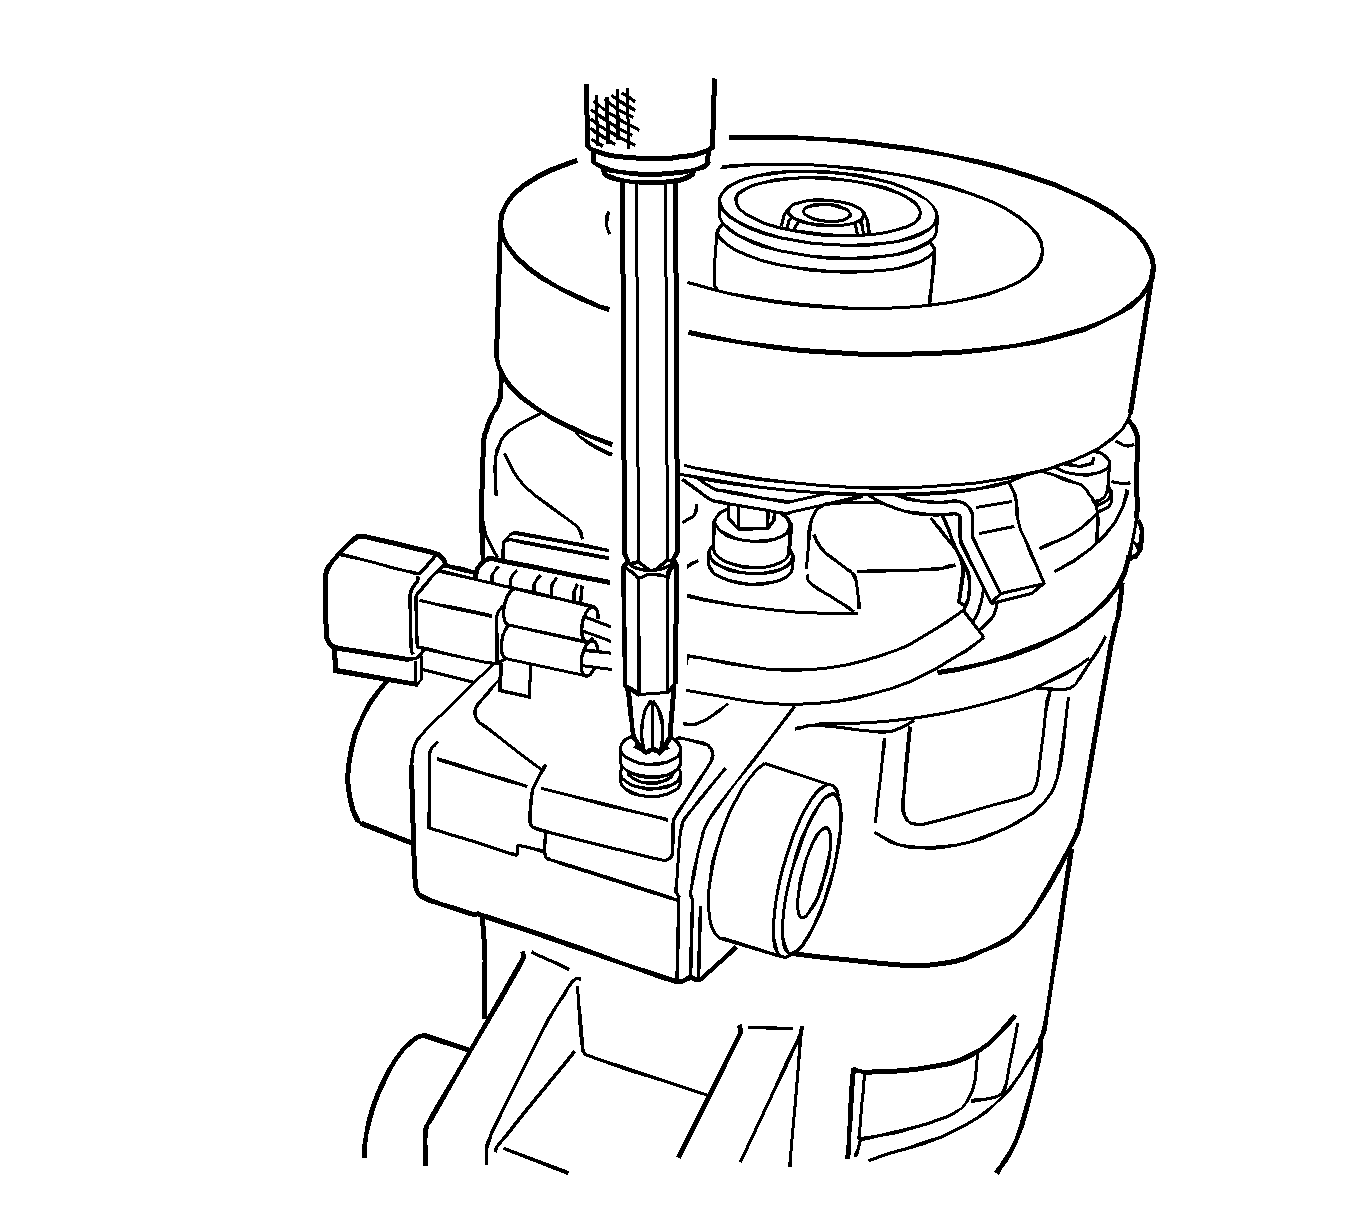
- Remove the bolt retaining the compressor clutch to the compressor.
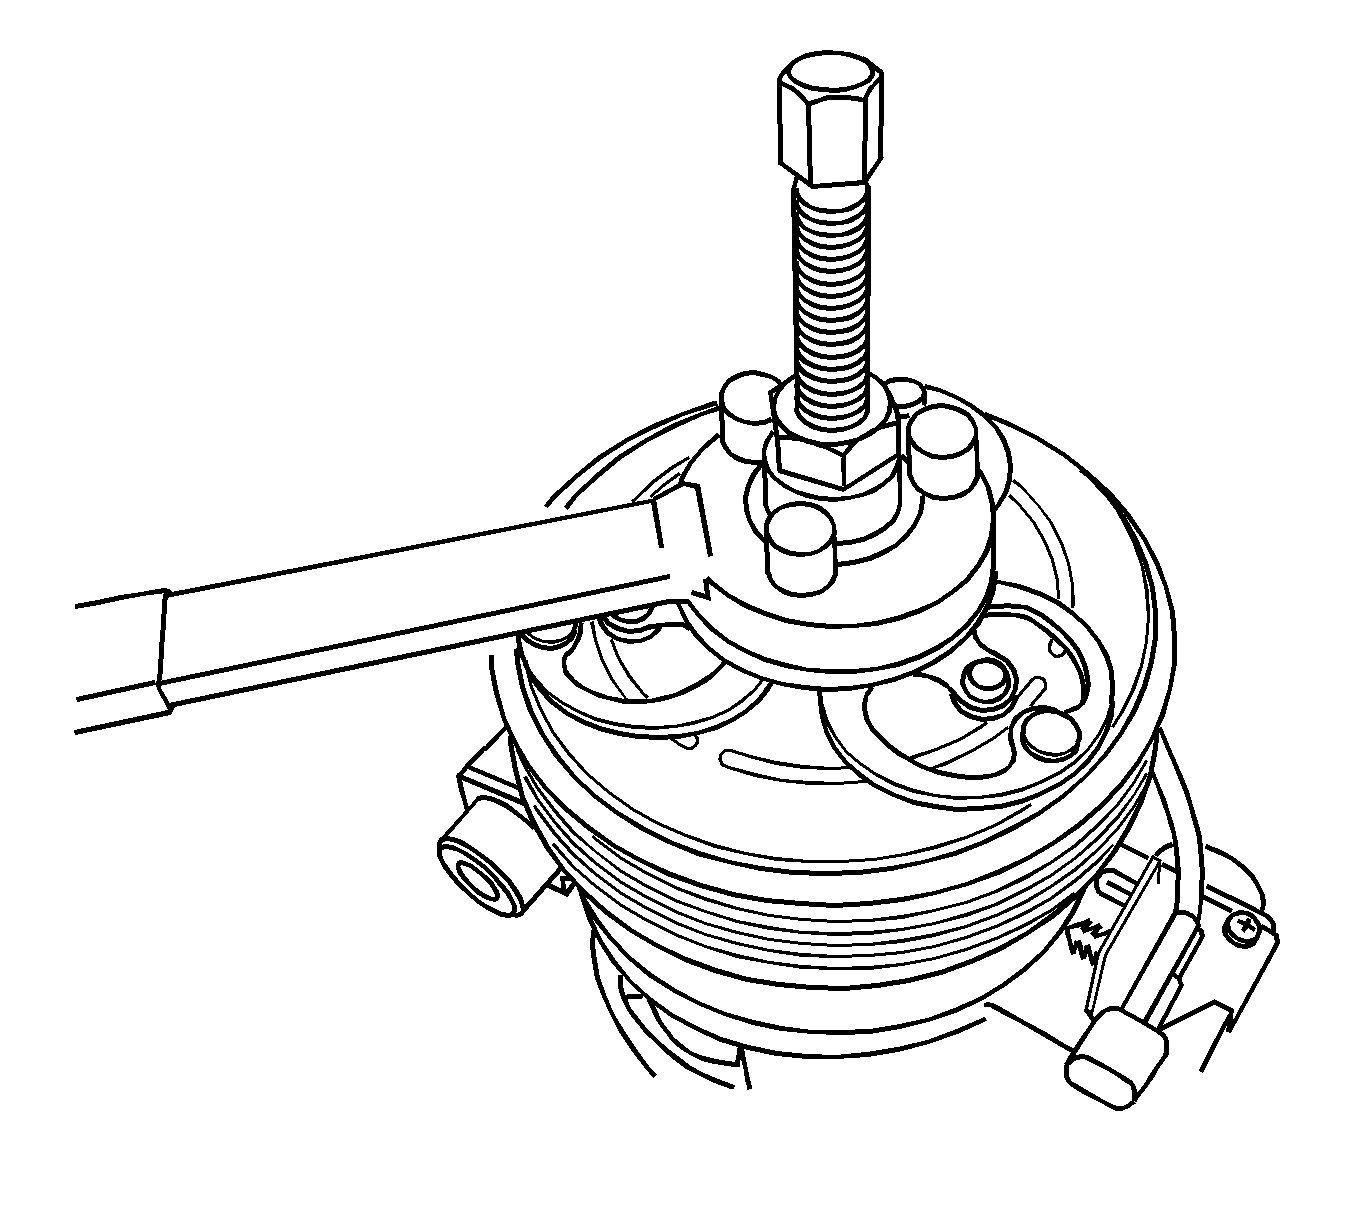
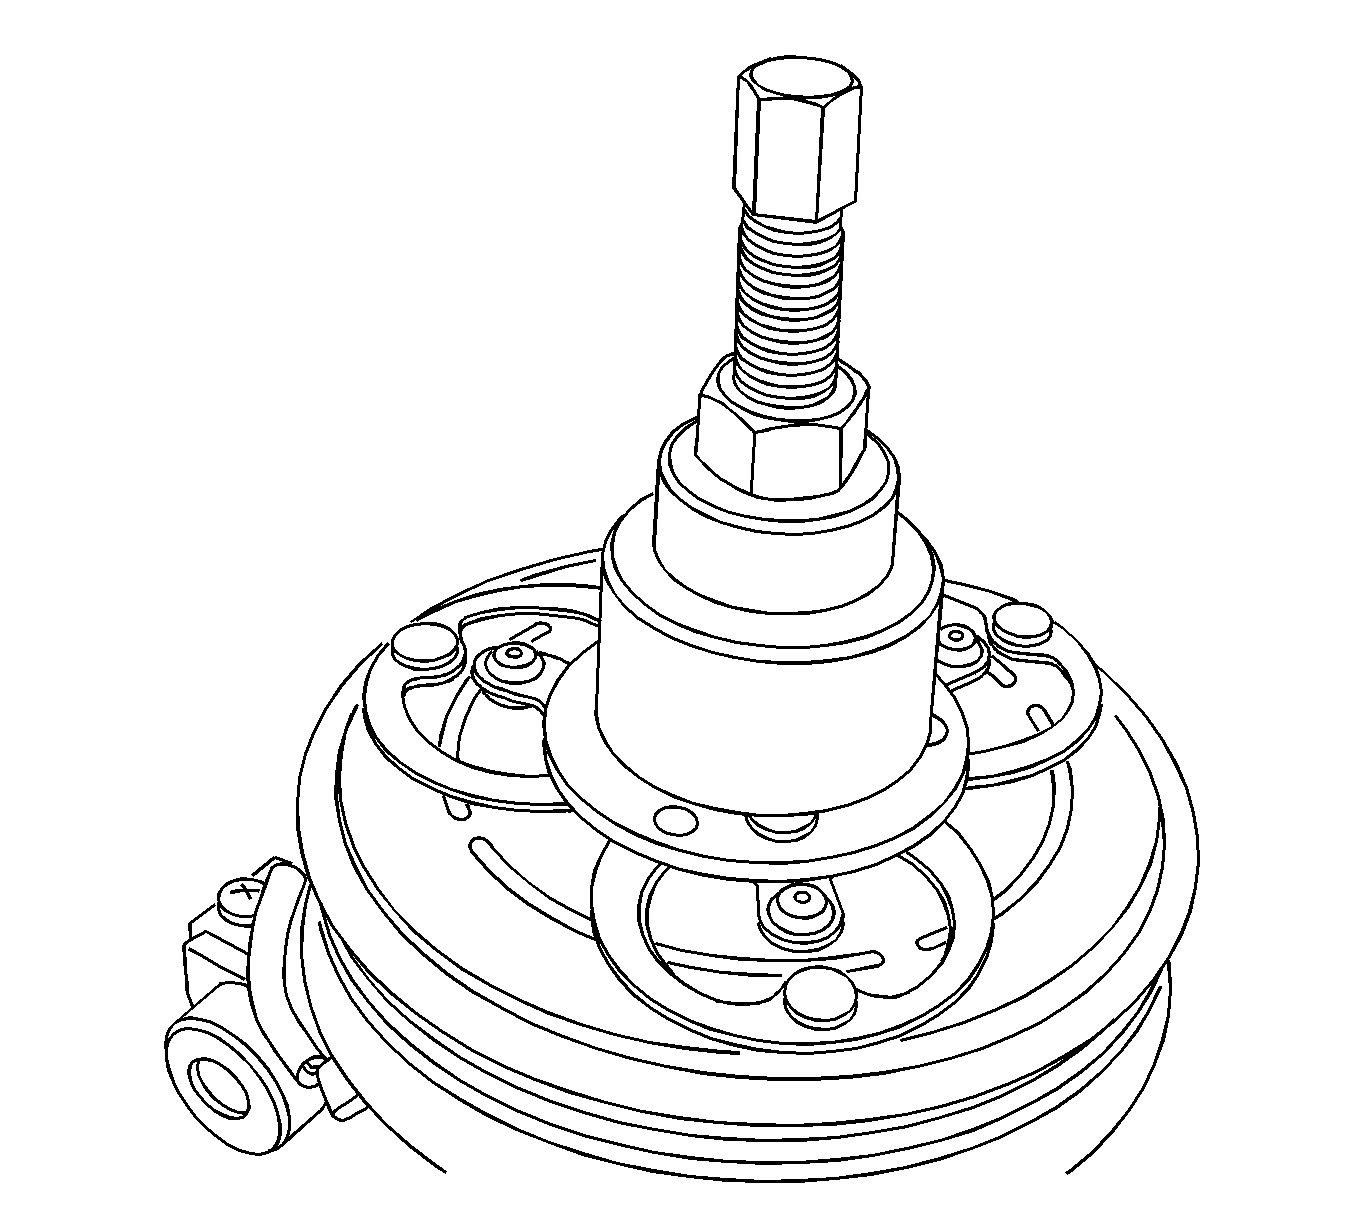
- Install GE-47849 to the compressor clutch.
- Using GE-47849 , remove the compressor clutch from the compressor.
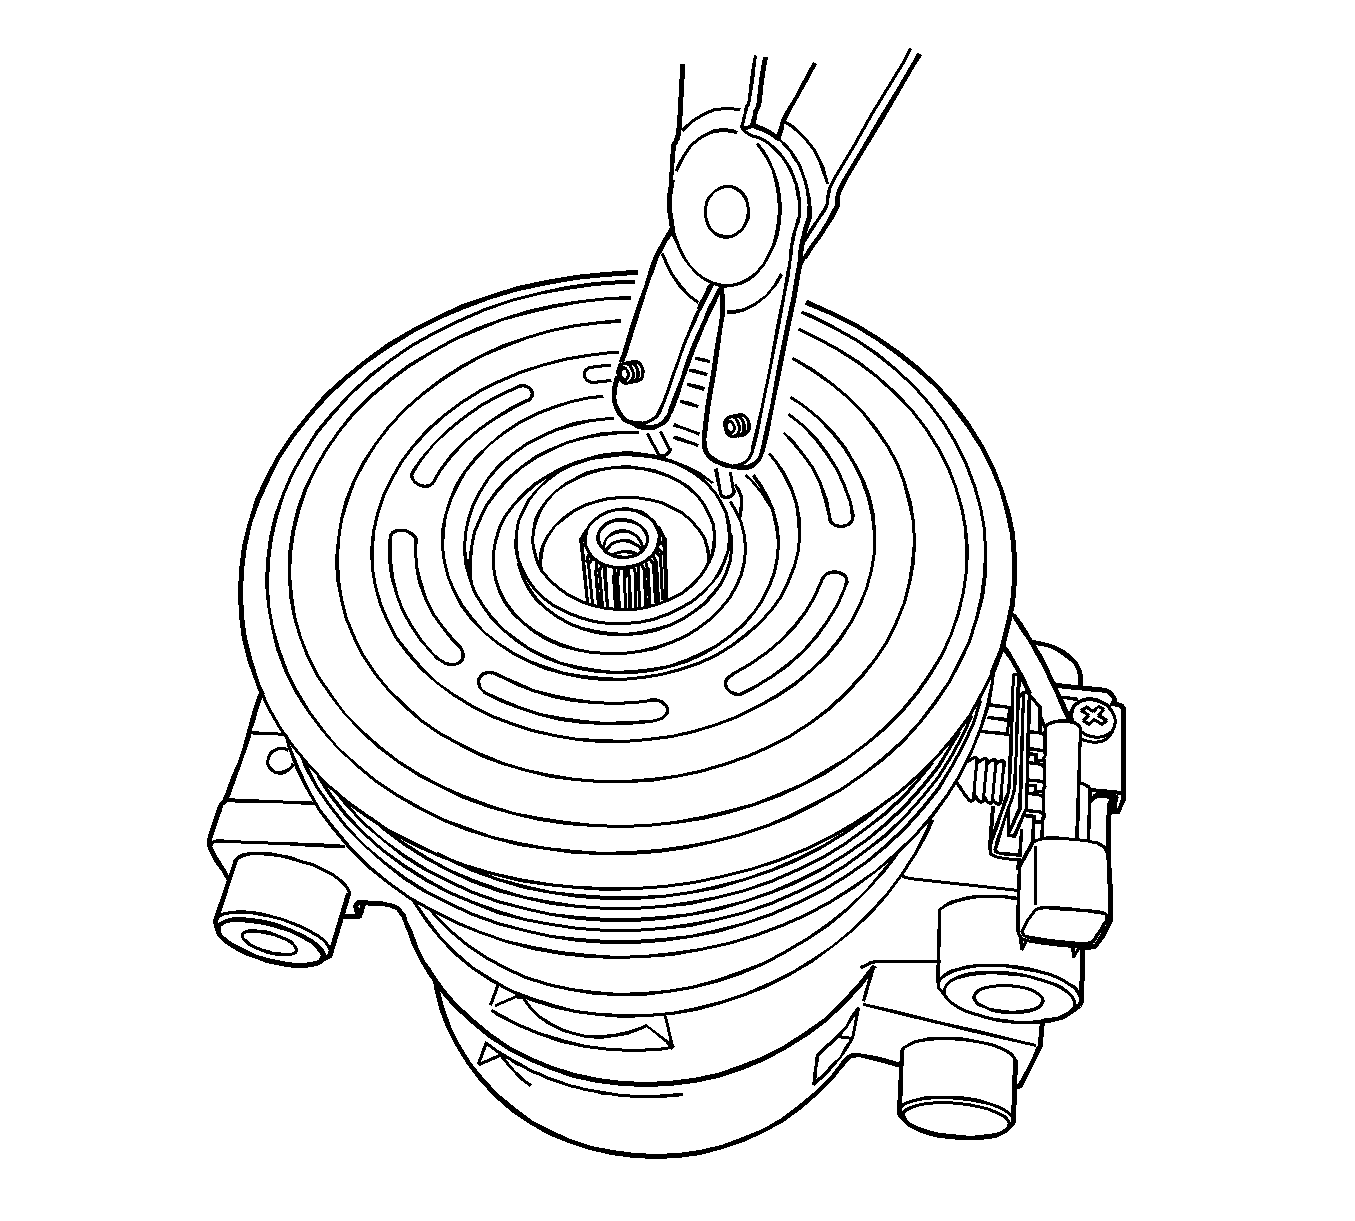
- Remove the compressor clutch shims from the compressor shaft.
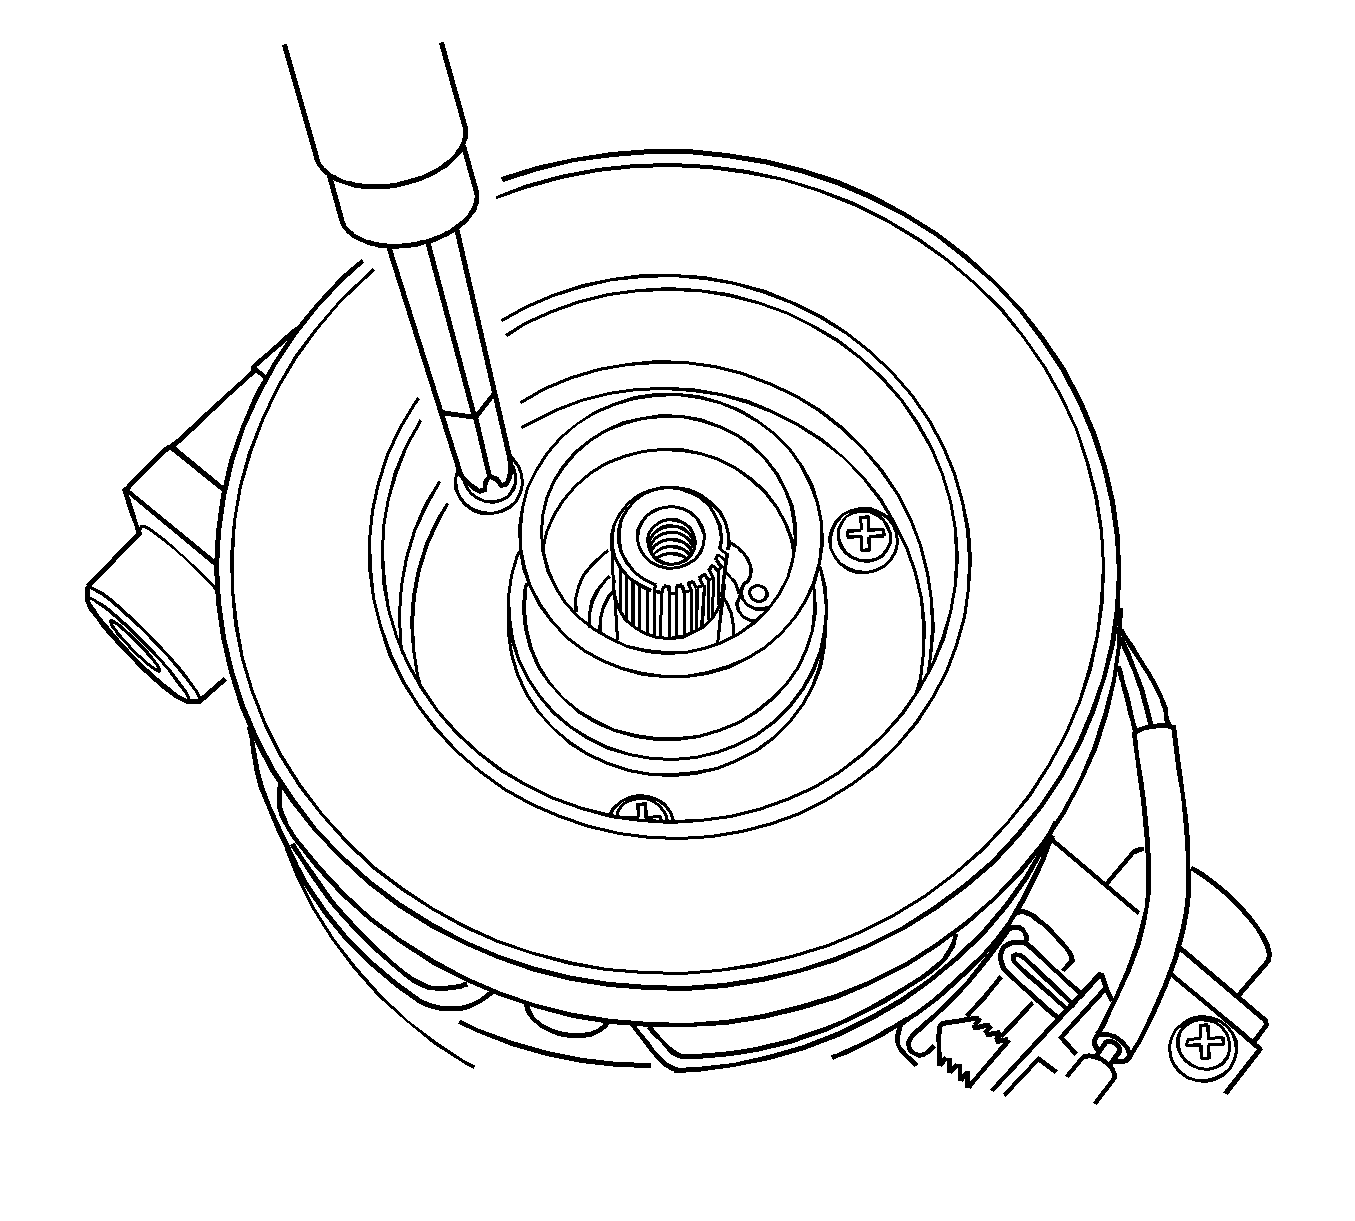
- Remove the snap ring from the compressor pulley.
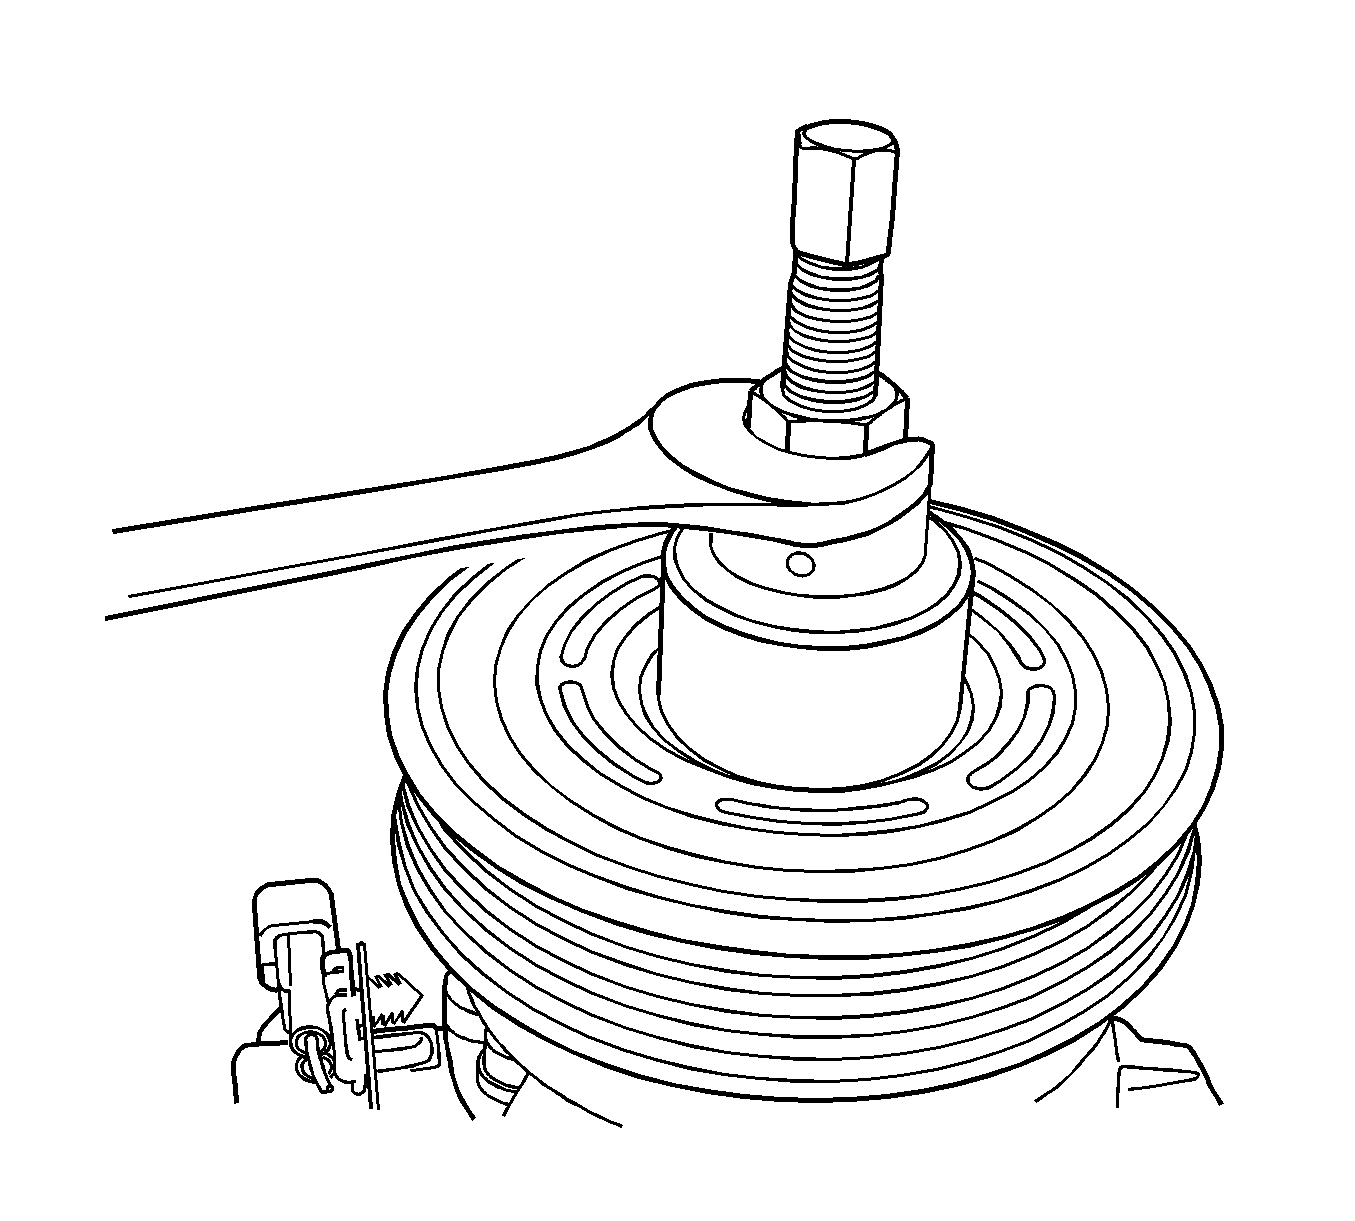
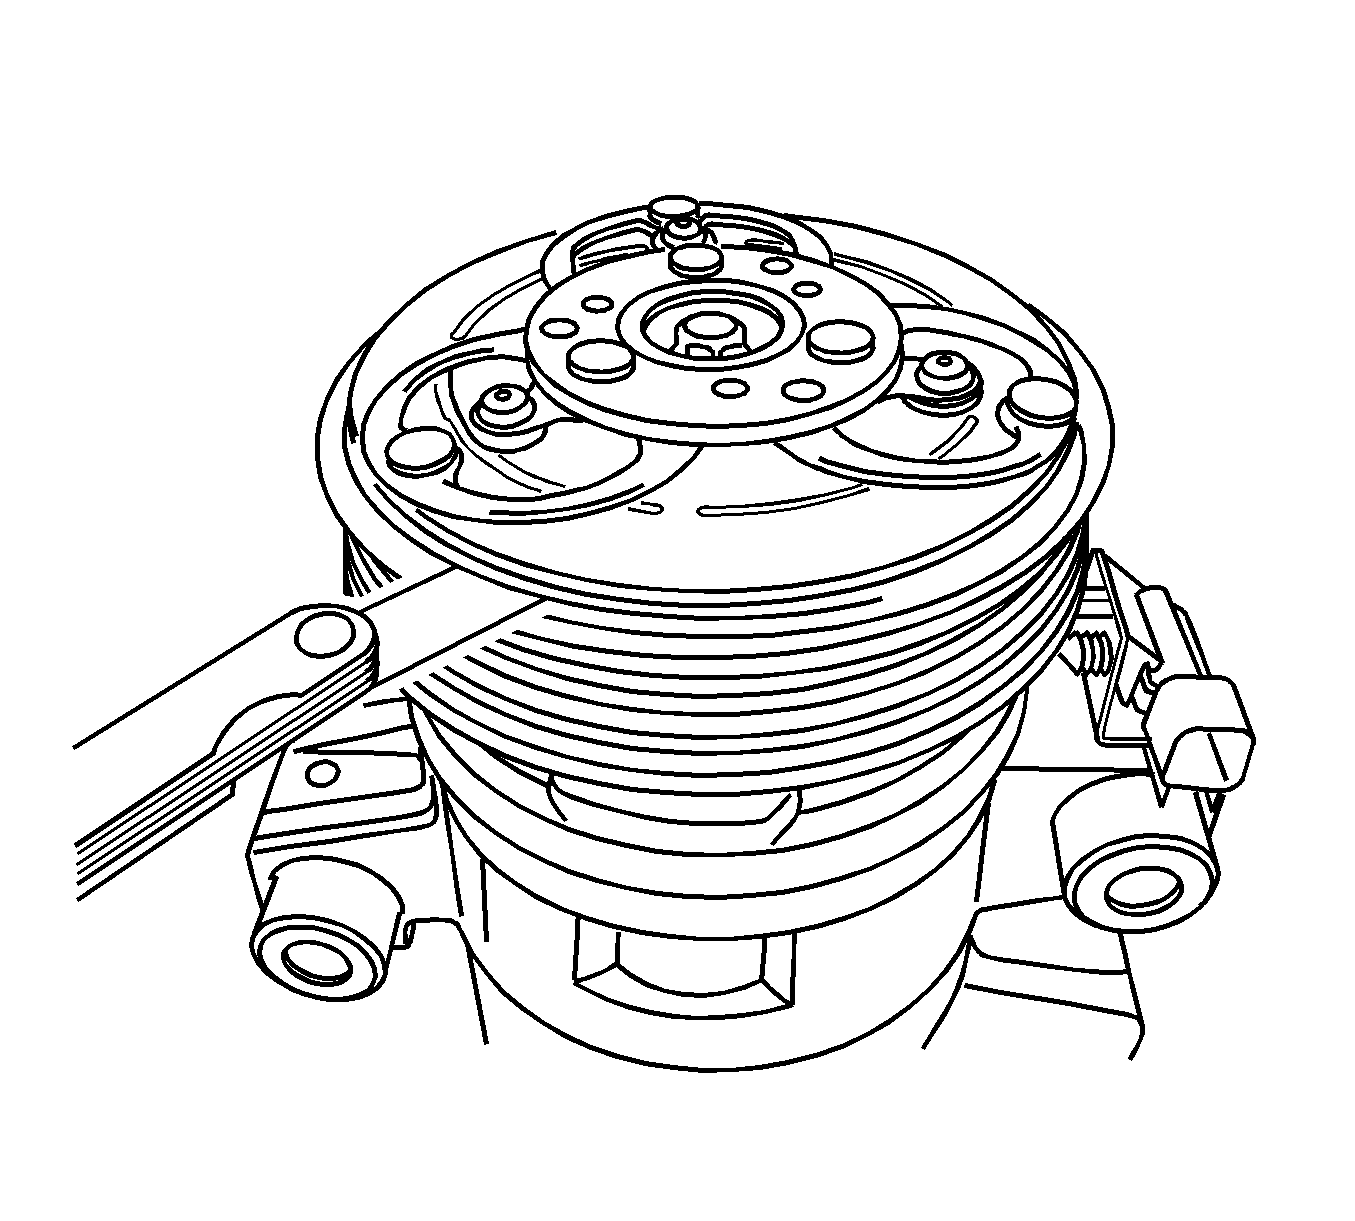
- Using GE-47850 with J 25031-A , remove the compressor pulley from the compressor.
- Remove the clutch field coil connector bracket screw from the compressor.
- Remove the clutch field coil screws from the compressor.
- Remove the clutch field coil from the compressor.
Installation Procedure
- Clean the clutch field coil and the pulley mounting surfaces.
- Install the clutch field coil to the compressor.
- Install the clutch field coil screws to the compressor.
- Install the clutch field coil connector bracket screw to the compressor.
- Using GE-47851 , install the compressor pulley to the compressor.
- Install the snap ring to the compressor pulley.
- Install the compressor clutch shims to the compressor shaft.
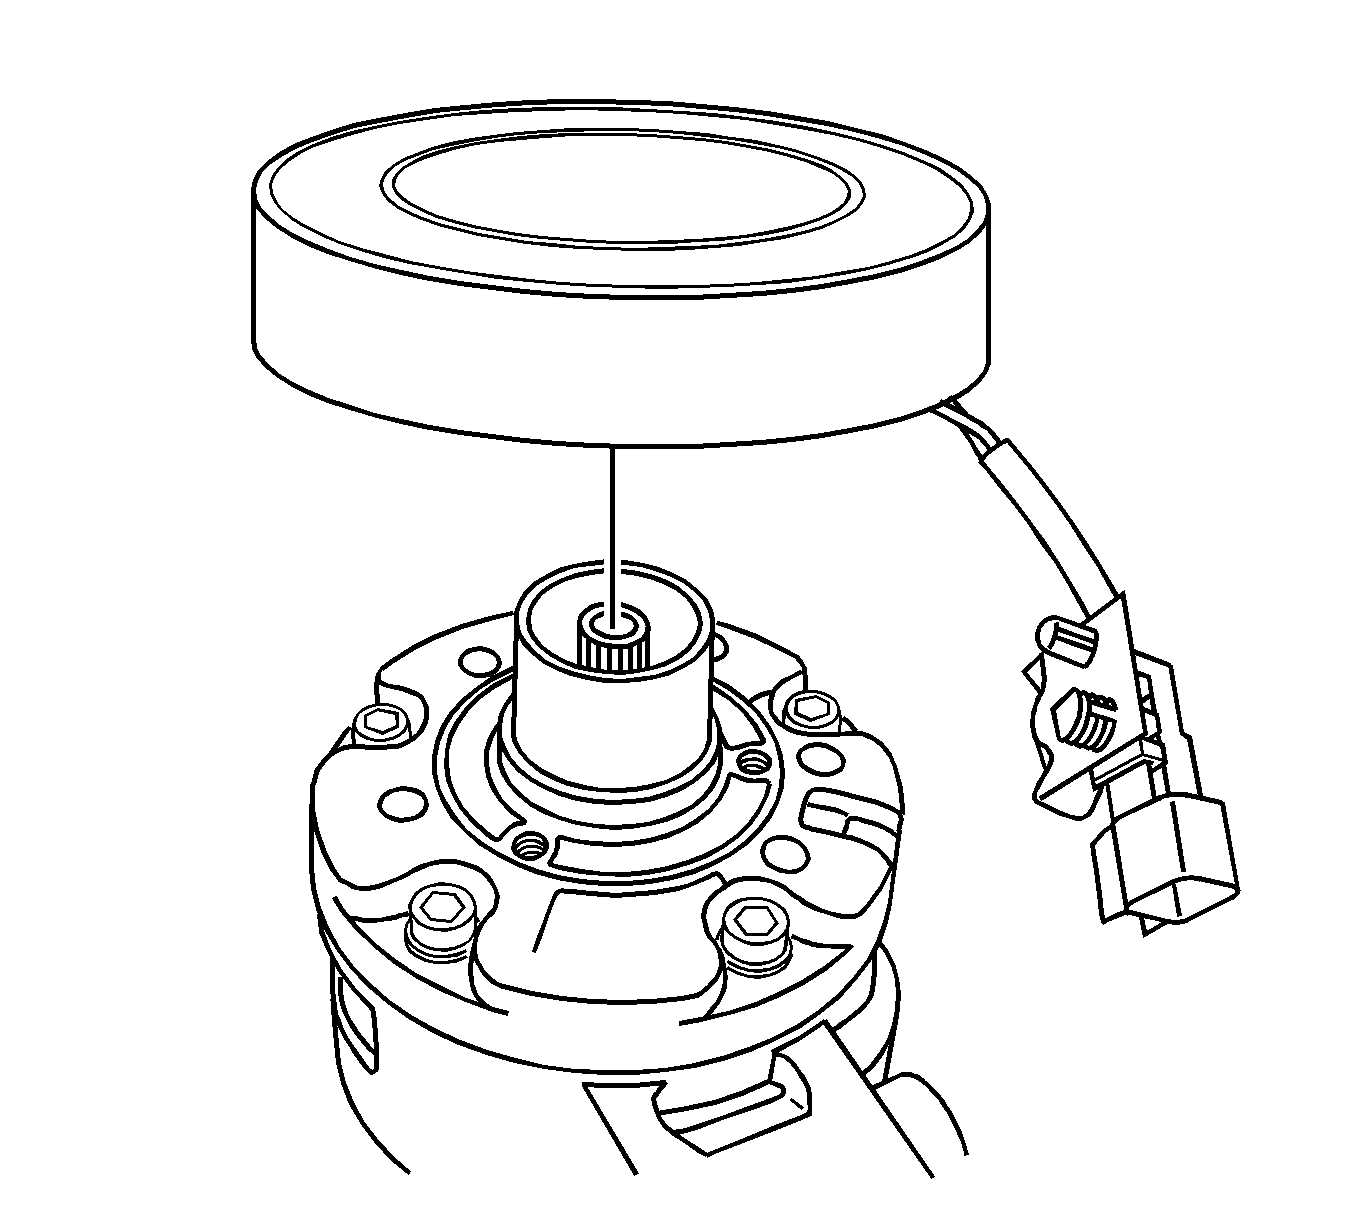
- Align the compressor clutch with the compressor shaft and install to the compressor.
- Using GE-47851 , install the compressor clutch to the compressor.
- Using a feeler gauge, check the clearance between the compressor clutch and the compressor pulley. Ensure the clearance is 0.3 mm to 0.6 mm (0.012 in to 0.024 in).
- Once the correct air gap is obtained, install the new clutch bolt.
- Using J 37872 to hold the compressor clutch, tighten the clutch bolt.
- After the clutch bolt is installed, verify that the compressor pulley spins freely.
- Install the compressor to the vehicle. Refer to Air Conditioning Compressor Replacement .
Notice: Use the correct fastener in the correct location. Replacement fasteners must be the correct part number for that application. Fasteners requiring replacement or fasteners requiring the use of thread locking compound or sealant are identified in the service procedure. Do not use paints, lubricants, or corrosion inhibitors on fasteners or fastener joint surfaces unless specified. These coatings affect fastener torque and joint clamping force and may damage the fastener. Use the correct tightening sequence and specifications when installing fasteners in order to avoid damage to parts and systems.
Tighten
Tighten the screws to 4.9 N·m (43 lb in).
Tighten
Tighten the screws to 4.3 N·m (38 lb in).
Important: Ensure that the compressor pulley snap ring is installed with the rounded edge face up.
Tighten
Tighten the bolt to 21 N·m (16 lb ft).
