For 1990-2009 cars only
Front Wheel Drive Shaft Replacement AWD
Tools Required
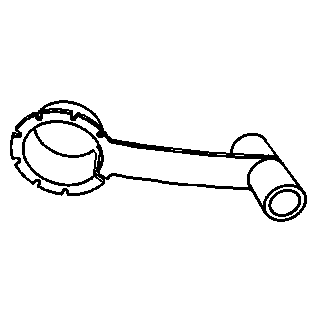
| • | J 21579 |
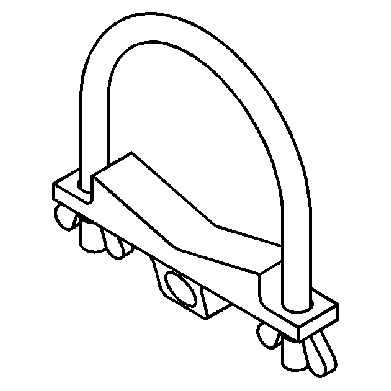
| • | J 44394 |
| • | J 45341 |
Removal Procedure
- Raise and support the vehicle. Refer to Lifting and Jacking the Vehicle .
- Remove the front tire and wheel. Refer to Tire and Wheel Removal and Installation .
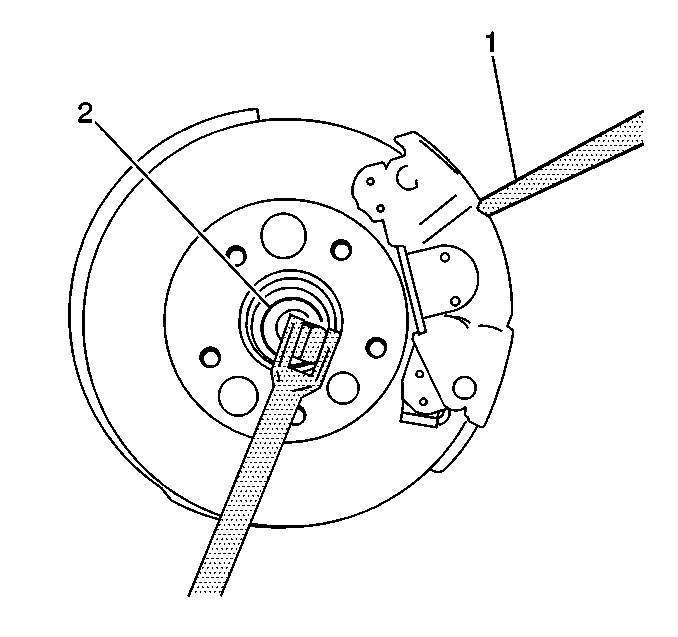
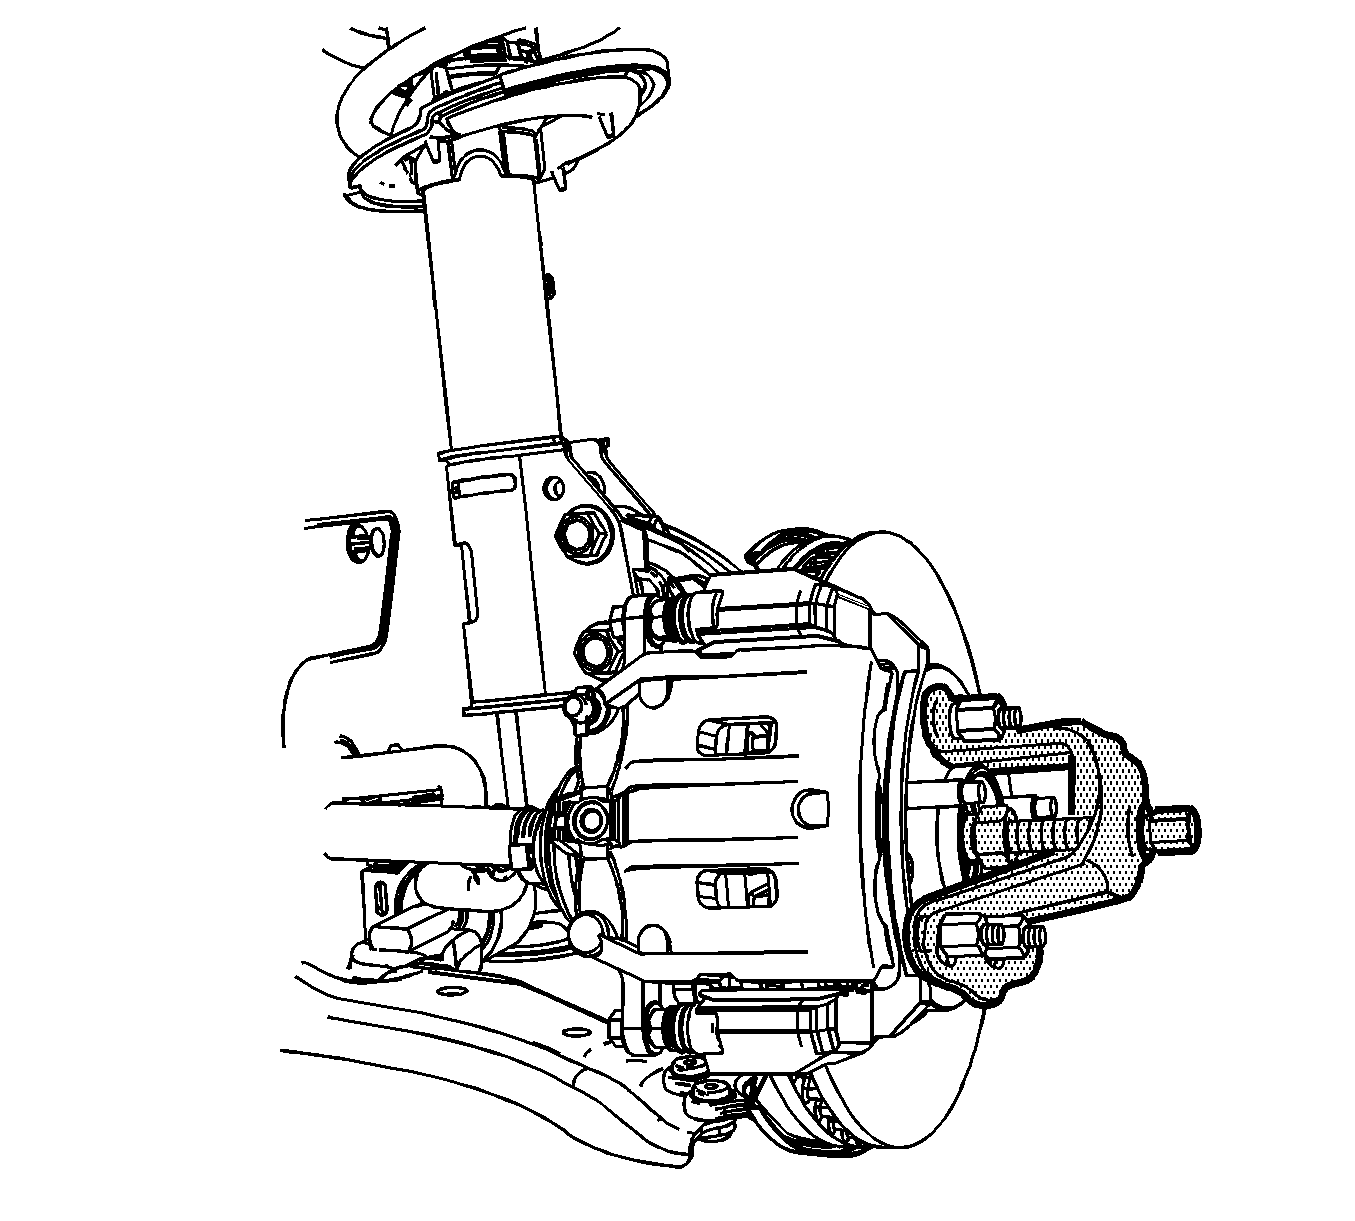
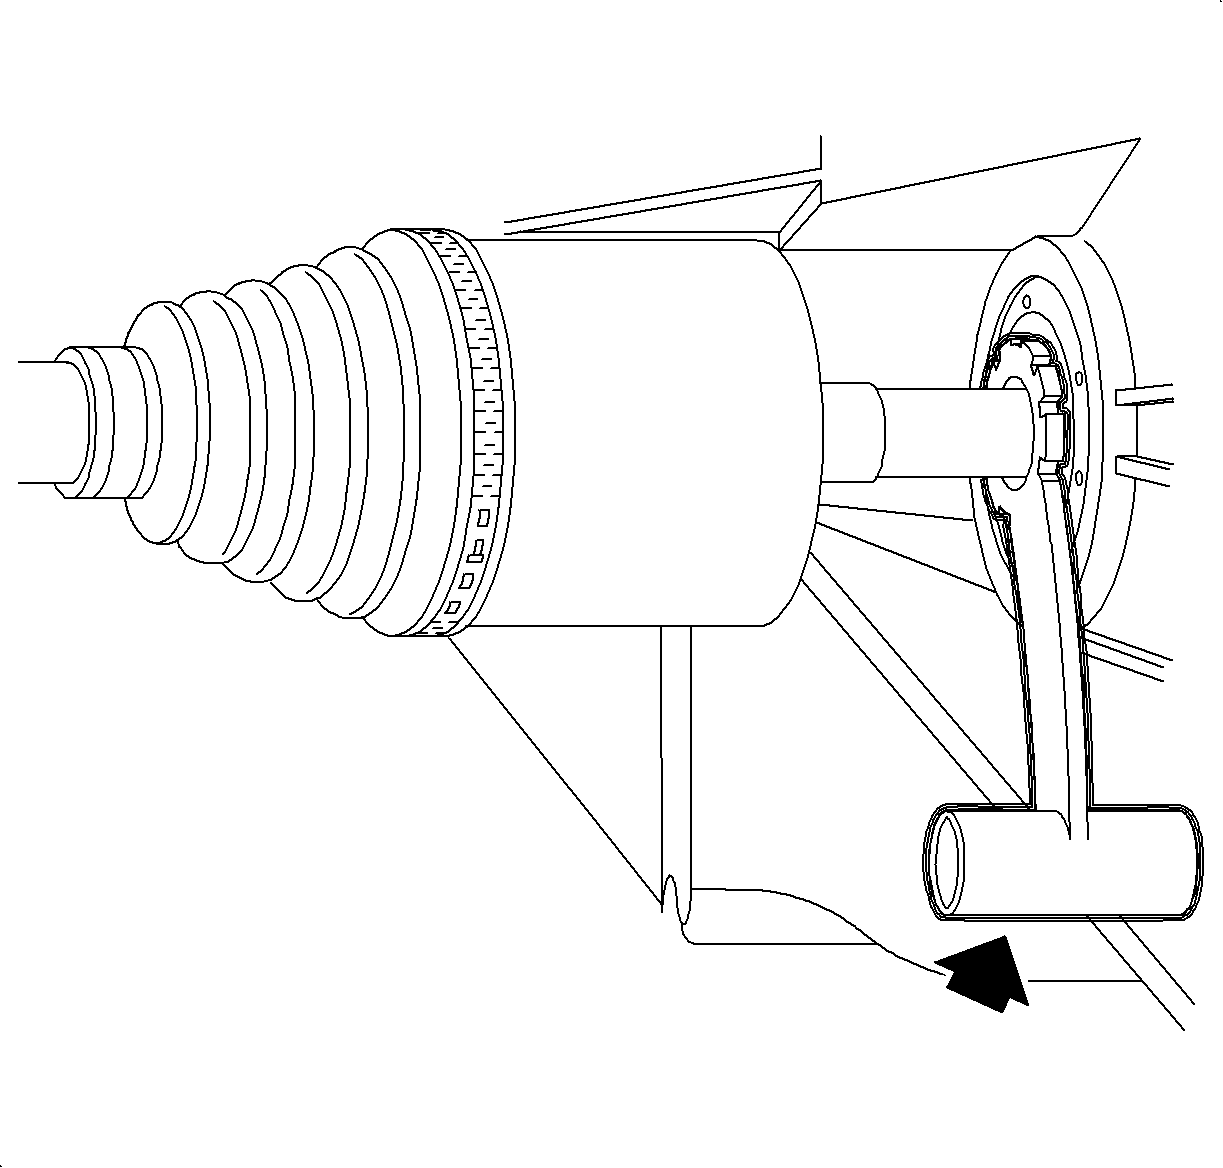
- Insert a brass drift or equivalent in the brake rotor cooling fins and the brake caliper mounting bracket to prevent the wheel drive shaft from turning.
- Remove the wheel drive shaft nut.
- Remove the outer tie rod end from the steering knuckle. Refer to Rack and Pinion Outer Tie Rod End Replacement .
- Remove the stabilizer shaft link from the stabilizer shaft. Refer to Stabilizer Shaft Link Replacement .
- Using the J 21579 , remove the wheel drive shaft from the wheel bearing/hub.
- Remove the J 21579 from the steering knuckle.
- Remove the lower ball joint from the steering knuckle. Refer to Lower Control Arm Ball Joint Replacement .
- Assemble the J 45341 and the J 2619-01 .
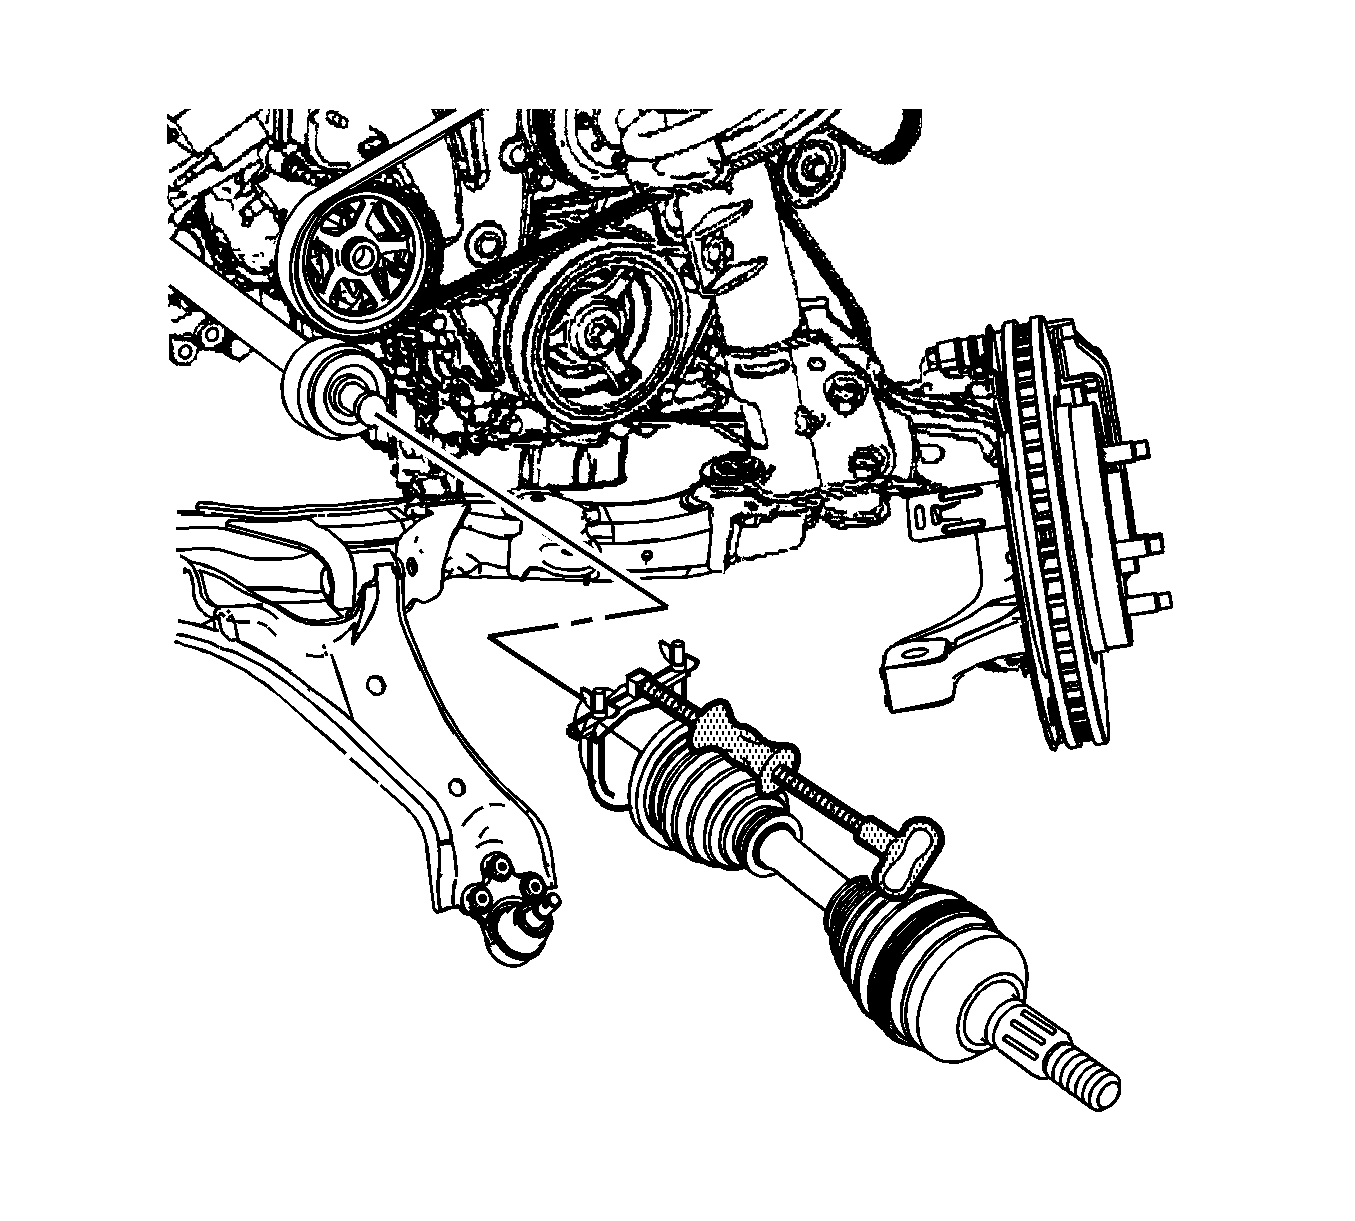
- Remove the wheel drive shaft from the vehicle.
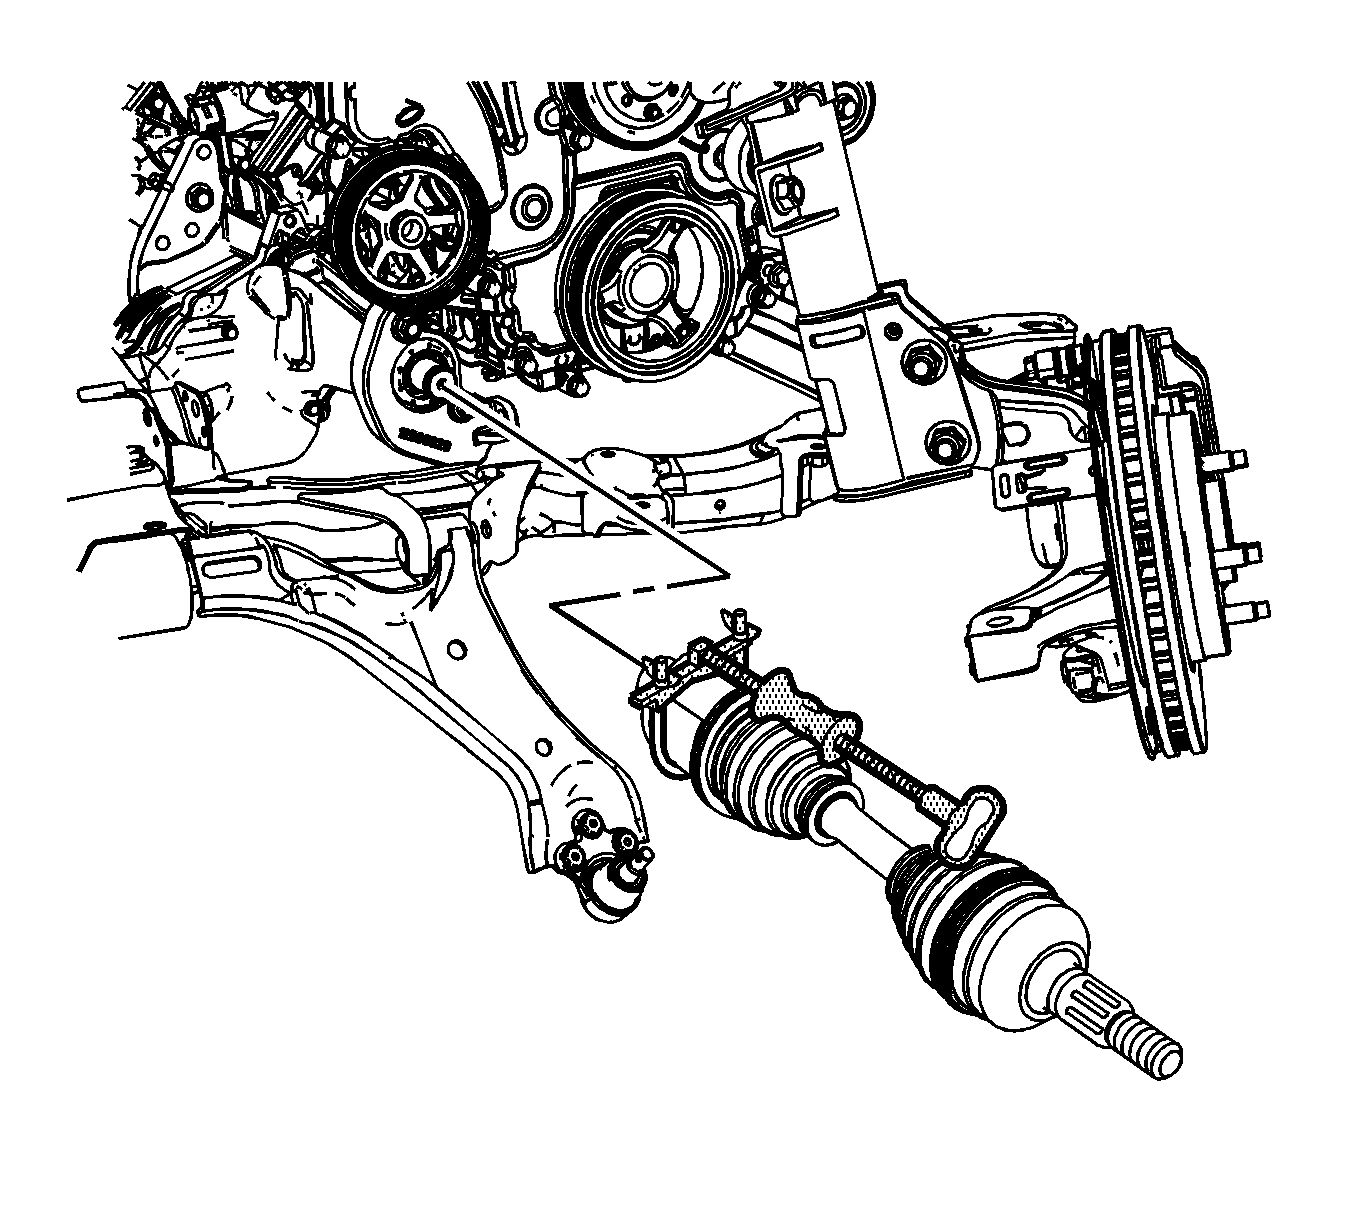
Important: It may be necessary to cap the transmission or transfer case, if equipped to prevent fluid loss.
Important: Use care not to damage the wheel drive shaft seal inner or outer boot seals on removal.
Installation Procedure
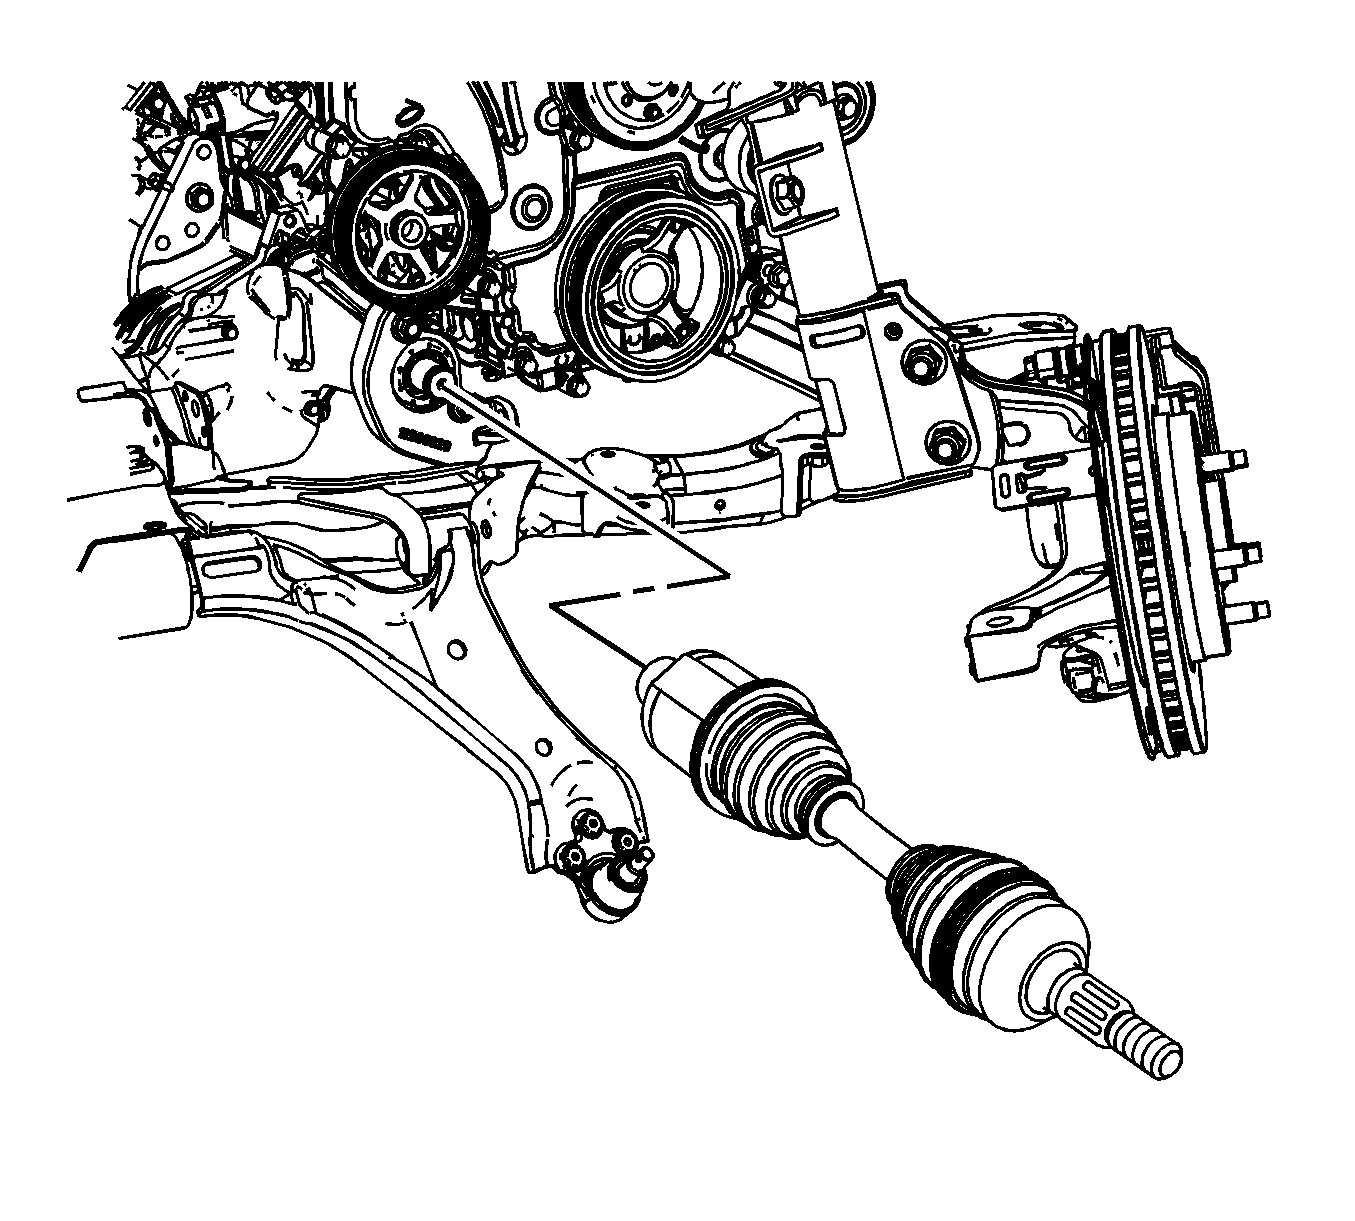
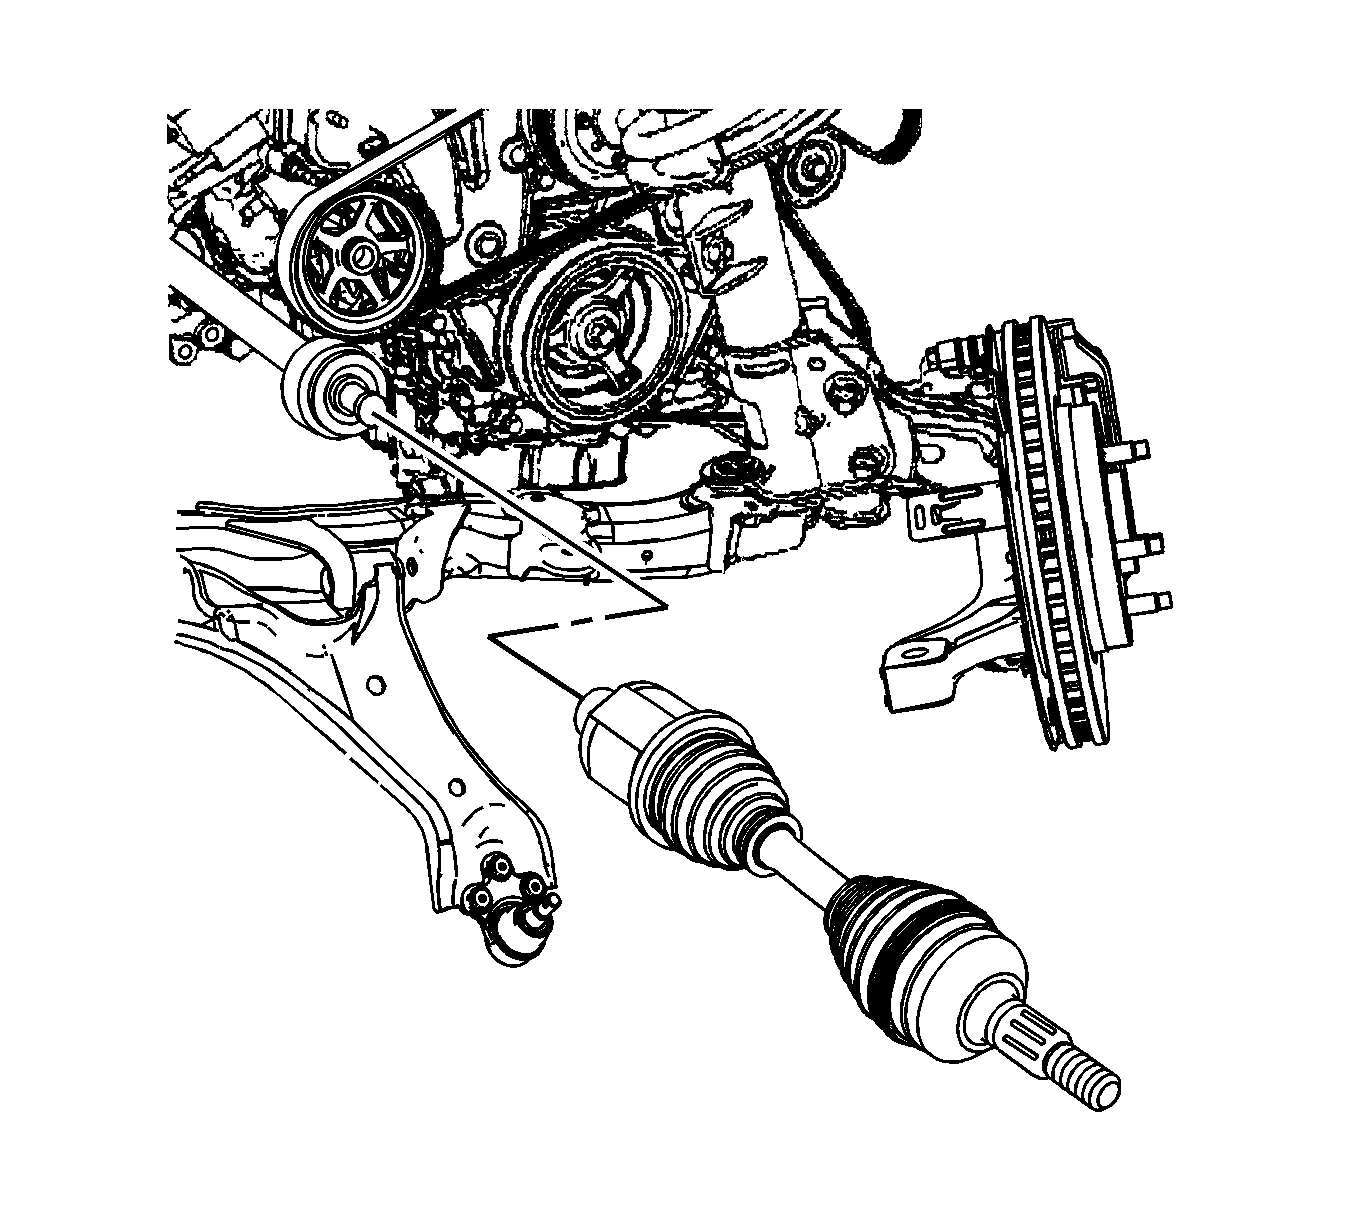
- Position the J 44394 on the wheel drive shaft.
- Install the wheel drive shaft in the transfer case.
- Remove the J 44394 from the wheel drive shaft.
- Ensure that the wheel drive shaft is properly seated by moving the wheel drive shaft back and forth or in and out. A click should be heard and felt as the wheel drive shaft hits the retaining clip.
- Install the wheel drive shaft in the wheel bearing/hub and finger tighten.
- Install the lower ball joint in the steering knuckle. Refer to Rack and Pinion Outer Tie Rod End Replacement .
- Install the stabilizer shaft link in the stabilizer shaft. Refer to Stabilizer Shaft Link Replacement .
- Insert a brass drift or equivalent in the brake rotor cooling fins and the brake caliper mounting bracket to prevent the wheel drive shaft from turning while torquing the nut.
- Tighten the wheel drive shaft nut
- Install the tire and wheel. Refer to Tire and Wheel Removal and Installation .
- Remove the support and lower the vehicle.
Caution: Refer to Fastener Notice in the Preface section.
Tighten
Tighten the nut to 205 N·m (151 lb ft).
Front Wheel Drive Shaft Replacement FWD
Tools Required
| • | J 21579 |
| • | J 44394 |
| • | J 45341 |
Removal Procedure
- Raise and support the vehicle. Refer to Lifting and Jacking the Vehicle .
- Remove the front tire and wheel assembly. Refer to Tire and Wheel Removal and Installation .
- Insert a brass drift or equivalent in the brake rotor cooing fins and the brake caliper mounting bracket to prevent the wheel drive shaft from turning.
- Remove the wheel drive shaft nut.
- Remove the outer tie rod end from the steering knuckle. Refer to Rack and Pinion Outer Tie Rod End Replacement .
- Remove the stabilizer shaft link from the stabilizer shaft. Refer to Stabilizer Shaft Link Replacement .
- Using the J 21579 , remove the wheel drive shaft from the wheel bearing/hub.
- Remove the J 21579 from the steering knuckle.
- Remove the lower ball joint from the steering knuckle. Refer to Lower Control Arm Ball Joint Replacement .
- Assemble the J 45341 and the J 2619-01 .
- Wrap the wheel drive shaft inner and outer boot seals in shop towels. This will help protect the seals during the removal an installation process.
- Remove the wheel drive shaft from the vehicle.
Important: Use care not to damage the wheel drive shaft inner and outer boot seals on removal.
Installation Procedure
- Position the J 44394 on the wheel drive shaft.
- Install the wheel drive shaft into the transfer case.
- Remove the J 44394 from the wheel drive shaft
- Ensure that the wheel drive shaft is properly seated by moving the wheel drive shaft back and forth or in and out. A click should be heard and felt as the wheel drive shaft hits the retaining clip.
- Install the wheel drive shaft in the wheel bearing/hub and finger tighten the nut.
- Install the lower ball joint in the steering knuckle. Refer to Rack and Pinion Outer Tie Rod End Replacement .
- Install the stabilizer shaft link in the stabilizer shaft. Refer to Stabilizer Shaft Link Replacement .
- Insert a brass drift or equivalent in the brake rotor cooing fins and the brake caliper mounting bracket to prevent the wheel drive shaft from turning while torquing the nut.
- Tighten the wheel drive shaft nut.
- Install the tire and wheel assembly. Refer to Tire and Wheel Removal and Installation
- Remove the support and lower the vehicle.
Notice: Refer to Fastener Notice in the Preface section.
Tighten
Tighten the wheel drive shaft nut to 205 N·m (151 lb ft).
