For 1990-2009 cars only
Removal Procedure
- Raise and support the vehicle. Refer to Lifting and Jacking the Vehicle .
- Remove the front tire and wheel. Refer to Tire and Wheel Removal and Installation .
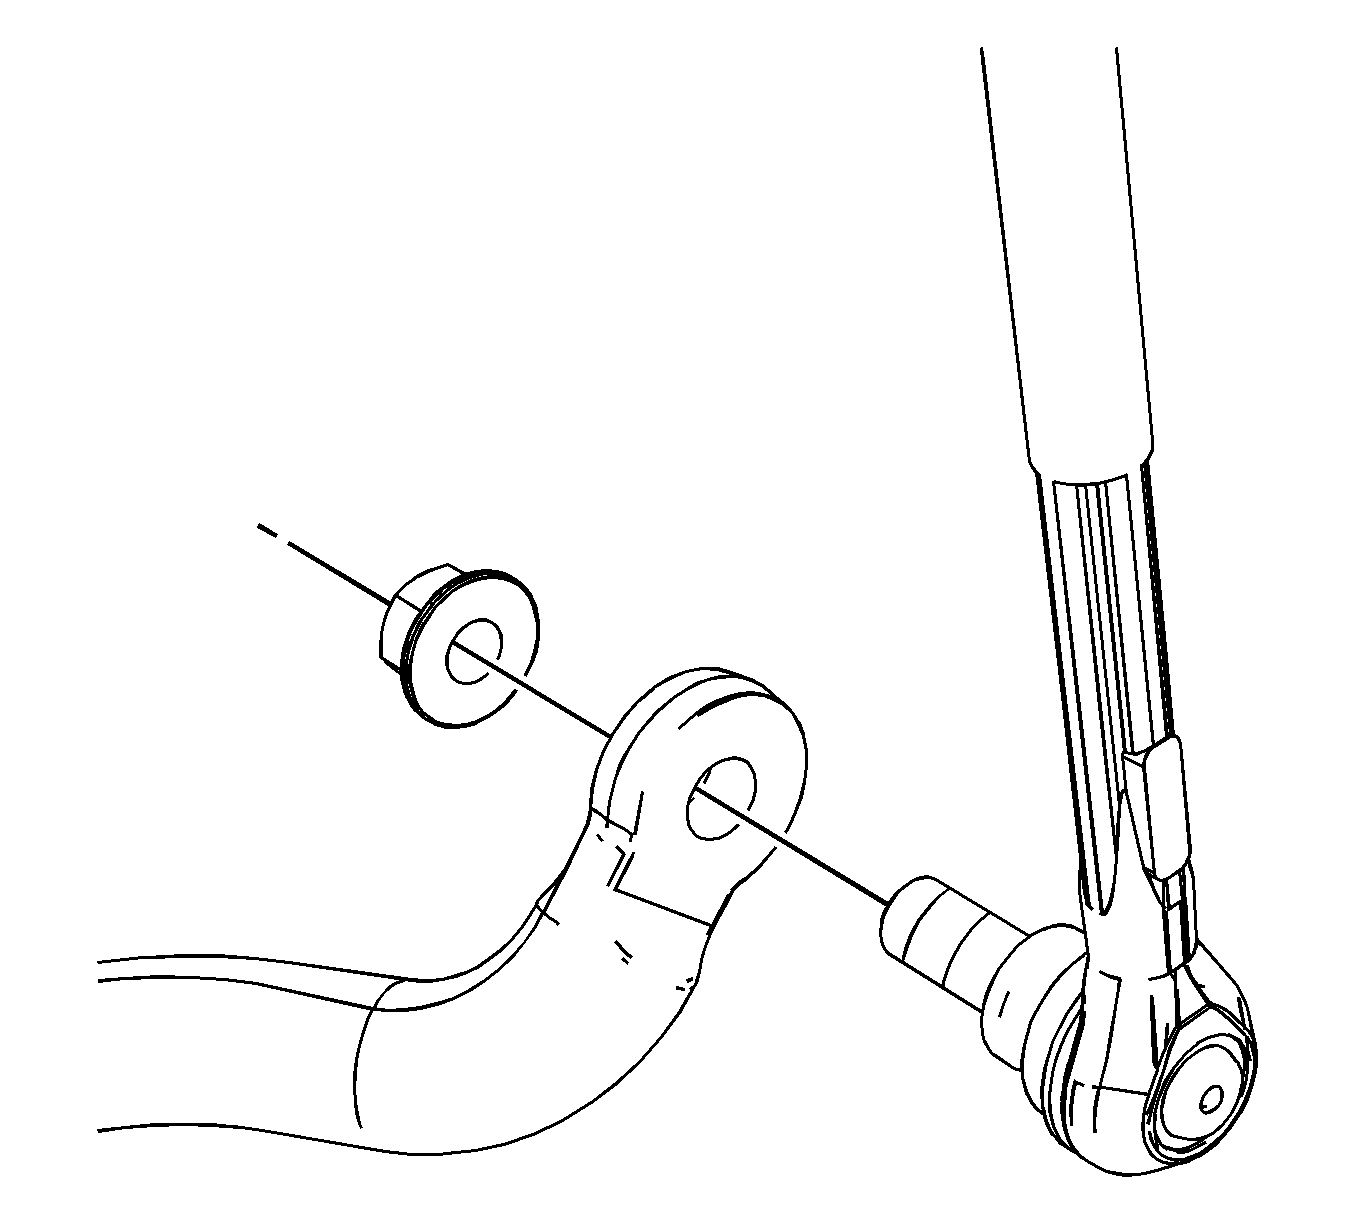
- Remove the stabilizer shaft links. Refer to Stabilizer Shaft Link Replacement .
- Remove the outer tie rod ends from the knuckle. Refer to Rack and Pinion Outer Tie Rod End Replacement .
- Rotate the left and right knuckle all the way forward.
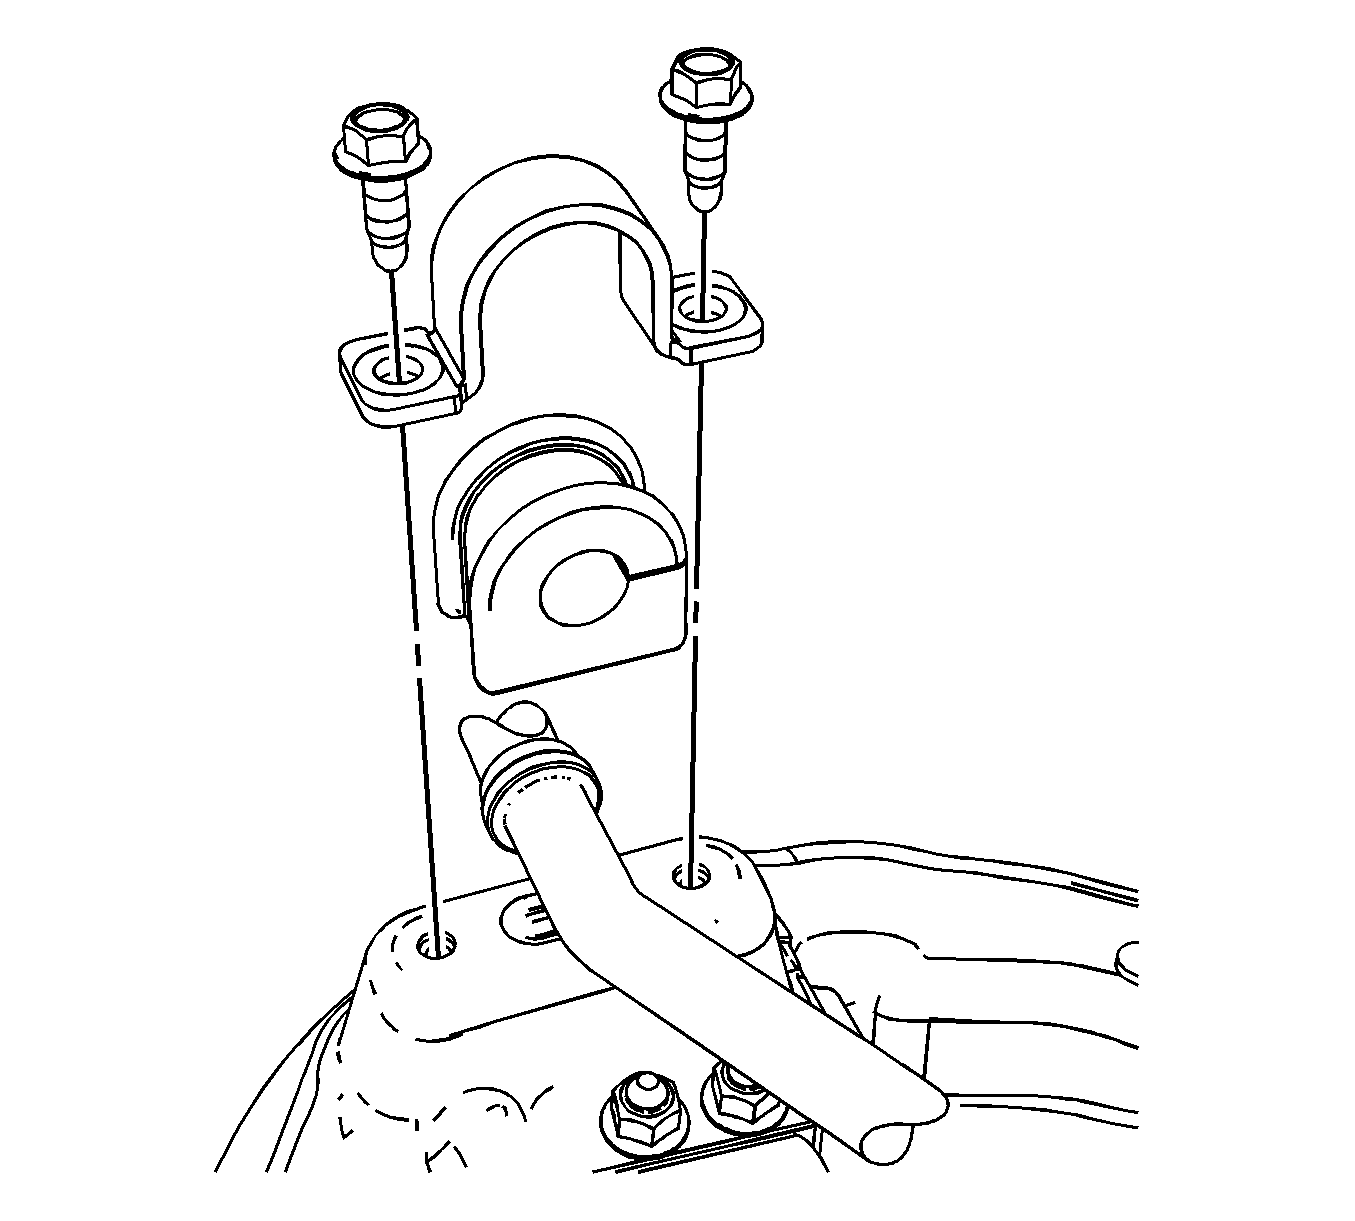
- Remove the stabilizer shaft clamp bolts.
- Remove the stabilizer shaft clamp and bushings.
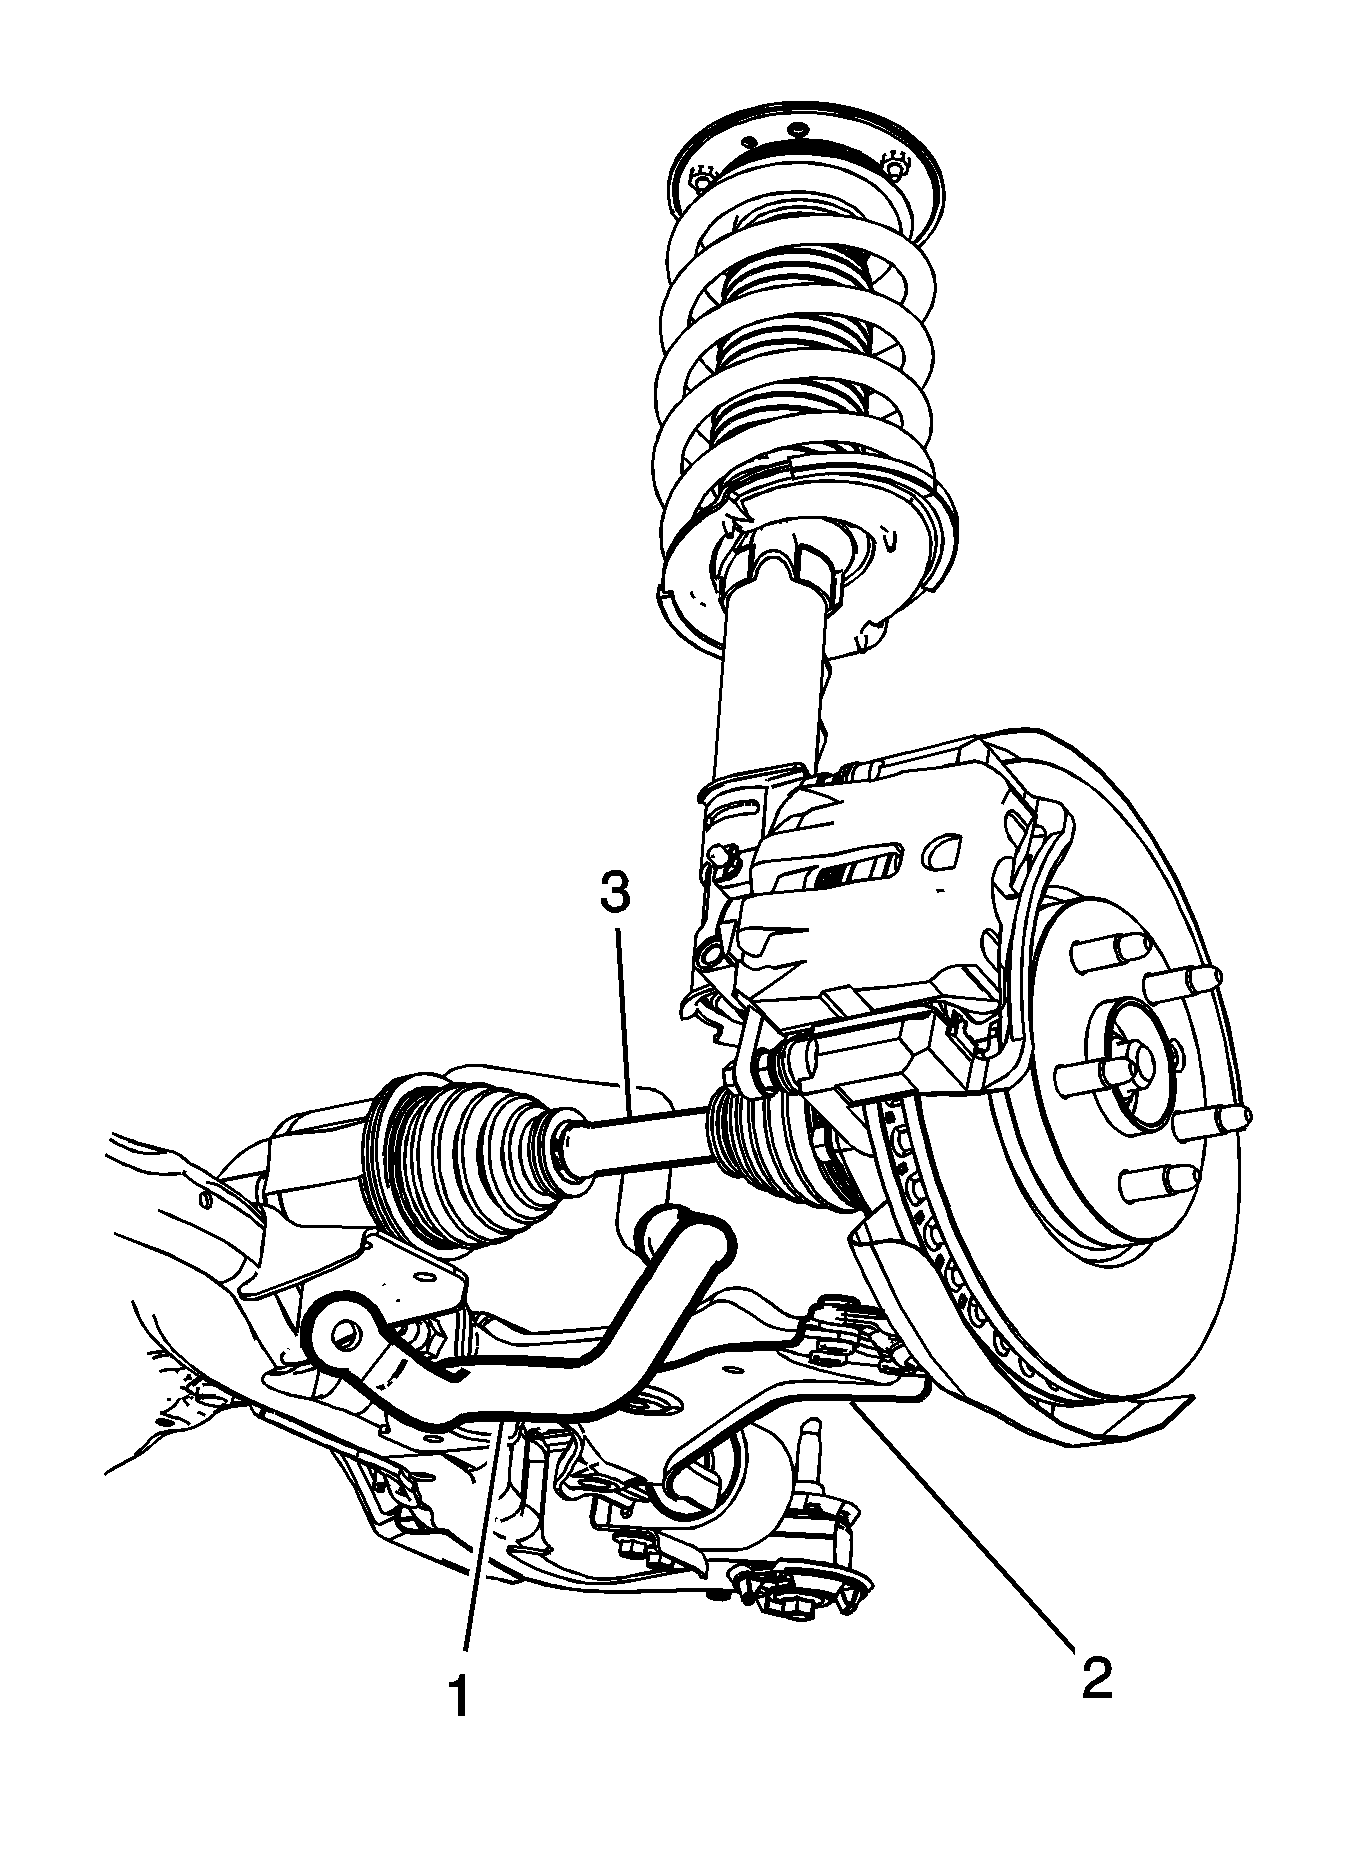
- Maneuver the stabilizer shaft (1) so that it is positioned between the wheel drive shaft (3) and the front lower control arm (2).
- Remove the stabilizer shaft from the vehicle through the left wheel opening.


Important: Take care as not to catch the transmission shift cable or the left wheel house plastic trim when removing the stabilizer shaft.
Important: It may be necessary to rotate the stabilizer shaft 180 degrees while removing it from the vehicle.
Installation Procedure
- Position the stabilizer shaft (1) so that it is positioned between the wheel drive shaft (3) and the front lower control arm (2).
- Maneuver the stabilizer shaft until it is properly position on the frame.
- Install the stabilizer shaft bushing and clamps.
- Install the stabilizer shaft clamp retaining bolts.
- Install the stabilizer shaft links. Refer to Stabilizer Shaft Link Replacement .
- Install the outer tie rod ends. Refer to Rack and Pinion Outer Tie Rod End Replacement .
- Install the tires and wheels. Refer to Tire and Wheel Removal and Installation .
- Remove the support.
- Lower the vehicle.

Important: Take care as not to catch the transmission shift cable or the left wheel house plastic trim when removing the stabilizer shaft.

Notice: Refer to Fastener Notice in the Preface section.
Tighten
Tighten the stabilizer shaft clamp bolts to 50 N·m (37 lb ft).

