For 1990-2009 cars only
Removal Procedure
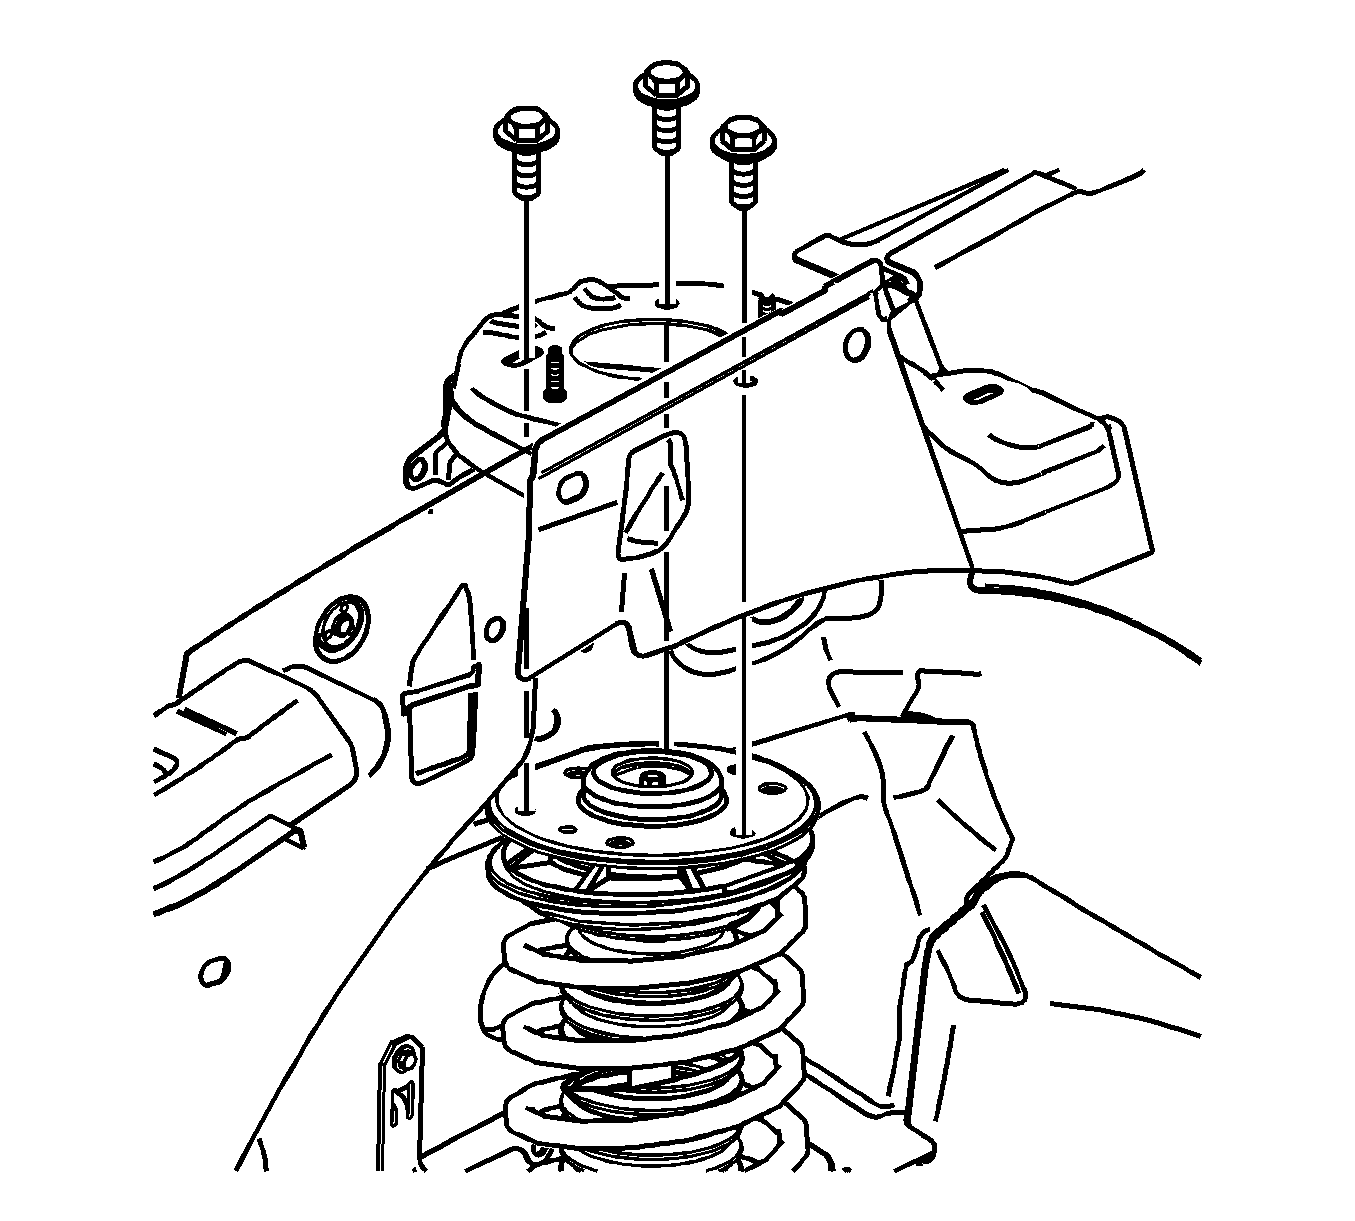
- Remove the 3 upper strut mount bolts.
- Raise and support the vehicle. Refer to Lifting and Jacking the Vehicle .
- Remove the wheel and tire assembly. Refer to Tire and Wheel Removal and Installation .
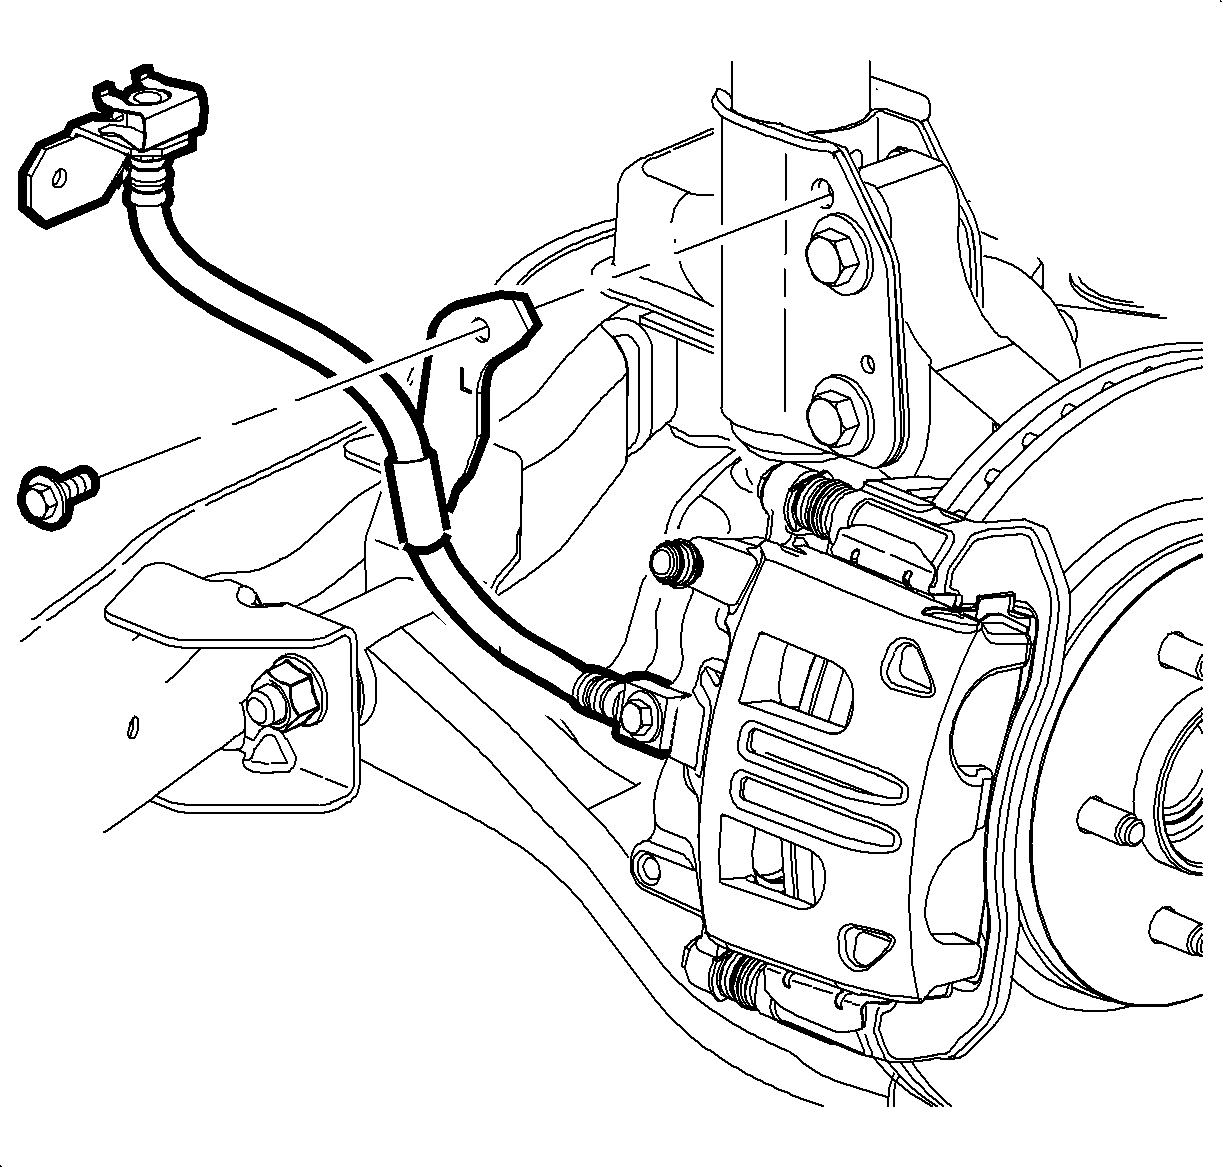
- Remove the brake hose bracket bolt from the strut assembly.
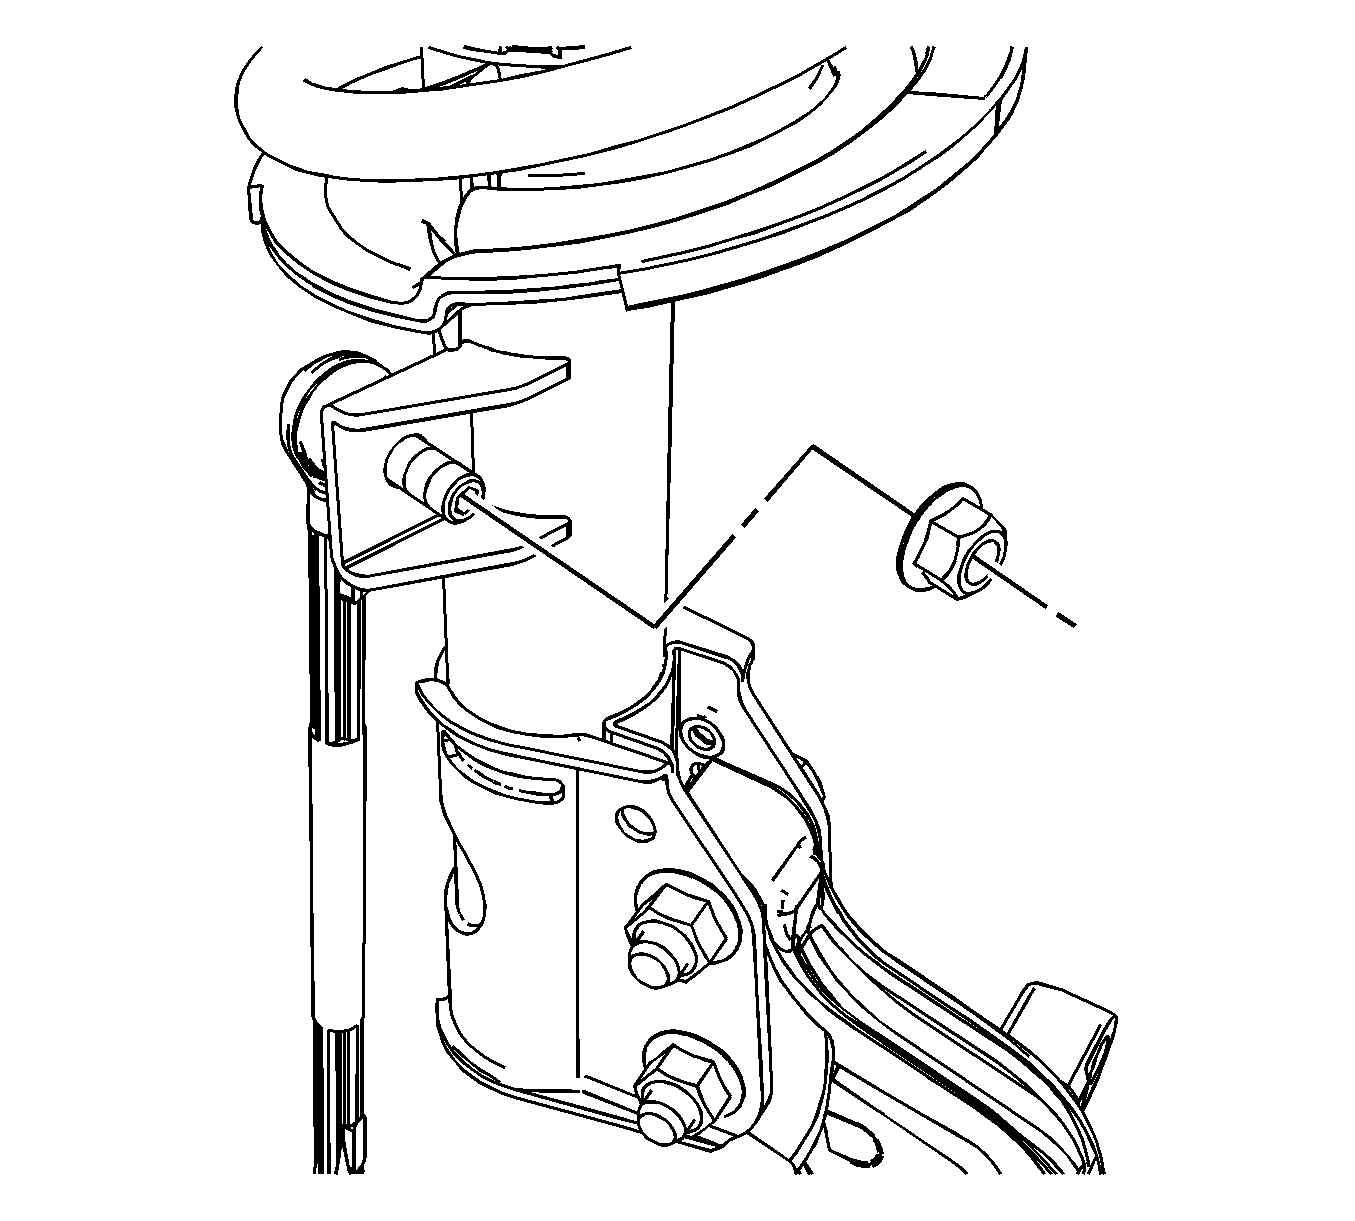
- Remove the stabilizer link nut and separate the link from the strut assembly.
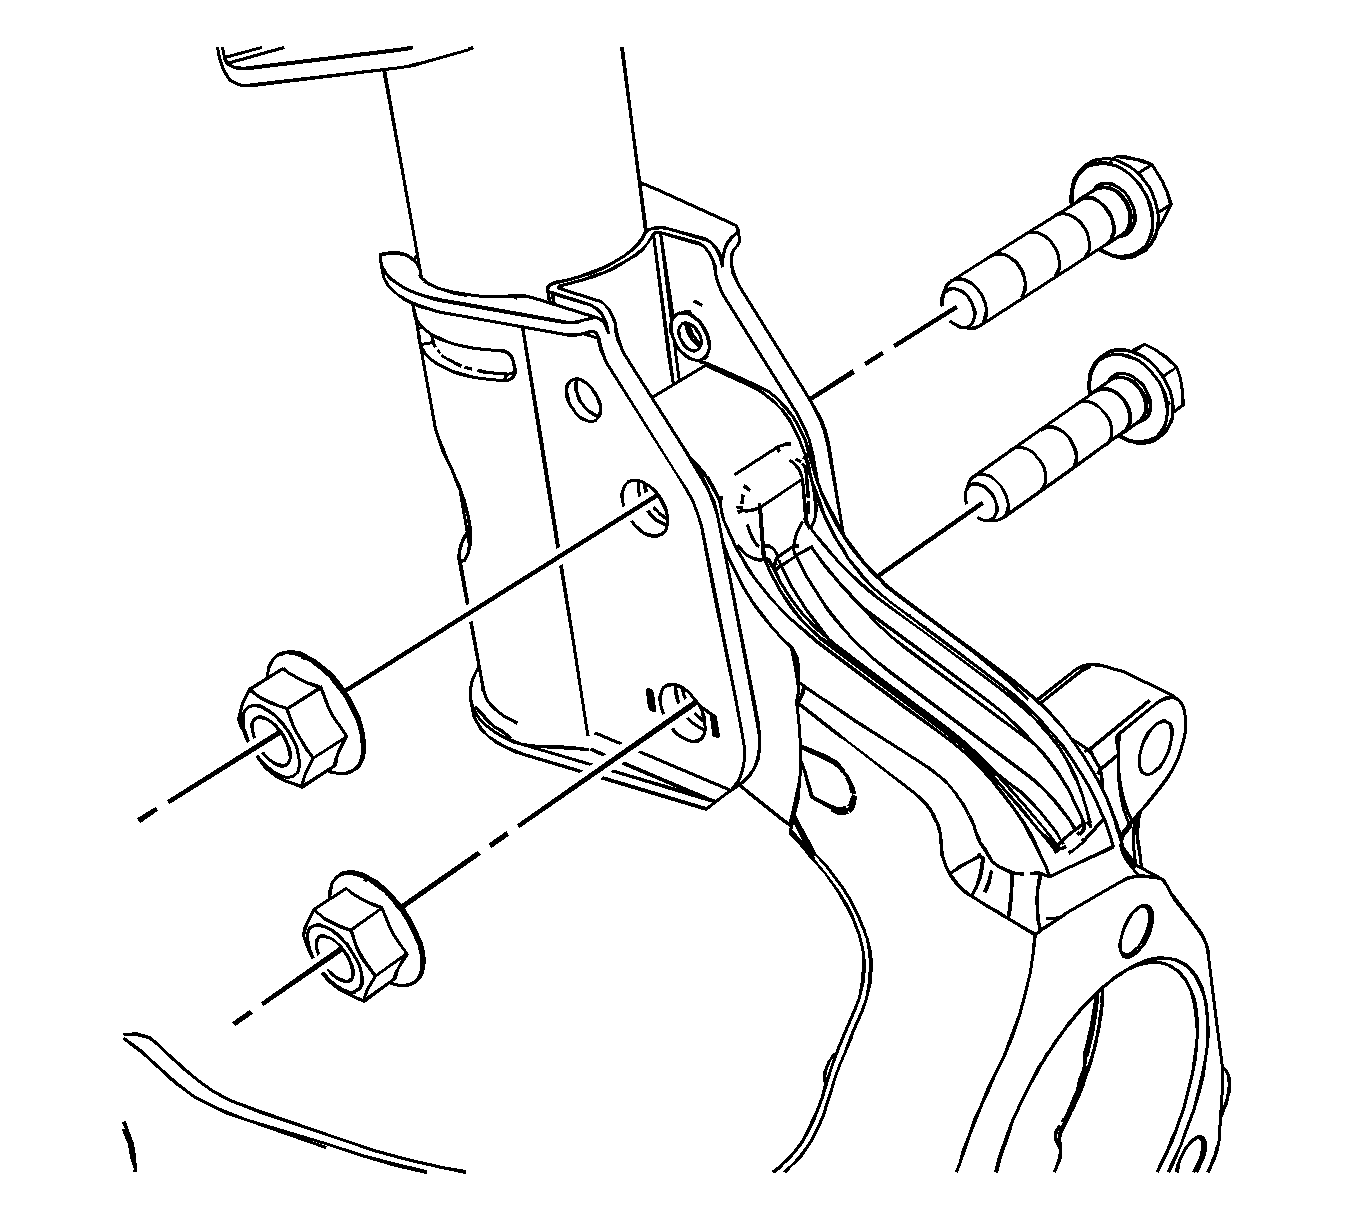
- Remove the lower strut bolts and nuts.
- Remove the strut assembly from the vehicle.
Installation Procedure
- Position the strut assembly to the vehicle.
- Install the 3 upper strut mount bolts.
- Install the lower strut bolts and nuts.
- Position the stabilizer link to the strut and install the nut.
- Position the brake hose bracket to the strut assembly and install the bolt.
- Install the wheel and tire. Refer to Tire and Wheel Removal and Installation .
- Lower the vehicle.
- Perform a wheel alignment. Refer to Wheel Alignment Measurement .
Notice: Refer to Fastener Notice in the Preface section.
Tighten
Tighten the upper strut mount bolts to 25 N·m (18 lb ft).
Tighten
Tighten the bolts and nuts to 200 N·m (148 lb ft).
Important: Inspect the stabilizer link seals for damage prior to installation. Replace as required.
Important: Do not allow the stabilizer link ball stud to rotate while installing the link nut.
Tighten
Tighten the nut to 65 N·m (48 lb ft).
Tighten
Tighten the brake bracket bolt to 15 N·m (11 lb ft).
