For 1990-2009 cars only
Special Tools
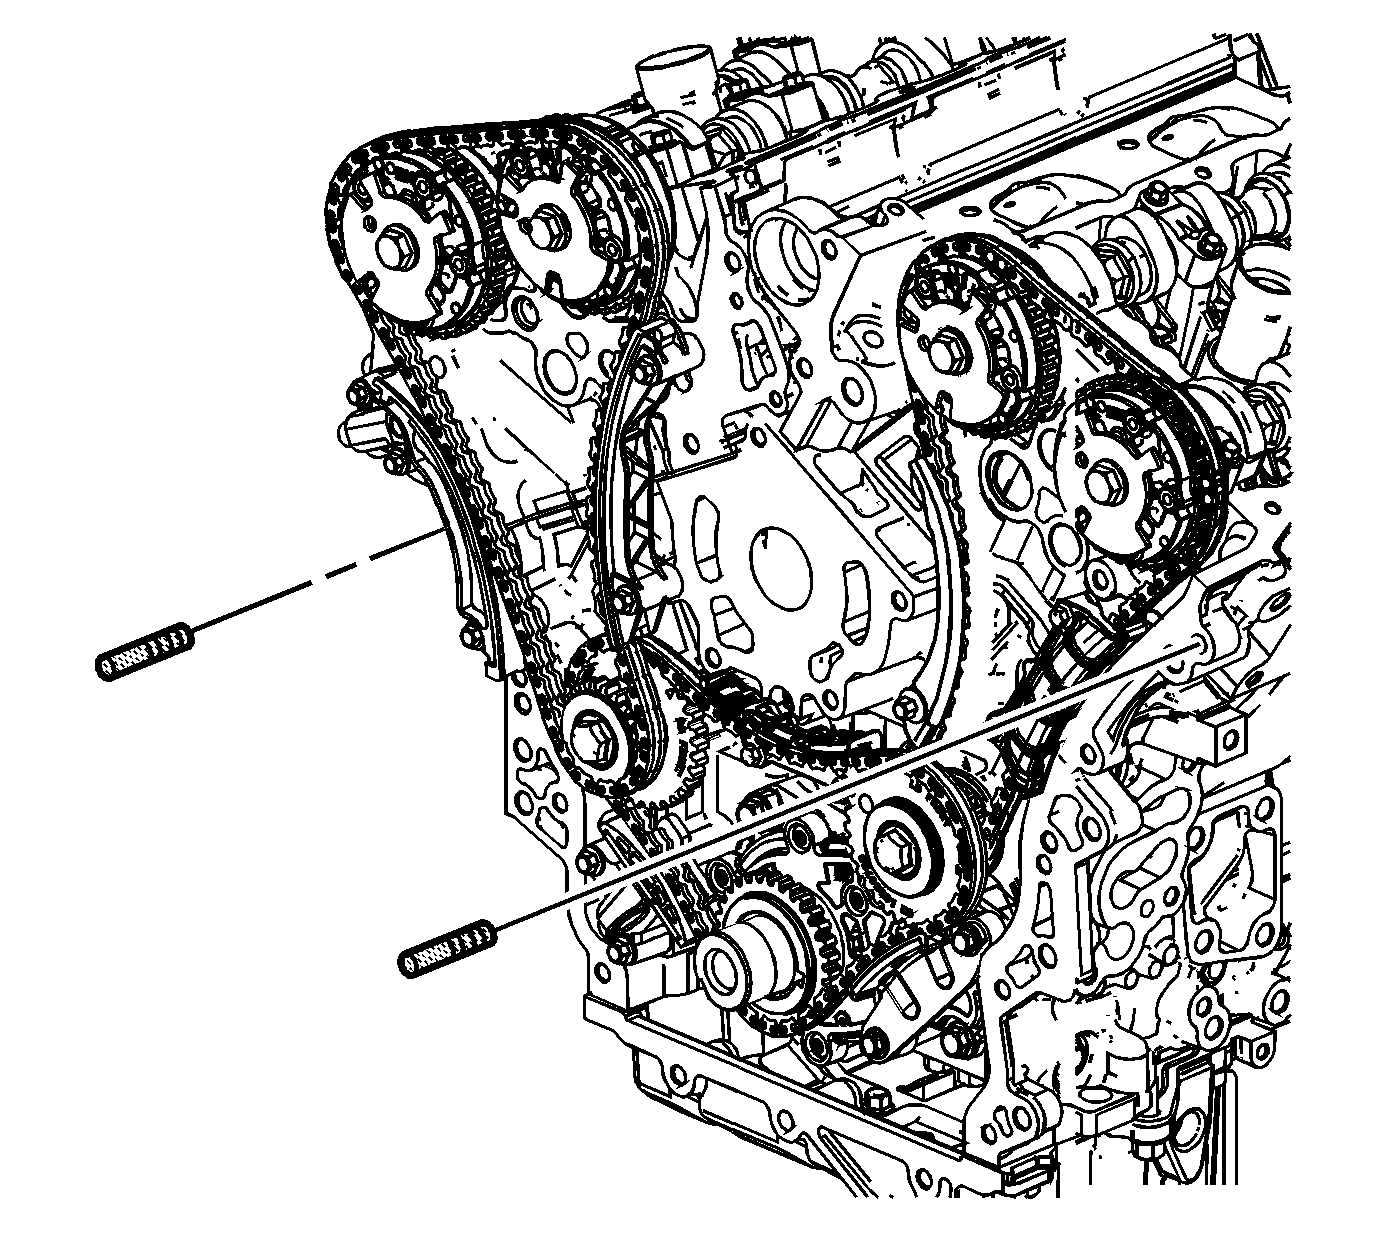
EN-46109 Guide Pins
For equivalent regional tools, refer to Special Tools.
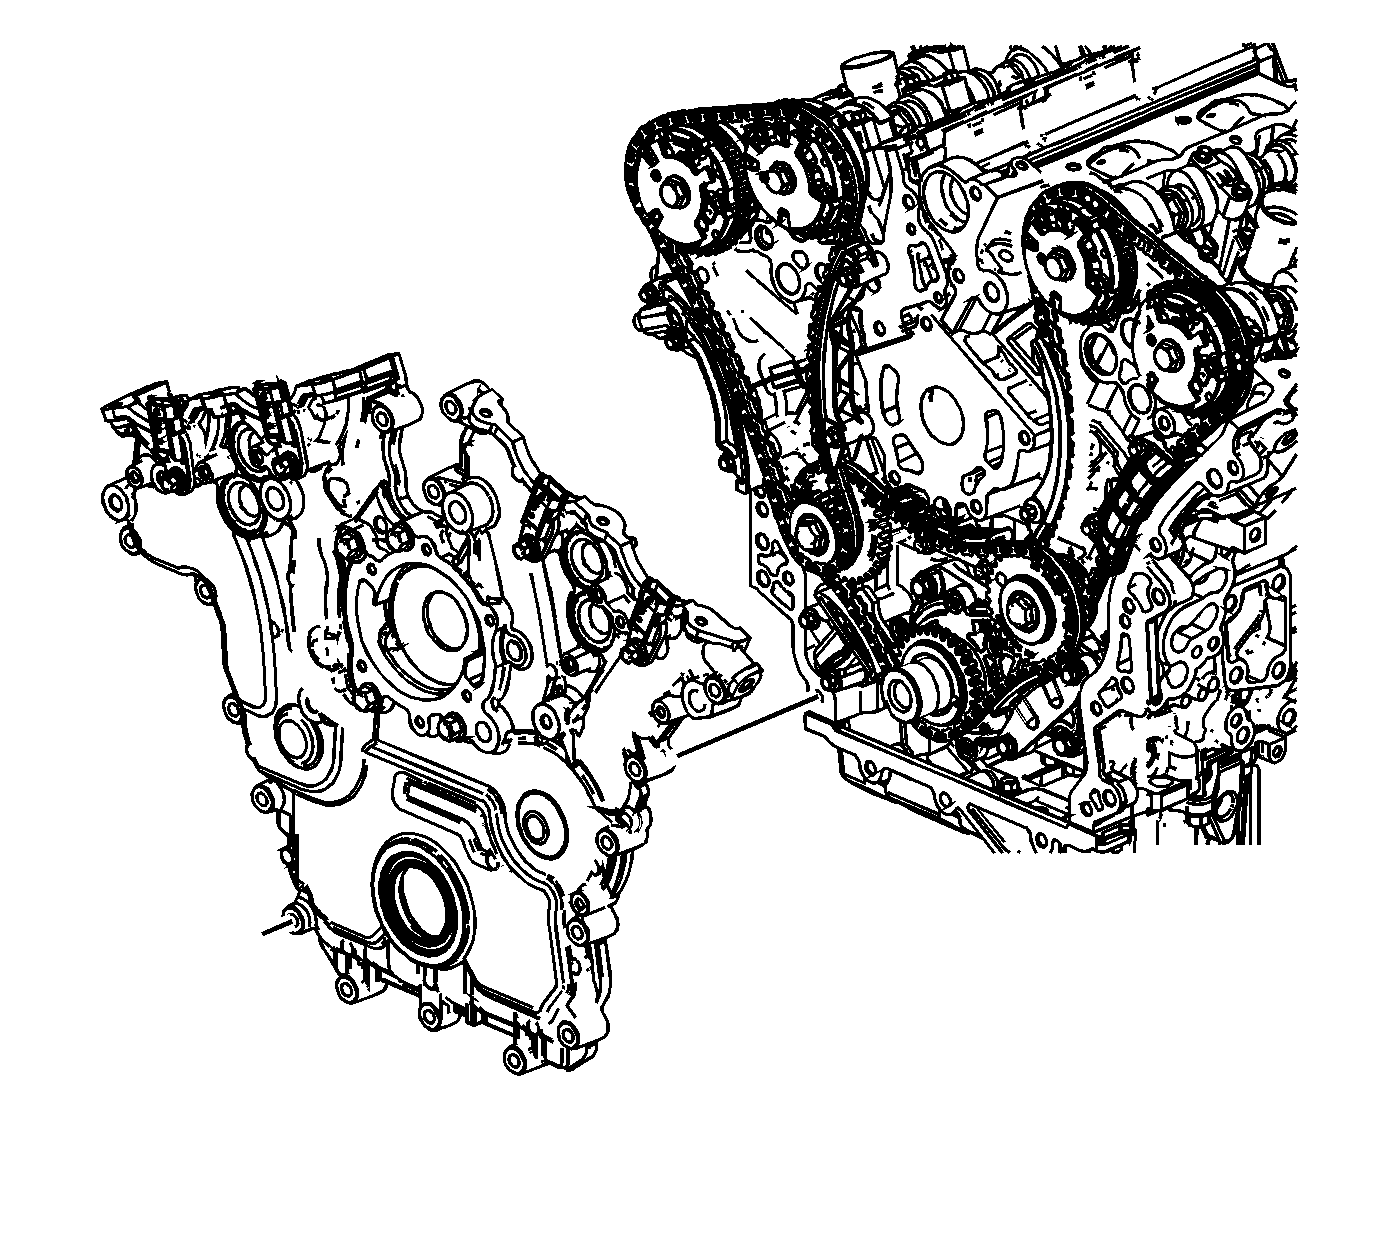
- Install the 8 mm (0.315 in) guide from the EN-46109 pins into the cylinder block positions as shown.
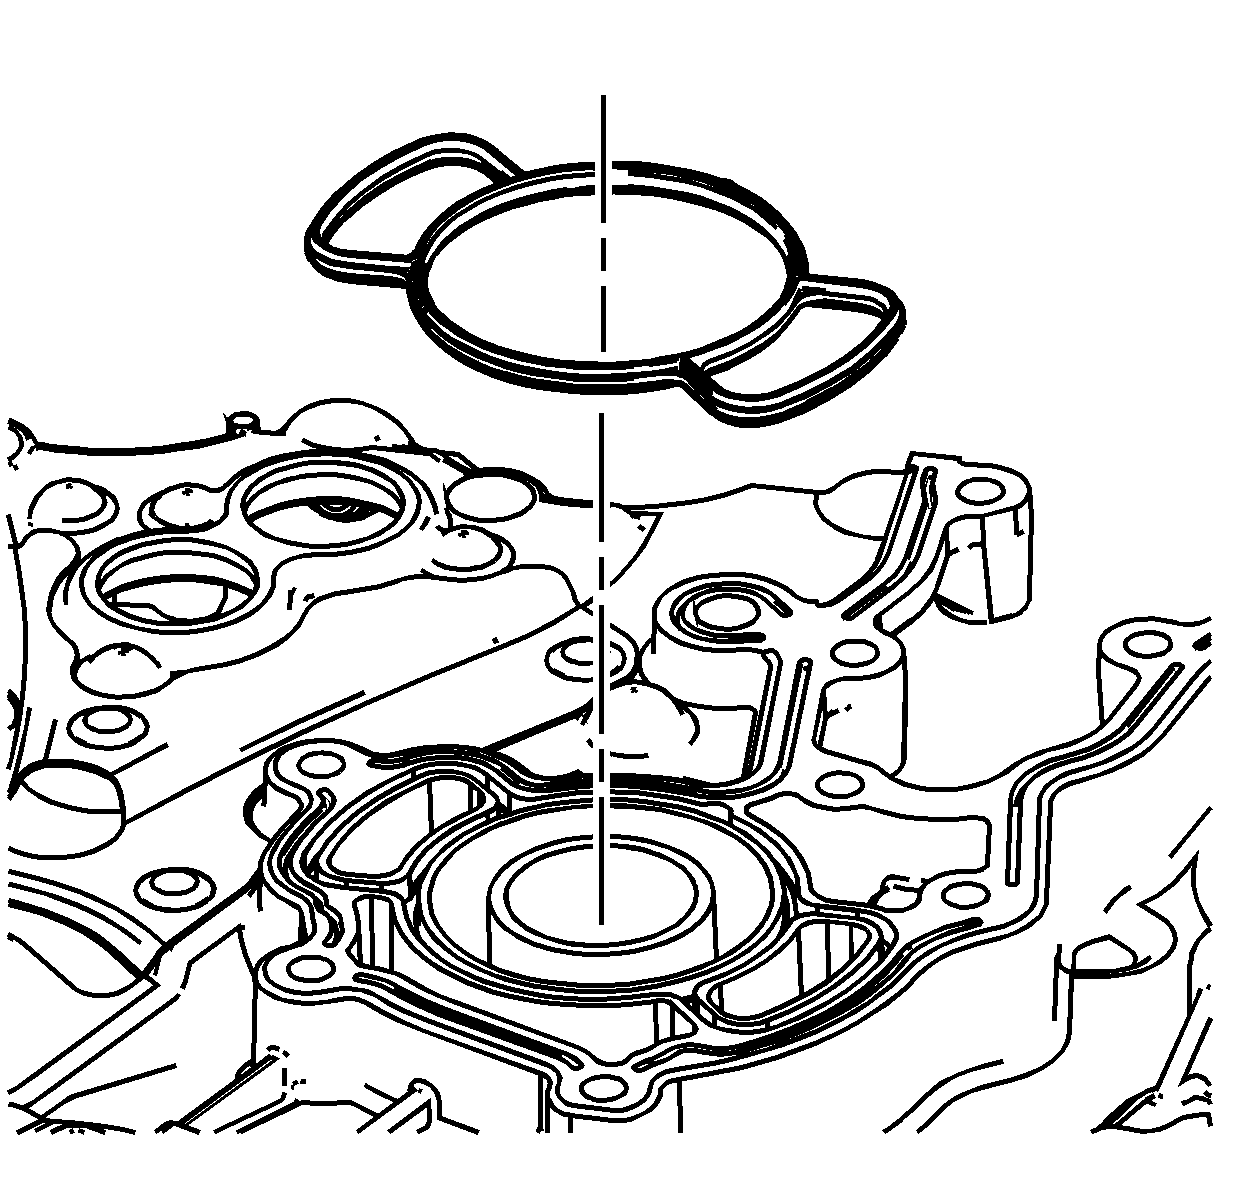
- Install the NEW engine front cover to cylinder block seal.
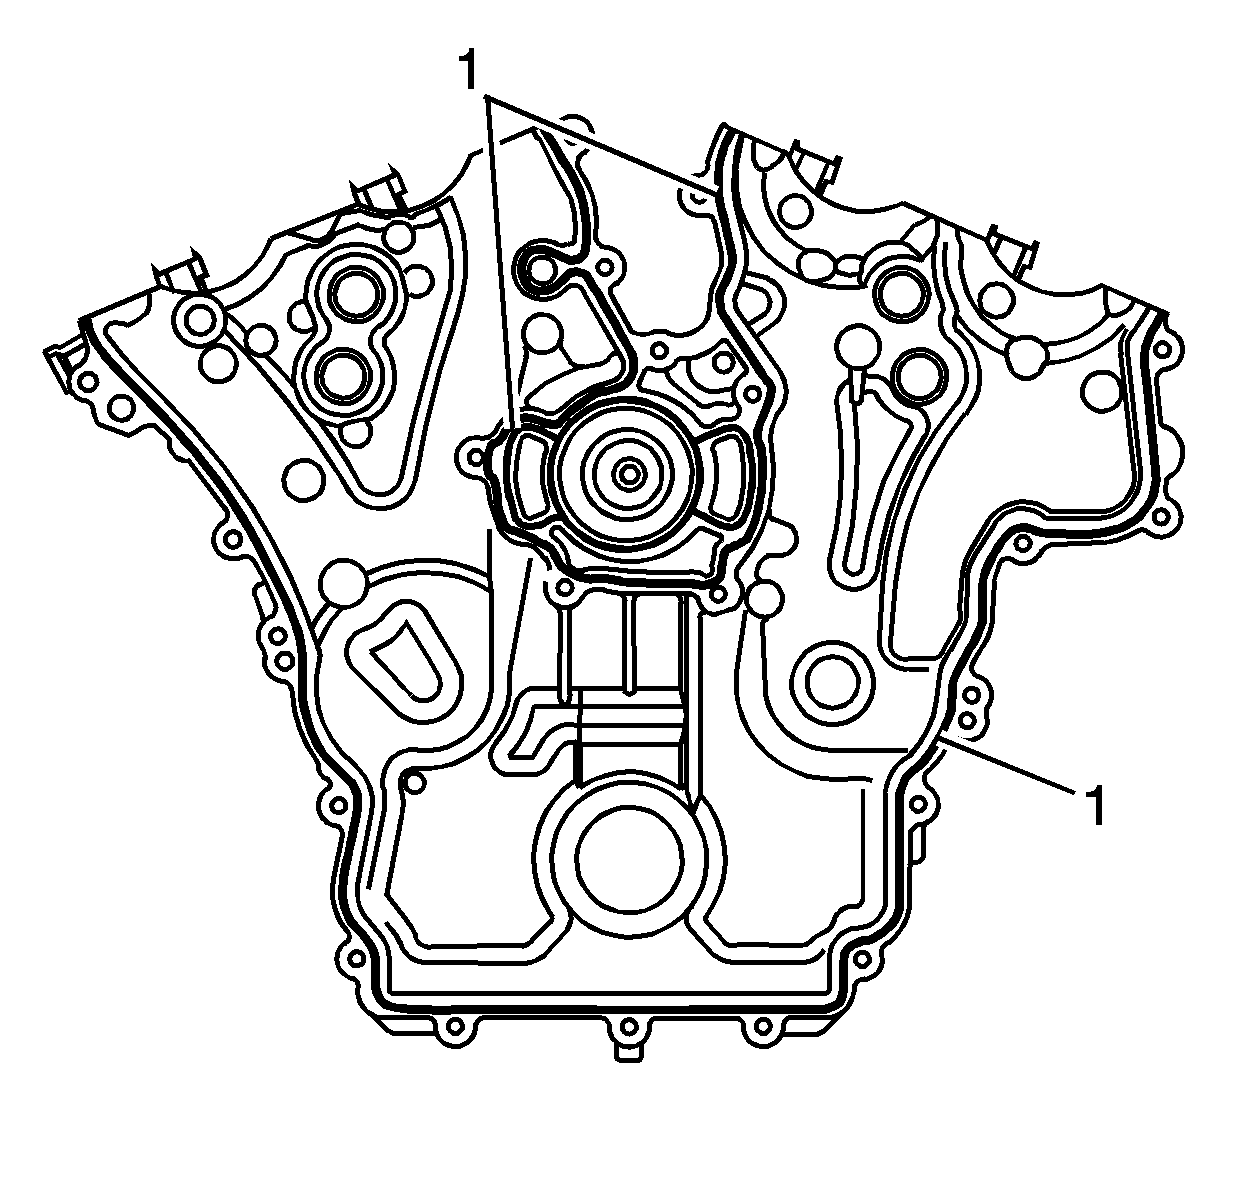
- Place a 3 mm (0.118 in) bead of RTV sealant, GM P/N 12378521 (Canadian P/N 88901148) or equivalent, on the engine front cover as shown (1).
- Place the engine front cover onto the EN-46109 pins and slide into position.
- Remove the EN-46109 pins from the cylinder block.
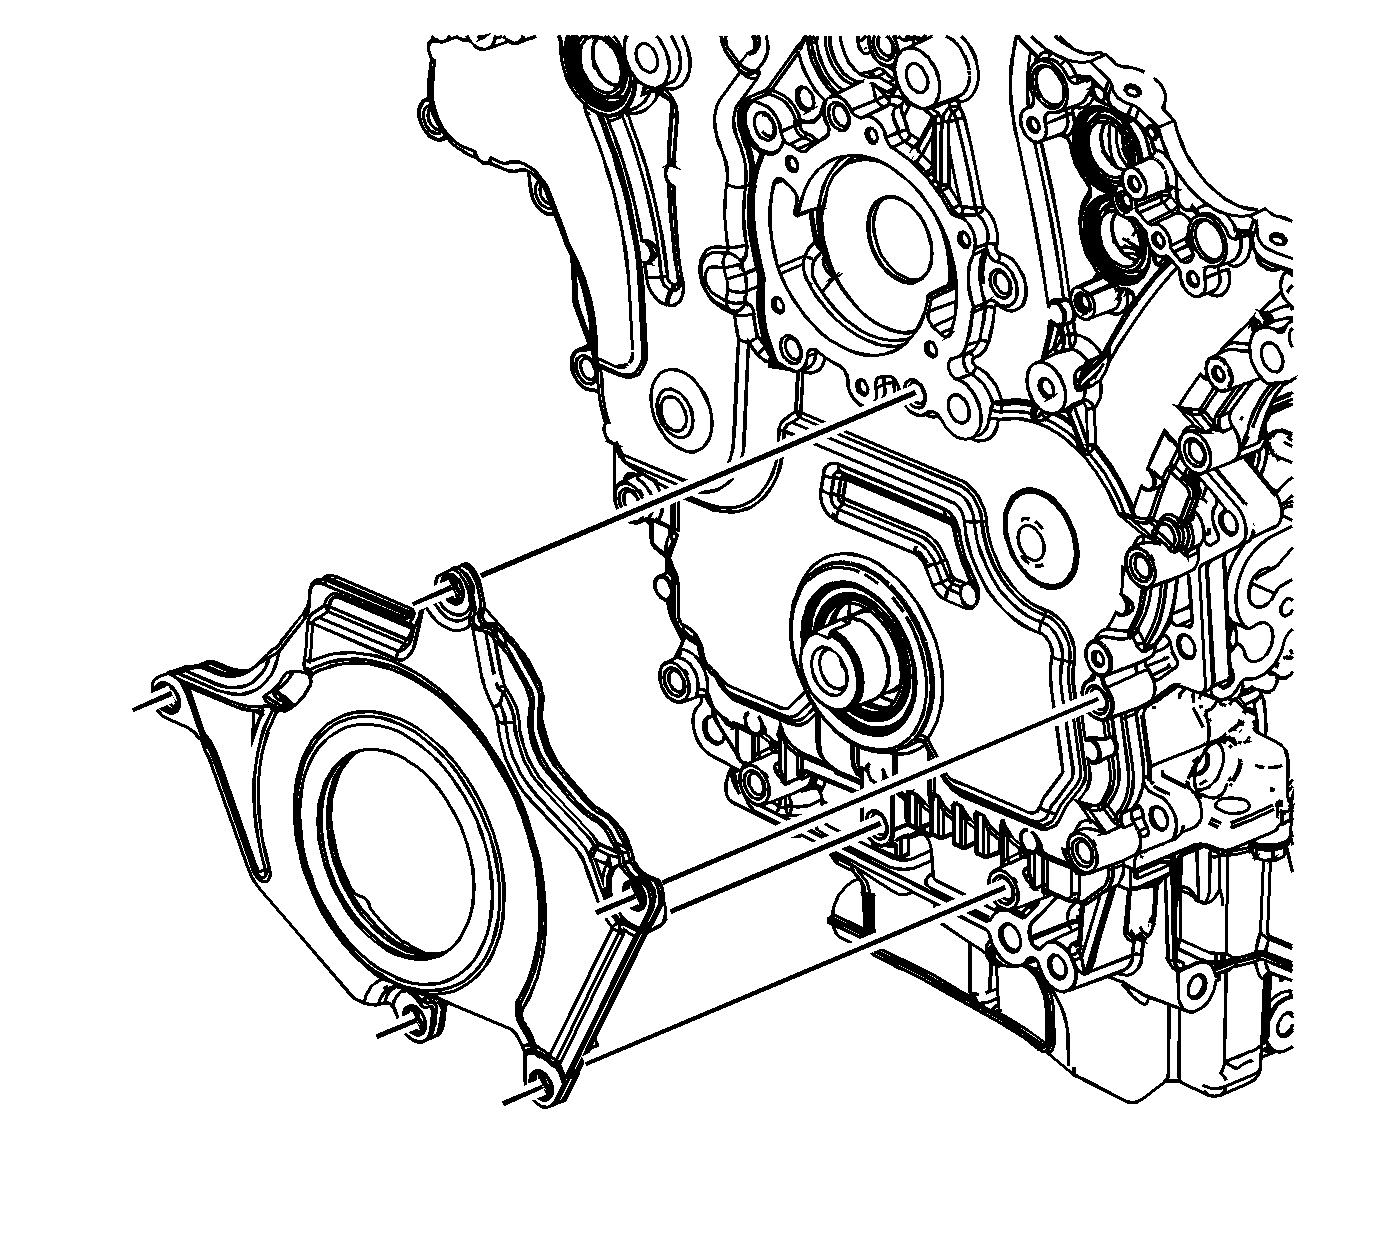
- Install the engine front cover deadener.
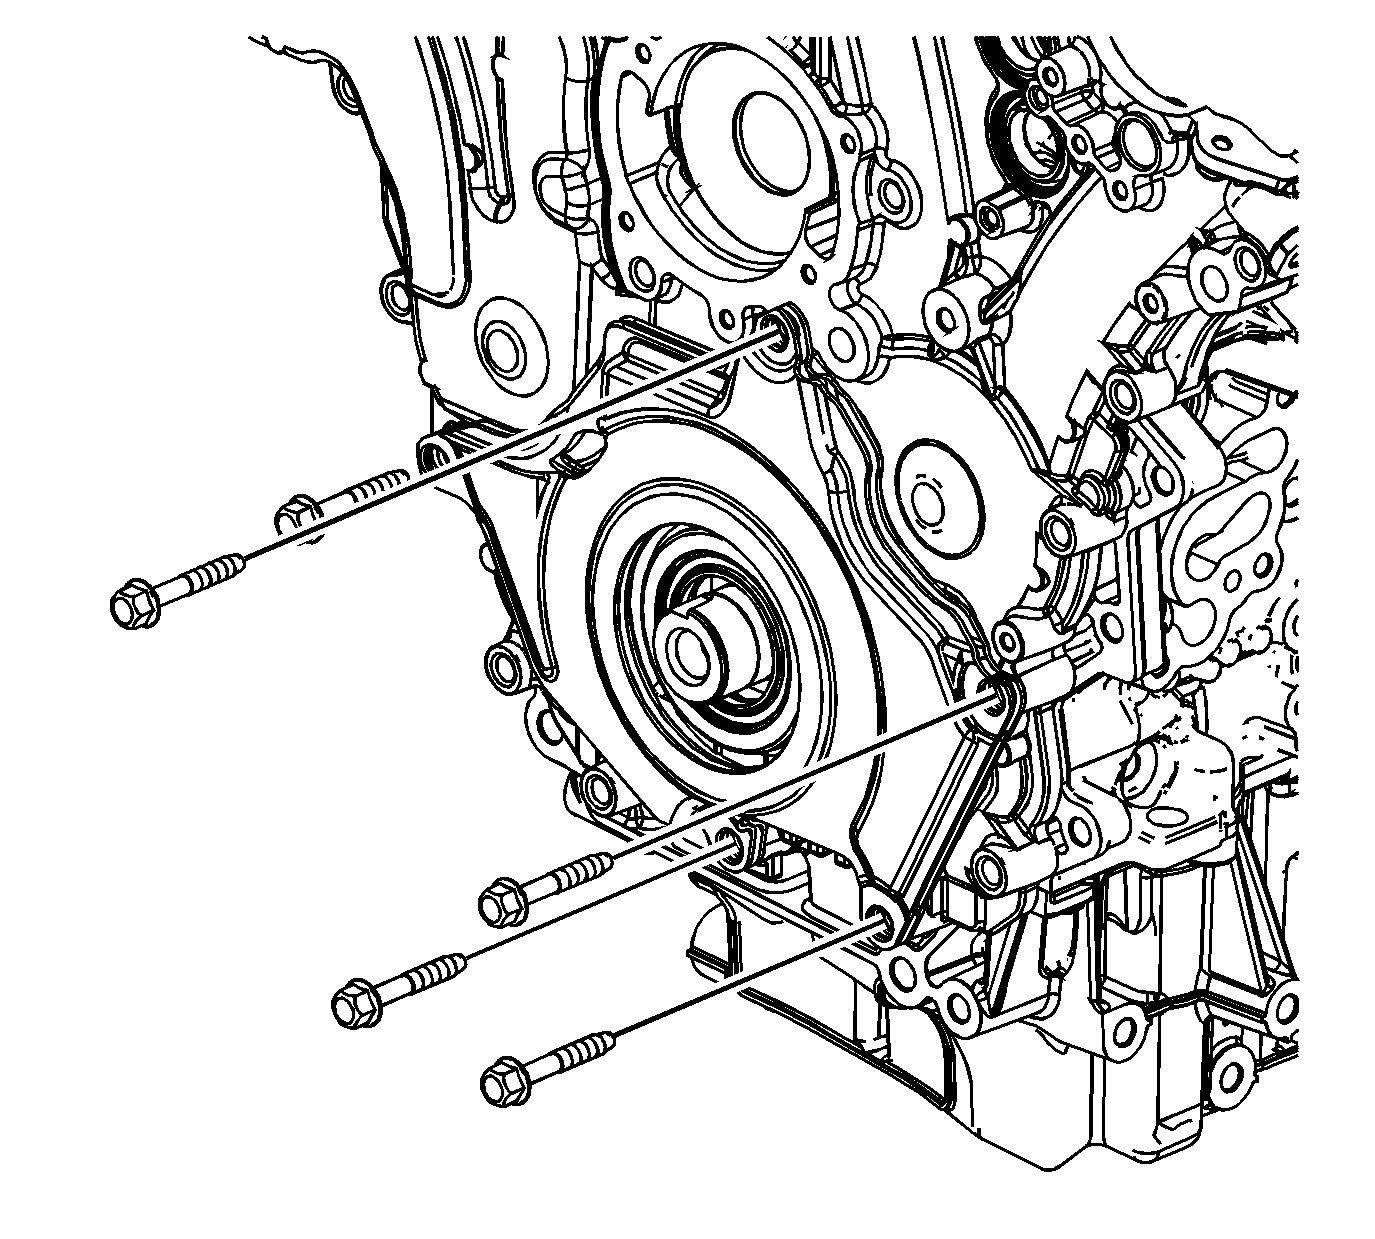
- Loosely install the engine front cover bolts to hold the engine front cover deadener into position.
- Loosely install the remaining engine front cover bolts.
- Tighten the engine front cover bolts in the sequence shown (1-22) to 20 N·m (14 lb ft).
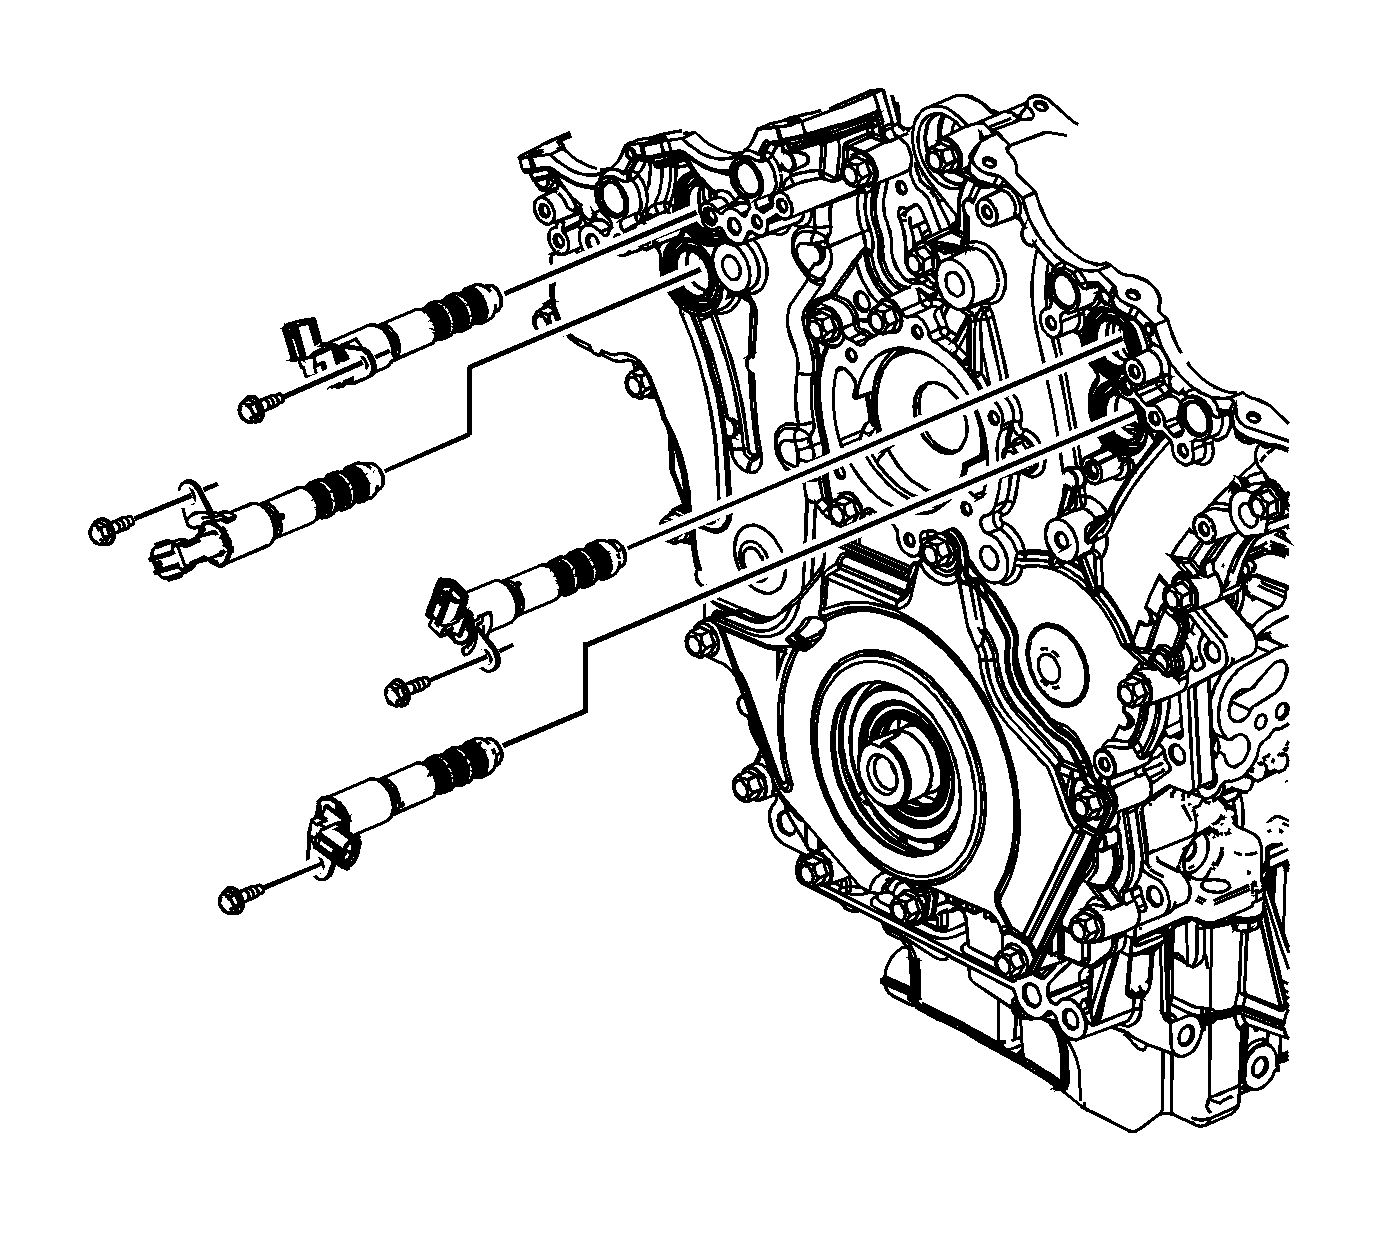
- Place the camshaft position actuator valves in position on the front cover.
- Install the camshaft position actuator valve bolts and tighten to 10 N·m (89 lb in).
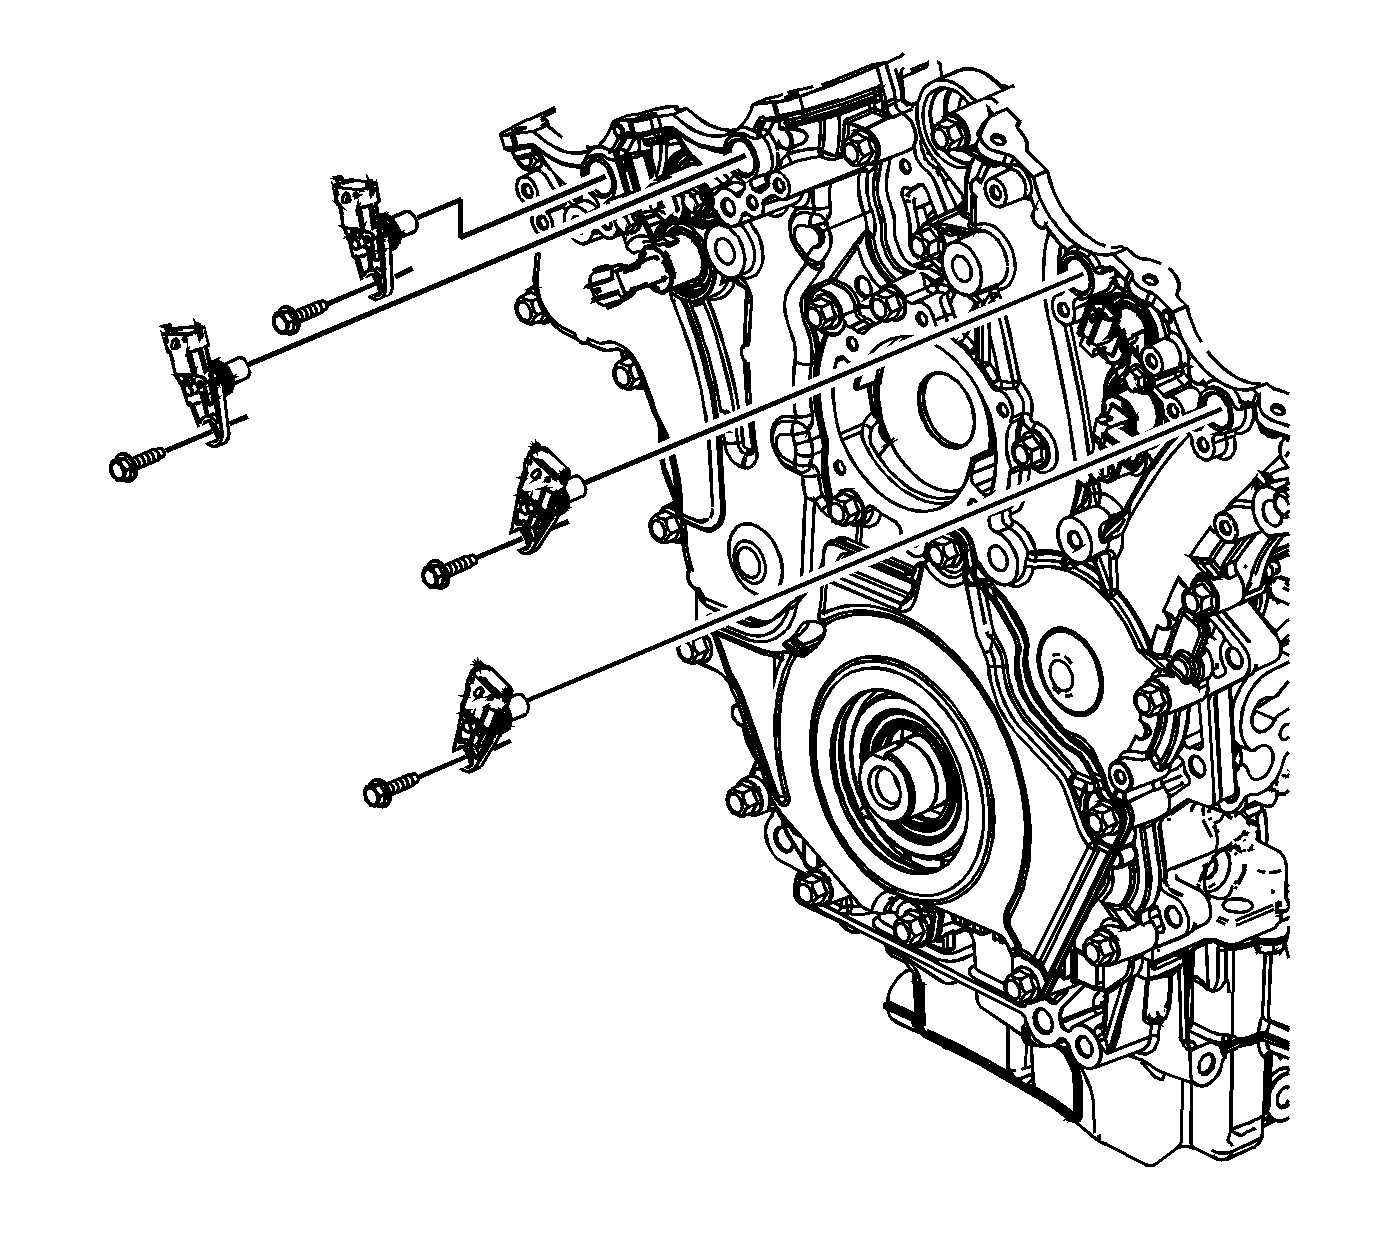
- Install NEW O-rings on the camshaft position sensor.
- Place the camshaft position sensors in position on the front cover.
- Install the camshaft position sensor bolts and tighten to 10 N·m (89 lb in).
Caution: Refer to Fastener Caution in the Preface section.
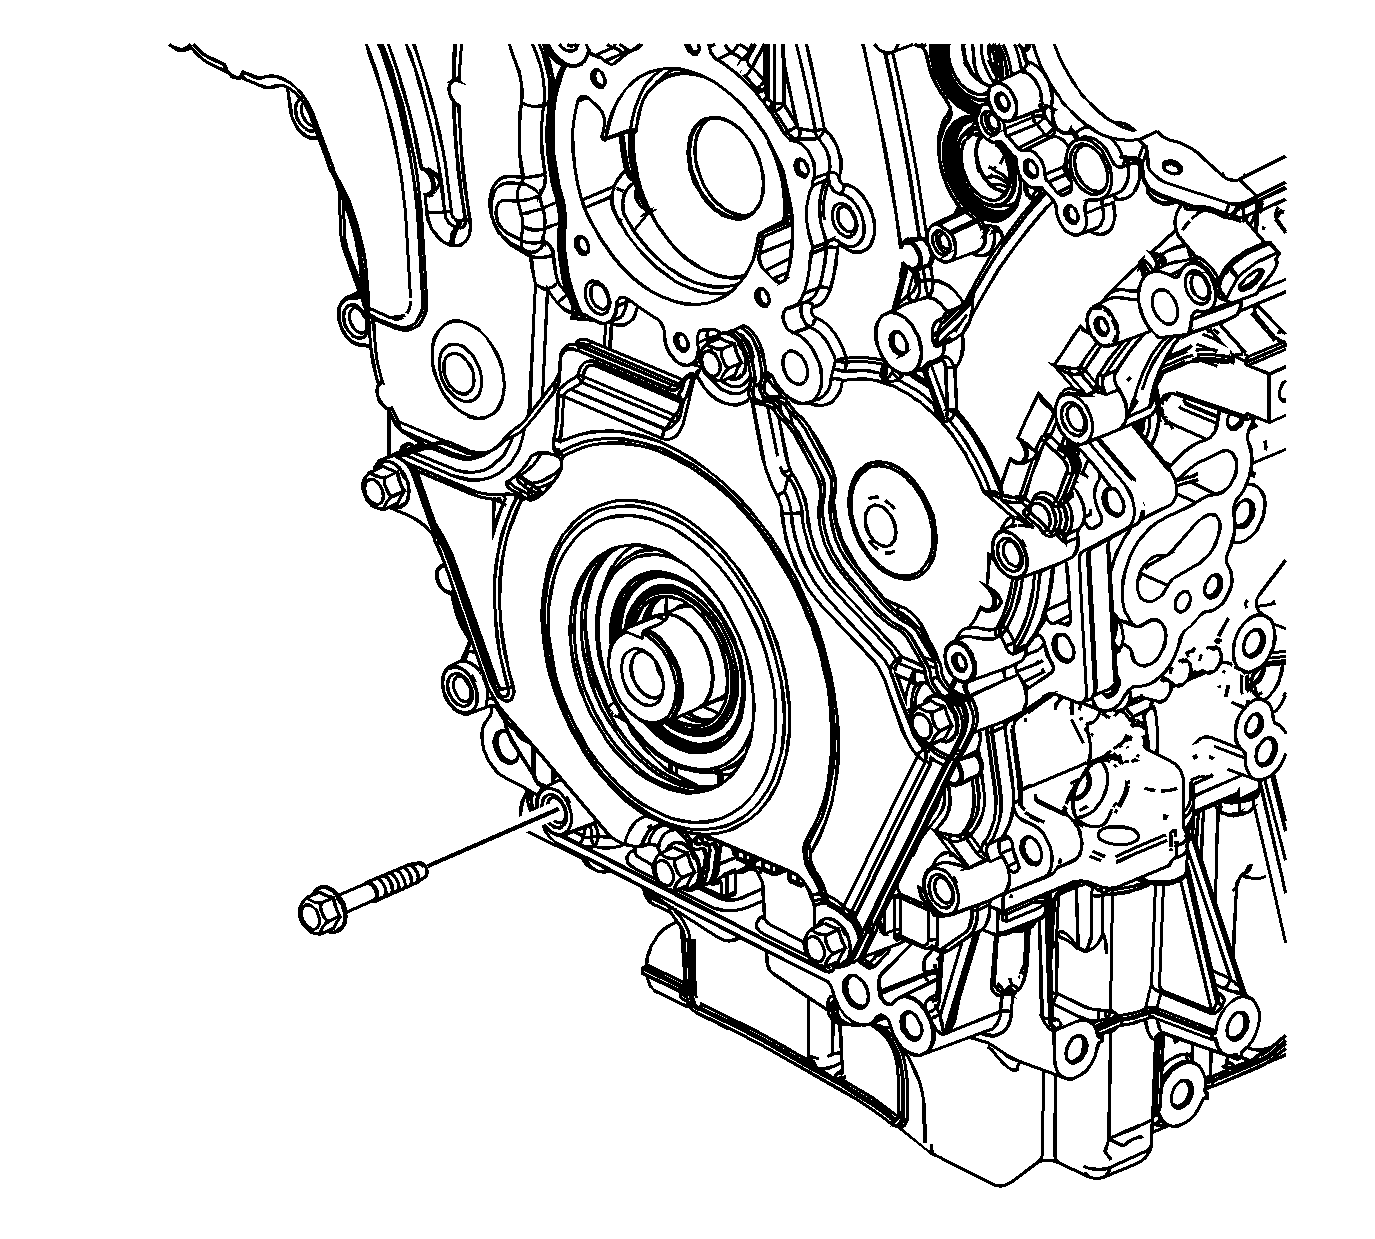
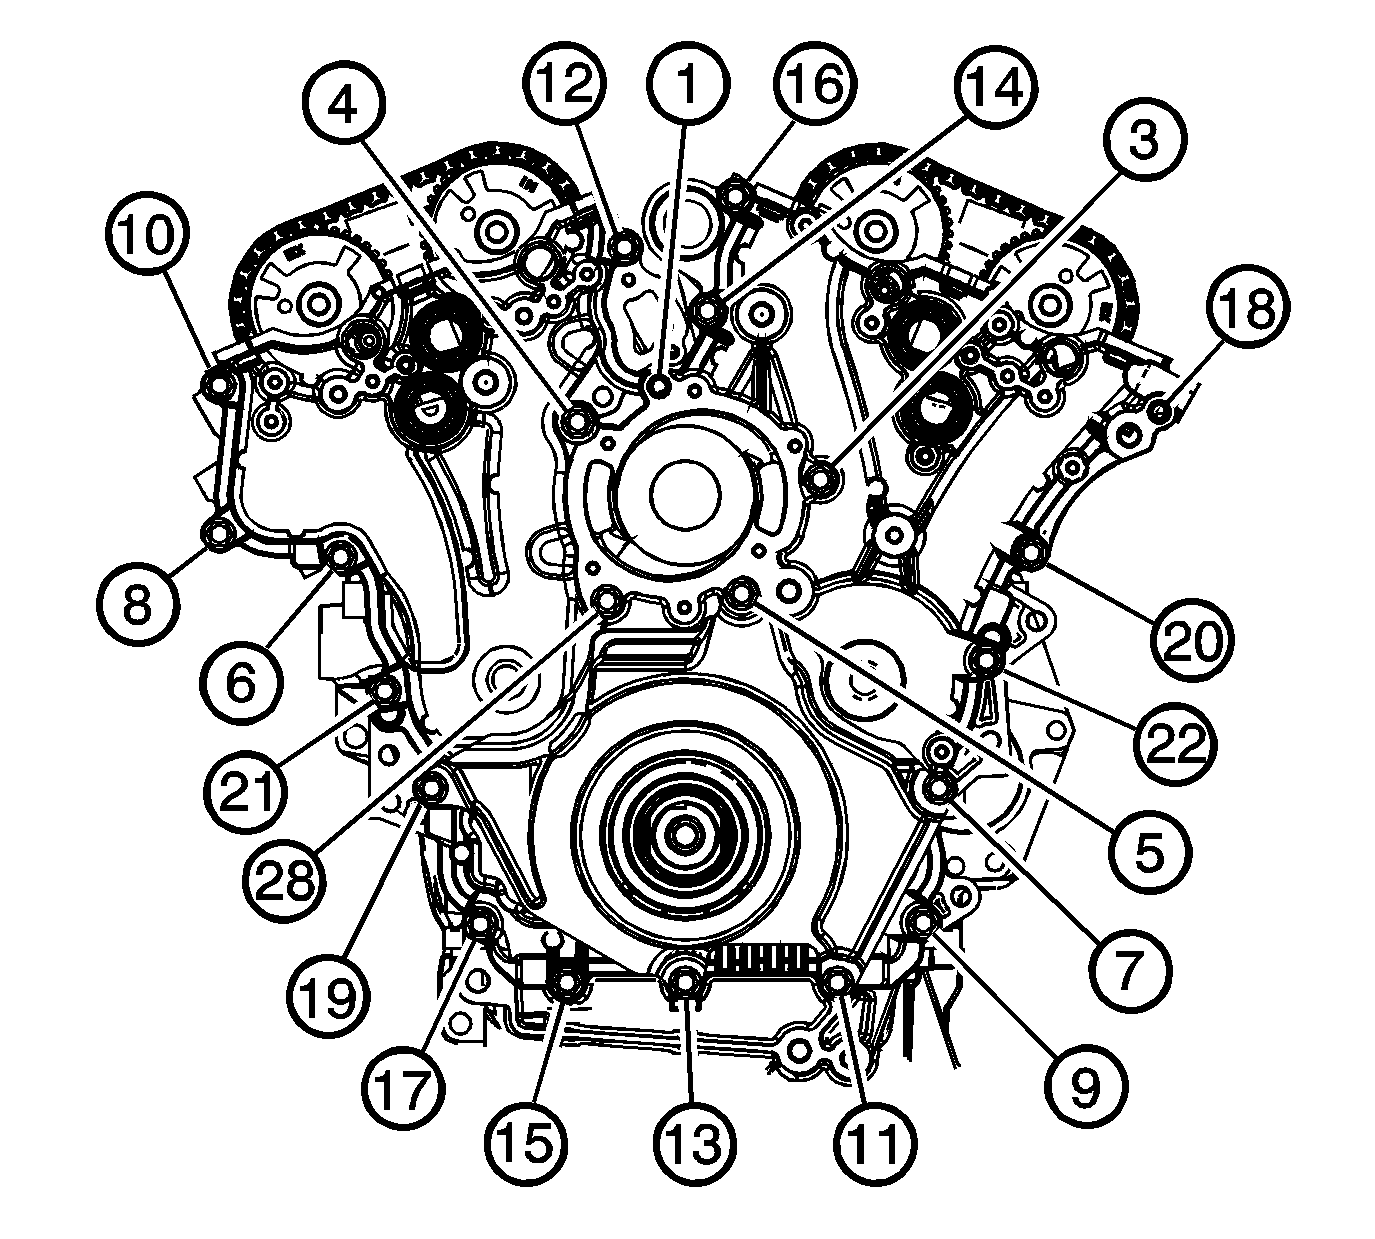
Tighten the engine front cover bolts a second pass in sequence an additional 60 degrees.
