For 1990-2009 cars only
Special Tools
| • | J 8059 Snap Ring Pliers |
| • | J 35910 Drive Axle Boot Clamp Pliers |
Note: The inner Constant Velocity Joint is not serviced separately. If the CV joint is found to have excessive wear or damaged, replace the wheel drive shaft as an assembly.
Disassemble Procedure
- Remove the wheel drive shaft. Refer to Rear Wheel Drive Shaft Replacement.
- Remove the outer CV joint and boot. Refer to Rear Wheel Drive Shaft Outer Joint and Boot Replacement.
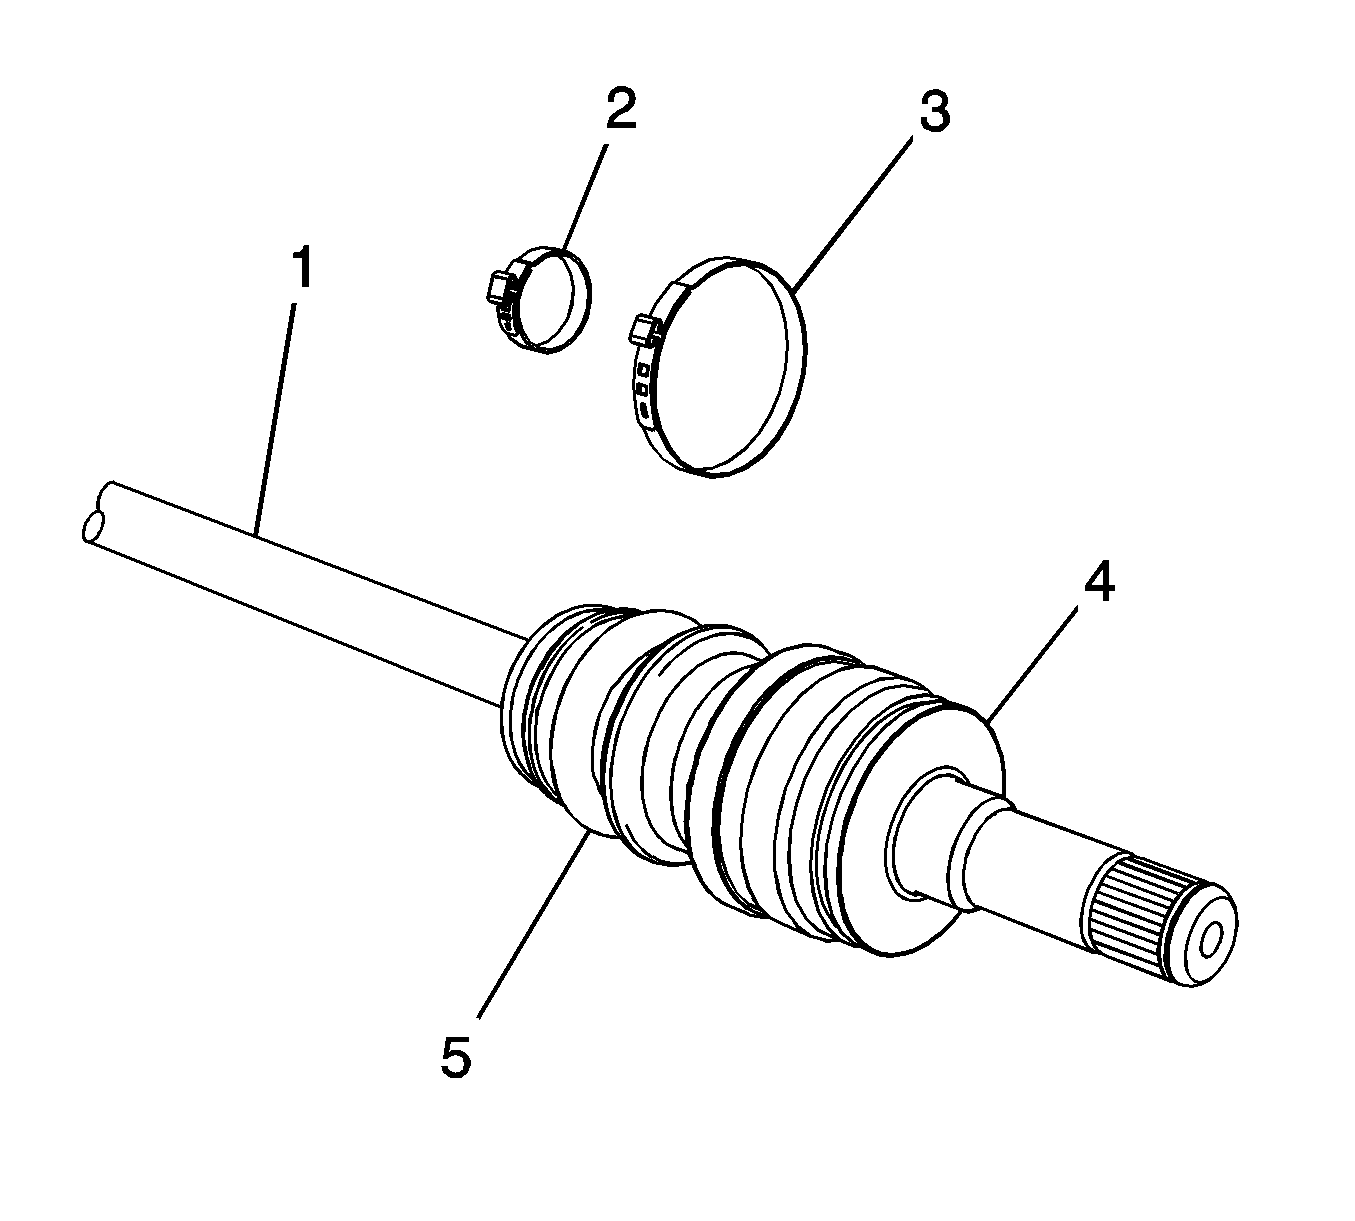
- Using the appropriate tool, remove and discard the outer boot clamp (3) and the inner boot clamp (2) from the CV joint (4).
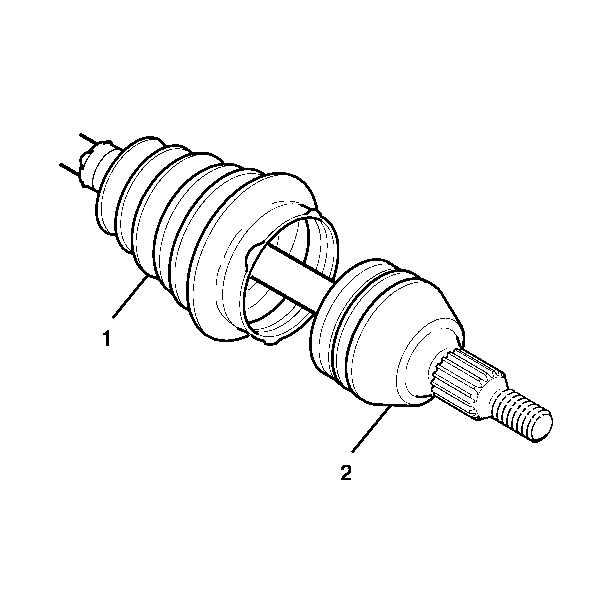
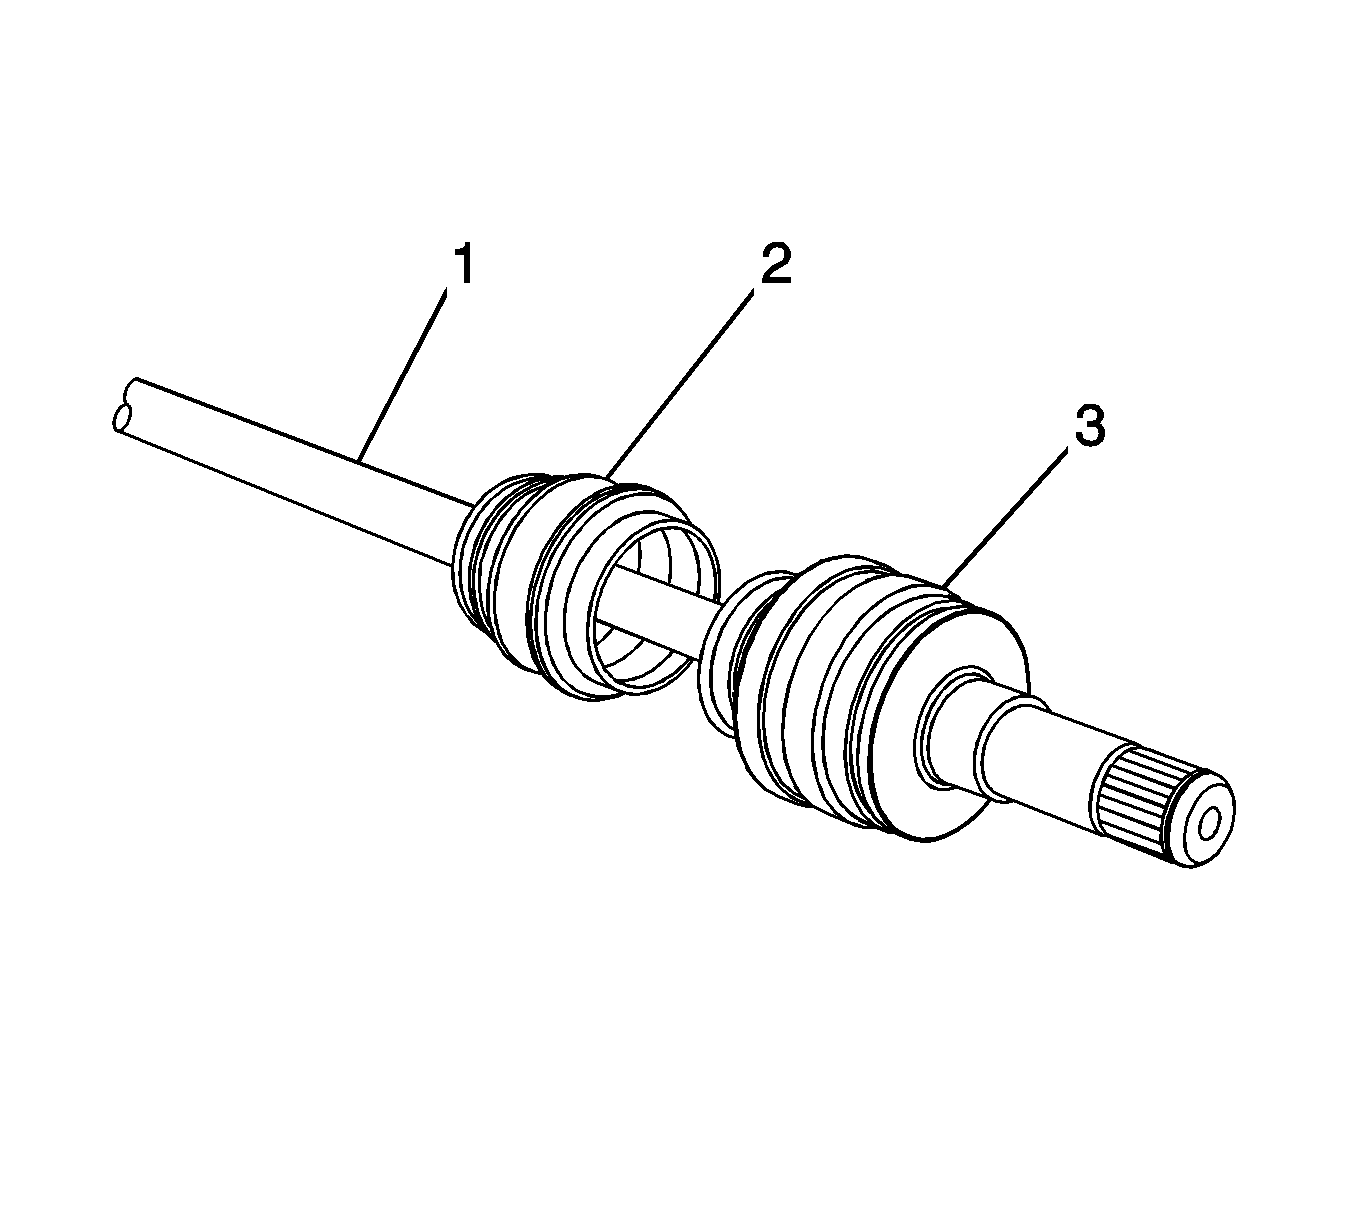
- Remove the CV joint boot (2) from the CV joint (3) and the wheel drive shaft (1).
- Using the appropriate cleaner, remove the lubricant from the CV joint and the wheel drive shaft.
Caution: Do not cut through the wheel drive shaft inboard or outboard boot during service. Cutting through the boot may damage the sealing surface of the housing and the tripot or the constant velocity joint bushing. Damage to the sealing surface may lead to water and dirt intrusion and premature wear of the constant velocity joint.
Note: If the boot is damaged and either the lubricant is gone, water or other foreign material are found in the CV joint, replace the wheel drive shaft as an assembly.
Assemble Procedure
- Install the CV joint boot and clamp (1) on the wheel drive shaft and CV joint housing (2).
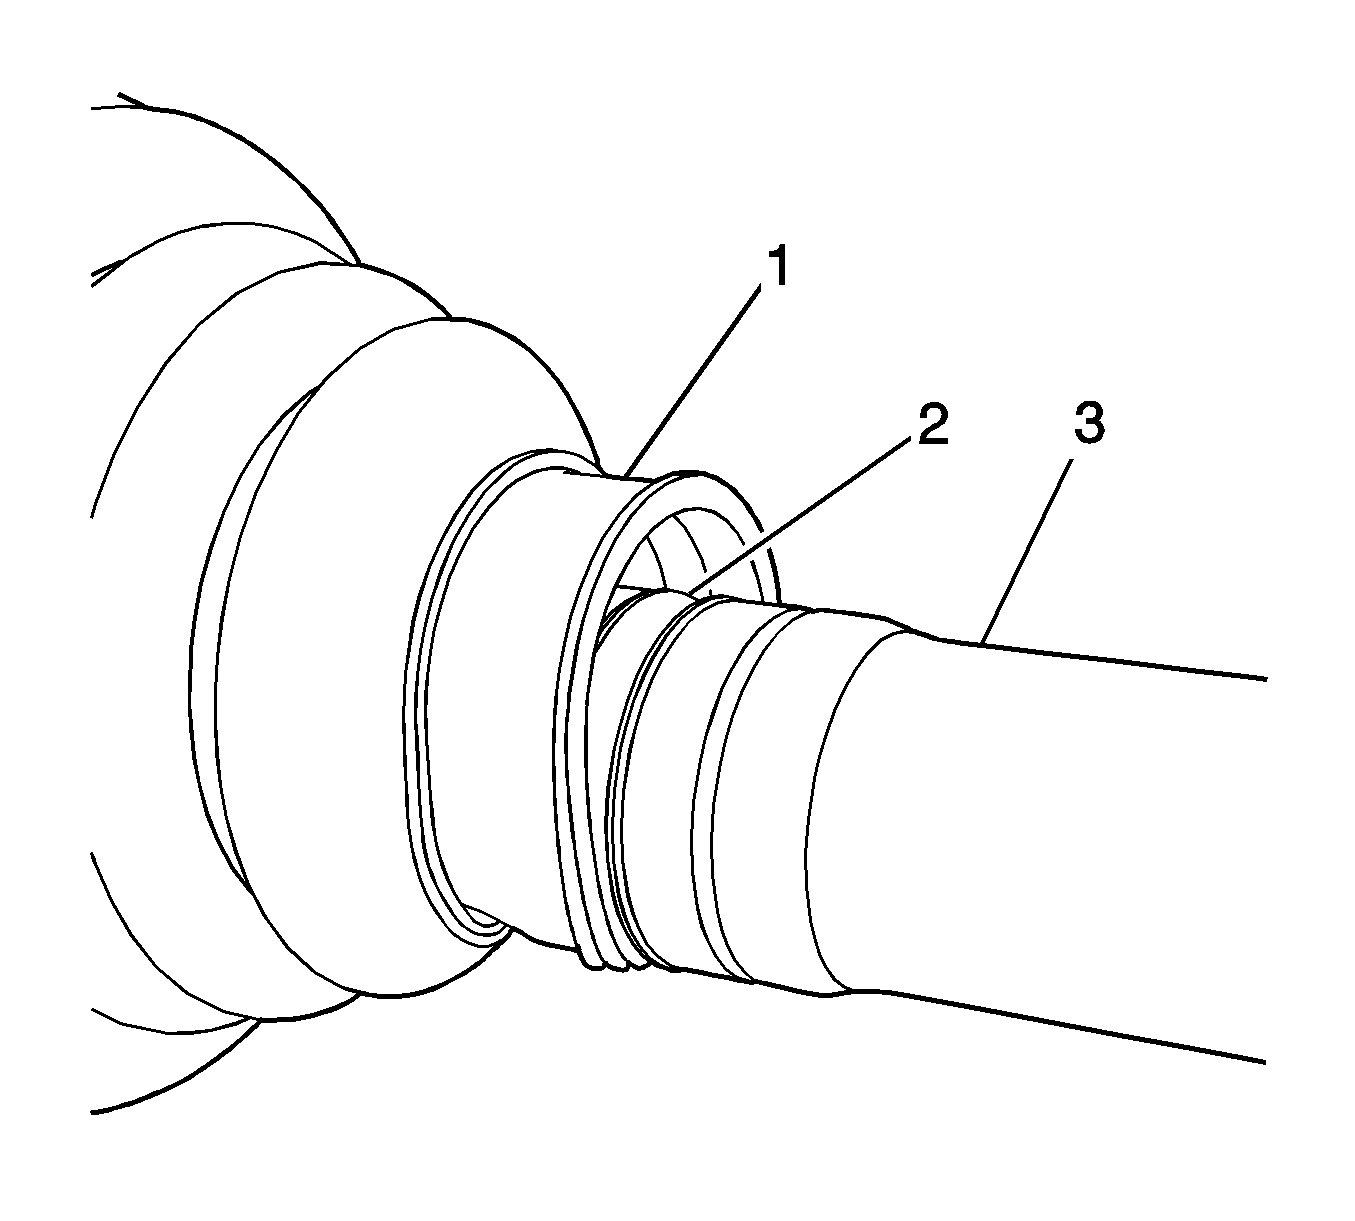
- Ensure that the CV joint boot (1) is properly seated in the groove (2) in the wheel drive shaft (3).
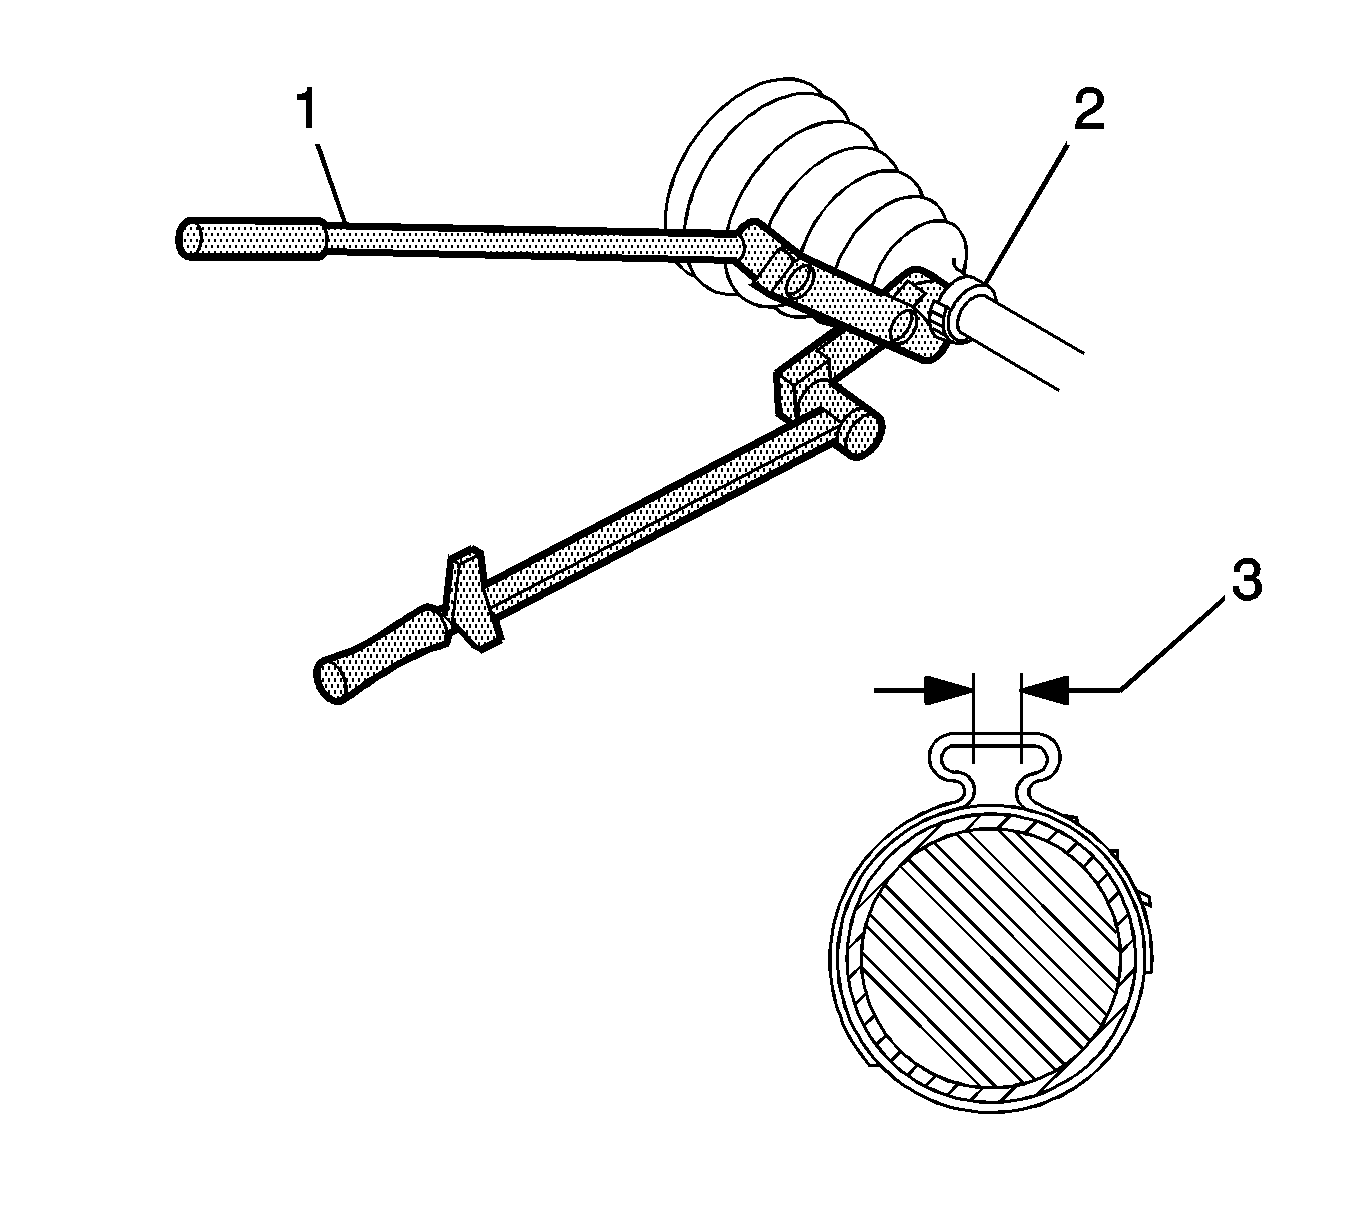
- Using the J 42572 pliers , breaker bar, torque wrench and or ratchet (1), close the clamp (2) until the gap (3) measures 2.15 mm (0.085 in).
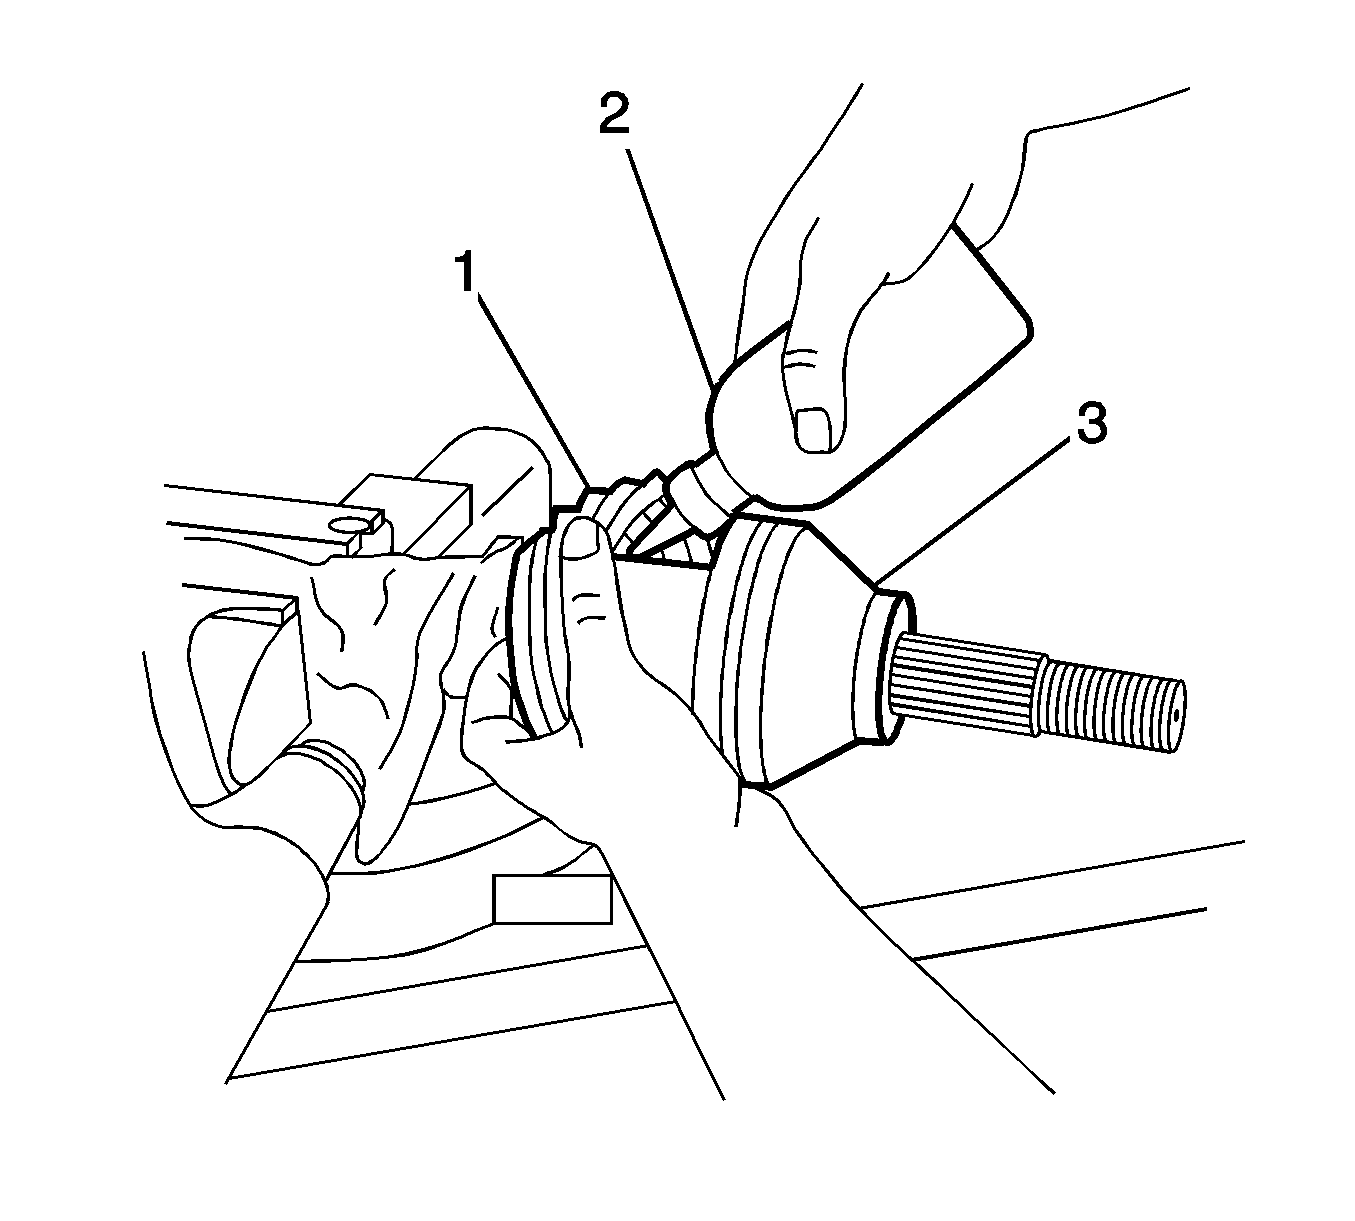
- Place approximately half of the lubricant (1) in the CV joint boot (2) and the other half in the CV joint (3).
- Install the CV joint boot and clamp (2) CV joint housing (1).
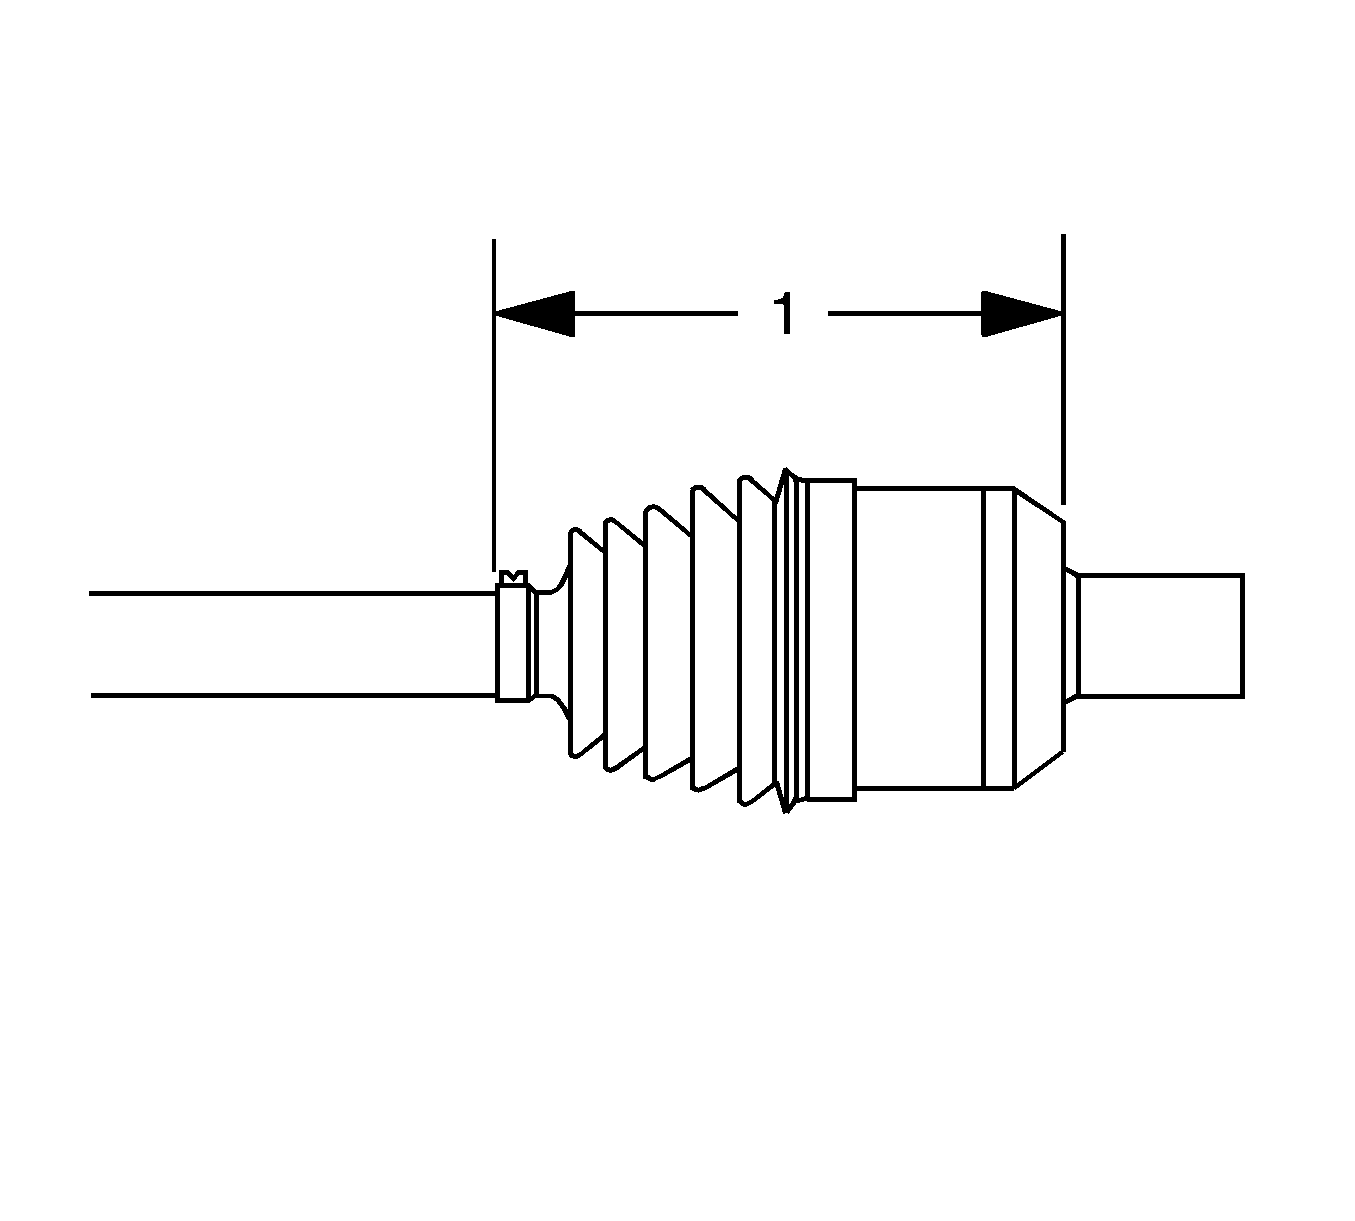
- The measured distance (1) between the boot edges should be 88.6 mm (3.50 in)..
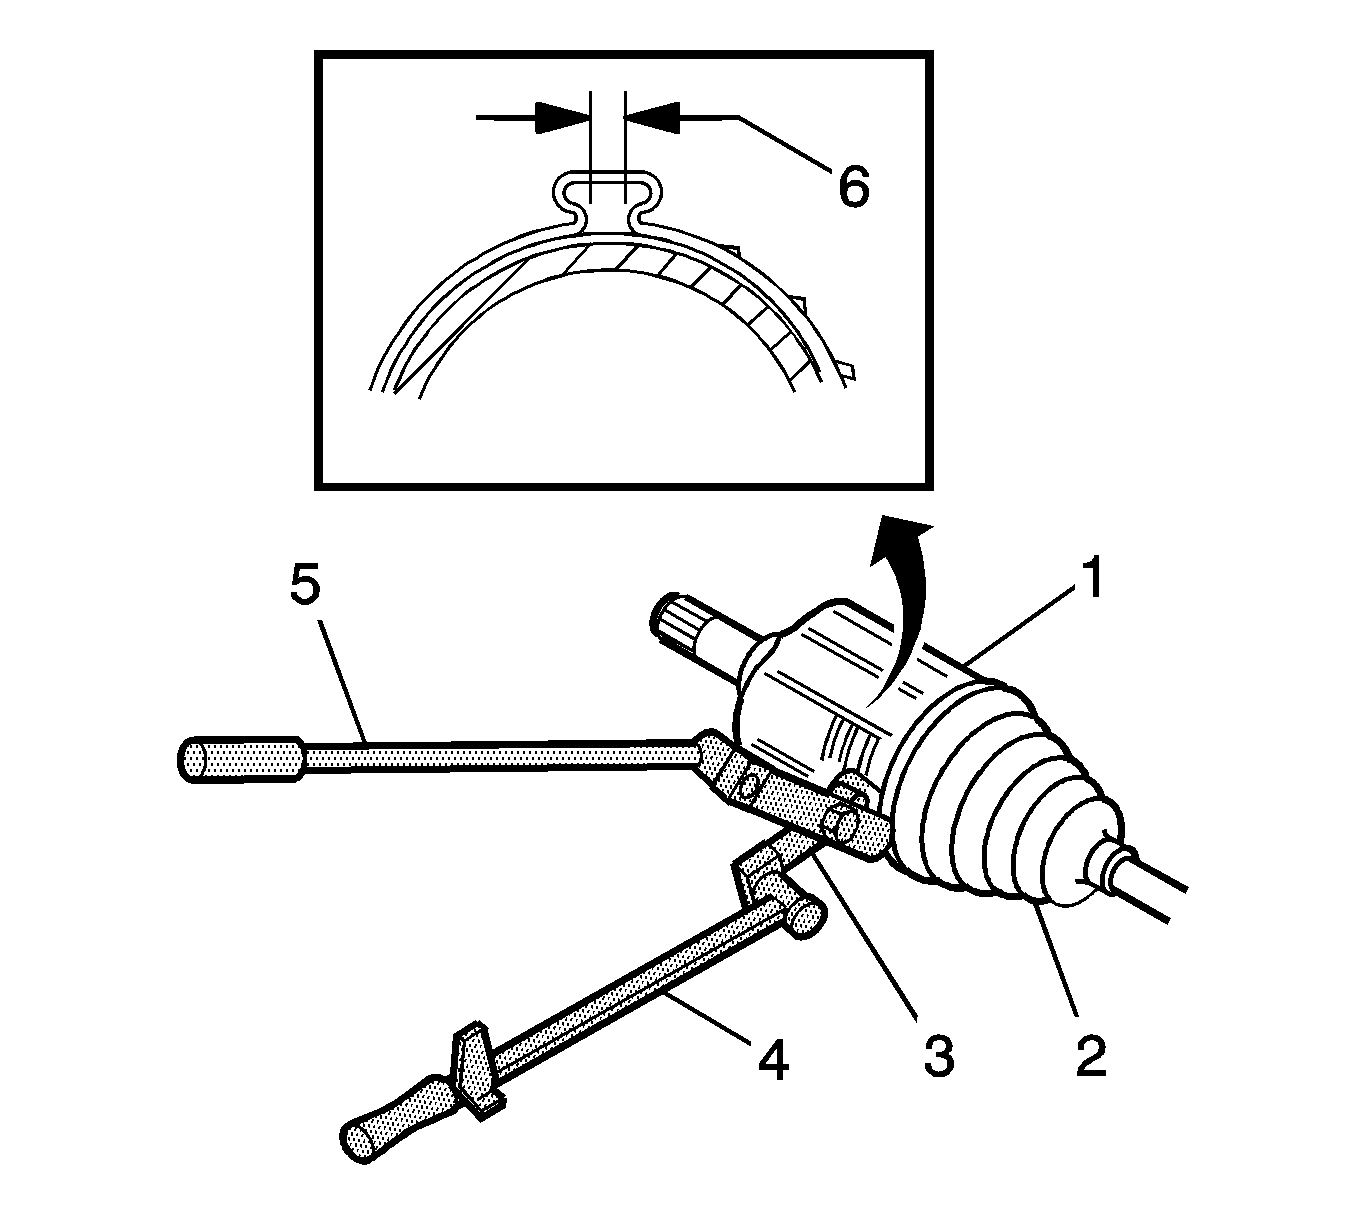
- Using the J 42572 pliers (3), breaker bar (5) and a torque or racket wrench (4), close the clamp until the gap measures 1.90 mm (0.070 in).
- Move the CV joint in a circular motion to distribute the lubricant inside the cv joint housing.
- Clean any remaining lubricant from the outside of the CV joint.
- Install the outer CV joint and boot. Refer to Rear Wheel Drive Shaft Outer Joint and Boot Replacement.
- Install the wheel drive shaft. Refer to Rear Wheel Drive Shaft Replacement.
