For 1990-2009 cars only
Special Tools
J 39400-A Halogen Leak Detector
Removal Procedure
- Recover the refrigerant. Refer to Refrigerant Recovery and Recharging.
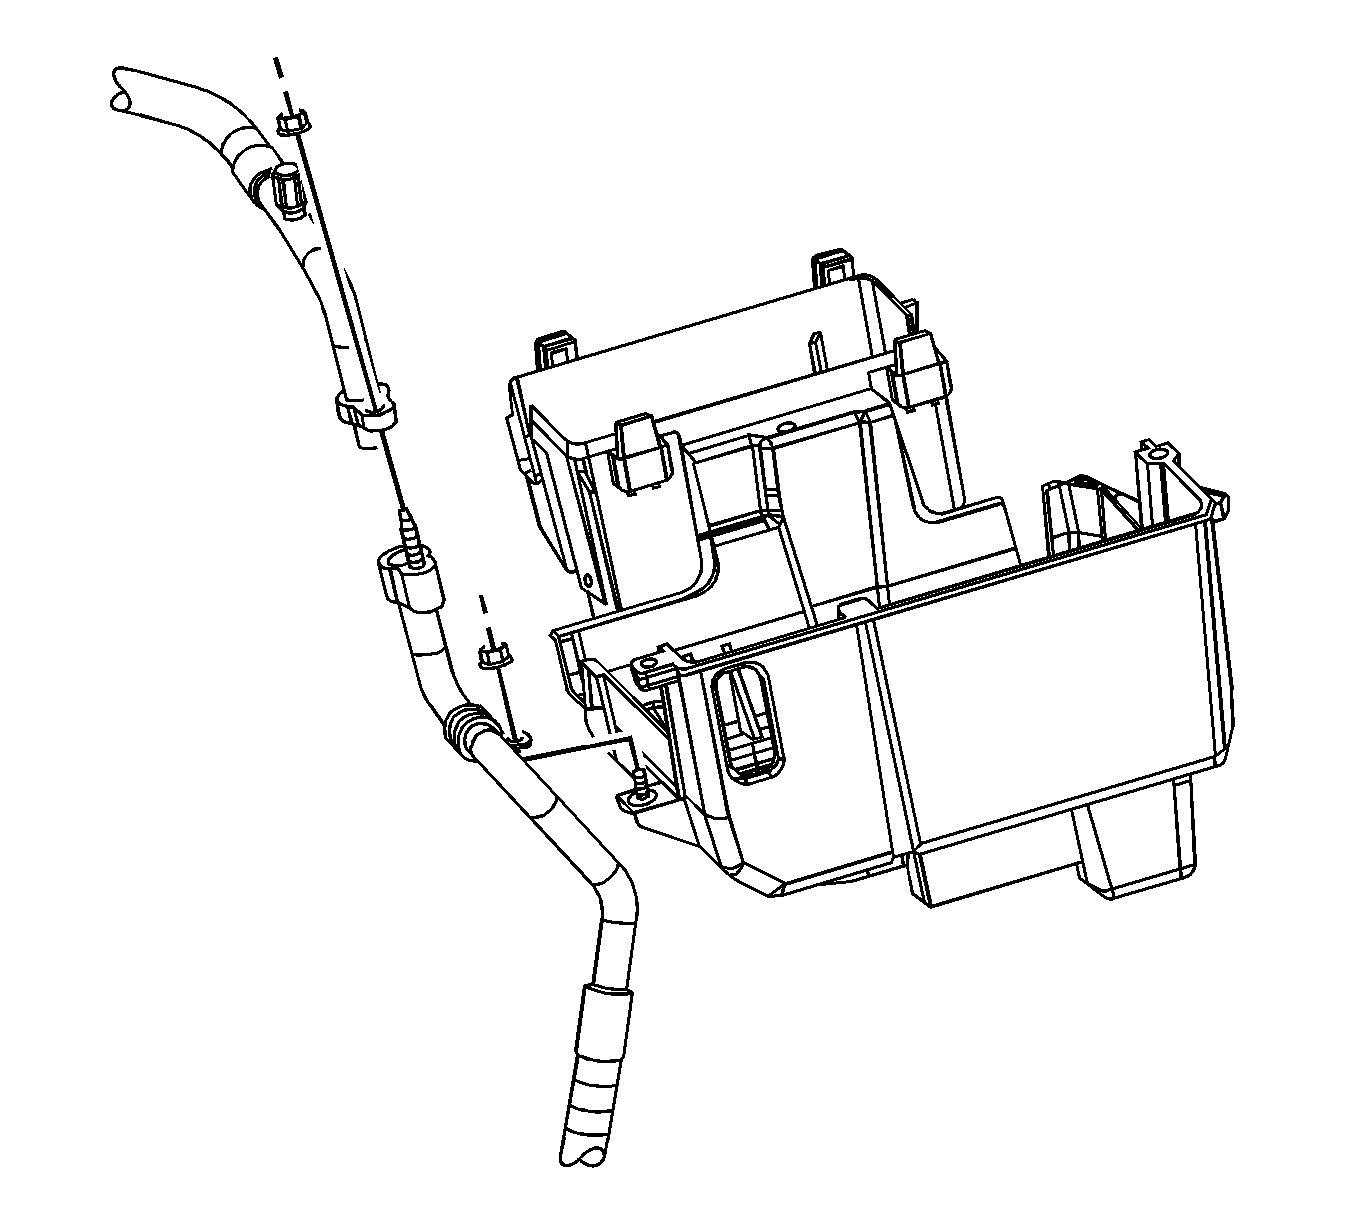
- Remove the evaporator outlet hose nut from the evaporator outlet hose.
- Remove the evaporator outlet hose from the compressor hose.
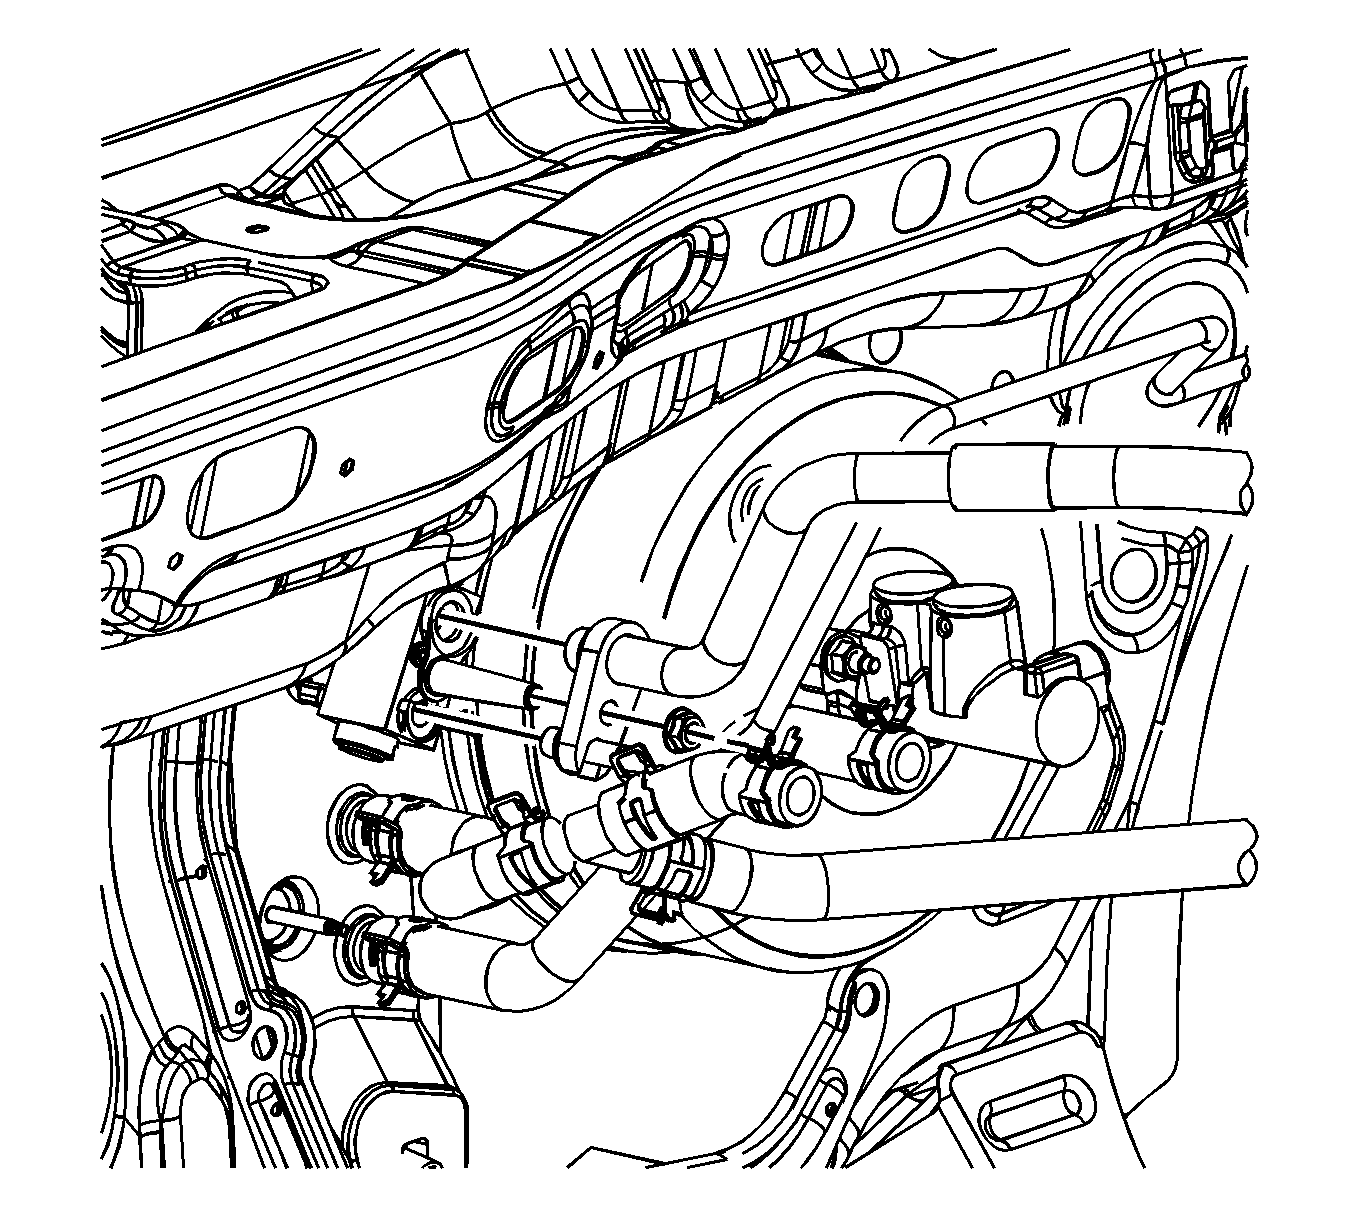
- Remove the evaporator outlet hose and liquid line retainer plate nut from the thermal expansion valve (TXV).
- Remove the evaporator outlet hose and liquid line from the TXV.
- Remove evaporator outlet hose from the vehicle.
- Remove and discard the sealing washers from the evaporator outlet hose and the compressor hose. Refer to Sealing Washer Replacement.
- Install protective caps to the TXV, the liquid line, and the compressor hose to prevent contamination and desiccant saturation.


Installation Procedure
- Remove the protective caps from the TXV, the liquid line, and the compressor hose.
- Install new sealing washers to the evaporator outlet hose, liquid line, and the compressor hose. Refer to Sealing Washer Replacement.
- Install the evaporator outlet hose and the liquid line to the TXV.
- Install the evaporator outlet hose and the liquid line nut to the TXV.
- Install the evaporator outlet hose to the compressor hose.
- Install the evaporator outlet hose nut to the evaporator outlet hose.
- Recharge the A/C system. Refer to Refrigerant Recovery and Recharging.
- Test the affected A/C joints for leaks using J 39400-A .

Caution: Refer to Fastener Caution in the Preface section.
Tighten the nut to 20 N·m (15 lb ft).

Tighten the nut to 20 N·m (15 lb ft).
