Removal Procedure
Tools Required

- Remove the control arm
from the vehicle. Refer to
Rear Axle Lower Control Arm Replacement
.
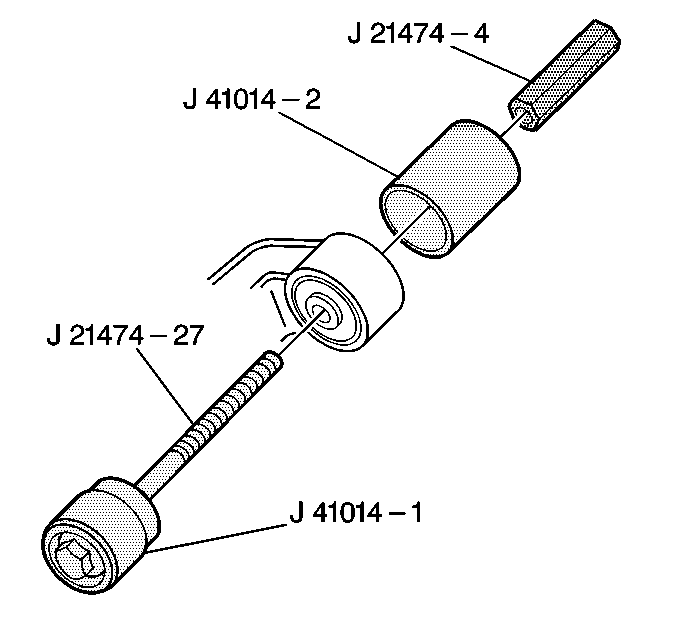
- Remove the bushing from control arm using tools as follows:
| • | Assemble the long bolt J 21474-27
with the thrust bearing through the bushing remover J 41014-1
through the bushing receiver J 41014-2
over the bushing against the control arm.. |
| • | Lubricate the bolt threads with high pressure lubricant. |
| • | Install the nut J 21474-4
and begin tightening the nut. |
- Tighten the nut until the bushing is driven out of the control
arm.
- Disassemble the tools.
- Remove the bushing.
Installation Procedure
Tools Required
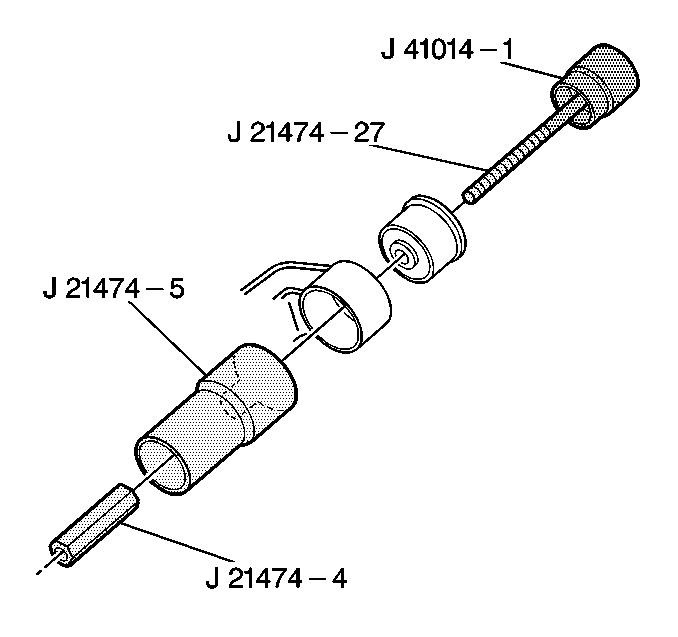
| • | J 21474-5 Bushing Receiver |
| • | J 21474-27 Long bolt with Thrust Bearing |
| • | J 41014-1 Bushing Installer |

- Begin installing the bushing
into the control arm ensuring that the flat on the bushing is vertical and
rearward.
| • | Assemble the long bolt J 21474-27
with
the washer through the bushing installer J 41014-1
over the bushing against the control arm. |
| • | Lubricate the bolt threads with a high pressure lubricant. |
| • | Install the bushing receiver J 21474-5 (large end
facing bushing), thrust bearing and nut onto the bolt. |
- Tighten the nut until the busing is into the control arm and
the bushing is fully seated.
- Disassemble the tools and remove the tools.
- Install the control arm. Refer to
Rear Axle Lower Control Arm Replacement
.


