For 1990-2009 cars only
Removal Procedure
- Remove the front side door trim panel. Refer to Front Side Door Trim Panel Replacement .
- Lower the front side door window completely.
- Use a flat-bladed tool wrapped in tape in order to gently pry the inner sealing strip from the door, if equipped.
- Use a flat-bladed tool wrapped in tape in order to gently pry the outer sealing strip from the door.
- Remove the screws and the door trim support bracket from the vehicle.
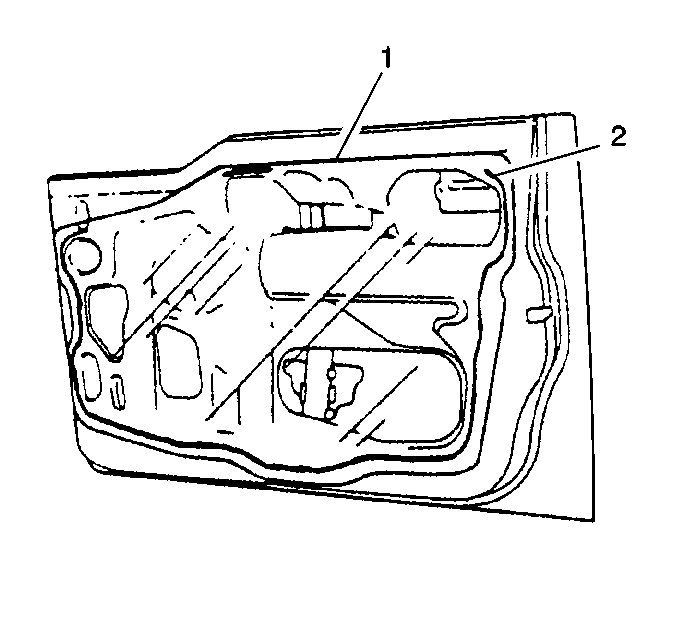
- Peel the water deflector (1) away from the door.
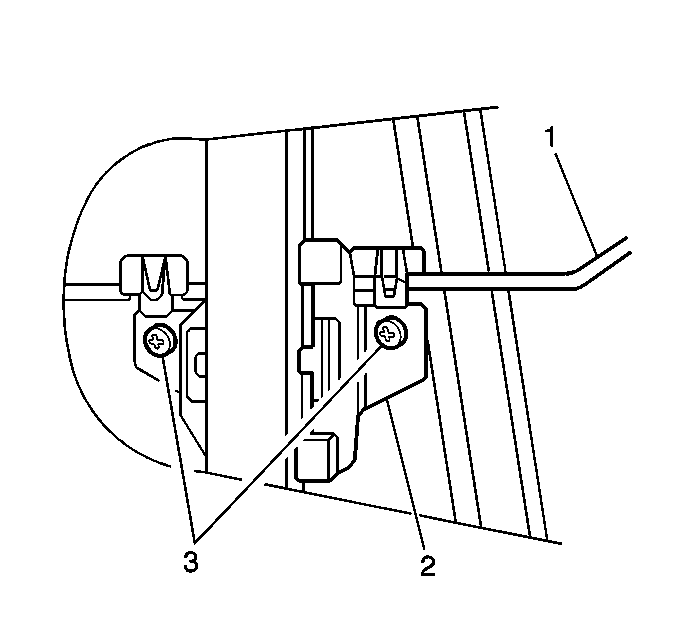
- Remove the 2 screws (3) which secure the window (1) to the regulator equalizer bracket (2).
- Lift the window (1) out from the door.
- Tilt the top of the window (1) inward in order to clear the regulator run channel.
Caution: Wear safety glasses in order to avoid eye damage.


Installation Procedure
- Install the window (1) into the door.
- Lower the window (1) to the regulator equalizer bracket (2). Secure the window (1) to the bracket (2) with the 2 screws (3).
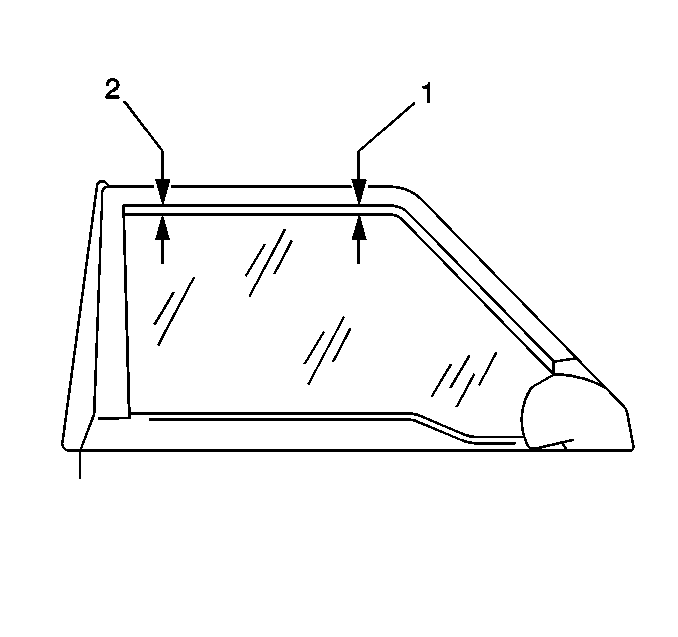
- Adjust the regulator equalizer bracket screws so that the measurements between the window and the front side door frame are equal at the points (1, 2).
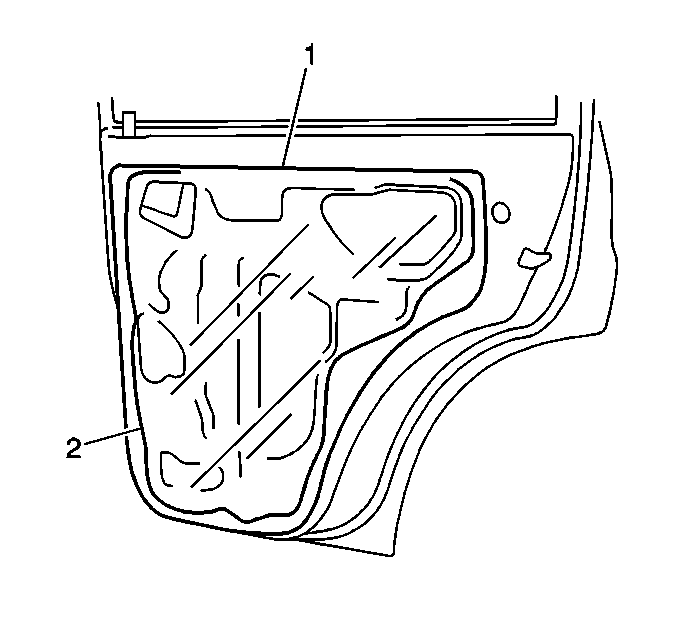
- Inspect the water deflector (1) for tears and holes.
- In order to repair the tears or holes, use waterproof tape on both sides of the water deflector (1), as needed.
- Apply adhesive (2) to the back of the water deflector (1).
- Install the water deflector (1) to the door.
- Install the door trim support bracket to the door. Secure the bracket with the screws.
- Install the outer sealing strip to the door by pressing into place.
- Install the inner sealing strip into the door by pressing into place, if equipped.
- Install the front side door trim panel. Refer to Front Side Door Trim Panel Replacement .


