For 1990-2009 cars only
Removal Procedure
- Remove the front side door trim panel. Refer to Rear Side Door Trim Panel Replacement .
- Remove the screws and the door trim support bracket from the door.
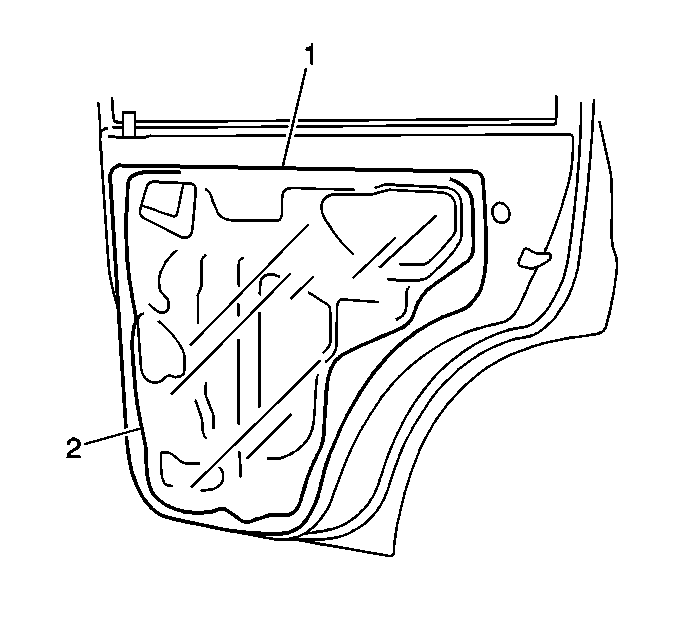
- Peel the water deflector (1) from the door.
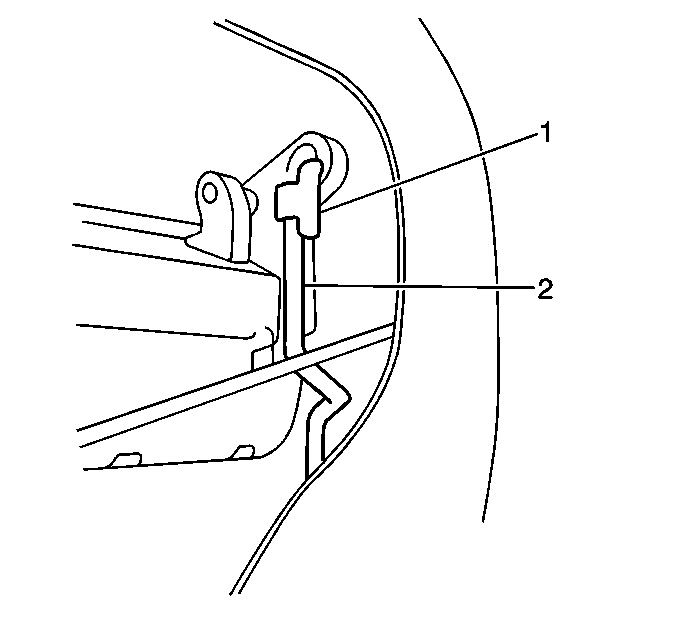
- Unclip the rear side door outside handle rod retainer (1).
- Remove the outside handle rod (2) from the outside door handle.
- Remove the door lock knob rod from the door lock knob linkage.
- Unclip the inside door handle rod from the inside door handle rod guides.
- Unclip the door lock electrical connector from the rear door.
- Disconnect the door lock actuator electrical connector.
- Remove the 4 door lock assembly screws.
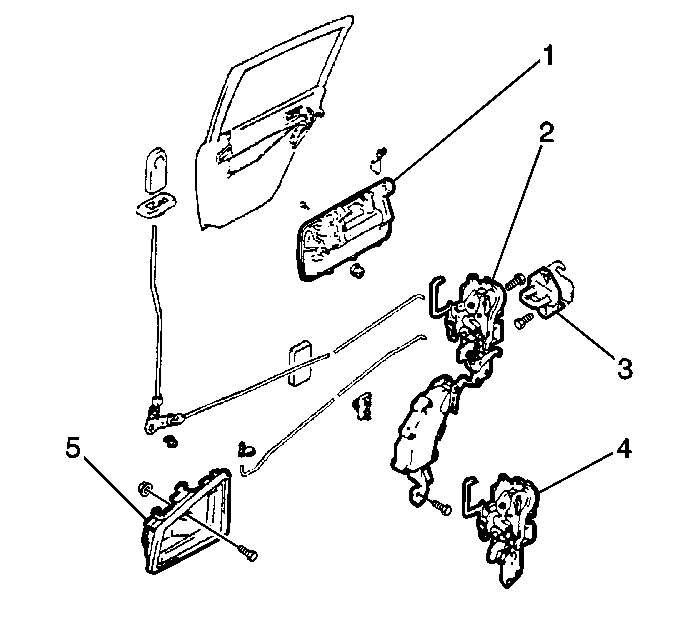
- Remove the door lock assembly (4).
- Remove the 2 door lock actuator screws.
- Remove the door lock actuator from the door lock assembly (4).


Installation Procedure
- Install the door lock actuator to the door lock assembly (4). Secure the assembly with the 2 screws.
- Install the door lock assembly to the door. Secure the door lock (4) with the 4 screws.
- Install the door lock actuator electrical connector clip to the door.
- Connect the lock actuator electrical connector.
- Snap the inside door lock handle rod into the inside door handle rod guides.
- Install the door lock knob rod to the door lock knob linkage.
- Position the rear side door outside handle rod (2) to the outside door handle.
- Close the rear side door outside handle rod retainer (1).
- Adjust the outside handle rod to the door linkage distance to 0.0-2 mm (0.0-0.08 inch).
- Inspect the water deflector (1) for tears and holes.
- In order to repair the tears or holes, use waterproof tape on both sides of the water deflector (1), as needed.
- Apply adhesive (2) to the back of the water deflector (1).
- Install the water deflector (1) to the door.
- Install the door trim support bracket to the door. Secure the bracket with the screws.
- Install the rear side door trim panel. Refer to Rear Side Door Trim Panel Replacement .


