For 1990-2009 cars only
Battery Positive and Negative Cable Replacement 2.0L Diesel LLW
Removal Procedure
- Disconnect battery negative cable. Refer to Battery Negative Cable Disconnection and Connection.
- Remove the air cleaner outlet front duct. Refer to Air Cleaner Outlet Front Duct Replacement.
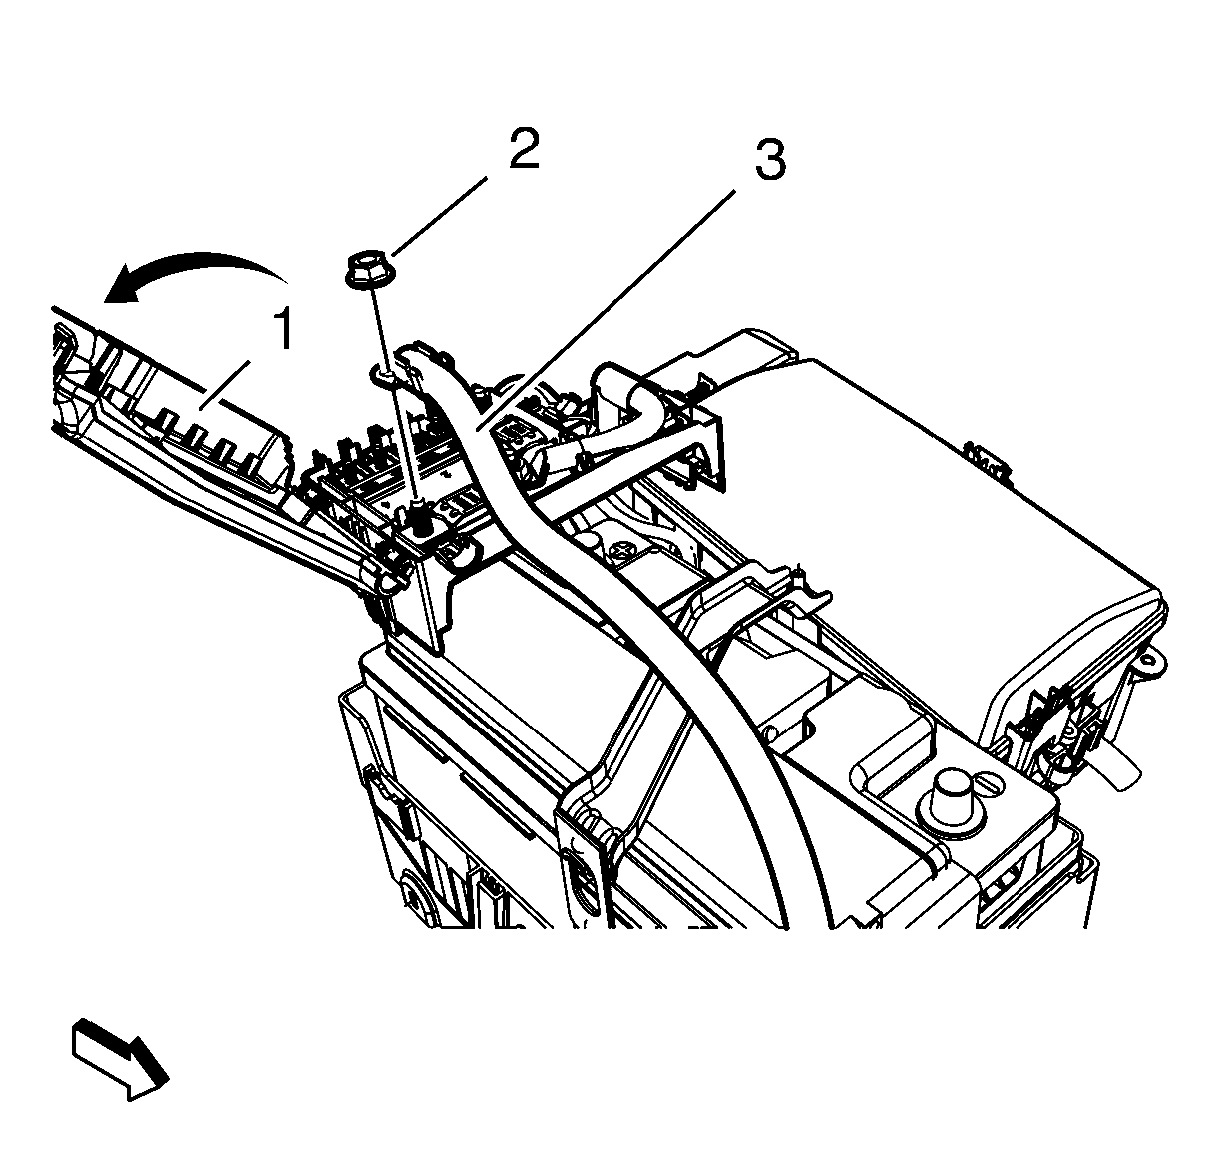
- Unlock the retaining tabs on the battery fuse box cover, and open the cover (1).
- Remove the positive battery cable to starter nut (2).
- Remove the positive battery cable to starter (3) from the battery.
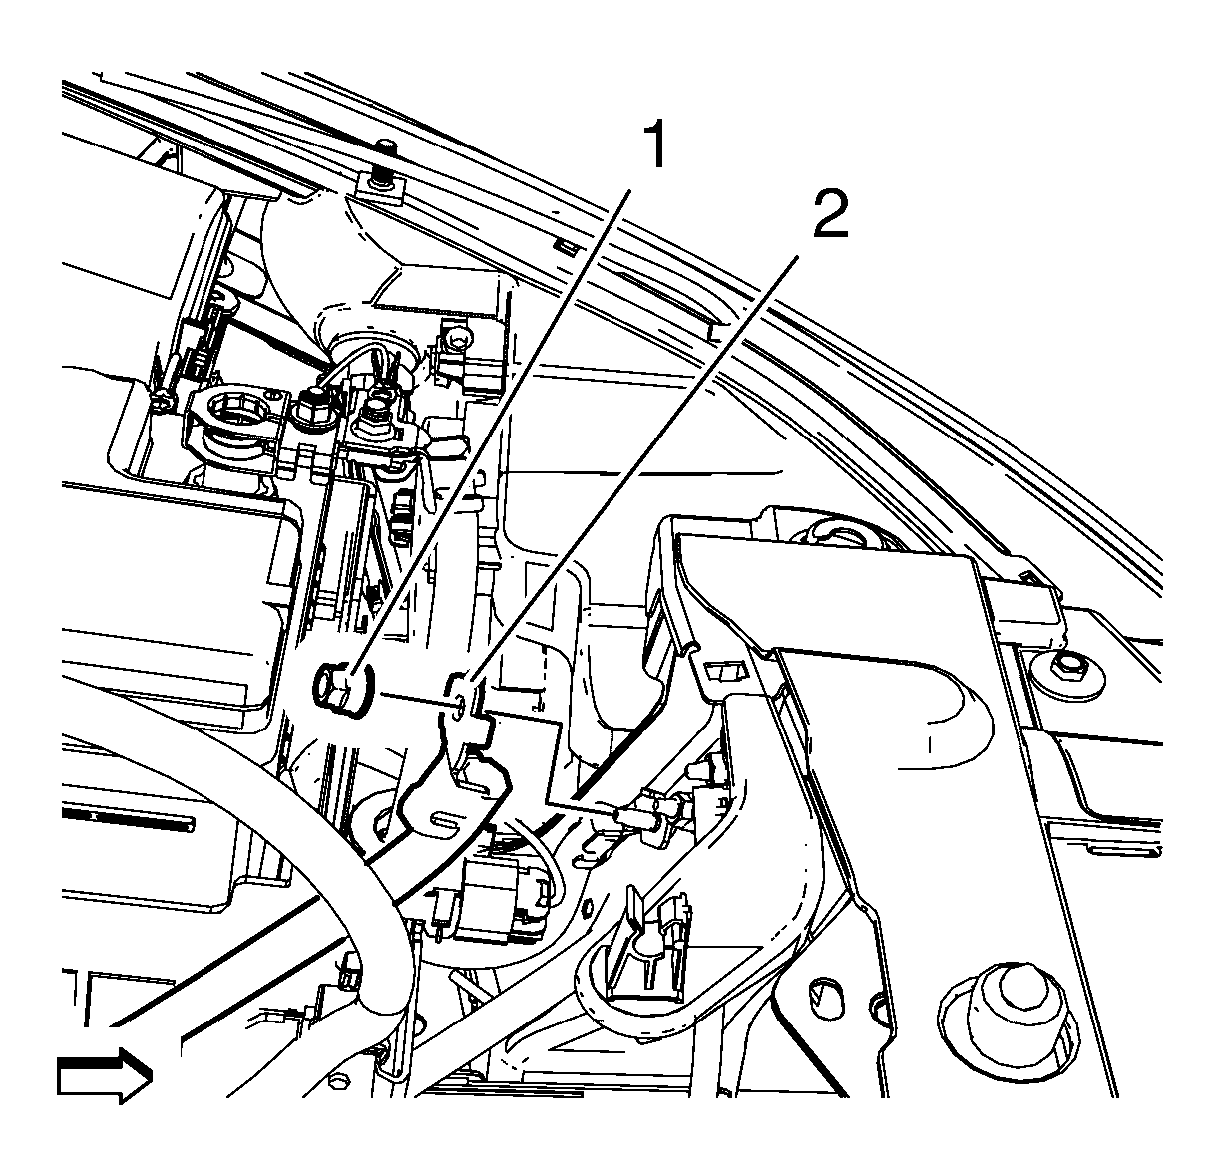
- Remove the negative cable nut (1).
- Remove the negative cable (2).
- Remove the front compartment insulator. Refer to Front Compartment Insulator Replacement.
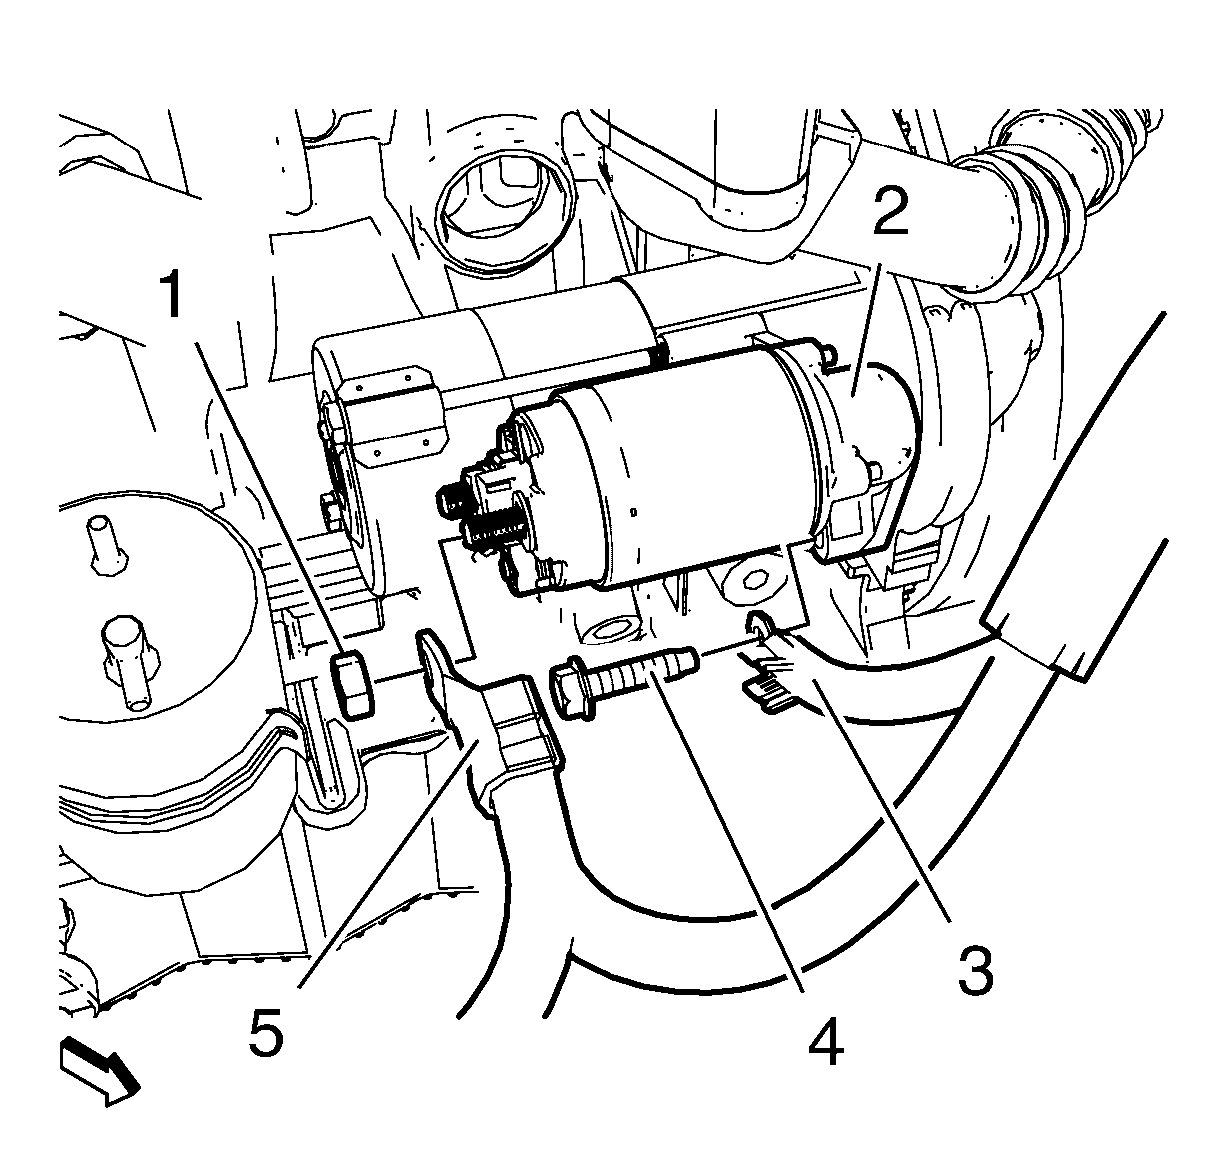
- Remove the positive cable nut (1) from starter (2).
- Remove the positive cable (5).
- Remove the starter bolt (4)
- Remove the negative cable (3).
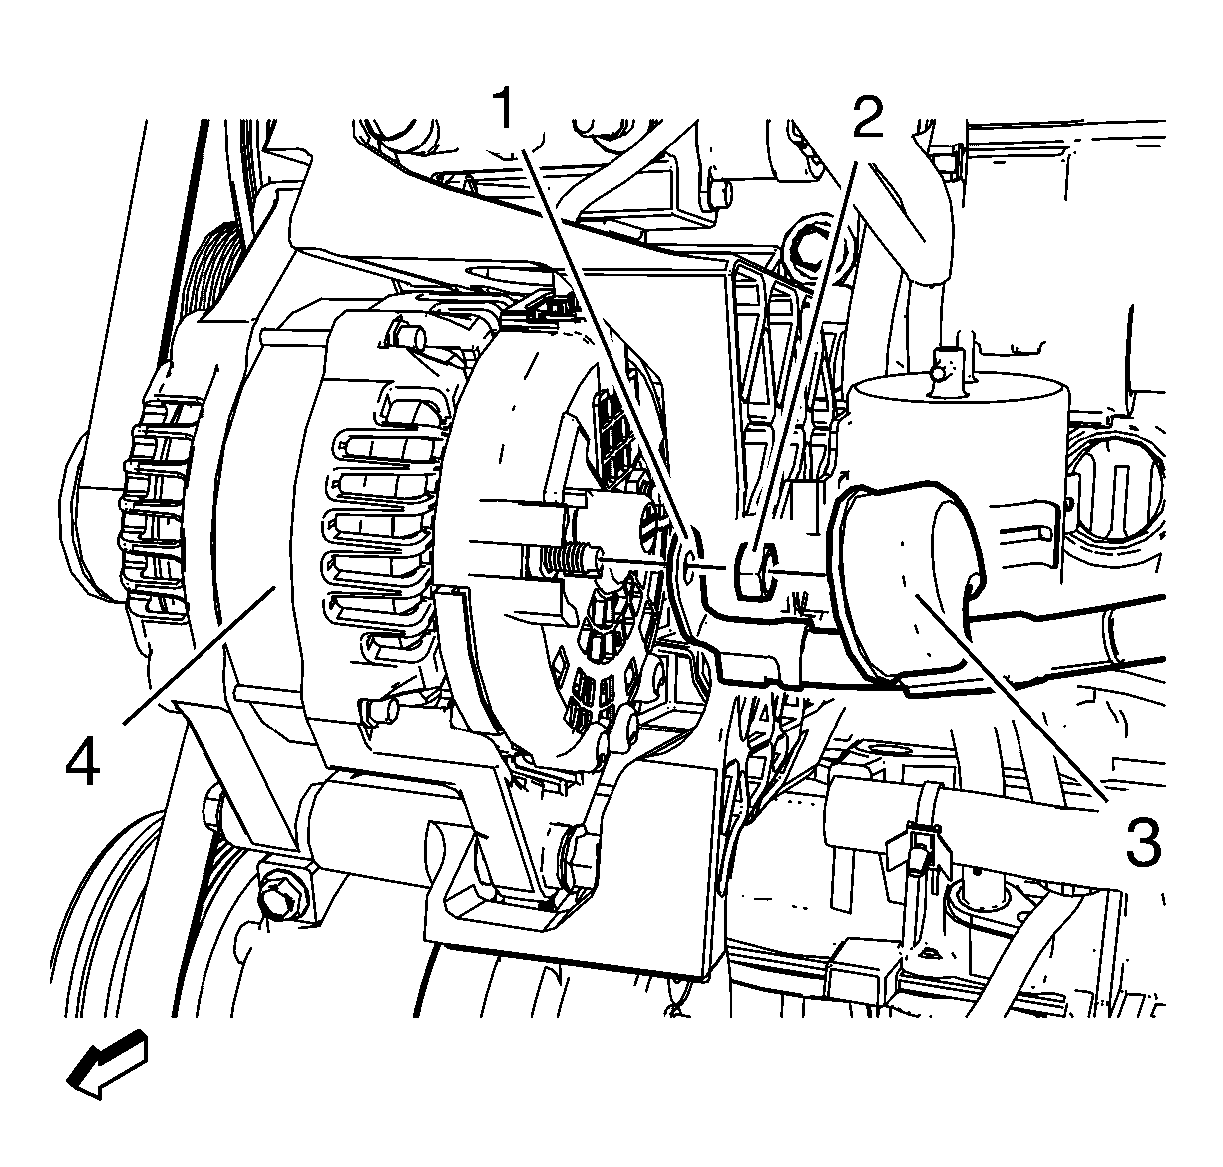
- Remove the rubber cap (3) from the positive cable generator connector.
- Remove the positive cable nut (2) from generator (4).
- Remove the positive cable (1) from generator (4).
- Remove the positive and negative cable.
Installation Procedure
- Install the positive and negative cable
- Install the positive cable (1) at the generator (4).
- Install the positive cable nut (2) at the generator (4) and thigten to 9 N·m (80 lb in).
- Install the rubber cap (3) at the positive cable generator connector.
- Install the negative cable (3).
- Install the starter bolt (4) and thigten to 58 N·m (43 lb ft).
- Install the positive cable (5).
- Install the positive cable nut (1) at the starter (2) and thigten to 9 N·m (80 lb in).
- Install the front compartment insulator. Refer to Front Compartment Insulator Replacement.
- Install the negative cable (2).
- Install the negative cable nut (1) and thigten to 9 N·m (80 lb in).
- Install the positive battery cable to starter (3) at the battery.
- Install the positive battery cable to starter nut (2) and thigten to 9 N·m (80 lb in).
- Close the cover (1) and lock the retaining tabs on the battery fuse box cover.
- Install the air cleaner outlet front duct. Refer to Air Cleaner Outlet Front Duct Replacement.
- Connect battery negative cable. Refer to Battery Negative Cable Disconnection and Connection.

Caution: Refer to Fastener Caution in the Preface section.


Battery Positive and Negative Cable Replacement 1.6L LXV
- Disconnect battery negative cable. Refer to Battery Negative Cable Disconnection and Connection.
- Remove the air cleaner outlet duct. Refer to Air Cleaner Outlet Duct Replacement.
- Unlock the retaining tabs on the battery fuse box cover, and open the cover (1).
- Remove the positive battery cable to starter nut (2).
- Remove the positive battery cable to starter (3) from the battery.
- Remove the negative cable nut (1).
- Remove the negative cable (2).
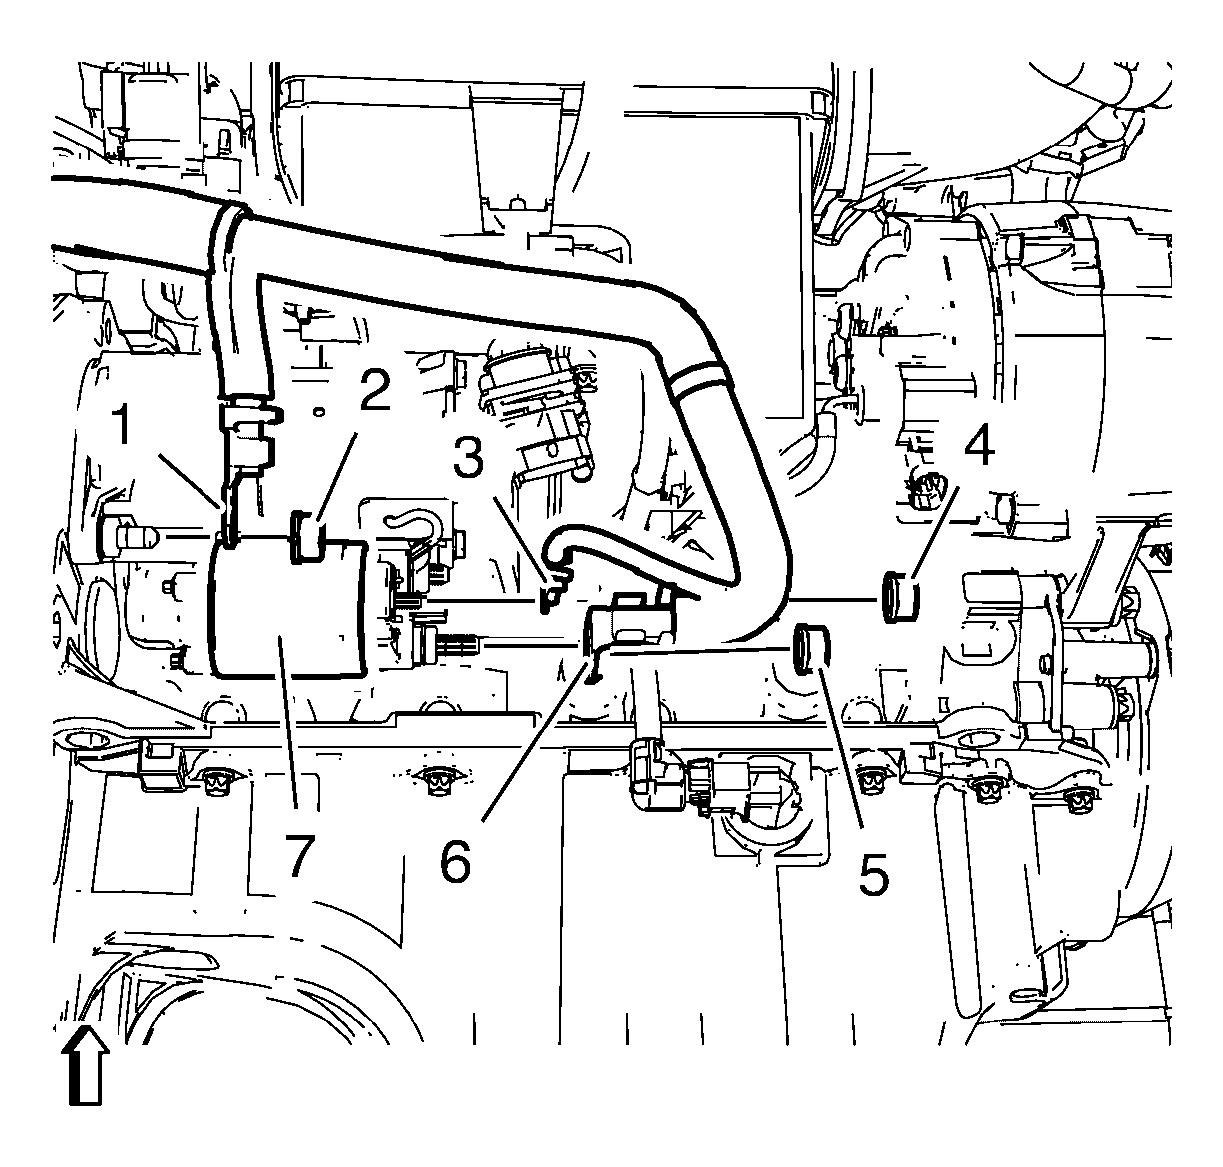
- Remove the neagative cable nut (2) from the starter motor (7).
- Remove the negative cable (1).
- Remove the 2 positive cable nuts (4; 5).
- Remove the 2 positive cables (3; 6).
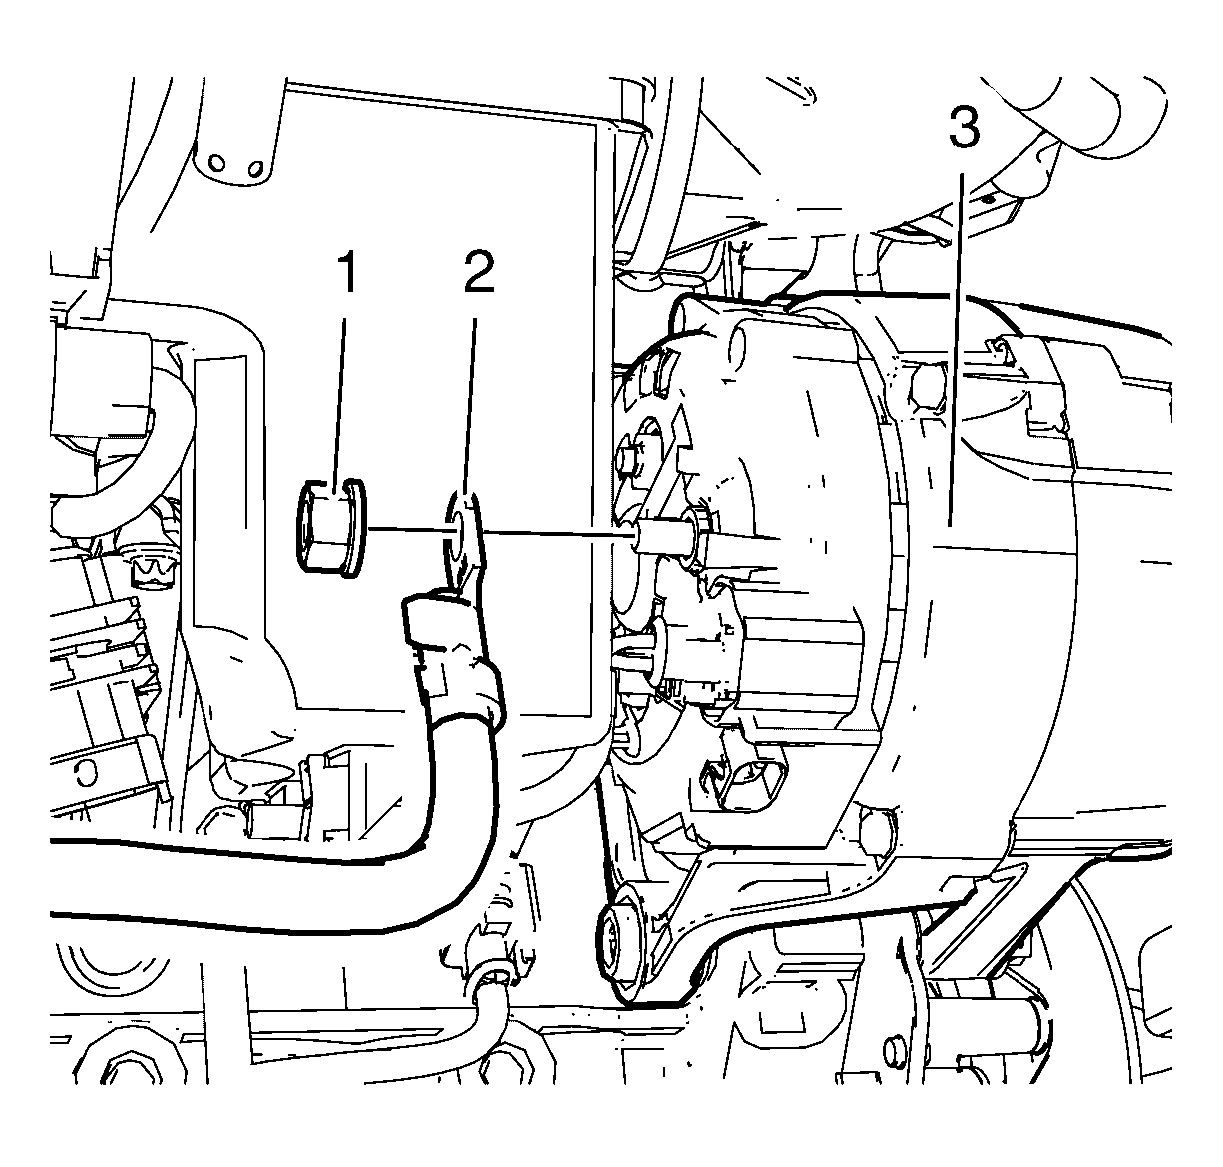
- Remove the rubber cap from the positive cable generator connector.
- Remove the positive cable nut (1) from the generator (3).
- Remove the positive cable (2) from the generator (3).


Installation Procedure
- Install the positive cable (2) to the generator (3).
- Install the positive cable nut (1) to the generator (3) and tighten to 7 N·m (62 lb in).
- Install the rubber cap to the positive cable generator connector.
- Install the 2 positive cables (3; 6).
- Install the 2 positive cable nuts (4; 5) and tighten to 12.5 N·m (111 lb in).
- Install the negative cable (1).
- Install the neagative cable nut (2) to the starter motor (7) and tighten to 12,5 N·m (110 lb in).
- Install the negative cable (2).
- Install the negative cable nut (1) and tighten to 9 N·m (80 lb in).
- Install the positive battery cable to starter (3) at the battery.
- Install the positive battery cable to starter nut (2) and tighten to 9 N·m (80 lb in).
- Close the cover (1) and lock the retaining tabs on the battery fuse box cover.
- Install the air cleaner outlet duct. Refer to Air Cleaner Outlet Duct Replacement.
- Connect battery negative cable. Refer to Battery Negative Cable Disconnection and Connection.

Caution: Refer to Fastener Caution in the Preface section.


