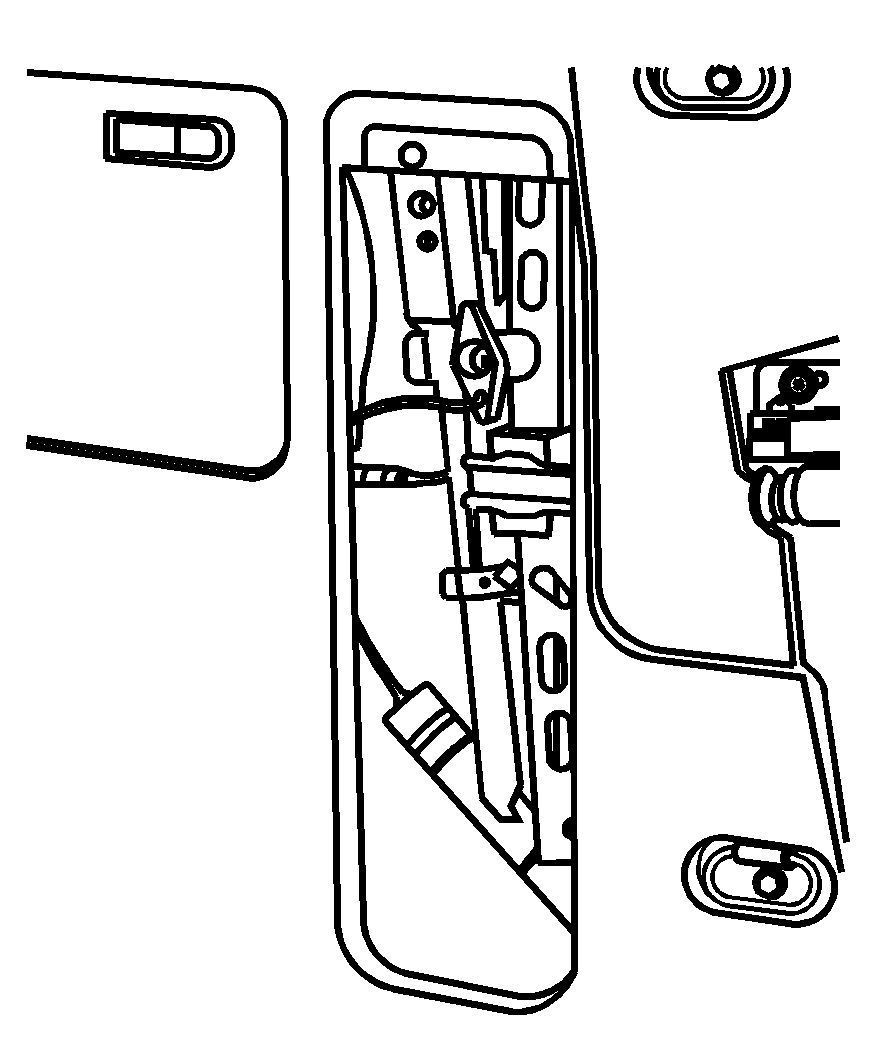
The equipment you'll need is located in the storage compartment at the rear of the vehicle, on the passenger's side.
- Remove the side convenience net.
- Open the jack storage compartment by lifting up the tab and pulling the cover off.
- Remove the jack and jacking tools by turning the wing bolt counterclockwise. Slightly lift up the jack from the bracket tab and then take it out of the storage compartment.
- Separate the jack and remove the folding wrench from the jack.
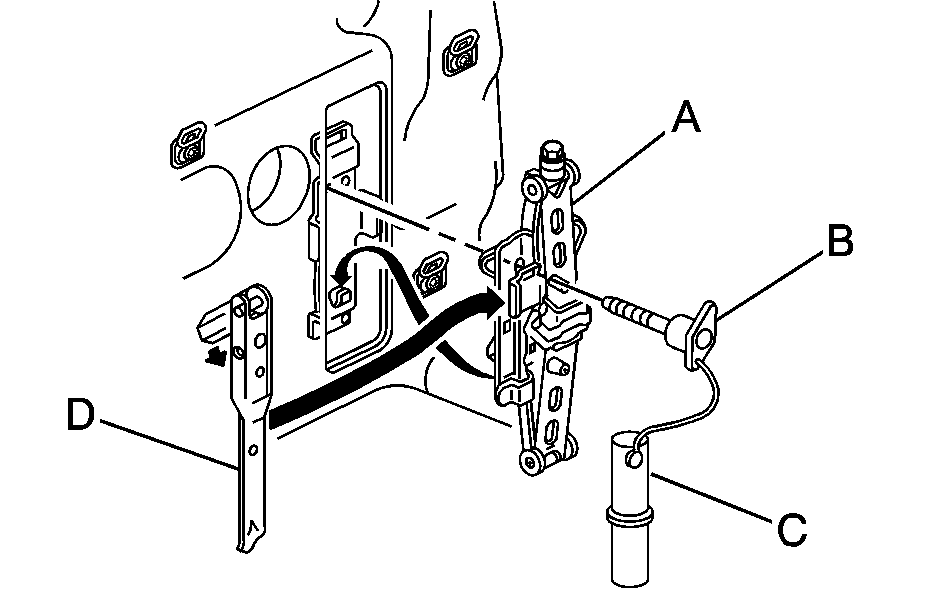
Jack
Wing Bolt
Jacking Instructions
Folding Wrench
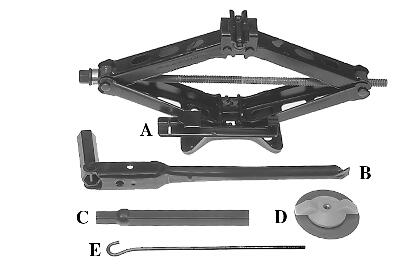
The tools you'll be using include the jack (A), folding wrench (B), extension tube (C), wing nut (D), and J-Hook (E).
Removing the Spare Tire (Vehicles without a Sliding Rear Convenience Tray)
The compact spare tire is located under the vehicle, behind the rear bumper. Use the spare tire hoist to raise, lower and store the compact spare. See Compact Spare Tire for more information about the compact spare.
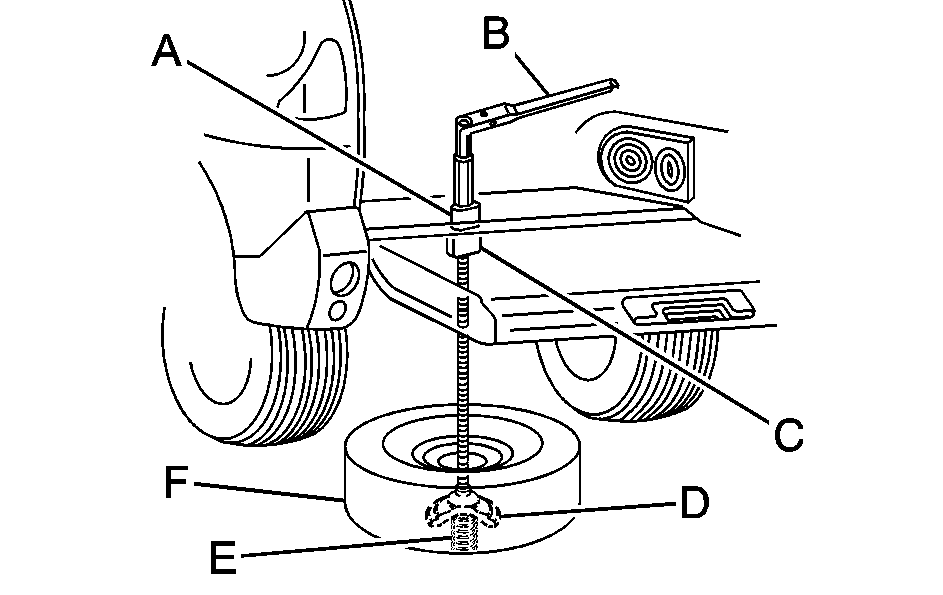
Hoist Shaft
Folding Wrench
Hoist Assembly
Retainer
Spring
Compact Spare Tire
- Flip the rear cargo area carpet cut out, to expose the hoist shaft.
- Attach the folding wrench into the hoist shaft.
- Turn the folding wrench counterclockwise to lower the compact spare tire to the ground. Continue turning the wrench until the spare tire can be pulled out from under the vehicle.
- Tilt the retainer and slip it through the wheel opening to remove the spare tire from the cable.
- Turn the wrench clockwise to raise the cable back up after removing the spare tire.

Do not store a full-size or a flat road tire under the vehicle. See Storing a Flat or Spare Tire and Tools .
To continue changing the flat tire, see Removing the Flat Tire and Installing the Spare Tire .
If the spare tire will not lower, the secondary latch may be engaged causing the tire not to lower. Do the following to check the cable:
All-wheel-drive Vehicle shown

- Check under the vehicle to see if the cable is visible.
- If it's not visible, see Secondary Latch System .
- Loosen the cable by turning the wrench counterclockwise three or four turns.
- If the spare tire has not lowered, tighten the cable all the way and then loosen it at least two times.
- If you still cannot lower the spare tire to the ground, see Secondary Latch System .
If it is visible, first try to tighten the cable by turning the folding wrench clockwise until you hear two clicks or feel it skip twice. You cannot over-tighten the cable.
If the spare tire did lower to the ground, continue with Step 4 under Removing the Spare Tire and Tools .
Removing the Spare Tire (Vehicles with a Sliding Rear Convenience Tray)
The compact spare tire is located under the vehicle, ahead of the rear bumper. Use the spare tire hoist to raise, lower and store the compact spare. See Compact Spare Tire for more information about the compact spare.
-
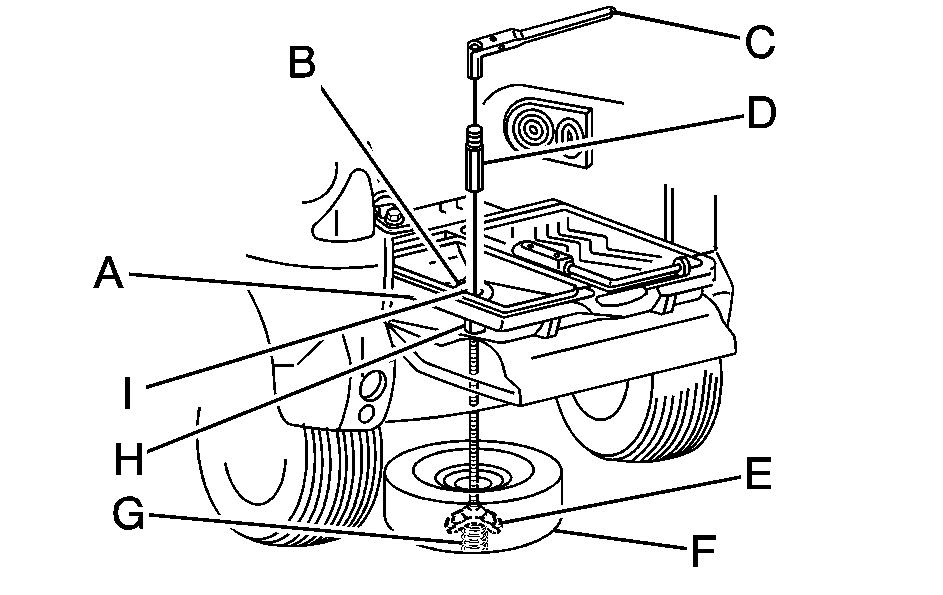
Sliding Rear Convenience Tray
Storage Compartment Cap Hole
Folding Wrench
Extension Tube
Retainer
Compact Spare Tire
Spring
Hoist Shaft Assembly
Hoist Shaft
- Push the release lever located in front of the handle of the sliding rear tray to release the pin from the floor track assembly.
- Pull the sliding rear convenience tray toward you without lifting it up.
- Open the driver's side storage compartment door of the sliding rear tray.
- Remove the cap on the bottom of the storage compartment and flip the carpet cut out, to expose the hoist shaft.
- Remove the extension tube that is attached at the front of the storage compartment.
- Insert one end of the extension tube to the hoist shaft and attach the folding wrench to the other end of the extension tube.
- Turn the folding wrench counterclockwise to lower the spare tire to the ground. Continue turning the wrench until the spare tire can be pulled out from under the vehicle.
- Tilt the retainer and slip it through the wheel opening to remove the compact spare tire from the cable.
- Turn the wrench clockwise to raise the cable back up after removing the spare tire.
You will hear a click when the sliding rear tray is locked into the extended position. This is where the sliding rear tray needs to be in order to be able to remove the compact spare tire.

Do not store a full-size or a flat road tire under the vehicle. See Storing a Flat or Spare Tire and Tools .
To continue changing the flat tire, see Removing the Flat Tire and Installing the Spare Tire .
If the spare tire will not lower, the secondary latch may be engaged causing the tire not to lower. Do the following to check the cable:
All-wheel-drive Vehicle shown

- Check under the vehicle to see if the cable is visible.
- If it's not visible, see Secondary Latch System .
- Loosen the cable by turning the wrench counterclockwise three or four turns.
- If the spare tire has not lowered, tighten the cable all the way and then loosen it at least two times.
- If you still cannot lower the spare tire to the ground, see Secondary Latch System .
If it is visible, first try to tighten the cable by turning the folding wrench clockwise until you hear two clicks or feel it skip twice. You cannot over-tighten the cable.
If the spare tire did lower to the ground, continue with Step 9 under Removing the Spare Tire and Tools .
