For 1990-2009 cars only
Tools Required
| • | J 5239 Connecting Rod Bolt Guide Set |
| • | J 45059 Angle Meter |
Removal Procedure
- Remove the oil pan. Refer to Oil Pan Replacement .
- Remove the spark plugs from the cylinders that are being serviced. Refer to Spark Plug Replacement in Engine Controls - 3.1L.
- Position the connecting rod to be serviced to Bottom Dead Center (BDC) by rotating the crankshaft.
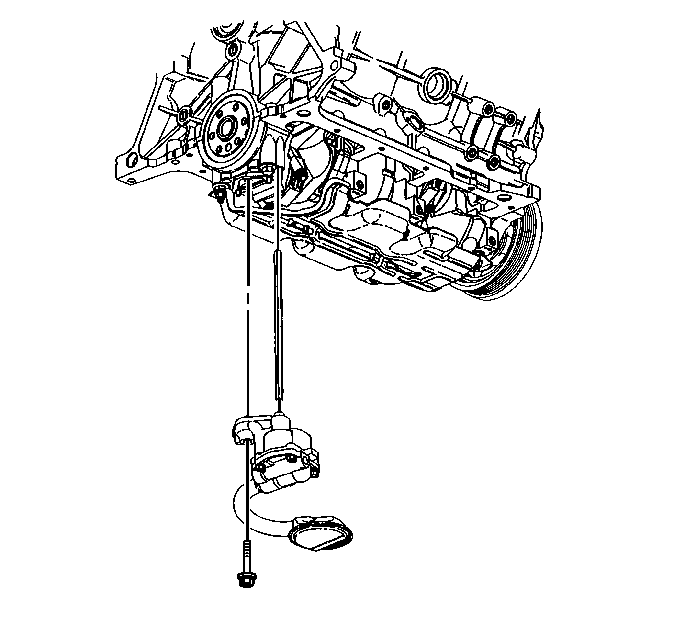
- Remove the oil pump bolt.
- Remove the oil pump and the oil pump driveshaft.
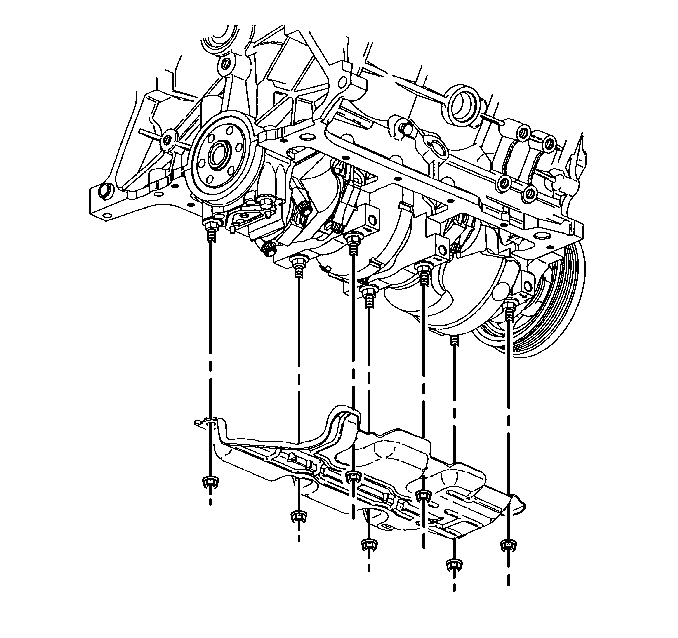
- Remove the crankshaft oil deflector nuts.
- Remove the crankshaft oil deflector.
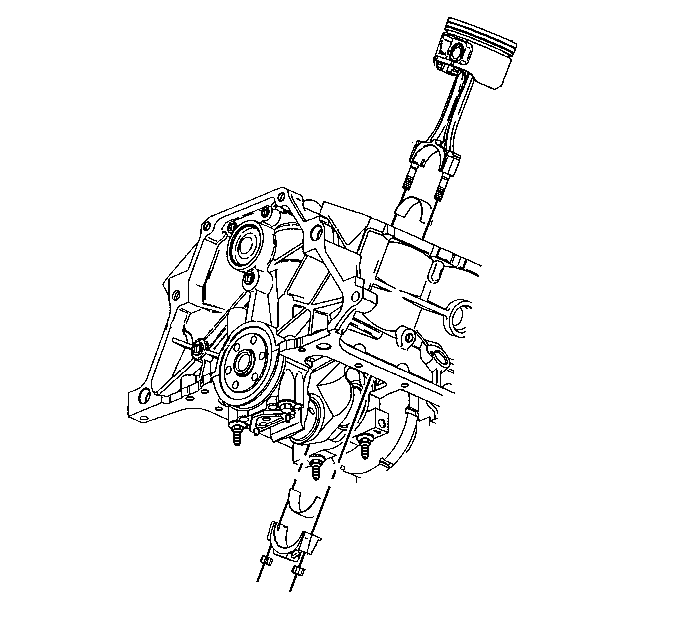
- Remove the connecting rod cap nuts.
- Remove the connecting rod cap and the lower connecting rod bearing.
- Remove the lower connecting rod bearing from the connecting rod cap.
- Install the J 5239 to the connecting rod.
- Use the J 5239 to push up the connecting rod and the piston to access the upper connecting rod bearing.
- Remove the upper connecting rod bearing.
- Wipe the oil from the bearings.
- Inspect the connecting rod bearings. Refer to Piston, Connecting Rod, and Bearing Cleaning and Inspection .
- Measure the bearing clearance. Refer to Engine Mechanical Specifications .


Important: Keep the bearings with the original connecting rod and cap. Do this in order to reassemble the connecting rod.
Installation Procedure
- Use clean engine oil in order to lubricate the bearing surface.
- Install the upper connecting rod bearing.
- Use the J 5239 to pull down the piston, the connecting rod and the upper connecting rod bearing.
- Remove the J 5239 .
- Install the lower connecting rod bearing to the connecting rod cap.
- Install the connecting rod cap.
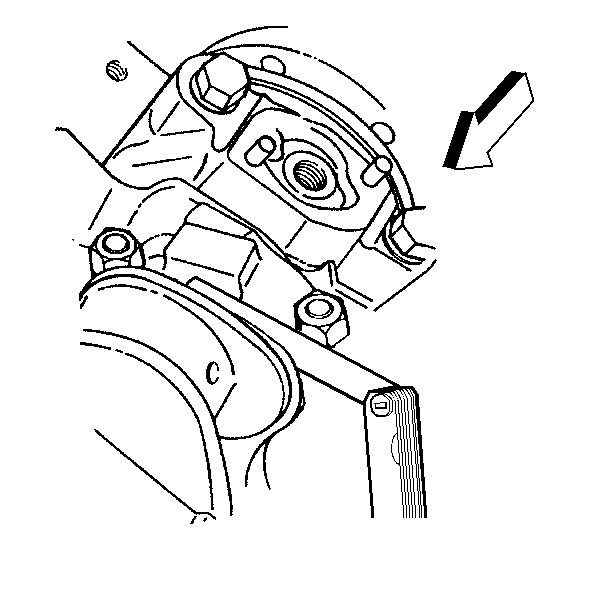
- Install the connecting rod cap nuts.
- Tighten the nuts to 20 N·m (15 lb ft).
- Use theJ 45059 to rotate the nuts an additional 75 degrees.
- Pry the connecting rod back and forth in order to check for binding. If necessary, loosen and then retighten the connecting rod cap nuts.
- Measure the connecting rod side clearance. Refer to Engine Mechanical Specifications .
- Install the crankshaft oil deflector.
- Install the crankshaft oil deflector nuts.
- Install the oil pump driveshaft and the oil pump.
- Install the oil pump mounting bolt.
- Install the spark plugs to the cylinders that was serviced. Refer to Spark Plug Replacement in Engine Controls - 3.1L.
- Install the oil pan. Refer to Oil Pan Replacement .
- Inspect for proper oil pressure.
- Inspect for leaks.

Notice: Do not scrape, shim, or file bearing inserts. If the bearing surface of the insert is touched with bare fingers, the skin oil and acids will etch the bearing surface.
Important: Ensure that the connecting rod cap bolt holes and the connecting rod cap mating surfaces are clean and dry.
Notice: Refer to Fastener Notice in the Preface section.
Tighten


Tighten
Tighten the nuts to 25 N·m (18 lb ft).

Tighten
Tighten the bolt to 41 N·m (30 lb ft).
