For 1990-2009 cars only
Tools Required
J 38778 Door Trim Clip Remover
Removal Procedure
- Remove the sunshades. Refer to Sunshade Replacement .
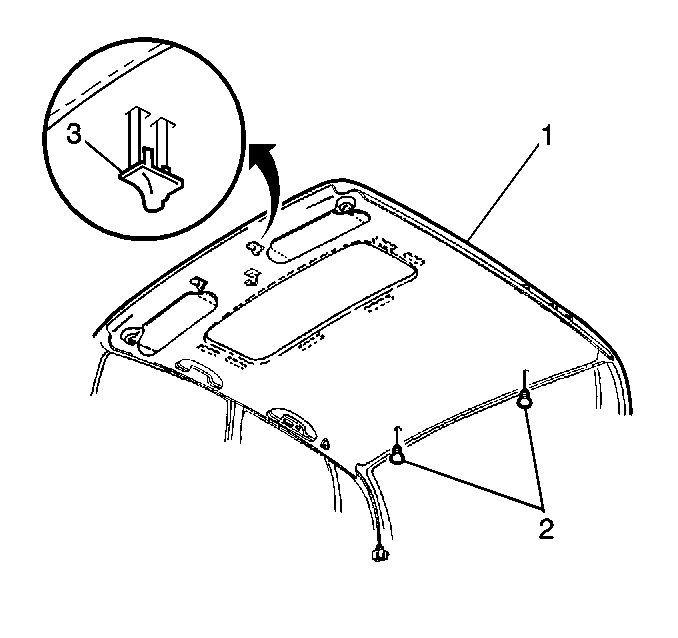
- Remove the sunshade retainers (3). Refer to Sunshade Anchor Replacement .
- Disconnect the electric connectors to the rear view mirror and to the front antenna.
- Remove the power sunroof switch, if equipped. Refer to Sunroof Switch Replacement in Roof.
- Remove the dome lamp, if equipped. Refer to Dome Lamp Replacement in Lighting Systems.
- Remove the assist handles. Refer to Front Assist Handle Replacement and to Roof Rail Rear Assist Handle Replacement .
- Remove the side upper garnish molding from the windshield. Refer to Windshield Pillar Garnish Molding Replacement .
- Remove the upper quarter trim panels. Refer to Rear Quarter Upper Trim Panel Replacement .
- Pull down on the door opening weatherstrip seal on both the front and the rear doors.
- Remove the rear window trim panel. Refer to Rear Window Shelf Trim Panel Replacement .
- Disconnect the headliner electrical harness connector, located behind the right rear speaker.
- Disconnect the OnStar® electrical connector, if equipped.
- Disconnect the headliner electrical harness and the antenna lead, located behind the left rear speaker.
- Use J 38778 in order to remove the rear retainers (2).
- Rotate the right front seatback to a horizontal position.
- Remove the headliner (1) from the vehicle through the right front door.
Caution: Do not attempt to repair or alter the head impact energy-absorbing material glued to the headliner or to the garnish trims. If the material is damaged, replace the headliner and/or the garnish trim. Failure to do so could result in personal injury.

Installation Procedure
- Install the headliner (1) in the vehicle through the right front door.
- Install the headliner (1):
- Connect the headliner electrical harness and the antenna lead, located behind the left rear speaker.
- Connect the OnStar® electrical connector, if equipped.
- Connect the headliner electrical harness connector, located behind the right rear speaker.
- Install the rear window trim panel. Refer to Rear Window Shelf Trim Panel Replacement .
- Install the rear retainers (2).
- Install the door opening weatherstrip seal on both the front and the rear doors in order to hold the headliner (1) in place.
- Install the center pillar upper trim panels. Refer to Center Pillar Upper Trim Panel Replacement .
- Install the upper quarter trim panels. Refer to Rear Quarter Upper Trim Panel Replacement .
- Install the side upper garnish molding to the windshield. Refer to Windshield Pillar Garnish Molding Replacement .
- Install the assist handles. Refer to Front Assist Handle Replacement and to Roof Rail Rear Assist Handle Replacement .
- Install the dome lamp, if equipped. Refer to Dome Lamp Replacement in Lighting Systems.
- Install the power sunroof switch, if equipped. Refer to Sunroof Switch Replacement in Roof.
- Connect the electric connector to the rear view mirror.
- Install the sunshade retainers (1). Refer to Sunshade Anchor Replacement .
- Install the sunshades. Refer to Sunshade Replacement .

Important: Do NOT bend the headlining too much when loading the headliner (1).
| 2.1. | Align the sunshade holes in the headlining with the respective hole in the body structure. |
| 2.2. | Engage the front hook and the loop fasteners. |
